Git Product home page Git Product logo

arcadelab / deepdrr Goto Github PK

View Code? Open in Web Editor NEW
190.0 11.0 54.0 64.92 MB

Code for "DeepDRR: A Catalyst for Machine Learning in Fluoroscopy-guided Procedures". https://arxiv.org/abs/1803.08606

License: GNU General Public License v3.0

Python 88.83% C 1.53% Cuda 0.60% C++ 0.04% Jupyter Notebook 9.00%
pytorch machine-learning simulation fluoroscopy cone-beam x-ray monte-carlo-simulation ray-casting noise-injection material-decomposition segmentation

deepdrr's Introduction

DeepDRR provides state-of-the-art tools to generate realistic radiographs and fluoroscopy from 3D CTs on a training set scale.

Installation

DeepDRR requires an NVIDIA GPU, preferably with >11 GB of memory.

  1. Install CUDA. Version 11 is recommended, but DeepDRR has been used with 8.0
  2. Make sure your C compiler is on the path. DeepDRR has been used with gcc 9.3.0
  3. We recommend installing pycuda separately, as it may need to be built. If you are using Anaconda, run
conda install -c conda-forge pycuda

to install it in your environment.

  1. You may also wish to install PyTorch separately, depending on your setup.
  2. Install from PyPI
pip install deepdrr

Development

Installing from the dev branch is risky, as it is unstable. However, this installation method can be used for the main branch as well, perhaps somewhat more reliably.

Dependencies:

  1. CUDA 11.1
  2. Anaconda

The dev branch contains the most up-to-date code and can be easily installed using Anaconda. To create an environment with DeepDRR, run

git clone https://github.com/arcadelab/deepdrr.git
cd deepdrr
git checkout dev
conda env create -f environment.yaml
conda activate deepdrr

Documentation

Documentation is available at deepdrr.readthedocs.io.

To create the autodocs, run

sphinx-apidoc -f -o docs/source deepdrr

in the base directory. Then do cd docs and make html to build the static site locally.

Usage

The following minimal example loads a CT volume from a NifTi .nii.gz file and simulates an X-ray projection:

from deepdrr import geo, Volume, MobileCArm
from deepdrr.projector import Projector # separate import for CUDA init

carm = MobileCArm()
ct = Volume.from_nifti('/path/to/ct_image.nii.gz')

# Initialize the Projector object (allocates GPU memory)
with Projector(ct, carm=carm) as projector:
    # Orient and position the patient model in world space.
    ct.orient_patient(head_first=True, supine=True)
    ct.place_center(carm.isocenter_in_world)
    
    # Move the C-arm to the desired pose.
    carm.move_to(alpha=30, beta=10, degrees=True)
    
    # Run projection
    image = projector()

The script example_projector.py gives an alternative example. Additional tutorials are in progress at deepdrr.readthedocs.io. Contributions are welcome.

Contributing

Contributions for bug fixes, enhancements, and other suggestions are welcome. Please make a pull request.

Method Overview

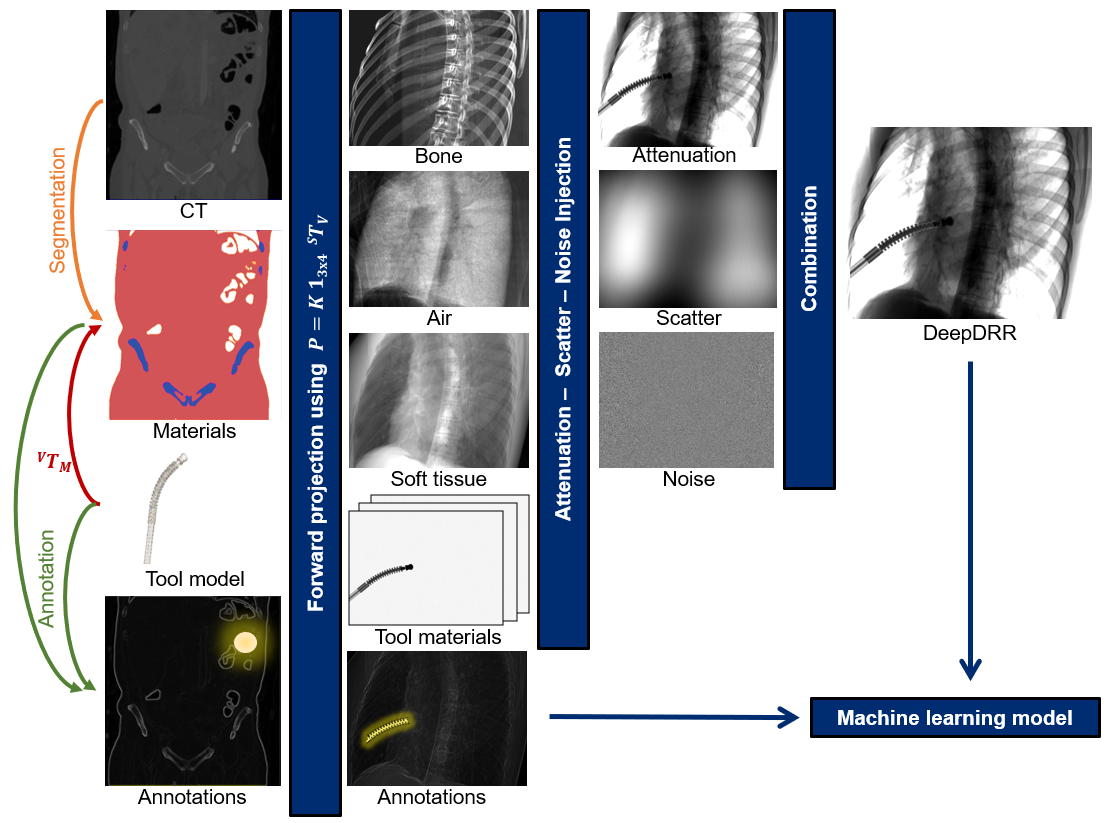
DeepDRR combines machine learning models for material decomposition and scatter estimation in 3D and 2D, respectively, with analytic models for projection, attenuation, and noise injection to achieve the required performance. The pipeline is illustrated below.

DeepDRR Pipeline

Further details can be found in our MICCAI 2018 paper "DeepDRR: A Catalyst for Machine Learning in Fluoroscopy-guided Procedures" and the subsequent Invited Journal Article in the IJCARS Special Issue of MICCAI "Enabling Machine Learning in X-ray-based Procedures via Realistic Simulation of Image Formation". The conference preprint can be accessed on arXiv here: https://arxiv.org/abs/1803.08606.

Representative Results

The figure below shows representative radiographs generated using DeepDRR from CT data downloaded from the NIH Cancer Imaging Archive. Please find qualitative results in the Applications section.

Representative DeepDRRs

Applications - Pelvis Landmark Detection

We have applied DeepDRR to anatomical landmark detection in pelvic X-ray: "X-ray-transform Invariant Anatomical Landmark Detection for Pelvic Trauma Surgery", also early-accepted at MICCAI'18: https://arxiv.org/abs/1803.08608 and now with quantitative evaluation in the IJCARS Special Issue on MICCAI'18: https://link.springer.com/article/10.1007/s11548-019-01975-5. The ConvNet for prediction was trained on DeepDRRs of 18 CT scans of the NIH Cancer Imaging Archive and then applied to ex vivo data acquired with a Siemens Cios Fusion C-arm machine equipped with a flat panel detector (Siemens Healthineers, Forchheim, Germany). Some representative results on the ex vivo data are shown below.

Prediction Performance

Applications - Metal Tool Insertion

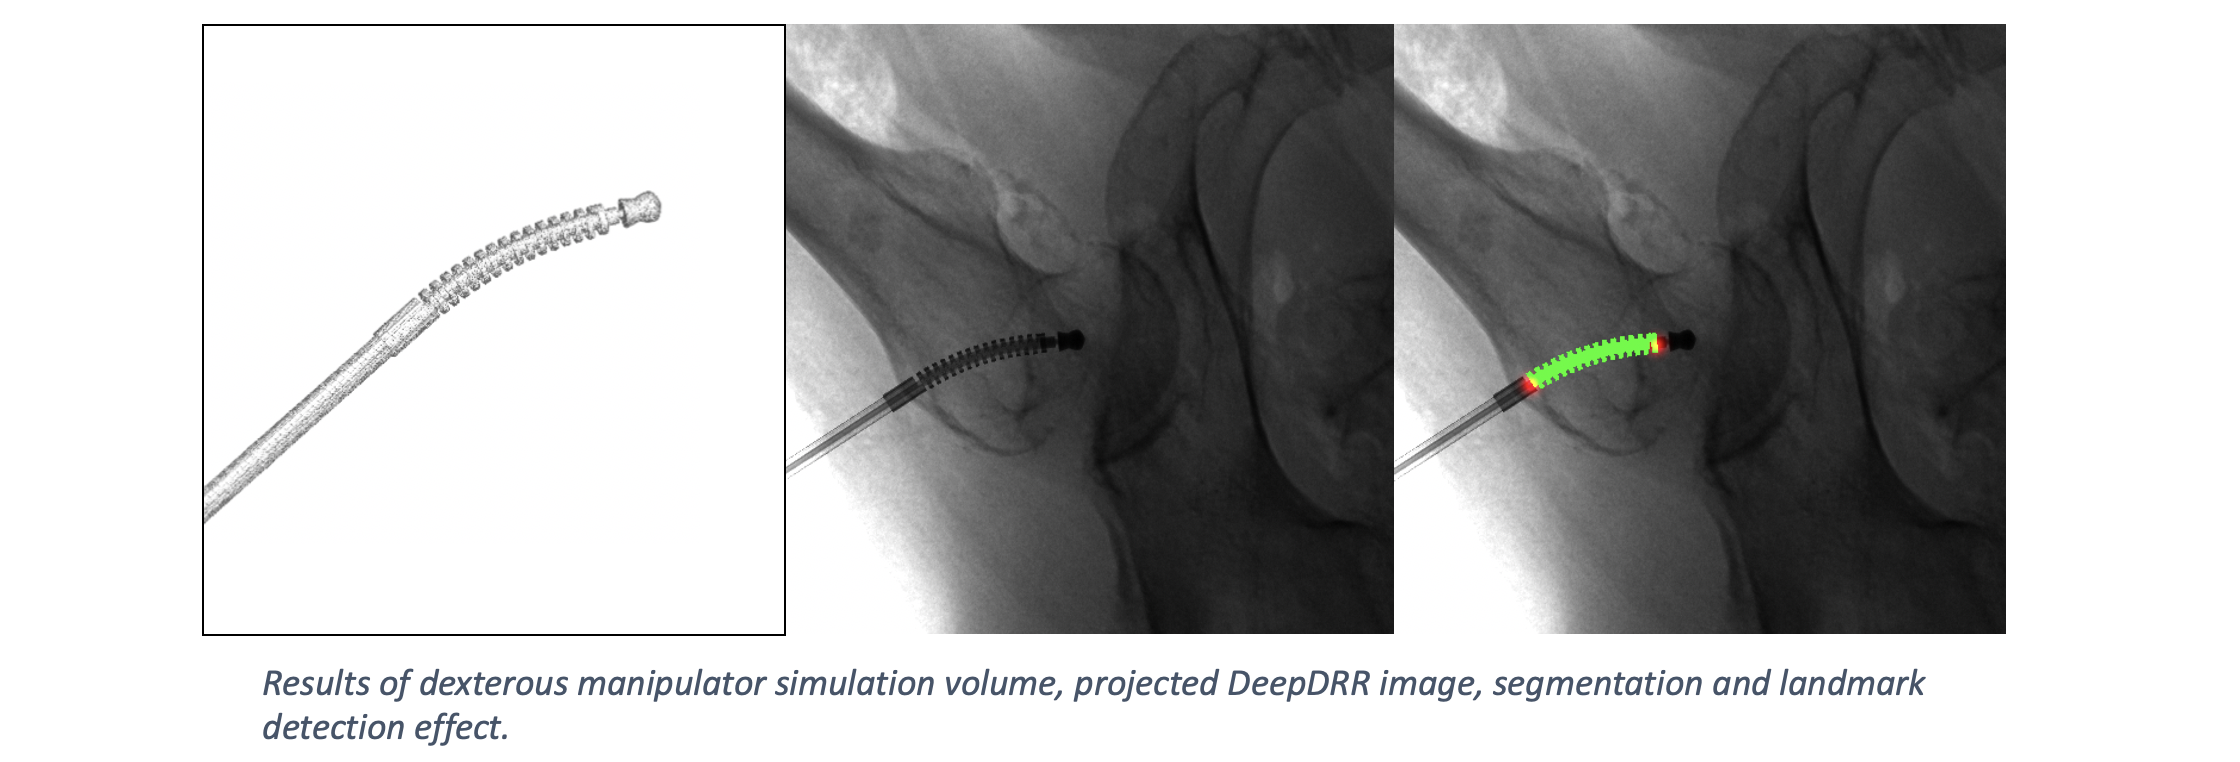
DeepDRR has also been applied to simulate X-rays of the femur during insertion of dexterous manipulaters in orthopedic surgery: "Localizing dexterous surgical tools in X-ray for image-based navigation", which has been accepted at IPCAI'19: https://arxiv.org/abs/1901.06672. Simulated images are used to train a concurrent segmentation and localization network for tool detection. We found consistent performance on both synthetic and real X-rays of ex vivo specimens. The tool model, simulation image and detection results are shown below.

This capability has not been tested in version 1.0. For tool insertion, we recommend working with Version 0.1 for the time being.

Robot Insertion and Detection

Potential Challenges - General

  1. Our material decomposition V-net was trained on NIH Cancer Imagign Archive data. In case it does not generalize perfectly to other acquisitions, the use of intensity thresholds (as is done in conventional Monte Carlo) is still supported. In this case, however, thresholds will likely need to be selected on a per-dataset, or worse, on a per-region basis since bone density can vary considerably.
  2. Scatter estimation is currently limited to Rayleigh scatter and we are working on improving this. Scatter estimation was trained on images with 1240x960 pixels with 0.301 mm. The scatter signal is a composite of Rayleigh, Compton, and multi-path scattering. While all scatter sources produce low frequency signals, Compton and multi-path are more blurred compared to Rayleigh, suggesting that simple scatter reduction techniques may do an acceptable job. In most clinical products, scatter reduction is applied as pre-processing before the image is displayed and accessible. Consequently, the current shortcoming of not providing full scatter estimation is likely not critical for many applications, in fact, scatter can even be turned off completely. We would like to refer to the Applications section above for some preliminary evidence supporting this reasoning.
  3. Due to the nature of volumetric image processing, DeepDRR consumes a lot of GPU memory. We have successfully tested on 12 GB of GPU memory but cannot tell about 8 GB at the moment. The bottleneck is volumetric segmentation, which can be turned off and replaced by thresholds (see 1.).
  4. We currently provide the X-ray source sprectra from MC-GPU that are fairly standard. Additional spectra can be implemented in spectrum_generator.py.
  5. The current detector reading is the average energy deposited by a single photon in a pixel. If you are interested in modeling photon counting or energy resolving detectors, then you may want to take a look at mass_attenuation(_gpu).py to implement your detector.
  6. Currently we do not support import of full projection matrices. But you will need to define K, R, and T seperately or use camera.py to define projection geometry online.
  7. It is important to check proper import of CT volumes. We have tried to account for many variations (HU scale offsets, slice order, origin, file extensions) but one can never be sure enough, so please double check for your files.

Potential Challenges - Tool Modeling

  1. Currently, the tool/implant model must be represented as a binary 3D volume, rather than a CAD surface model. However, this 3D volume can be of different resolution than the CT volume; particularly, it can be much higher to preserve fine structures of the tool/implant.
  2. The density of the tool needs to be provided via hard coding in the file 'load_dicom_tool.py' (line 127). The pose of the tool/implant with respect to the CT volume requires manual setup. We provide one example origin setting at line 23-24.
  3. The tool/implant will supersede the anatomy defined by the CT volume intensities. To this end, we sample the CT materials and densities at the location of the tool in the tool volume, and subtract them from the anatomy forward projections in detector domain (to enable different resolutions of CT and tool volume). Further information can be found in the IJCARS article.

Using DeepDRR Simultaneously with PyTorch

Some issues may arise when using DeepDRR at the same time as PyTorch due to conflicts between pycuda's CUDA initialization and PyTorch CUDA initialization. The best workaround we know of is to first initialize the PyCUDA context (by importing deepdrr.projector) and then run your model on a dummy batch before creating a Projector object. For mysterious reasons (likely involving overlapping GPU resources and the retrograde of Mercury), this seems to work.

import torch
from torch import nn
from torchvision import models

import deepdrr
from deepdrr.projector import Projector # initializes PyCUDA

# Before creating a Projector, run backprop to initialize PyTorch
criterion = nn.CrossEntropyLoss()
model = models.resnet50() # Your model here
model.cuda()
optimizer = optim.SGD(model.parameters(), lr=0.001, momentum=0.9)
optimizer.zero_grad()
x = torch.ones((32, 3, 224, 224), dtype=torch.float32).cuda() # Your image size
y = torch.ones(32, dtype=torch.int64).cuda()
y_pred = model(x)
loss = criterion(y_pred, y)
loss.backward()
optimizer.step()
log.info(f"Ran dummy batch to initialize torch.")

volume = ...
carm = ...
with Projector(volume, carm=carm):
  image = projector()
  image = image.unsqueeze(0) # add batch dim
  y_pred = model(image)
  ...

Reference

We hope this proves useful for medical imaging research. If you use our work, we would kindly ask you to reference our work. The MICCAI article covers the basic DeepDRR pipeline and task-based evaluation:

@inproceedings{DeepDRR2018,
  author       = {Unberath, Mathias and Zaech, Jan-Nico and Lee, Sing Chun and Bier, Bastian and Fotouhi, Javad and Armand, Mehran and Navab, Nassir},
  title        = {{DeepDRR--A Catalyst for Machine Learning in Fluoroscopy-guided Procedures}},
  date         = {2018},
  booktitle    = {Proc. Medical Image Computing and Computer Assisted Intervention (MICCAI)},
  publisher    = {Springer},
}

The IJCARS paper describes the integration of tool modeling and provides quantitative results:

@article{DeepDRR2019,
  author       = {Unberath, Mathias and Zaech, Jan-Nico and Gao, Cong and Bier, Bastian and Goldmann, Florian and Lee, Sing Chun and Fotouhi, Javad and Taylor, Russell and Armand, Mehran and Navab, Nassir},
  title        = {{Enabling Machine Learning in X-ray-based Procedures via Realistic Simulation of Image Formation}},
  year         = {2019},
  journal      = {International journal of computer assisted radiology and surgery (IJCARS)},
  publisher    = {Springer},
}

Version 0.1

For the original DeepDRR, released alongside our 2018 paper, please see the Version 0.1.

Acknowledgments

CUDA Cubic B-Spline Interpolation (CI) used in the projector:
https://github.com/DannyRuijters/CubicInterpolationCUDA
D. Ruijters, B. M. ter Haar Romeny, and P. Suetens. Efficient GPU-Based Texture Interpolation using Uniform B-Splines. Journal of Graphics Tools, vol. 13, no. 4, pp. 61-69, 2008.

The projector is a heavily modified and ported version of the implementation in CONRAD:
https://github.com/akmaier/CONRAD
A. Maier, H. G. Hofmann, M. Berger, P. Fischer, C. Schwemmer, H. Wu, K. Müller, J. Hornegger, J. H. Choi, C. Riess, A. Keil, and R. Fahrig. CONRAD—A software framework for cone-beam imaging in radiology. Medical Physics 40(11):111914-1-8. 2013.

Spectra are taken from MCGPU:
A. Badal, A. Badano, Accelerating Monte Carlo simulations of photon transport in a voxelized geometry using a massively parallel graphics processing unit. Med Phys. 2009 Nov;36(11): 4878–80.

The segmentation pipeline is based on the Vnet architecture:
https://github.com/mattmacy/vnet.pytorch
F. Milletari, N. Navab, S-A. Ahmadi. V-Net: Fully Convolutional Neural Networks for Volumetric Medical Image Segmentation. arXiv:160604797. 2016.

We gratefully acknowledge the support of the NVIDIA Corporation with the donation of the GPUs used for this research.

deepdrr's People

Contributors

benjamindkilleen avatar eigenvivek avatar gaocong13 avatar liamjwang avatar mathiasunberath avatar maxrohleder avatar mmjudish avatar

Stargazers

 avatar  avatar  avatar  avatar  avatar  avatar  avatar  avatar  avatar  avatar  avatar  avatar  avatar  avatar  avatar  avatar  avatar  avatar  avatar  avatar  avatar  avatar  avatar  avatar  avatar  avatar  avatar  avatar  avatar  avatar  avatar  avatar  avatar  avatar  avatar  avatar  avatar  avatar  avatar  avatar  avatar  avatar  avatar  avatar  avatar  avatar  avatar  avatar  avatar  avatar  avatar  avatar  avatar  avatar  avatar  avatar  avatar  avatar  avatar  avatar  avatar  avatar  avatar  avatar  avatar  avatar  avatar  avatar  avatar  avatar  avatar  avatar  avatar  avatar  avatar  avatar  avatar  avatar  avatar  avatar  avatar  avatar  avatar  avatar  avatar  avatar  avatar  avatar  avatar  avatar  avatar  avatar  avatar  avatar  avatar  avatar  avatar  avatar  avatar  avatar

Watchers

 avatar  avatar  avatar  avatar  avatar  avatar  avatar  avatar  avatar  avatar  avatar

deepdrr's Issues

question about the segmentation of bone vs soft tissue

Hi Prof. Unberath,

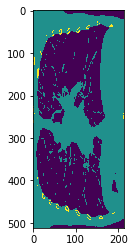
Thanks for the awesome repo. I have a question in terms of separating the bone and soft tissue structure. In the image shown in the Readme (as well as my testing on the LIDC dataset), it seems like the bone segmentation map does not cover the entirety of, e.g. spine columns, but rather just the outer ring of them. As a result, the spine is very visible from the soft tissue render. I am wondering if this is by design or due to the imperfection in segmentation?

I attached a bone segmentation image below to better illustrate:

seg0_bone

Many thanks,
Cheng

Source detector distance / perspective question

Hi there - I have mismatch between my intuition about what the MobileCArm source_to_detector_distance parameter should do and what I see.

image

For a fixed sensor size, I might expect for small source_to_detector_distance that the front and back faces of the cube are well separated (d1 big), and for large source_to_detector_distance the opposite (d2 smaller). Also for large source_to_detector_distance I would expect the volume to appear smaller on the rendered image. However for a toy minimal example I get different behaviour:

https://gist.github.com/hemmer/0c48d0d5ba9526e666d03cb0dbe35c25

I observe no change in separation between front and back faces, and the volume appears larger for big source_to_detector_distance.

I suspect this may be due to differences in intrinsic and extrinsic parameters that are a bit above my head at the moment. My questions are:

  • what am I misunderstanding about this problem?
  • can you explain how I might modify the objects in the minimal example to vary the separation of cube faces in the projected image (d1 to d2)?

For context, i see the behaviour i'd expect from DiffDRR (see end of minimal example) - I'm sure it's just a convention/parameterisation thing, but it'd be nice to reconcile these approaches.

Google Colab Issue

Hi,

I ran across another issue with Google Colab file referencing.

I copied "DeepDRR-master" into the "My Drive" directory in my google drive.

In the example_projector_tool.py file

I had to change Line 23 from

metal_path = r"./sample_metal_volume/sample.dcm"
to

metal_path = r"./gdrive/My Drive/DeepDRR-master/sample_metal_volume/sample.dcm"

code then runs

The generated DRR is too bright

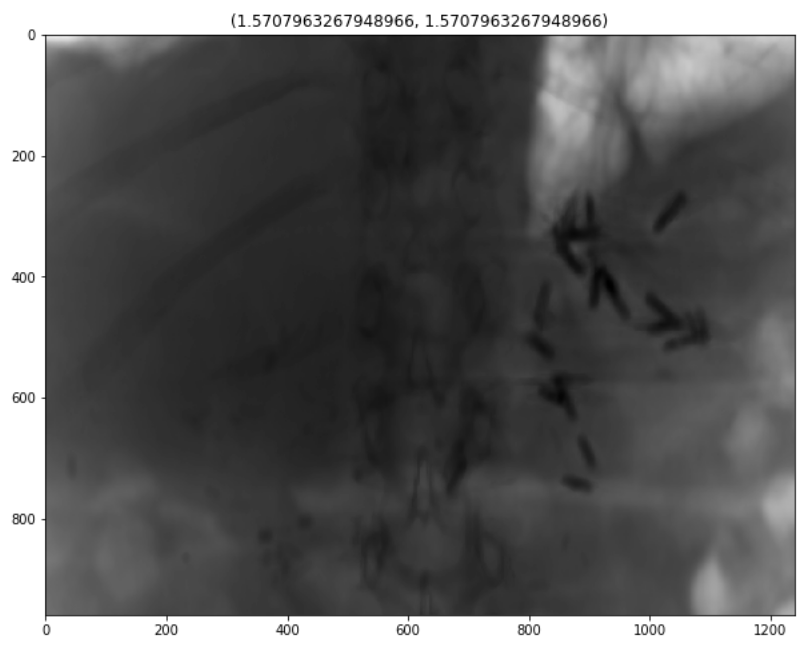
Hi! I'm using deepdrr to generate a DRR from .nii.gz files, and I found out that the result is too bright, as the image below shows:
example_projector_26
Do you have any idea how can I fix this problem?

mapping 3D to 2D points

Hello, I have a small question regarding projections.

I have some annotations for my CT data in 3D world coordinate space. Is there is a way to find the transformed 2D point of this annotation on the generated x-ray image?

DRR for cheat CT

Hi,
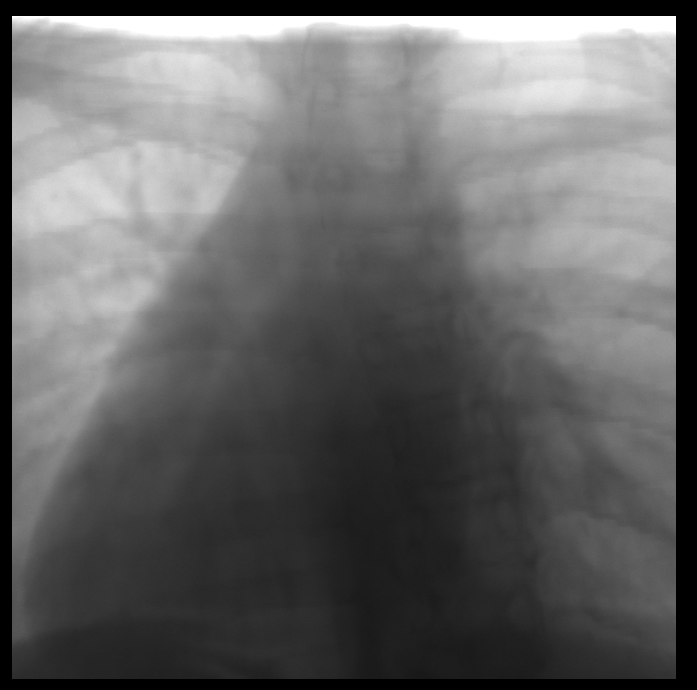
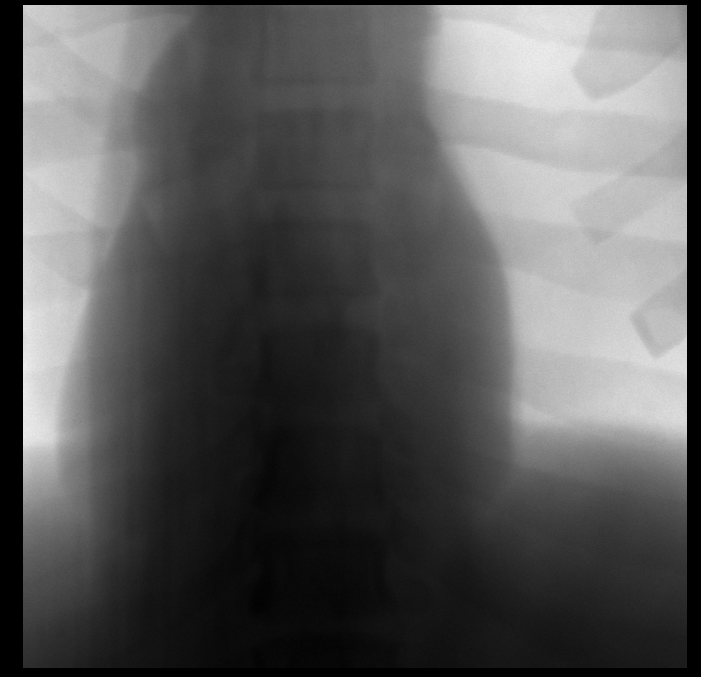
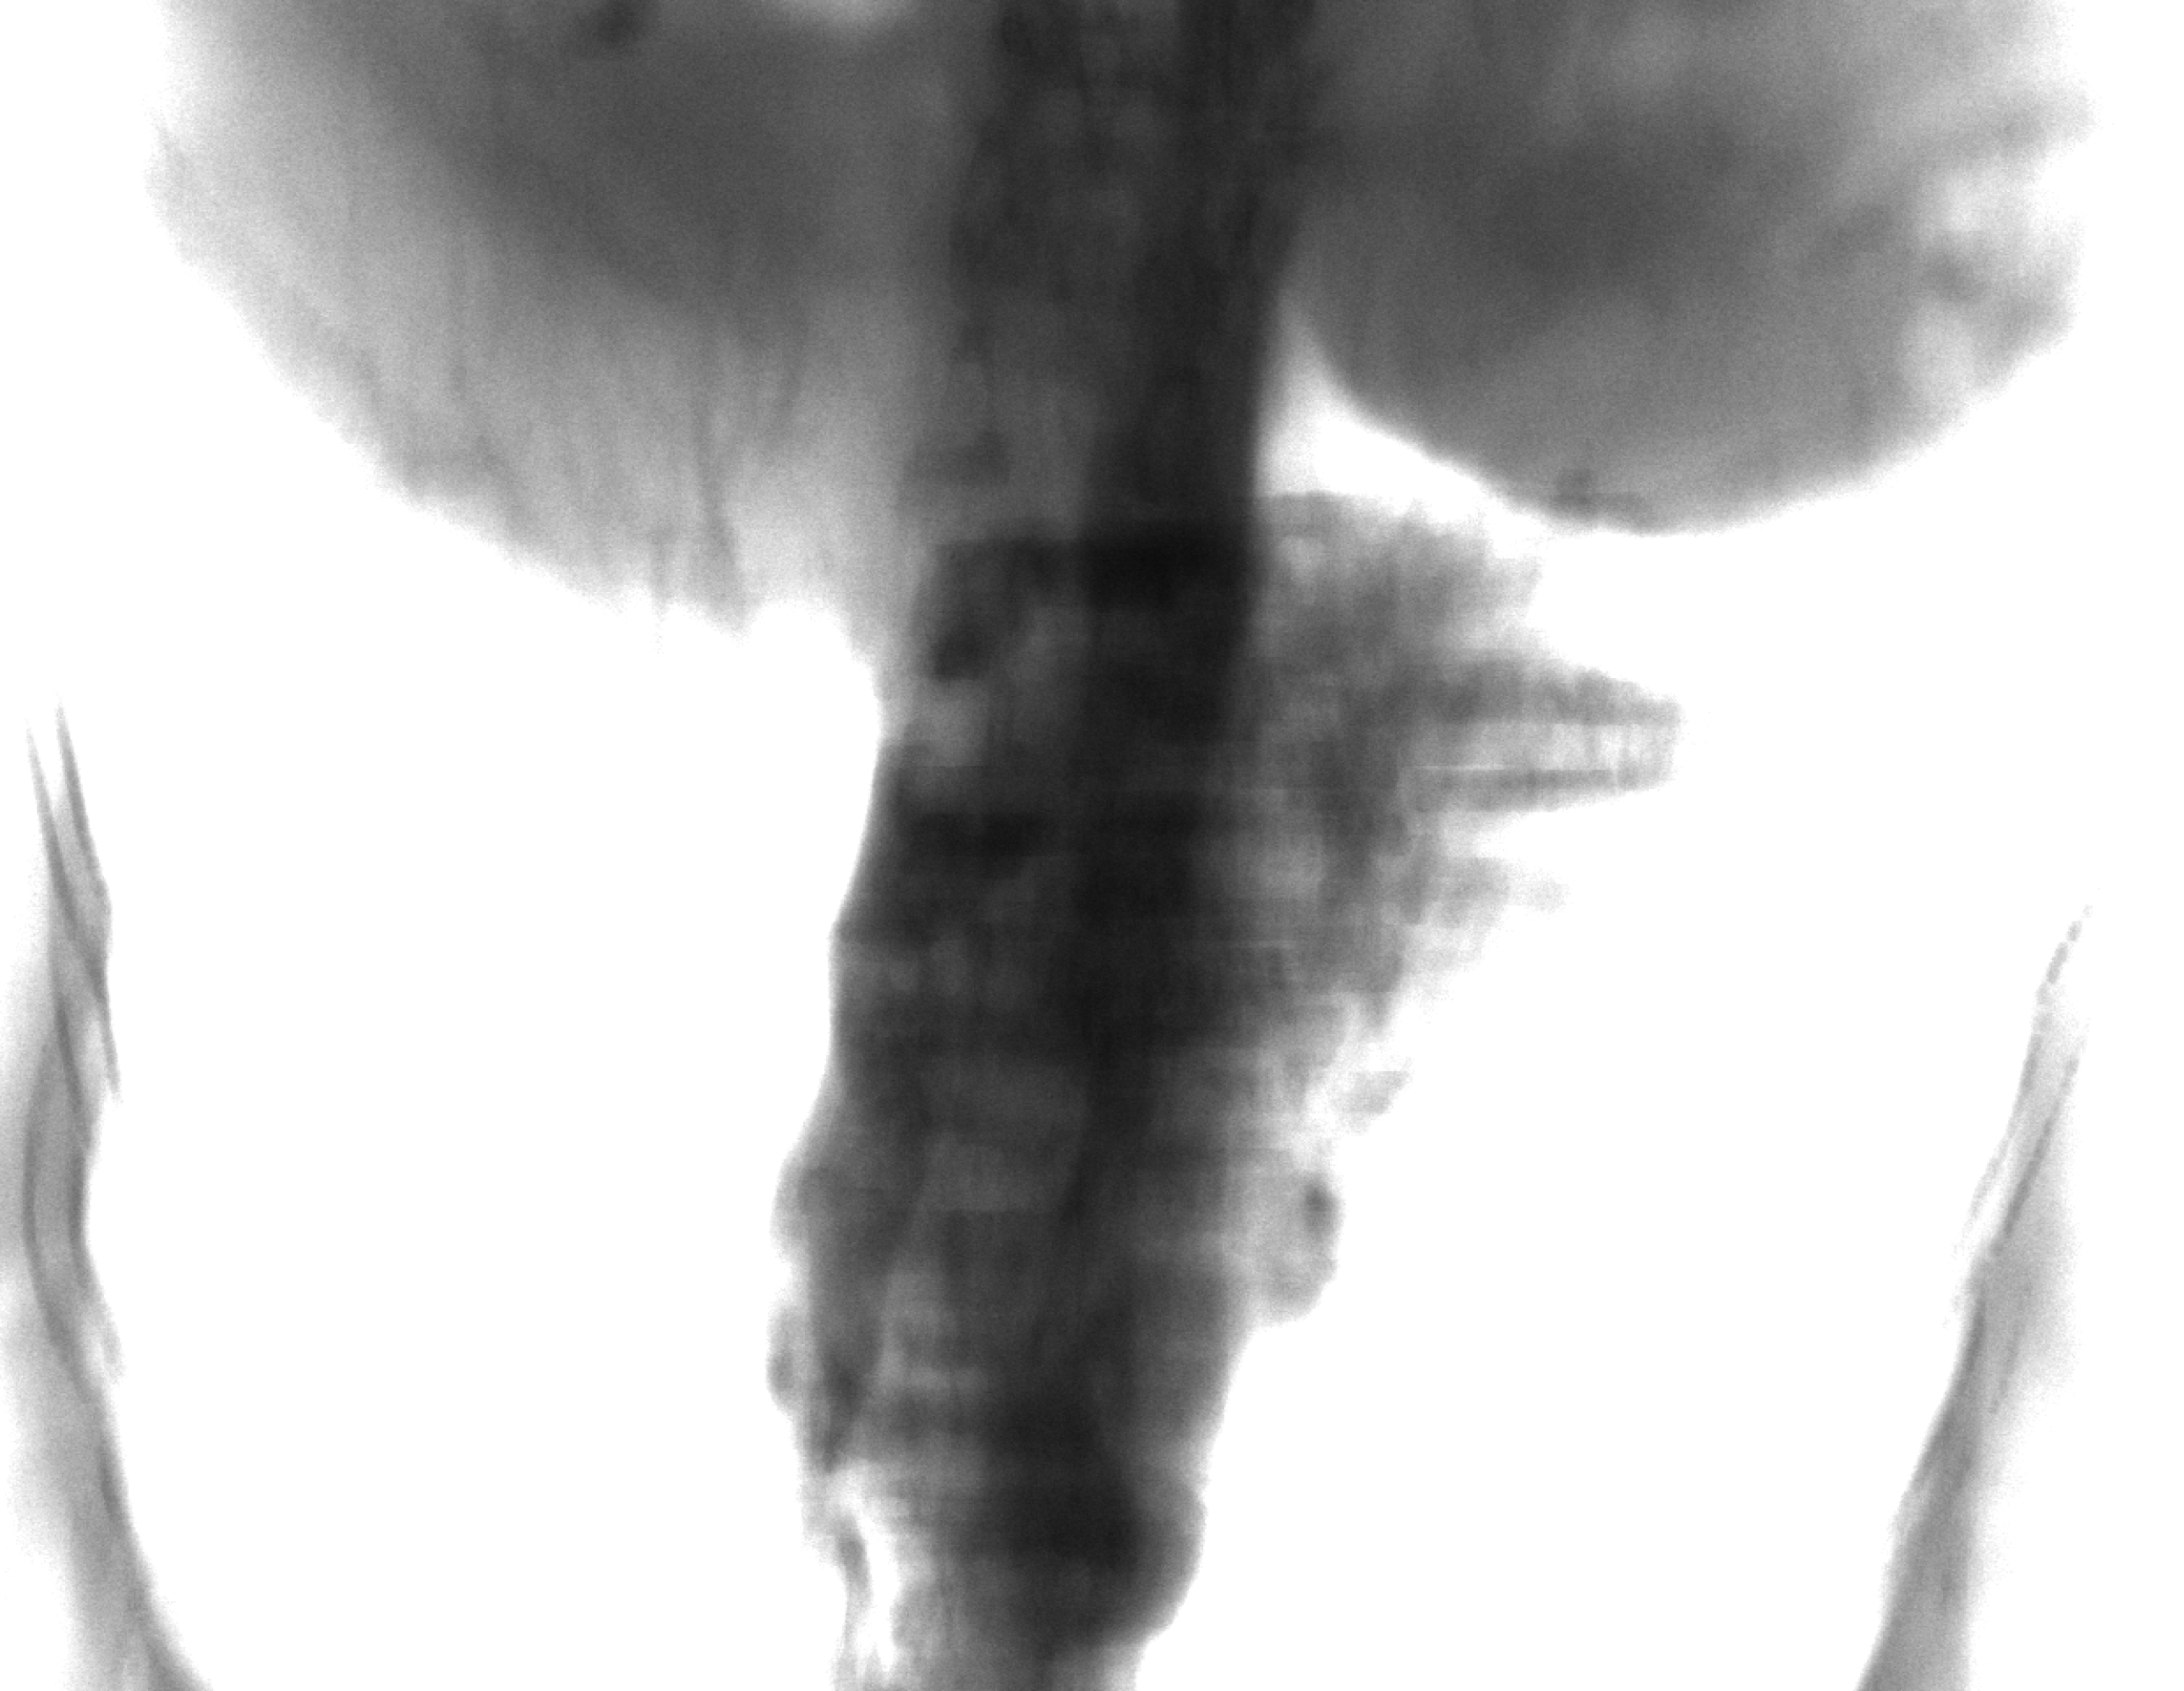
I tried DeepDRR fort cheat CT and i found the lung area is very bright (Figure 1 and Figure 2) compared to real x-ray (Figure 3), so it's difficult to observe the shape of vertebrae. I found in the code of materials, there are specific Attenuation Coefficients for the lung. So do i have to segment the lung first, if I want to observe thoracic vertebra in DRR.
Figure 1
screenshot from 2018-11-30 14-43-41
Figure 2
screenshot from 2018-11-30 14-44-59
Figure 3
screenshot from 2018-11-30 15-07-01

Projection of 3D masks

Given a 3D segmentation of 3D CT can we project the 3D segmentation in order to get a 2D image (2D masks) ?

Support for Faceup/Facedown for volume create from HU

I get the hu_matrix from pydicom then create volume with Volume.from_hu and trying to get projection with PA view.
Because the anatomical_coordinate_system for Volume.from_hu does not implement RAS, I can only get projection on axial plane.
The raised error show NotImplementedError("conversion from RAS (not hard, look at LPS example)" ).

The rotation matrix of LPS is

rotation = [
    [spacing[0], 0, 0],
    [0, 0, spacing[2]],
    [0, -spacing[1], 0],
]

I know the difference between LPS and RAS is only the opposite direction of axis.
However, I tried to add negative symbol -, but I still can't get PA view projection.

Could you please give me some hint to modify it?

Running DeepDRR for producing X-ray images from arbitrary CT

Hi,

I successfully ran the example on google colab and I have two questions:
1- The generated images in the generated_image folder does not seem OK.
2- How can I produce simulated X-ray from the results

Thank you all for your helpful comments

network weights file is corrupted

Hi,

I would like to try your deepDRR code but the segmentation network weights file from dropbox is corrupted. I tried many times. Would you help me regarding this issue?

Is there any parameters about the distance between object and source?

Hi, I wonder that there is any parameters about the distance between object and source,
which means the red line on the below figure.

image

Also, How can I get the forward-projection results on the v1.0.1-alpha branch?
On master, I wrote below codes on mass-attenuation.py
image

Then, I could get below forward-projection results.
image

However, On v1.0.1-alpha, I couldn't find the right spot to insert my codes to get forward-projection results.

Thanks for your valuable research again.

dicom convert nii

Hi,
Is there a scirpt which can transfrom dicom to nii in this project?

CUDA does not match blocking stream's device type CPU.

Performing a torch backpropagation after importing deepdrr results in the following error:

Traceback (most recent call last):
File "/medacta/landmark-detection/src/main.py", line 20, in
loss.backward()
File "/usr/local/lib/python3.8/dist-packages/torch/_tensor.py", line 363, in backward
torch.autograd.backward(self, gradient, retain_graph, create_graph, inputs=inputs)
File "/usr/local/lib/python3.8/dist-packages/torch/autograd/init.py", line 173, in backward
Variable._execution_engine.run_backward( # Calls into the C++ engine to run the backward pass
RuntimeError: Event device type CUDA does not match blocking stream's device type CPU.

Running in docker with

FROM nvidia/cuda:11.2.0-cudnn8-devel-ubuntu20.04
...
RUN pip install deepdrr

ValueError on example_projector !?

Hi by running the example_projector.py I had this error:
File "/deepdrr/deepdrr/projector/projector.py", line 462, in project ijk_from_world @ world_from_index,
ValueError: matmul: Input operand 1 has a mismatch in its core dimension 0, with gufunc signature (n?,k),(k,m?)->(n?,m?) (size 3 is different from 4).
Any clues ?

Windowing/Leveling

Hi,

Regarding windowing/leveling mentioned in Issue 11

Is there a way to adjust this within the DeepDRR code? Or this is to be done on using image processing software after running?

Question on the Euler angles

A MobileCArm has the method move_to() where one can specify two Euler angles alpha and beta.
These angles are then used in device_from_arm() and get_mesh_in_world(), where alpha is the Euler angle for the x-axis and beta the one for the y-axis.

I would like to compare this to one of your publications, e.g. Fig 4 in https://arxiv.org/pdf/1803.08608.pdf, where CRA/CAU and RAO/LAO angles are varied. If I am not mistaken, the CRA/CAU angle corresponds to an Euler angle of the x-axis and the RAO/LAO angle to the z-axis, with respect to the patient coordinate system, correct?. We notice different hardcoded axes within the methods device_from_arm() and get_mesh_in_world().

Of course, axes can be permuted, but I do have some questions:

  • Do the hardcoded axes in device_from_arm() and get_mesh_in_world() intend to correspond to the patient space? Or is this an arbitrary internal representation...
  • Where and when should I take care of the orientation of the loaded volume? What is the design/philosophy here? I see for example the Volume class method faceup() that may setup the internal axes s.t. CRA/CAU corresponds to an Euler angle on the y-axis and RAO/LAO corresponds to the x-axis.
  • Why only two Euler angles? Is this because we mainly use the conventional angles RAO/LAO and CRA/LAU? I would still find it more convenient when one could always feed 3 angles, because (is there another method available that sets up such geometries?):
    1. This way, one would not need to take care of the correct orientation of the volume. We could simply experiment with the 3 angles.
    2. We would not need to perform an additional rotation when applying data augmentation on the DRR for deep learning purposes. Doing this afterwards introduces padding issues.

This concept is new to me, and some things became clear to me while I was writing the question. But maybe you can clarify some things?

generated DRR from pelvis CT

Hi,

Thanks for sharing such a framework, the paper looked very promising!

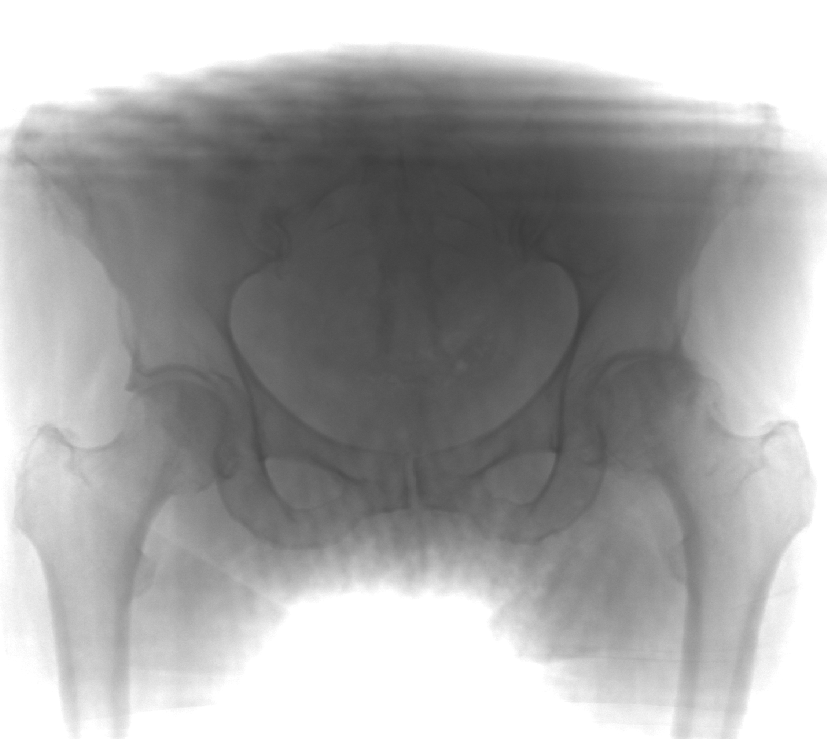
Like issue #2, I am facing the difficulty to generate a DRR that is similar to a real radiograph. I am trying to replicate some of your results by using an abdominal pelvis CT scan (0.9x0.9x0.4 mm) and by trying to create AP radiograph of the pelvis. I use the same spectrum (120kV, Al 4.3mm) and photons count of 5.10^5 with noise and scatter turned on, but I get a DRR image where areas with small density (air, zones outside of the patient) will present extreme values compared to the body areas of soft or bone. This makes an intensity windowing tedious and not optimal as exemplified in the following picture.

image

I wonder if your images in the paper underwent a last intensity conversion. For instance if I use logarithmic conversion (-log(DRR+min(DRR))) I get something like:

image

Which has a better dynamics (intensity windowing is easier) but it is not yet appropriate. If I turn off scatter, the image intensities are distributed and the result looks better but still not as nice as in your paper:

image

Moreover, scatter is turned off which is annoying (and reduces the advantage of using your Deep Learning based framework) and this logarithmic response is somehow arbitrary...

Any pointers?

Thanks!

Best regards,

Jerome

cuModuleUnload failed

Hi Killen
I am getting this cuModuleUnload failed error on setting any value to this to volume.world_from_ijk @ deepdrr.geo.point(100, 100, 100).

return self.project(*args, **kwargs)
File "/usr/local/lib/python3.8/dist-packages/deepdrr/projector/projector.py", line 516, in project
intensity, photon_prob = projector.project(proj)
File "/usr/local/lib/python3.8/dist-packages/deepdrr/projector/projector.py", line 244, in project
cuda.memcpy_dtoh(intensity, self.intensity_gpu)
pycuda._driver.LogicError: cuMemcpyDtoH failed: an illegal memory access was encountered
PyCUDA WARNING: a clean-up operation failed (dead context maybe?)
cuModuleUnload failed: an illegal memory access was encountered

pycuda.driver.CompileError

Hi,

I am trying to build the DeepDRR environment on my local Windows machine. I followed the instructions for installations, but when I am trying to run example_pojector.py, it seems to have issues with nvcc complier. The major error shows as:
pycuda.driver.CompileError: nvcc preprocessing of C:\Users\huyic\AppData\Local\Temp\tmpp4l1k4ir.cu failed [command: nvcc --preprocess -arch sm_75 -m64 -ID:\Research\DeepDRR-master\cubic -Id:\anaconda\lib\site-packages\pycuda\cuda C:\Users\huyic\A

I also traced to issue #13 and try to find something, but it seems like the temp.cu can be found under my machine but cannot compile. By the way, I am using CUDA version 10.2 and PyTorch version 1.5.0, I had no issues running default CUDA examples.

I also attached the entire error message below. Hope to hear back from you!

Cheers :)

(base) D:\Research\DeepDRR-master>python example_projector.py generating 6 matrices projecting: air D:\Research\DeepDRR-master\cubic Traceback (most recent call last): File "example_projector.py", line 97, in <module> main() File "example_projector.py", line 93, in main generate_projections_on_sphere(dicompath,save_path,min_theta,max_theta,min_phi,max_phi,spacing_theta,spacing_phi,photon_count,camera,spectrum,origin=origin,scatter=False) File "example_projector.py", line 40, in generate_projections_on_sphere forward_projections = projector.generate_projections(proj_mats, volume, materials, origin, voxel_size, camera.sensor_width, camera.sensor_height, mode="linear", max_blockind=200, threads=8) File "D:\Research\DeepDRR-master\projector.py", line 248, in generate_projections projector = ForwardProjector(density, materials[mat], voxel_size, origin=origin, mode = mode) File "D:\Research\DeepDRR-master\projector.py", line 12, in __init__ self.mod = self.generateKernelModuleProjector() File "D:\Research\DeepDRR-master\projector.py", line 173, in generateKernelModuleProjector """, include_dirs=[bicubic_path], no_extern_c=True) File "D:\Anaconda\lib\site-packages\pycuda\compiler.py", line 291, in __init__ arch, code, cache_dir, include_dirs) File "D:\Anaconda\lib\site-packages\pycuda\compiler.py", line 254, in compile return compile_plain(source, options, keep, nvcc, cache_dir, target) File "D:\Anaconda\lib\site-packages\pycuda\compiler.py", line 78, in compile_plain checksum.update(preprocess_source(source, options, nvcc).encode("utf-8")) File "D:\Anaconda\lib\site-packages\pycuda\compiler.py", line 55, in preprocess_source cmdline, stderr=stderr) pycuda.driver.CompileError: nvcc preprocessing of C:\Users\huyic\AppData\Local\Temp\tmpp4l1k4ir.cu failed [command: nvcc --preprocess -arch sm_75 -m64 -ID:\Research\DeepDRR-master\cubic -Id:\anaconda\lib\site-packages\pycuda\cuda C:\Users\huyic\AppData\Local\Temp\tmpp4l1k4ir.cu --compiler-options -EP]

"Fixed" C-arm

Hi Arcade Lab,

Previously, I adopted a "fixed" fluoroscope frame to perform 3D-2D co-registration, as shown in the figure below. The global coordinate system was set at the detector. A local coordinate system was defined at the anatomic object, such that the orientation/position of the anatomic object relative to the global coordinate system was determined.

It appears that the MobileCArm class in the DeepDRR adopted an isocenter reference frame. Can I set the frame of the MobileCArm to my frame described above?

Thank you very much for your suggestion!

image

Problem with generated output images

We tried to run the DeepDRR after solving some of the issues which I had posted earlier. The library was able to read our Dicom data successfully and also fills the volume with information. Some of the generated images that showed on the command-line after the segmentation network got loaded are:
image1

image2

We have used the default camera settings of 2x2 binning. The problem is that, once all the spectral bins are evaluated, the program produces a blank white image on the screen, similar to this:

image4

We also looked inside the generated_data folder, and unfortunately, the program has generated around 6 completely black tiff image files. Here is a sample output:

black

Can you tell why the program has produced such outputs and where are we exactly going wrong?

efficiency of the projection algorithm / G-arm

Hello,

I am writing to see if you can give me a hand on improving the efficiency of the projection algorithm. Here is what I think how the projection algorithm works.
First, the c-arm is moved to a specific location/ orientation in space, with camera coordinates updated.
Second, the direction of the x-ray is computed.
Third, the path of the ray is mapped and the ray is shone on CT objects.
Fourth, the energy of the ray is absorbed by material standing on its path.
Fifth, whatever left of it is computed at the detector / sensor.
Sixth, any relative difference is shown as the difference in intensity of the projection image (ranging between 0 to 1)

In the case where we have to move the c-arm to multiple locations or orientations, each projection is performed in a sequential manner (step 1-6). However, if hardware is capable, i.e. several CT volumes can be fitted on a GPU, I would like to perform multiple projections together.

As the CT data is not large, hardware appears not to be the issue here. More crucially, I am unsure how to parallize the existing algorithm.

What I have succeeded to do is to divide the input argument space and to parallize the task on separate processes (each with its own unique PID) up to 4 times. The method is to run 4 separate python scripts simultaneously, each carrying its own mutually exclusive set of input parameters. The shortcoming is that the same CT volume is copied 4 times on the GPU, and that these processes do not talk to each other, and that this method falls short in resolving my next problem.

My next problem is to emulate a g-arm, a device that is like 2 c-arms joined at right angle from each other. A g-arm can take the frontal and lateral view simultaneously because it carries 2 sets of sensor and source, at right angle to each other.

One approach is to run step 1-6 twice, with one setting being orthogonal to another. However, complete projection takes too long. In other words, it is too slow for a “real-time” widget on python jupyter notebook that illustrates how changes in alpha, beta, distances and offset affect the appearances of the projected images.

Capture

My thinking is that if I can keep a main process and spawn 2 subprocesses, each carrying a separate projector object, then I can pass from main process 2 sets of orthogonal setting to each object in subprocesses and get back the frontal and lateral views simultaneously on the main process.

While the Process from the standard python multiprocess library typically lets me to spawn processes, I face numerous errors concerning pycuda, memory initialization, etc. These errors do not arise in a single/ main process. As a note, it is possible to create multiple projector objects on the SAME / main process. This is verified by the increased amount of memory usage on the GPU under an identical PID. Of course, this is no use whatsoever except in showing that errors do not arise from having multiple objects alone.

Any ideas on how the parallization could be achieve for the notebook?

Thanks

generating images without readjusting parameters

Hi Mathias,

I'd like to use your framework to generate training data based on a CT scan covering pelvic and thorax region. As mentioned in #8 I (currently) cannot use the same setting and just run over the whole scan and generate images.

How did you do this for the model described in the paper?

Thanks a lot!

meaningless output of a new dicom dataset

Hello,
I have ran the example_projector code with the default dataset properly.but now I want to load our experimental dataset which contains 128 2d dicoms with the size of 512x512. It doesn't have any technical error but the output is meaningless and without any segmentation.Which part should I change?
In addition, I also like to know that how can I switch the output from transvers plane to frontal.

Thanks in advance,
Hoda

Questions regarding the article

Hi guys,

I was wondering how you combine those 3 parts (attenuation, scatter, noise) can you elaborate on that?
also when playing with the projection I saw that the output xray is somehow normalized between 0 and 1, can you elaborate on that as well?

btw very nice article and project!
Thanks

Path problem to segmentation network weights file

Hi, thanks for this great library.
We tried the DeepDRR library on Google Colab and there arose a number of issues. We have found the solutions to most of them and we would like to post it here so that it could be of benefit to others.

Issue: In the file segmentation.py and inside the constructor, the field model_path is set to search for the segmentation network weights file in the current directory. So, what we did was to modify the field’s value to set the path in google drive where the file was stored. When we executed the code after modification, it resulted in the Error: No such file or directory.

Solution: After much time, we discovered that the error might be due to the optimized pre-compiled code that python was executing instead of the modified python file. These pre-compiled codes are stored in pycache folder inside the DeepDRR. So, all we did was to delete the folder and execute the program once again. This time it worked as expected.

DeepDRR - Google Colab

Hi,

I am trying to run DeepDRR on Google Colab.

I copied the entire DeepDRR github directory structure to "Colab Notebooks" in GoogleDrive.

I create a new notebook. I then Edit --> Notebook Setting --> Runtime type = Python 3 and Hardware accelerator = GPU.

I then use the following code:

!pip install -q pydicom

from google.colab import drive
drive.mount('/content/gdrive', force_remount=True)

!python gdrive/My\ Drive/Colab\ Notebooks/DRR/example_projector.py

I get an error error which is attached. I think the main issue is that "pycuda.driver.CompileError: nvcc preprocessing of /tmp/tmp65qx05s_.cu failed"

I was hoping I could get help resolving this issue so that I can run the example in Google Colab.

Thank you

Image vanishes when threads are increased

When changing the number of threads in the Projector instantiation, parts of the projection images vanish as can be seen in the screenshot. Nothing else was changed in the creation of these two images except the threads parameter (from 8 to 10).

Does anyone have an idea what the problem could be? Will post updates if I find out myself.

thread_issue

Which settings to change - and how - for better images res.?

Hi Mathias,

thank you very much for providing the framework!

I created some images from a perpendicular view on the pelvic are with your camera settings described in the paper using threshold segmentation, SPECTRUM120KV_AL43 and no scatter. See Fig. 1 (origin=[0, 0, 120])

Then I moved up to the thorax by translation of the origin (origin=[0, -180, -120]) but am receiving a worse image. See Fig. 2
I might guess I could change by tweaking the exposure - how could I do that?

Or do you have other suggestions?

Thanks in advance!


image

Fig. 1


image

Fig. 2

Project with coronal view

Hi, I'm trying to create DRRs with coronal view. I converted dicom to nifti format and create Volume as instructions. However, I tried many different rotations with volume.rotate, the result is not as expectations. And I'm confused why the the size of dicom which is (512, 512) before projection changed after projection?

get_camera3d_from_world() got an unexpected keyword argument 'phi'

Hi author @mathiasunberath ,I have encountered a bug when implementing func projector.project_over_carm_range().Here are the errors.Could you please give me a hand? thx.


TypeError Traceback (most recent call last)
Input In [21], in <cell line: 1>()
1 with deepdrr.Projector(
2 volume=volume,
3 carm=carm,
(...)
10
11 ) as projector:
---> 12 images = projector.project_over_carm_range(
13 (-40,40,40),
14 (-45,45,45))
15 for i,image in enumerate(images):
16 plt.imshow(image,cmap ='gray')

File ~/deepdrr/deepdrr/projector/projector.py:813, in Projector.project_over_carm_range(self, phi_range, theta_range, degrees)
811 phis, thetas = utils.generate_uniform_angles(phi_range, theta_range)
812 for phi, theta in zip(phis, thetas):
--> 813 extrinsic = self.device.get_camera3d_from_world(
814 self.device.isocenter,
815 phi=phi,
816 theta=theta,
817 degrees=degrees,
818 )
820 camera_projections.append(
821 geo.CameraProjection(self.camera_intrinsics, extrinsic)
822 )
824 return self.project(*camera_projections)

TypeError: get_camera3d_from_world() got an unexpected keyword argument 'phi'

Mobile carm classs not importing

Hi killen,
i had to install deepdrr in new environment and i am getting import error for mobilecarm. when i tried to look at the code of installed deepdrr code there is no mobilecarm class in it
image
arrcap1
and also in device.py there is no mobile carm .is it the code being update

Hello, how can I use the code for making scatter?

Hello, thank you for the good code.
I need an image using a scatter.
But, There was a problem with the scatter in #68, is it not solved yet?
It does not seem to work well with test_scatter.py..

Thank you in advance.

New to Python

Hi

i would like to generate some DRRs at various angles.

I have been struggling with generating adequate DRRs with plastimatch.

I noticed that you generated a beautiful AP Pelvis DRR with the NIH Cancer Imaging Archive... I was hoping to do the same but generate a lateral DRR.

I was wondering if you might be able to share your code, and the specific dataset you used?

I am not very skilled at python and would greatly appreciate your help.

Thank you

installation problem

Hello,
I am really interested in using your program, but I keep getting an error when trying the example script.
The first error is in this line:
carm = deepdrr.CArm(isocenter=center)
I get this error : TypeError: init() missing 1 required positional argument: 'isocenter_distance'

So I add a random value of 800 to read : carm = deepdrr.CArm(isocenter=center, isocenter_distance=800)

and it runs. But in this line a get a long error message:
CompileError: nvcc compilation of C:\Users\Samer\AppData\Local\Temp\tmprdw5qsft\kernel.cu failed
[command: nvcc --cubin -D NUM_MATERIALS=3 -arch sm_75 -m64 -IC:\Users\Samer\anaconda3\envs\deepdrr2\Lib\site-packages\deepdrr\projector\cubic -Ic:\users\samer\anaconda3\envs\deepdrr2\lib\site-packages\pycuda\cuda kernel.cu]
[stdout:
kernel.cu(351): error: expected an expression

kernel.cu(363): error: expected an expression

kernel.cu(371): error: expected an expression

kernel.cu(324): warning: variable "px" was set but never used

kernel.cu(324): warning: variable "py" was set but never used

kernel.cu(324): warning: variable "pz" was set but never used

kernel.cu(327): warning: variable "boundary_factor" was set but never used

3 errors detected in the compilation of "kernel.cu".
kernel.cu
]

Some Information about my system. I am running python 3.9 under windows 10 through a jupyter Notebook.
I have CUDA 11 installed. I tried using pycuda (https://documen.tician.de/pycuda/tutorial.html) And I had no errors.
I can run tensorflow CNN on my machine without errors edit: (in R).

edit: I also added the path to cl.exe to the envoronment variables.

I would be very thankful if you could you maybe help find where this error is coming from.

Projector can't work correctly with scatter

Hi! It's great that you've developed such a good framework, I'm trying to run your geometry_testing.py program, however, I found out that when using the default setting, which is "photon_count=100000, scatter_num=10e7", it shows "cuMemFree failed: an illegal memory access was encountered", and when I checking out this problem, I accidentally got an error reporting says "got NaN values from negative log transform", but unfortunately I forgot to save the picture, and I didn't encounter it again.
image
Anyway, I can't run it with scatter, but if I drop the scatter setting, it can run till the end.
I'm new to this, and I've searched it on google, but I got nothing, so I'm not sure what's the problem, is it a bug or is my hardware not good enough?


Besides, I found out that if I tried to use V-Net to do the segment, which is provided by the framework, I got nothing, the output image would be all black, and when I output the materials list, I got all 1 in "air", and 0 in both "soft tissue" and "bone", why would this happen?
image
image
image

Pretreined model weights

Hello and thank you for a great library!
Where can I find the weights for the pretrained model?
Lucia

Type Error: Can't convert CUDA tensor to numpy

Issue: So, this is another error that occurred when we ran the code in Google Colab. This occurs when assigning the value to the output_tensor variable on line 60 of segmentation.py file.

Solution: Just move the current_block_tensor to CPU and also the output that is returned by self.model.forward(). Modify this line from:

output_tensor = np.array(self.model.forward(Variable(curren_block_tensor,requires_grad = False)).data)
to
output_tensor = np.array(self.model.forward(Variable(curren_block_tensor.cpu(),requires_grad = False)).cpu().data)

The reason is that we need to convert the operations to CPU. This is because numpy doesn't support CUDA. So, we cannot use the GPU memory without copying the numpy object to the CPU first.

How to provide a torch tensor volume as input to DeepDRR without detaching from the computational graph.

Hello,
I am using DeepDRR and I need help. I really like the DRR output, it's really looks like real X-rays.

I am using a DeepDRR in a pytorch. So my input to the DeepDRR and the output DRR must be torch tensors. This is because I want to keep these tensors attached to the computational graphs. Converting them to numpy or whatever would detach them from the computational graphs, which would be a problem because the model weights won't be updated.

In the code execution guide, you explain how to use it in a pytorch code. But it was not clear if the input volume can be a torch tensor as well as the output.

Your help will be appreciated.

How can I tune the parameters to use the data from Kaggle?

Hi, I want to generate some DRR dataset from the CT volumetic images.

I got some CT data from Kaggle.
However, I couldn't find any information about those data that is required to tune the parameters from the codes.
(e.g. sensor_size, pixel_size, isocenter_distance etc..)

How can I set the parameters with the data from Kaggle or other datasets which are achieved from the opensource?

can't convert cuda:0 device type tensor to numpy

Hi,
I got an error like
$python3 example_projector.py
generating 6 matrices
segmenting volume with Vnet
loaded segmentation network
(3, 512, 512, 256)
1
Traceback (most recent call last):
File "example_projector.py", line 97, in
main()
File "example_projector.py", line 93, in main
generate_projections_on_sphere(dicompath,save_path,min_theta,max_theta,min_phi,max_phi,spacing_theta,spacing_phi,photon_count,camera,spectrum,origin=origin,scatter=False)
File "example_projector.py", line 23, in generate_projections_on_sphere
volume, materials, voxel_size = load_dicom(volume_path, use_thresholding_segmentation=False)
File "/home/ubuntu/DeepDRR/load_dicom.py", line 68, in load_dicom
materials = conv_hu_to_materials(volume)
File "/home/ubuntu/DeepDRR/load_dicom.py", line 108, in conv_hu_to_materials
materials = segmentation_network.segment(hu_values)
File "/home/ubuntu/DeepDRR/segmentation.py", line 60, in segment
output_tensor = np.array(self.model.forward(Variable(curren_block_tensor,requires_grad = False)).data)
File "/home/ubuntu/anaconda3/lib/python3.7/site-packages/torch/tensor.py", line 492, in array
return self.numpy()
TypeError: can't convert cuda:0 device type tensor to numpy. Use Tensor.cpu() to copy the tensor to host memory first.

and changed these 3 lines

curren_block_tensor = torch.from_numpy(presegmentation).cuda()
curren_block_tensor = torch.unsqueeze(curren_block_tensor,0)
output_tensor = np.array(self.model.forward(Variable(curren_block_tensor,requires_grad = False)).data)

to these

curren_block_tensor = torch.from_numpy(presegmentation)
curren_block_tensor = torch.unsqueeze(curren_block_tensor,0).cuda()
output_tensor = np.array(self.model.forward(Variable(curren_block_tensor,requires_grad = False)).cpu().data)

and run the example_projector.py file with a chest CT data. (from LIDC-IDRI dataset)
and I got the attached files as a result. I am not sure about that I did the correct adjustments to have more realistic result. What should I do to improve my results?
DRR00004
DRR00002
DRR00005
DRR00003
DRR00001
DRR00000

Unable to install using pip command

I get the following issue while installing from pip:

Collecting deepdrr
  ERROR: Could not find a version that satisfies the requirement deepdrr (from versions: none)
ERROR: No matching distribution found for deepdrr

I tried a workaround by downloading the repo and running python setup.py build develop. It did install, but when I deleted the downloaded repo after installation and tried running the example, it threw me the following error:

ModuleNotFoundError: No module named 'deepdrr'

How to solve this?

About the function "conv_hu_to_density"

Hi!

Thank you for sharing the code framework.
I have a question about some values in the 'conv_hu_to_density' function.
image
0.0005886
0.001029
1.030
Are they fixed? If it's not fixed, how can I get this number on my data?

Thanks.

Peixin Li

Metal insertion

What format was used for the metal device in order to achieve such a representation of it? I am wondering how the inside device got darker than the outside one?

Make use of sensor_size in Projector explicit

The Projector class takes the CameraIntrinsicTransform as an argument during construction, which it uses to derive the desired detector resolution.

Later, it is also implicitly used as the intrinsic component of a CameraProjection, when a C-Arm helper class is provided to describe the trajectory. If another approach of projection (without the CArm helper class) is used, then it never used again.

It would be more explicit to instantiate the Projector with a sensor_size parameter, which is used to set the output image size and then explicitly pass the intrinsic to the projection method used with the CArm.

Something like this:

Projector(..., sensor_size = (976, 976))
...
projector.project_over_carm_range(
            (min_phi, max_phi, spacing_phi),
            (min_theta, max_theta, spacing_theta)
            camera_intrinsic)

How to accelerate the Projector?

Hi,
The projector takes around 6.5 seconds running on a GTX1060 GPU, it's much slower than an ITK DRR projector, do you have any suggestions for accelerating the projector?

Correspondence Between Center and DICOM

Hi

I've downloaded ABD_LYMPH_057 from the NIH database and am using it in DeepDRR. I'm trying to put the isocenter in a specific location. I've opened the DICOM in 3D Slicer, and the location is at axial cut -433.800mm, sagittal 5.078mm, and coronal 144.111mm. I've been unsuccessful in rationally changing the center vector in the DeepDRR code to effect this change...

I'm trying to understand what the relationship is between the slices and the origin. I've gone over your Anatomical Landmarks work.., I don't understand how you computed the Origin Offset?

I would greatly appreciate some guidance...

Recommend Projects

  • React photo React

    A declarative, efficient, and flexible JavaScript library for building user interfaces.

  • Vue.js photo Vue.js

    🖖 Vue.js is a progressive, incrementally-adoptable JavaScript framework for building UI on the web.

  • Typescript photo Typescript

    TypeScript is a superset of JavaScript that compiles to clean JavaScript output.

  • TensorFlow photo TensorFlow

    An Open Source Machine Learning Framework for Everyone

  • Django photo Django

    The Web framework for perfectionists with deadlines.

  • D3 photo D3

    Bring data to life with SVG, Canvas and HTML. 📊📈🎉

Recommend Topics

  • javascript

    JavaScript (JS) is a lightweight interpreted programming language with first-class functions.

  • web

    Some thing interesting about web. New door for the world.

  • server

    A server is a program made to process requests and deliver data to clients.

  • Machine learning

    Machine learning is a way of modeling and interpreting data that allows a piece of software to respond intelligently.

  • Game

    Some thing interesting about game, make everyone happy.

Recommend Org

  • Facebook photo Facebook

    We are working to build community through open source technology. NB: members must have two-factor auth.
  • Microsoft photo Microsoft

    Open source projects and samples from Microsoft.

  • Google photo Google

    Google ❤️ Open Source for everyone.

  • D3 photo D3

    Data-Driven Documents codes.