Git Product home page Git Product logo

bluevga's Introduction

BlueVGA View

Demo video here: http://www.youtube.com/watch?v=nNWkdR4P_UA

This work is licensed under a Creative Commons Attribution-NonCommercial 4.0 International License.

BlueVGA v1.3

VGA library for STM32F103C8T6 (BluePill) that can manipulate a 224x240 pixels screen with 8x8 Tiles (or Characters) from a user defined bitmap font

In version 1.3 there is a graphical mode that allows to manipulate pixels as well. Actually it uses 256 RAM Tiles that can be positioned any place in the screen and, by this way, it is possible to set individual pixels.

This is not a full screen pixel setting, but allows for several graphical applications. Please check the examples in this library to learn more about it.

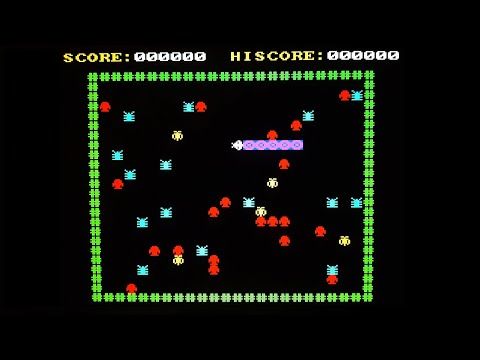
This graphical mode can be used to create some animation such as in the Space_Invaders_Animation_Demo sketch found in examples - screenshot:

Space Invaders Screen Shot

How to use it with Arduino IDE

This library was designed to work with Arduino IDE using the STM32F103C8, aka Bluepill It olny runs with Arduino board configuration called Generic STM32F1 Series or Generic STM32F103C Series, depending on the choosen core.

This library is compatible with the 2 most known "Arduino Cores", in a transparently way:

Option 1: The STMicroelectronics Official Core known as STM32 Core. This library only runs on minimum version 1.9.0 of STM32 Core

In order to install this board to Arduino IDE, please refer to this guide

For more information about STM32 Core click here For doubts or questions about how to use it, please go to this forum

Option 2: The community Core known as Roger's Core.

In order to install this board to Arduino IDE, please refer to this guide

For more information about Roger's Core click here For doubts or questions about how to use it, please go to this forum

What can be done with this Library?

BlueVGA is an Arduino compatible VGA library that can be used to display text and graphics to a VGA monitor. It uses a very low footprint (RAM & Flash). BlueVGA uses only about 1.5KB RAM and 8K Flash, leaving a lot of room for your sketch and data.

This library is compatible with Print Class, therefore it is possible to use print() and println() functions from BlueVGA class. This works in the same way as Serial.print() and Serial.println() but its output is displayed on the VGA screen, with text scrolling. In the examples there is the printTest.ino that demonstrates this capabilities.

Functions related to text printing:

#include "bluevga.h"
#include "font.h"

BlueVGA vga(ASCII_FONT);   // starts VGA driver using bitmap array ASCII_FONT

// It is based on 'hello_world.ino' that can be found in the library examples 
void setup() {
  vga.setTextCursor(0, 1);                 // position cursor at x = 0 and y = 1 (second line) in the screen
  vga.print("Hello World\t\t");            // it supports all Arduino way for println() and understands '\t' as tab, default 4 columns
  vga.print("tab space\n");                // it also understands '\n' as new line and '\r' as carriage return in the same line
  vga.setTextWrap(false);                  // it allows to wrap text or not when printing beyond right margin of the screen
  vga.setTextTab(3);                       // it allows to set number of columns for TAB ('\t')
  vga.setTextColor(RGB_GREEN, RGB_BLACK);  // it allows to define foreground (green) and background (black) colors for further printing
  vga.print(3.1415, 3);                    // it works as Arduino, printing floats witn any number of decimal digits 
  uint8_t color = vga.getTextColor();      // gets current colors in format 8 bits rgb0rgb0 BGColor 4 bits followed by FGColor 4 bits
  uint8_t x = vga.getTextCursorX();        // gets current X cursor position
  uint8_t y = vga.getTextCursorY();        // gets current Y cursor position
  vga.scrollText(3);                       // it scrolls the screen up 3 lines, no change on current cursor position. Just scrolls text and its colors!
  for(uint32_t i=0;;i++) {                 // prints increasing numbers for ever and scrolls the screen when reaching last line
    vga.print("value of i is ");
    vga.println(i);
    vga.waitVSync();                       // waits to end of VGA frame drawing routine to end -- makes the image to stay solid
  }
}

Functions related to graphical drawing:

In this version, it's possible to set individual pixels using the new class BlueBitmap.

It actually uses RAM Tiles instead of Flash Tile, which in turn allow to set an individual pixel within this tile. There are 256 RAM Tiles, thus, in a 16 x 16 tile arrangement, we could create a full canvas of 128 x 128 pixels. But those RAM Tiles can be any place in the 28x30 tile space. This allows to create, for instance, an animation such as Space Invaders (in the examples), or even create widgets for the user interface.

Main Methods are:

void BlueBitmap::drawPixel(uint8_t x, uint8_t y, bool setReset) // to draw a pixel on any place of the screen
void BlueBitmap::drawBitmap(uint8_t x, uint8_t y, uint8_t frameNum, bool setReset, int8_t color) // to draw a bitmap on the screen
void BlueBitmap::drawBitmap8(uint8_t x, uint8_t y, uint8_t frameNum, bool setReset, int8_t color) // to fast draw of 8x8 or 16x8 bitmaps

void setBlueVgaObject(BlueVGA &bvgaPtr) // to associate the vga object to drawing functions 

// RAM Tiles can be split into two sections: RAM Tiles that are "safe" and won't be used in a drawPixel() 
// and the rest that will be dynamically allocated to display pixels in the screen. By default all the tiles 
// are available for drwaing pixels.
void BlueBitmap::eraseRamTiles() 	// to reset the graphical environment - uses firstTile information
void setFirstTile(uint8_t tile)		// to assign the Tile number that a graphical function can use to set a pixel 
 					// when all available tiles are used it will recycle back to this tile
void setNextFreeTile(uint8_t tile)  	// to assign the Tile number that a graphical function can use to set a pixel
 					// used as next available tile for pixels

New Examples in Github:

  • Space Invaders Animation Demo - a nice auto-play Space Invaders Animation
  • Elliptical Text Animation - an animation of text moving in different elliptical paths
  • graph Demo Sine Curve - an slow motion animation of a sine curve drawing. At the end it changes to character view in order to help understanding how the graphical mode works. Top

Some Examples

Click the image below to watch it in action (you will be redirected to YouTube)

Video Snake Game

Image2

Connections

BlueVGA uses pins:

  • PA9 as Horizontal Sync VGA signal
  • PB6 as Vertical Sync VGA signal
  • PC13 for Blue VGA signal
  • PC14 for Green VGA signal
  • PC15 for Red VGA signal
  • G (BluePill ground) must be connected to GND pin of VGA

VGA Connection

VGA signal goes from 0 volt to 0.7 volt. Bluepill works with 0 to 3.3 volts. In order to level the output to a voltage close to 0.7, it's necessary to add a 330R resistor between STM32F103 port and VGA connected pin. VGA has a 75R grounded resistor to RGB pins, thus 330R will work as voltage divider and take 3.3 volts to something about 0.6 volts.

But most modern VGA monitors support 3.3 volts directly, therefore STM32F103 pins could be connected directly VGA using wires or jumpers, as in the images:

Jumpers on VGA

Jumpers

BlueVGA Screen

BlueVGA Screen is composed of 28x30 tiles. Each tile has only 2 possible colors, a foreground and background color. BlueVGA is designed to display 8 different colors: black, blue, cyan, green, yellow, red, magenta and white.

BlueVGA Image 8 Colors

What are Tiles?

A tile can be as simple as a character. A tile is a bitmap of 8x8 pixels (bits). Bit 1 is foreground and Bit 0 background. This bitmap can represent a letter or any graphic drawing with 8x8 pixels.

IMAGE Char A

A tile has 8 bytes (64 bits). For representing the character 'A' as in the image above, we can create an array such as:

// Font array for letter A bitmap
// each tile has olny two colors out of 8 possible colors
// bit 0 is background color 
// bit 1 is foreground color
//
// It can be represented as binary number for making it easy to view the drawing
// but also can use hexa code such as 0x24 = 36 = 0B00100100
// It has 8x8 bits = 8 bytes to define 'A' letter

const uint8_t bitmap_A = {
   0B00000000,      // ________ 
   0B00011000,      // ___XX___
   0B00100100,      // __X__X__
   0B00100100,      // __X__X__
   0B00111100,      // __XXXX__
   0B00100100,      // __X__X__
   0B00100100,      // __X__X__
   0B00000000       // _________
};

Coding!

Sketch example

#include "bluevga.h"
#include "font.h"

BlueVGA vga(ASCII_FONT);   // starts VGA driver using bitmap array ASCII_FONT

// It is based on 'hello_world.ino' that can be found in the library examples 
void setup() {
}

// Blink the text 'Hello World!"
void loop() {
  vga.clearScreen();  // clears the screen to black
  vga.waitVSync(60);  // same as delay(1000); -- it delays by 60 frames in a 60 frames per second system
  
  // prints the text at position 1,2 using yellow as foreground color on a black background
  vga.printStr(1, 2, vga.getColorCode(RGB_YELLOW, RGB_BLACK), (char *)"Hello World!"); 
  vga.waitVSync(60);  // same as delay(1000); 
}

Result of this sketch:

Hello World

Documentation and functions

Please look at "BlueVGA.h" for further information on each possible function of the library There are also good examples in the library

Important Information

This library halts SysTime functionality in order to generate a solid and clear image on the screen. Thus functions such as delay(), millis(), micros(), delayMicroseconds() will not work! Instead of those functions, BlueVGA provides two alternatives:

// each Frame is displayed 60 times per second.
// waitVSync() holds the executuion for 1/60 of a second or 16.66 milliseconds
void waitVSync(uint16_t waitFrames = 1);

// returns the number of frames already displayed since VGA driver started
// it also represents time beacuse each frame is drawn at each 16.66 milliseconds
// thus it can be used instead of millis() using as unit 1/60 of a second instead of 1/1000 of a second
int32_t getFrameNumber();          

Another important information is related to use of STM32 Core. In order to achieve a nice VGA resoltution, BlueVGA turns off HardwareTimer in this core. This is done by adding a file named "build_opt.h", that does nothing and is not compiled, but tells STM32 Core to use its content as compiling options. Beside that effect there is an important side effect: Any Arduino function that relies on a HardwareTimer won't work. Some known fuctions that need Timer are: HardwareTimer functions, Servo Motor control functions, tone() related functions, pwmWrite() and pinMode(..., PWM) functions In order to use any of those functions, unfortunately, user will have to write a new version of necessary functions or use some 3rd party library to replace them.

For work aroud, it's possible to use Roger's Core instead, which doesn't turn off HardwareTimer.

bluevga's People

Contributors

rocorbera avatar

Stargazers

 avatar  avatar  avatar  avatar  avatar  avatar  avatar  avatar  avatar  avatar  avatar  avatar  avatar  avatar  avatar  avatar  avatar  avatar  avatar  avatar  avatar  avatar  avatar  avatar  avatar  avatar  avatar  avatar  avatar  avatar  avatar  avatar  avatar  avatar  avatar  avatar  avatar  avatar  avatar  avatar  avatar  avatar  avatar  avatar  avatar  avatar  avatar  avatar  avatar  avatar  avatar  avatar  avatar  avatar  avatar  avatar  avatar

Watchers

 avatar  avatar  avatar  avatar  avatar  avatar

bluevga's Issues

Stm32H7? Potr?

Hello again, how do you think of STM32H7 with 1024kb mem and 480mhz / 550mhz clock? Then vga 640x480 @ 60 hz is achievable?

Stm32H7 port?

Hello again, how do you think of STM32H7 with 1024kb mem and 480mhz / 550mhz clock? Then vga 640x480 @ 60 hz is achievable?

Do I need to use any Resistors for VGA pins?

Hi I was going through your project and in the stm32duino thread, (https://stm32duinoforum.com/forum/viewtopic_f_2_t_3318.html). Amazing work! Just out of curiocity, are any resistors required between R,G,B pins of VGA and STM32 mcu? Other 'works' with VGA have several "potential divider" resistors of 220 Ohm as the pins MAX input voltage is ~1V. I am about to walk on your path, so I thought, its better to ask you before damaging something. ๐Ÿ˜‡

Question about tile size customization

Hello @RoCorbera ... Nice library...

But how it can be customized,

I need 24x14 grid for 28x34 px tile size.

To display in 640x480 resolution.

I know that I need black padding 4px Horisontaly [top,bottom]and 2px vertically[left,right]... But do you think stm32 is powefrull enough to drive full 640x480 resolution with around 90 custom maped characters at this size of tile

?

multiple definition of `TIM1_CC_IRQHandler';

hi, i would like to use your pretty cool library in order to make a monitor of my car parking sensors but i've got some issues.
first, i installed the library from the new arduino ide 2.0.2 library manager and when i tryed to compile the ''hello world'' sketch i got an issue with ''bluebitmap.cpp'' it seems to have a issue with this line :
''uint32 color32Bits = color << 24 | color << 16 | color << 8 | color;''

i simply replaced with :
''uint32_t color32Bits = color << 24 | color << 16 | color << 8 | color;''

the second issue is that i have this error while compiling : ''multiple definition of `TIM1_CC_IRQHandler';''

have you an idea of how i can fit it ?

i'm working with STM32F103C8T6 (chinese version) and official STM32 Core v2.3.0 (lastest version). also, i'm using HID 2.0 bootloader (lastest version).

thank you.

Display the temperature of DHT11 sensor on VGA

Hello, I am trying to use DHT11 to match your cool library to complete the temperature display. I found that the official DHT11 library cannot be used. I try to use the capture mode of the hardware timer to complete the driver. It works successfully, but it needs to pull it down for 18ms in the initial stage, I can't use vga.waitVSync(2) to complete the delay, I can only modify the source file to unlock the systick and use delay(18) to complete the pull down, But this seems to cause the screen to flicker. How should I solve this delay problem?

Below is my arduino code.

void Request()      /* Microcontroller send request */
{
  pinMode(DHT11, OUTPUT);
  digitalWrite(DHT11,LOW);    /* set to low pin */
  delay(18); /* wait for 18ms */
//vga.waitVSync(2); /* it not work */
  digitalWrite(DHT11,HIGH);    /* set to high pin */
}

void Response()
{
    pinMode(DHT11, INPUT_PULLUP);
    Timer2.attachCompare1Interrupt(handler_channel_1);
    TIMER2_BASE->CR1 = TIMER_CR1_CEN;
    TIMER2_BASE->CR2 = 0;
    TIMER2_BASE->SMCR = 0;
    TIMER2_BASE->DIER = TIMER_DIER_CC1IE;
    TIMER2_BASE->EGR = 0;
    TIMER2_BASE->CCMR1 = TIMER_CCMR1_CC1S_INPUT_TI1;
    TIMER2_BASE->CCMR2 = 0;
    TIMER2_BASE->CCER = TIMER_CCER_CC1E;
    TIMER2_BASE->PSC = 71;
    TIMER2_BASE->ARR = 0xFFFF;
    TIMER2_BASE->DCR = 0;
}

void handler_channel_1(void) {                           //This function is called when channel 1 is captured.
    if (0b1 & GPIOA_BASE->IDR  >> 0) {                     //If the receiver channel 1 input pulse on A0 is high.
      channel_1_start = TIMER2_BASE->CCR1;                 //Record the start time of the pulse.
      TIMER2_BASE->CCER |= TIMER_CCER_CC1P;                //Change the input capture mode to the falling edge of the pulse.
    }
    else {                                                 //If the receiver channel 1 input pulse on A0 is low.
      channel_1 = TIMER2_BASE->CCR1 - channel_1_start;     //Calculate the total pulse time.
      if (channel_1 < 0)channel_1 += 0xFFFF;               //If the timer has rolled over a correction is needed.
      TIMER2_BASE->CCER &= ~TIMER_CCER_CC1P;               //Change the input capture mode to the rising edge of the pulse.
      a[index1++]=channel_1;
    }
}

CRT VGA Monitor Image Problem & Fake Bluepill Issues

Hello, I have a problem with the signals. The image is distorted in some horizontal lines.

20201122_164817

I confirm that the problem is in the Sync signals, because shorting any color signal with the horizontal Sync signal, the image is also distorted.

20201122_170337

I tried other sketches and libraries, and they worked correctly, I tried to program the microcontroller with both cores, changing the bootloaders, trying another Blue Pill, but I couldn't get it to work.

For some reason, the problem is slightly greater when there are more colors displayed on the screen.

Any help is appreciated.

I2C disabled when rendering image on the screen

Like the project. I am trying to use my stm32 as display renderer, so I needed to make it as i2c slave and set the Wire pins to I2C2. Arduino nano is sending over i2c letters to put on the display. It doesn't work while it is displaying, only before displaying image. I know that the code relies on hardware timer, so delay, pwm etc doesn't work, but does it also disable i2c and spi interfaces?

STM32 code:

#include <Wire.h>
#include "bluevga.h"
#include "font.h"            // imports a ASCII Flash font bitmap
#include "bluebitmap.h"      // functions for drawing pixels in the screen

#define LED_PIN PB12

BlueVGA vga(ASCII_FONT);
//BlueVGA vga(USE_RAM);

uint8_t color_code = vga.getColorCode(RGB_WHITE, RGB_BLACK);
BlueBitmap fontBitmap(8, 8, (uint8_t *)ASCII_FONT);

volatile char text_buffer[VRAM_HEIGHT][VRAM_WIDTH] = {0};

volatile bool blink_led = true;

static void twi_receive(int bytes);
static void twi_request(void);

void setup() {
    Wire.setSCL(PB10);
    Wire.setSDA(PB11);
    Wire.begin(4);
    Wire.onReceive(twi_receive);
    Wire.onRequest(twi_request);

    pinMode(LED_PIN, OUTPUT);
    digitalWrite(LED_PIN, LOW);

    {
        uint8_t tx = 0;
        uint8_t ty = 0;
        for (char letter = 32; letter < 127; letter++)
        {
            text_buffer[ty][tx++] = letter;
            if (tx >= 28)
            {
                tx = 0;
                ty++;
            }
        }
    }

    vga.clearScreen(color_code);
}

void loop() 
{
    BlueBitmap::eraseRamTiles();
    for(uint8_t y = 0; y < VRAM_HEIGHT; y++)
    {
        char* line = (char*)text_buffer[y];
        vga.printStr(0, y, color_code, line);
    }

    if (blink_led)
    {
        digitalWrite(LED_PIN, HIGH);
        vga.waitVSync(60);
        digitalWrite(LED_PIN, LOW);
        vga.waitVSync(60);
        blink_led = false;
    }
}

// Write from Master, Read from Slave
static void twi_receive(int bytes)
{
    if (bytes != 3)
        return;

    uint8_t buffer[3];
    Wire.readBytes(buffer, 3);
    uint8_t x = buffer[0];
    uint8_t y = buffer[1];
    uint8_t c = buffer[2];
    text_buffer[y][x] = c;
    blink_led = true;
}

// Read from Master, Write from Slave
static void twi_request(void)
{
    
}

Arduino Nano code:

#include <Arduino.h>
#include <Wire.h>

static void write_vga(uint8_t x, uint8_t y, uint8_t c);

void setup() 
{
    Wire.begin();
}

void loop() 
{
    write_vga(0, 0, 'A');
    write_vga(1, 0, 'B');
    write_vga(2, 0, 'C');
}

static void write_vga(uint8_t x, uint8_t y, uint8_t c)
{
    Wire.beginTransmission(4);
    Wire.write(x);
    Wire.write(y);
    Wire.write(c);
    Wire.endTransmission();
}

Recommend Projects

  • React photo React

    A declarative, efficient, and flexible JavaScript library for building user interfaces.

  • Vue.js photo Vue.js

    ๐Ÿ–– Vue.js is a progressive, incrementally-adoptable JavaScript framework for building UI on the web.

  • Typescript photo Typescript

    TypeScript is a superset of JavaScript that compiles to clean JavaScript output.

  • TensorFlow photo TensorFlow

    An Open Source Machine Learning Framework for Everyone

  • Django photo Django

    The Web framework for perfectionists with deadlines.

  • D3 photo D3

    Bring data to life with SVG, Canvas and HTML. ๐Ÿ“Š๐Ÿ“ˆ๐ŸŽ‰

Recommend Topics

  • javascript

    JavaScript (JS) is a lightweight interpreted programming language with first-class functions.

  • web

    Some thing interesting about web. New door for the world.

  • server

    A server is a program made to process requests and deliver data to clients.

  • Machine learning

    Machine learning is a way of modeling and interpreting data that allows a piece of software to respond intelligently.

  • Game

    Some thing interesting about game, make everyone happy.

Recommend Org

  • Facebook photo Facebook

    We are working to build community through open source technology. NB: members must have two-factor auth.

  • Microsoft photo Microsoft

    Open source projects and samples from Microsoft.

  • Google photo Google

    Google โค๏ธ Open Source for everyone.

  • D3 photo D3

    Data-Driven Documents codes.