Git Product home page Git Product logo

reactioncommerce / example-storefront Goto Github PK

View Code? Open in Web Editor NEW
606.0 36.0 287.0 8.15 MB

Example Storefront is Reaction Commerce’s headless ecommerce storefront - Next.js, GraphQL, React. Built using Apollo Client and the commerce-focused React UI components provided in the Storefront Component Library (reactioncommerce/reaction-component-library). It connects with Reaction backend with the GraphQL API.

Home Page: https://www.mailchimp.com/developer/open-commerce

License: Apache License 2.0

JavaScript 94.80% Shell 4.23% Dockerfile 0.30% TypeScript 0.67%
ecommerce-platform ecommerce commerce reactioncommerce storefront e-commerce javascript cart shop marketplace

example-storefront's Introduction

Example Storefront

Mailchimp Open Commerce is an API-first, headless commerce platform built using Node.js, React, and GraphQL. It plays nicely with npm, Docker and Kubernetes.

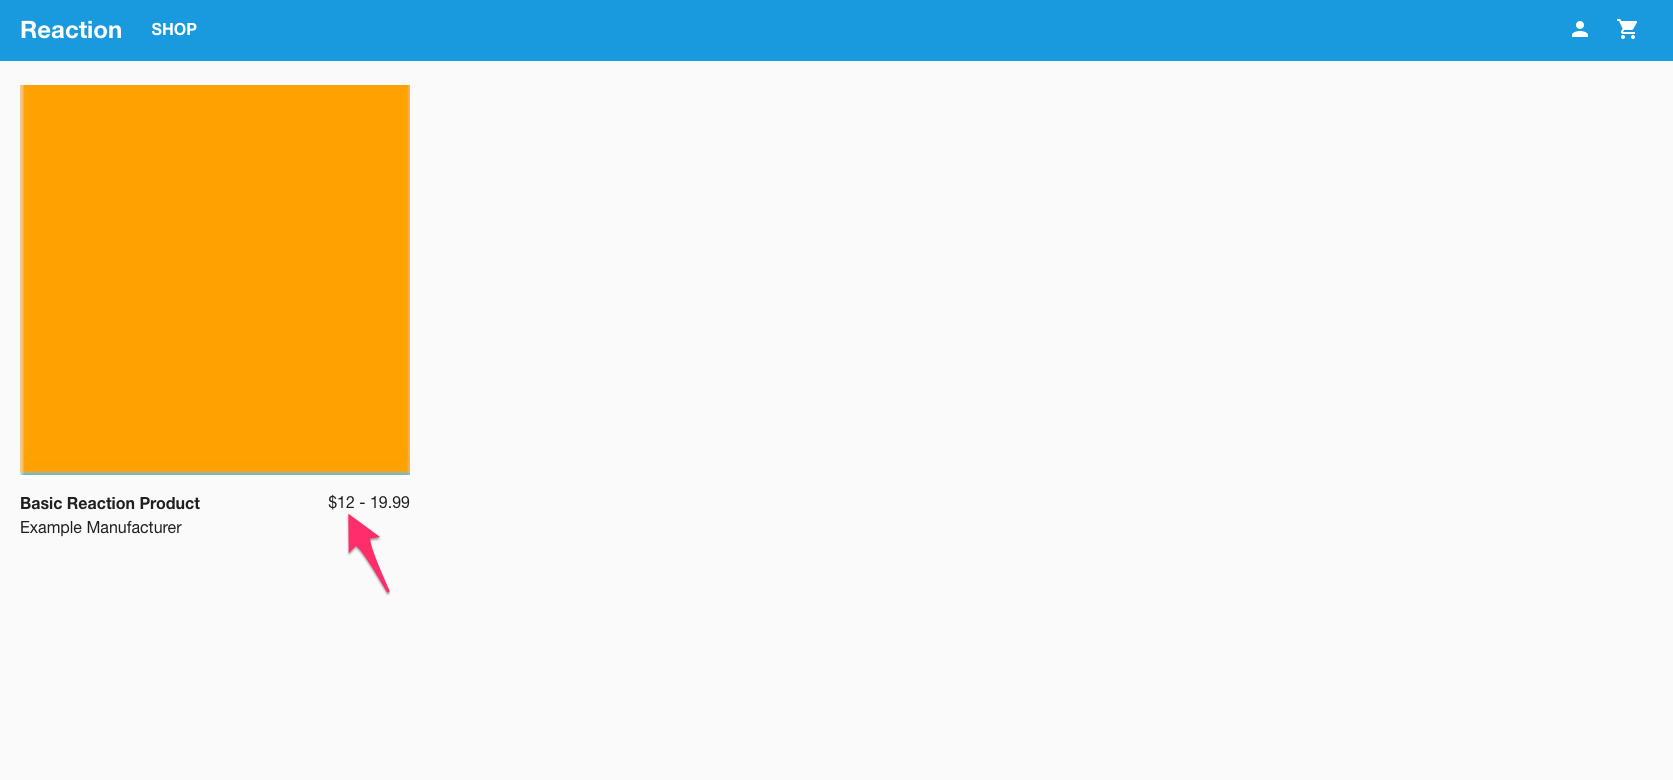
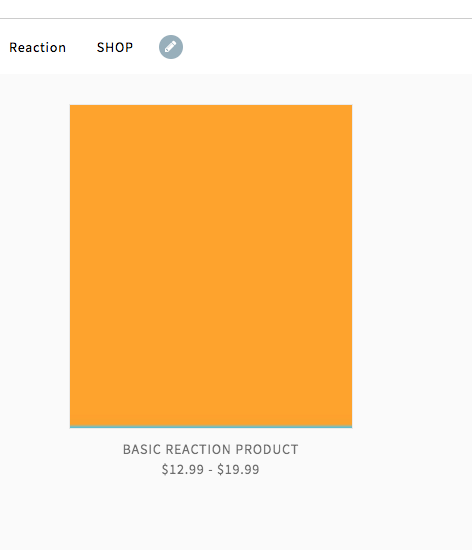
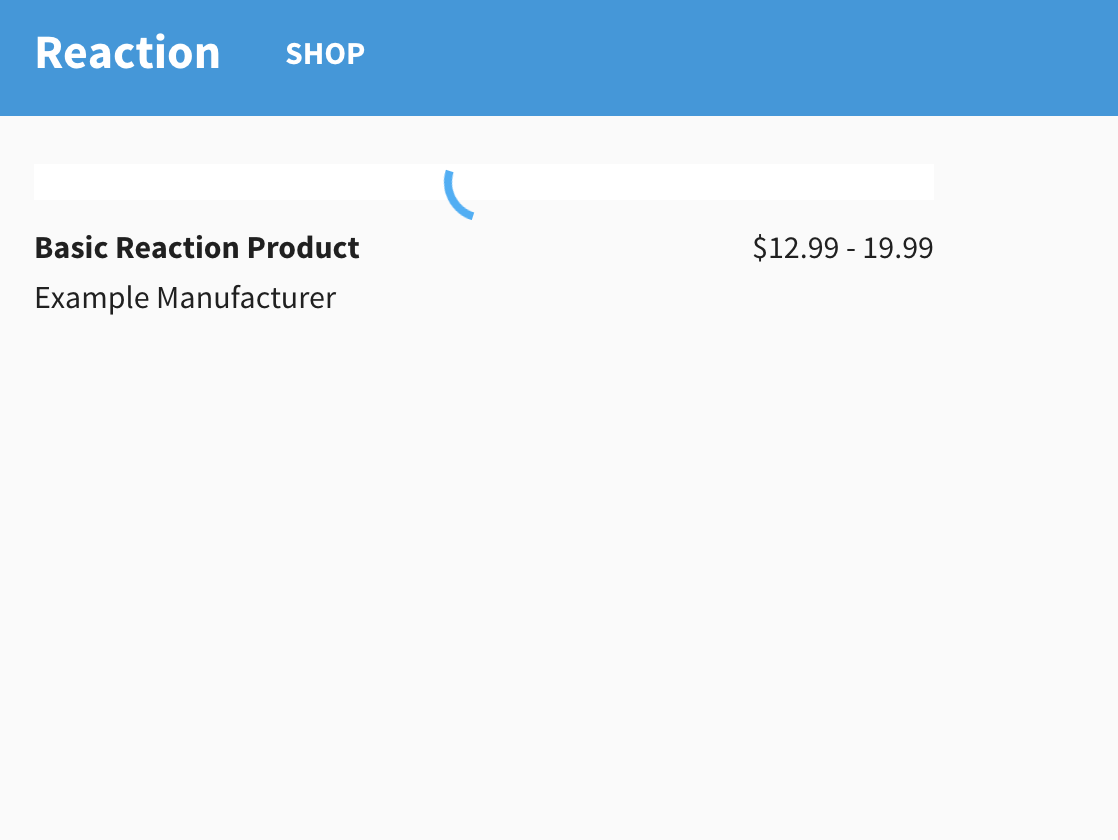
This Example Storefront is to serve as a reference on how to implement a web based storefront using the Reaction Commerce GraphQL API. You can fork this project as a jumping off point or create your own custom experience using your preferred client-side technology. While we believe our example storefront is full-featured enough to use in production, it may be missing features your shop requires at this time.

Features

Mailchimp Open Commerce comes with a robust set of core commerce capabilities right out of the box. And since anything in our codebase can be extended, overwritten, or installed as a package, you may also customize anything on our platform.

This example storefront is built with Next.js, React, GraphQL, and Apollo Client

Getting Started

Follow the Quick Start Guide to install and run all the services necessary to run the storefront:

Directory: Service URL
reaction: GraphQL API localhost:3000/graphql
reaction-admin: Reaction Admin localhost:4080
reaction: MongoDB localhost:27017
example-storefront: Storefront localhost:4000

Note: The storefront has redirects so that if you open http://localhost:4000/graphql, you'll be redirected to the GraphQL Playground.

Configuration

Set up Stripe

When running the storefront and Reaction for the first time, you will need to configure Stripe payment processing and shipping options to test a complete order checkout flow. After signing up for a Stripe API key, follow these steps:

  1. Add public Stripe API key (STRIPE_PUBLIC_API_KEY) to .env.
  2. Open the Reaction Admin app, at http://localhost:4080. Log in as an Admin user.
  3. Open Payments: Enable Stripe by checking the box. Add a Stripe secret key and public key.
  4. Open Shipping: Enable flat-rate shipping by checking the box. Enable at least one type of flat-rate shipping by clicking on the option in the table and checking the box.

Set up Analytics event tracking

Read the docs for setting up Segment or a custom analytics tracker

Documentation

Development

The Reaction Platform runs the storefront with Docker, so you will have to use Docker commands to view logs, run commands inside the container and more. To run commands specifically for the storefront, make sure to change directories into the example-storefront directory within the reaction-platform repository:

cd example-storefront

Build and run in development mode with logs

Create a symbolic link to use the development Docker image:

ln -s docker-compose.dev.yml docker-compose.override.yml

If running for the first time or environment variables in .env.example have changed execute the command below to update environment variables.

./bin/setup

Start the storefront by executing:

docker-compose up -d && docker-compose logs -f

Run in development against a production API

Change the INTERNAL_GRAPHQL_URL in .env to the production API URL. The URL should end in /graphql, like: https://my-website.com/graphql. Save the .env file and restart the application with:

docker-compose run --rm --service-ports web yarn start

Run commands in container

docker-compose run --rm web [command]

Run any command inside a Docker container and then remove the container. Use this to run any tooling operations. Remember your project directory will be mounted and things will usually just work. See Yarn section below for more examples.

Run tests in container

Run tests locally

docker-compose run --rm web yarn test

Run tests locally without cache (this can be helpful if changes aren't showing up)

docker-compose run --rm web yarn test --no-cache

To run Snyk security tests (this will run tests in the same way as CI)

docker-compose run --rm web sh -c "cp package.json ../ && cp .snyk ../ && cd .. && snyk auth && snyk test"

To run ESLint

docker-compose run --rm web eslint src

Debugging the server with Chrome DevTools

You can use the Google Chrome DevTools to debug the code running in the Node.js application server while it's running inside Docker.

  • run docker-compose run --rm --publish 9229:9229 --publish 4000:4000 -e NODE_ENV=development web node --inspect=0.0.0.0:9229 ./src/server.js
  • Open Chrome and browse to chrome://inspect. Find the process under Remote Target and click inspect.

Yarn Commands

Yarn & NPM should run inside the Docker container. We've taken steps to ensure that the node_modules are placed into a cacheable location. If you run Yarn locally, the node_modules are written directly to the project directory and take precedence over those from the Docker build. Yarn Add

docker-compose run --rm web yarn add --dev [package]

Yarn Install

⚠️ Always rebuild the image and start a new container after modifying yarn.lock or Dockerfile!

docker-compose run --rm web yarn install
docker-compose down --rmi local
docker-compose up -d --build

Testing component library in the storefront

Sometimes we need to test the Example Storefront Component Library components in the context of the storefront. Unfortunately, there isn't an easy wasy to do this within our Docker containers, so we need to run the storefront outside of docker.

  1. cd to your local reaction-component-library repo.
  2. Git checkout the proper branch that you want to link
  3. cd into the package folder of this repo, and run the command yarn install followed by yarn build
  4. After the build is done, cd into the new dist folder it just built and run yarn link to allow the library to be installed into the storefront. This will link @reactioncommerce/components
  5. Inside the example-storefront repo, temporarily rename your .yarnrc file to anything else (i.e. .yarnrc-temp)
  6. Run yarn install and then the command yarn link "@reactioncommerce/components" to set the local version as an override of the published npm version
  7. Inside your .env file, change INTERNAL_GRAPHQL_URL to equal http://localhost:3000/graphql, the same as the EXTERNAL_GRAPHQL_URL
  8. Start the storefront locally by running the command export $(cat .env | xargs) && yarn dev
  9. Your storefront should now be running at localhost:4000
    • If you see errors about not being able to find peer dependency packages, that seems to be an issues with yarn linking. You can just temporarily yarn add each of those packages in the component library package/dist folder. (This folder is gitignored anyway.)
  10. After your changes are tested, shut down the storefront by running the command CTRL+C
  11. Run yarn unlink "@reactioncommerce/components" in the storefront repo folder
  12. cd to the package/dist folder of the reaction-component-library repo. Run the command yarn unlink to unlink the local version of the component library
  13. Undo the renaming of your .yarnrc file
  14. Undo the URL change inside your .env file

Clean up containers

Stop, and retain containers:

docker-compose stop

Stop, and remove containers:

docker-compose down

Stop, and remove containers, volumes and built images:

docker-compose down -v --rmi local

Build and run the production app locally

Sometimes it is helpful during development to make a production build of the app and run that locally.

Run this command to build a Docker image with the production build of the app in it:

docker build --network=host -t  reactioncommerce/example-storefront:X.X.X .

Where X.X.X indicates the tag version you want to use, i.e. 3.1.0

Then, to start the app on your machine, make sure the Reaction API container is already running and enter:

docker run -it --name storefront -p 4000:4000 --env-file .env.prod --network reaction.localhost reactioncommerce/example-storefront:X.X.X

NOTE: You can replace the number before the colon in 4000:4000 with a different localhost port you'd like the application to run at.

NOTE: This is not the way to run the app in actual production deployment. This is only for running the production build locally for development, demo or trial purposes.

To stop the Docker container after starting it with the above command, use:

docker stop reaction-storefront

Contribute

Find a bug, a typo, or something that’s not documented well? We’d love for you to open an issue telling us what we can improve! This project uses semantic-release, please use their commit message format..

Want to request a feature? Use our Reaction Feature Requests repository to file a request.

We love your pull requests! Check our our Good First Issue and Help Wanted tags for good issues to tackle.

Pull Request guidelines

Pull requests should pass all automated tests, style, and security checks.

Automated Tests

Your code should pass all acceptance tests and unit tests. Run

docker-compose run --rm web yarn test

to run the test suites locally. If you're adding functionality to Reaction, you should add tests for the added functionality. You can run the tests locally without cache if necessary by passing the --no-cache flag. This can be helpful if changes aren't showing up.

docker-compose run --rm web yarn test --no-cache

To update a failing snapshot (if you've made changes to a component)

docker-compose run --rm web yarn test -u

Eslint

We require that all code contributed to Reaction follows Reaction's ESLint rules. You can run

docker-compose run --rm web eslint src

to run ESLint against your code locally.

Developer Certificate of Origin

We use the Developer Certificate of Origin (DCO) in lieu of a Contributor License Agreement for all contributions to Reaction Commerce open source projects. We request that contributors agree to the terms of the DCO and indicate that agreement by signing all commits made to Reaction Commerce projects by adding a line with your name and email address to every Git commit message contributed:

Signed-off-by: Jane Doe <[email protected]>

You can sign your commit automatically with Git by using git commit -s if you have your user.name and user.email set as part of your Git configuration.

We ask that you use your real name (please no anonymous contributions or pseudonyms). By signing your commit you are certifying that you have the right have the right to submit it under the open source license used by that particular Reaction Commerce project. You must use your real name (no pseudonyms or anonymous contributions are allowed.)

We use the Probot DCO GitHub app to check for DCO signoffs of every commit.

If you forget to sign your commits, the DCO bot will remind you and give you detailed instructions for how to amend your commits to add a signature.

License

Copyright 2019 Reaction Commerce

Licensed under the Apache License, Version 2.0 (the "License"); you may not use this file except in compliance with the License. You may obtain a copy of the License at

   http://www.apache.org/licenses/LICENSE-2.0

Unless required by applicable law or agreed to in writing, software distributed under the License is distributed on an "AS IS" BASIS, WITHOUT WARRANTIES OR CONDITIONS OF ANY KIND, either express or implied. See the License for the specific language governing permissions and limitations under the License.

FOSSA Status

example-storefront's People

Contributors

akarshit avatar aldeed avatar dancastellon avatar delagroove avatar dependabot[bot] avatar focusaurus avatar fossabot avatar griggheo avatar ihalton avatar impactmass avatar jeffcorpuz avatar jrw421 avatar jshimko avatar kieckhafer avatar loan-laux avatar machikoyasuda avatar manueldelreal avatar mikemurray avatar mohannarayana avatar nnnnat avatar rickyholland avatar rosshadden avatar semantic-release-bot avatar snyk-bot avatar spencern avatar stefancruz avatar ticean avatar trojanh avatar willopez avatar zenweasel avatar

Stargazers

 avatar  avatar  avatar  avatar  avatar  avatar  avatar  avatar  avatar  avatar  avatar  avatar  avatar  avatar  avatar  avatar  avatar  avatar  avatar  avatar  avatar  avatar  avatar  avatar  avatar  avatar  avatar  avatar  avatar  avatar  avatar  avatar  avatar  avatar  avatar  avatar  avatar  avatar  avatar  avatar  avatar  avatar  avatar  avatar  avatar  avatar  avatar  avatar  avatar  avatar  avatar  avatar  avatar  avatar  avatar  avatar  avatar  avatar  avatar  avatar  avatar  avatar  avatar  avatar  avatar  avatar  avatar  avatar  avatar  avatar  avatar  avatar  avatar  avatar  avatar  avatar  avatar  avatar  avatar  avatar  avatar  avatar  avatar  avatar  avatar  avatar  avatar  avatar  avatar  avatar  avatar  avatar  avatar  avatar  avatar  avatar  avatar  avatar  avatar  avatar

Watchers

 avatar  avatar  avatar  avatar  avatar  avatar  avatar  avatar  avatar  avatar  avatar  avatar  avatar  avatar  avatar  avatar  avatar  avatar  avatar  avatar  avatar  avatar  avatar  avatar  avatar  avatar  avatar  avatar  avatar  avatar  avatar  avatar  avatar  avatar  avatar  avatar

example-storefront's Issues

Investigate and implement isomorphic logging

We currently have a logger implementation that I believe is only used for server logging. It would be nice to have a more isomorphic solution to keep logging consistent throughout the application.

Create sorting dropdown component for the product grid

image

2018-05-14 description rewrite by @aldeed:

Work

  1. Create the component with these options in this order:
    • Newest
    • Price: low to high
    • Price: high to low
  2. Place the component above the grid according to designs, but do not wire it up to data or handle the selection change yet.

Product Detail Header

@spencern commented on Tue Apr 03 2018

Add the header to the product detail page within the product detail layout defined in #4126

The header should include the Title and the Page Title of the product, where the Page Title appears as a subtitle. If Page Title does not exist, the subtitle should not exist.

image

Product Grid Item

@spencern commented on Tue Apr 03 2018

Create a component to display a product grid item within the product grid layout.

As mentioned in #4120 these items can have multiple sizes and this component should account for that.

Grid item should display inventory status badge appropriately:

  • Low Inventory
  • Sold Out
  • Backordered

Product Grid Document Head Meta Tags

@spencern commented on Tue Apr 03 2018

Add meta tags to the document head for the product grid.

The meta tags should update the meta-tag title, description, social tags (facebook og, twitter card) based on the information present in the grid such as which tag is currently being viewed.

Product Grid Item does not display whole dollar price correctly

When viewing a product grid item which has a price range - e.g. $12.99 - $19.99 - the price is not rendered correctly. The "cents" side of the value should always be shown, even the price is a rounded amount.

The currency symbol should also be shown on both sides of the range - e.g. $12.99 - $19.99 not $12.99 - 19.99

As you can see in this screen shot, the cents are not rendered for the low price, even though the price is not rounded and the currency symbol is only shown on the left-hand side of the range.
image

This screenshot shows what it looks like in the Meteor UI
image

This screenshot is from design showing the ideal @cassytaylor @rymorgan
image

Product Detail Options List

@spencern commented on Tue Apr 03 2018

Create an options list for the Product Detail page, within the product detail layout #4126

The options list should display a clickable list of all options that have the currently selected variant as their parent, along with the option title and price. It should be ordered based on the index, with the option in the first position being the default. If a variant has no options, this list should not show.

image.png

Make grid filtering by tag work

Goal

Filter the product grid by tag when you're on a tag URL

Work

Using a similar method to how pagination updates the grid from URL changes, make the grid contents reflect whatever tag is in a URL route.

Testing

  1. When I click on a navigation tag, the URL changes and the grid reloads. This is done with a nice animation, and not a full page refresh.
  2. When I go directly to a tag route, the server side rendering properly filters the grid by that tag.

Product Detail UI: Media Gallery

@spencern commented on Tue Apr 03 2018

Within the Product Detail layout #4126, create a media gallery component

The media gallery component should be a list of media items.

Each media item should be clickable, clicking an item should change the featured image to display the item that was clicked.

This featured image section should show the image featured at the product level if no variant is selected, or if a variant is automatically selected or selected as part of the url, then, the featured image should show the primary image from that variant or option.

image

Create storefront app scaffold

@spencern commented on Tue Apr 03 2018

Scaffold an example app

Using Next or similar scaffold a reference front end that can be used for the stand alone Reaction storefront.

This should tie in our GraphQL client (Apollo or Relay) along with a state management lib (Redux or MobX).

The consensus from planning:
Next
Apollo
MobX
Material UI

Create image header component for product grid

Create a component to display the featured image of a tag or category.

Note: currently we do not have an operator UI for adding an image to a tag.

  • Add image url to tag schema
  • Add image url to graphql query schema
  • display image in grid as shown in designs if it exists
  • Use cover

image

Investigate and implement reactive 2-way route bindings

We need a better solution for updating the URL and UI, keeping both in sync, particularly for product grid filtering, sorting, and pagination.

Requirements:

  • URL is the source of truth but is also bound to MobX routing store.
  • There is one defined and documented way that any component should trigger URL updates.
  • The solution is generic, allowing us to use most of it in another storefront that may not use mobx or NextJS.
  • Changes are reflected immediately in the URL and the UI reactively updates, but the page does not refresh.
  • Works with SSR

Idea:

The individual components need not think of this as routing, nor even know that it's bound to the URL. It could simply be an action in the UI store, where any component might do uiStore.updateProductGridFilters({ ... }) or uiStore.updateProductGridSort({ ... }). The grid/pagination components can simply use filtering and sorting props from mobx store. Then URL binding can be achieved by updating the URL when certain uiStore props change (autorun) and updating mobx props when URL changes.

Here is example two-way binding pattern that I once wrote for another app, but this used react-router and redux, and would not work with SSR. Might still be useful as a starting point:

import querystring from 'query-string';
import { browserHistory } from 'react-router';

const actionList = [];
let acting = false;
let lastQs = {};

function updateLocationSearch(qs) {
  // Get the new query string as a string
  let newQs = querystring.stringify(qs);

  // Since window.location.search has the "?" if there's any string, add that
  // back for comparison with the existing string
  if (newQs.length) newQs = `?${newQs}`;

  // It's very important to update only when we've actually changed something
  // or we'll trigger an infinite loop.
  if (window.location.search !== newQs) {
    browserHistory.replace(`${window.location.pathname}${newQs}`);
  }
}

/**
 * Call mapStateToQueryStringParam to specify that a query string param should
 * be updated to be kept in sync with some part of the redux state whenever a
 * certain action changes that state (after the action is done).
 * @param {String} param - The name of the query string param to set
 * @param {Object} [options] - Options
 * @param {Function} options.paramToState - A function that accepts the param value, called on every route change. If something is returned, it is assumed to be an action and is dispatched.
 * @param {Function} options.stateToParam - A function that accepts the new state, after the action is done, and returns the query string param's new value. Must return a string to set the param or any non-string to clear the param.
 * @param {String[]} [options.routes] - The routes on which to show the query string
 */
function mapStateToQueryStringParam(param, options = {}) {
  actionList.push({
    options,
    param,
  });
}

/**
 * Call getQueryStringStateListener with your store to get back a listener. Like this:
 *
 * store.subscribe(getQueryStringStateListener(store));
 *
 * @param {Object} store - A redux store
 */
function getQueryStringStateListener(store) {
  return function queryStringStateListener() {
    if (typeof window === 'undefined') return;

    // We use `acting` to make sure we do not run this listener when any of the
    // paramToState functions emit actions that modify state WHILE this function
    // is already running. This is extra protection against infinite looping.
    if (acting) return;
    acting = true;

    // If commas are escaped, change back to commas
    const search = window.location.search.replace(/%2C/g, ',');
    const qs = querystring.parse(search);
    const pathname = window.location.pathname;

    if (JSON.stringify(qs) !== JSON.stringify(lastQs)) {
      actionList.forEach(({ options, param }) => {
        if (
          // If this mapping applies to all routes or to the current route
          (!options.routes || options.routes.indexOf(pathname) > -1) &&
          // And there is a paramToState function
          options.paramToState &&
          // And the param changed
          JSON.stringify(qs[param]) !== JSON.stringify(lastQs[param])
        ) {
          const action = options.paramToState(qs[param]);
          if (action) store.dispatch(action);
        }
      });
    }

    const nextState = store.getState();

    // For all other state changes, check to see whether a query string param
    // needs updating to stay in sync.
    actionList.forEach(({ options, param }) => {
      // Update the query string for the current path, we do not clear the params
      // here because this deletes any duplicate params shared by seperate routes
      if (
        // If this mapping applies to all routes or to the current route
        (!options.routes || options.routes.indexOf(pathname) > -1) &&
        // And there is a stateToParam function
        options.stateToParam
      ) {
        // Run the provided function, which pulls the qs value out of the state object
        const value = options.stateToParam(nextState);

        // Set or clear the param
        if (typeof value === 'string') {
          qs[param] = value;
        } else {
          delete qs[param];
        }
      }
    });

    updateLocationSearch(qs);

    acting = false;
    lastQs = qs;
  };
}

export { getQueryStringStateListener, mapStateToQueryStringParam, updateLocationSearch };

This is how it was used:

store.subscribe(getQueryStringStateListener(store)); // redux store listener
mapStateToQueryStringParam(paramName, {
    paramToState(value) {
      // Return a redux action to be dispatched
    },
    replace: true,
    routes: ROUTES, // an array of routes on which this query param should be watched/bound
    stateToParam(state) {
      // return a value for the param based on current redux state. Runs whenever state changes.
    },
  });

Wire up grid sorting component

Prerequisites

Do this after #80 and reactioncommerce/reaction#4245

Goal

As a customer, I can sort the product grid by newest, price (low to high), and price (high to low).

Work

  1. The select component should already be above the grid from #80. When selection is changed, update the URL with something like sortby=price-asc, sortby=price-desc, etc. Also clear/reset any after/before/first/last pagination from the query string.
  2. The URL change should also trigger reloading the grid with a nice animation, not a full page refresh. Refer to reactioncommerce/reaction#4245 for details about what the GraphQL query parameters should be.

Implement Token-based login for dev

Task

Note: this is a token based login for use in development only.

To make testing auth a little nicer as an interim solution until we have a true login flow, do the following:

  1. Add a "Login" button in the nav bar.
  2. Clicking "Login" opens a modal. Modal contains a “Meteor token” text field and Save and Cancel buttons. Use Material Dialog, TextField, Button, etc. components.
  3. When you click Save on the modal, save the entered token to mobx state and local storage.
  4. Reload as that user. Easiest is probably to just hard refresh the page.

PassportJS could be a good solution here.

In server code, come up with a solution to get proper auth token from the request somehow. Might need to be from a cookie. Whatever solution this is needs to be in sync with the above, changed when the user saves a different token.

Goal

  • I can change who I'm logged in as (which token is used) while the app is running
  • Server rendered page shows the correct content for me if I've previously "logged in" in the browser I'm using.

Connect Add To Cart Button to GraphQL mutation

The PDP page Add To Cart button (#94) is currently just a UI placeholder. We need to connect the button to our GraphQL endpoint (which currently doesn't exist) and pass the data as needed.

Additionally we'll need to trigger showing the mini-cart after an item has been successfully added to the cart.

This ticket needs to deal with the logic around deciding whether to call createCart or addCartItems.

Product Detail Inventory Status Badges

@spencern commented on Tue Apr 03 2018

Within the Variant List #4132 and the Options List #4133 of the Product Detail layout, create status badges that reflect the current status of each variant and option inventory status.

  • Sold Out
  • Backordered
  • Low Inventory

We should abstract the status badges used on the grid and use the same component here.

image.png

Add Segment ecommerce event tracking to starterkit app scaffold

We need to be tracking events. We've decided to do this using Segment's V2 Ecommerce Events API for now. This ticket should do the necessary setup work such that we can track events from any component in the starterkit going forward.

Setup documentation for which events are being tracked so that each event tracking ticket can add documentation as we create new events.

Here's an example of how to add segment analytics to a nextjs app.
https://github.com/zeit/next.js/tree/canary/examples/with-segment-analytics

https://segment.com/docs/spec/ecommerce/v2/

Product Detail Tag List

@spencern commented on Tue Apr 03 2018

Create a tag list for the product detail page.

This tag list should show all tags that are associated with the product and permit a customer to click on the tag to be taken to the product grid view for that tag.

image

Create Breadcrumb Navigation component for use on Product Grid and PDP

Create breadcrumb navigation component for use on the product grid and PDP pages (and potentially other pages)

The breadcrumb navigation should start with a home link which should link back to the index.

After that it should drill down into the tag category that the user is currently browsing, including the parents in the breadcrumb list if applicable.
e.g. if browsing the 'Skirts' tag within Womens and Active Wear, the breadcrumb list should render:
Home > Womens > Active Wear > Skirts

If on a PDP page, the breadcrumbs should show the breadcrumb list where the user originated followed by the product title

e.g.
Home > Womens > Active Wear > Skirts > Patagonia Women's Lithia Skirt

image

@rymorgan @cassytaylor If someone doesn't click in from a product grid to the PDP, what tag(s) should be shown in the breadcrumb list? The first tag probably?

Product Grid Layout

@spencern commented on Tue Apr 03 2018

Create a product grid UI layout.

This layout should take into account the fact that grid items can have multiple sizes (currently small, medium, and large)

Small:
image

Medium:
image

Large:
image

Add Segment ecommerce event tracking to the PDP

For our current implementation of the PDP, we'll need to track one event:

Track this event from the client.

Start by adding documentation for the event and identifying any decisions that were made for mapping data to segment.

Product Viewed
This event should be tracked each time the variant/option is changed, as that represents a unique variant viewed.

Update status badge appearance and UX to match designs

Zeplin: http://zpl.io/V18RD3Q

Work

Figure out all possible badges and prioritize. The applicable closest to top goes on the left of the product item, the next applicable goes on right side.

  1. Sold Out or Backordered
  2. Sale
  3. Low Inventory
  4. Bestseller

Note: We don't have "Sale" and "Bestseller" implemented yet, but make a prioritization function that can handle them eventually.

Example from Cassy:

if an item is on sale, low inventory, and a bestseller, the Sale and Low Inventory badges would display (the thinking here is that “Low Inventory” conveys more of a sense of urgency for order conversion than the Bestseller badge).

If an item is on sale and a bestseller, Bestseller would be the secondary badge.

If Sold Out or Backordered shows, then there is NEVER a secondary badge shown.

Update colors for primary (left) badge:

  • Sold Out, Backordered - @cool-grey
  • Low Inventory - @cool-grey

For simplicity, the secondary (right) text-only badge should just be @cool-grey.

Build top-level navigation components

@spencern commented on Tue Apr 03 2018

Create a top-level navigation for our Tag based navigation system.

When viewing full-width, the top-level navigation should cascade across the navbar from left to right.

The links don't have to "work" but should update the url.

image

When viewing in a mobile view, the top level navigation should be constrained to the mobile menu and cascade from top to bottom.

image

In the mobile view, there should be an indicator if the navigation element has sub-nav elements.


@mikemurray commented on Tue Apr 03 2018

Some components you could use:

Create items per page selector component

Create an "items per page" select component to permit users to define the "limit" or max number of items to retrieve for a single page on the grid.

This setting should be persisted on the client such that when the user visits other tags, the limit is consistent.

image

Work

  1. Create the component
  2. Place the component above the grid.
  3. When selection changes, update this in the URL with, e.g., limit=20 in query string, and then refetch the data, staying on the current page (keeping the same after cursor).
  4. Make sure this limit is respected by server side rendering, too.

Product Detail Variant List

@spencern commented on Tue Apr 03 2018

Create a variant list for the Product Detail page, within the product detail layout #4126

The variant list should display a clickable list of all variants that have the product as the only ancestor, along with the variant title and denormalized price. It should be ordered based on the variant index, with the variant in the first position being the default.

image

Update Readme docs

Update the readme in this project to include clear documentation about the following:

Config and running inside docker

  1. How this app should be configured
  2. Starting up the app initially
  3. Starting the app a second time
  4. Restarting the app after changing files. What types of files require removing and/or rebuilding the image
  5. Teardown of the app and removing images

MobX

  1. Quick ramp up guide for devs new to the starter kit
  2. What type of data we're storing in each store
  3. What considerations to make before adding data to an existing store or creating a new store

Product grid item displays wrong image or spinner on load

When I visit the product grid directly, or refresh the page while on the grid. Images are displayed incorrectly.

See this screen cap for an example.

The correct images are:
Basic Reaction Product: Orange Square
My First Product: Vans shoe - Grey/Black
My Second Product: Vans Shoe - Red/Blue

As you can see, if I navigate around enough, the images eventually correctly display on the grid. After a refresh, the incorrect images are displayed again though.

To Reproduce

  1. Start Reaction and dev-server in a container
  2. Start the starterkit in a container
  3. Add a product via reaction meteor operator with an image
  4. Visit the grid via the starter kit
  5. Add a second product via the meteor operator with a different image
  6. Visit the grid again.
  7. Click to visit the PDP for one of the products
  8. Click the "Shop" tag to visit the grid

Build sub-navigation elements for tag navigation

@spencern commented on Tue Apr 03 2018

Build the sub-navigation components of our tag-navigation system.

On a full-width view, these should be shown in a drop-down menu on hover.
Note that the "view all" isn't a requirement, but some way to access the top-level tag as a link is.
image

On a mobile view, the menu should be accessible from a tap to expand the sub-navigation while leaving the original menu item still accessible.
image


@mikemurray commented on Tue Apr 03 2018

You could do the sub navigation with the Drawer and/or Popover components below from Material UI.

Product Detail Layout

@spencern commented on Tue Apr 03 2018

Create a layout for the product detail page.

Keep in mind that the PDP may exist as part of a page in the future where it is not the only type of content on the page.

Use this layout:
image.png

image

Create a tags query in GraphQL

@spencern commented on Fri Mar 30 2018

Summary
Create a query to retreive tags associated with navigation in GraphQL for the provided shop.

Implementation

Schema

type Tag implements Node, Deletable {
  _id: ID!
  name: String!
  slug: String
  # type: String # OMIT: Introduced for Foray?
  metafields: [Metafield]
  position: Int
  relatedTags: [TagConnection]
  isDeleted: Boolean!
  isTopLevel: Boolean!
  #isVisible: Boolean! # OMIT: This is not editable or used. Keep in db but don't expose over Graphql.
  #groups: [String] # OMIT: Not used in core. Limits visibility to groups.
  shop: Shop!
  createdAt: DateTime!
  updatedAt: DateTime!
}

enum TagSortByField {
  _id
  name
  createdAt
  updatedAt
}

type TagEdge implements NodeEdge {
  cursor: ConnectionCursor!
  node: Tag
}

type TagConnection implements NodeConnection {
  edges: [TagEdge]
  nodes: [Tag]
  pageInfo: PageInfo!
  totalCount: Int!
}

Query

The root navigationTags query should have the following signature

# Returns a paged list of tags for a shop
tags(shopId: ID!, isTopLevel: Boolean, sortOrder: SortOrder = asc, sortBy: TagSortByField = createdAt): TagConnection

Also create a similar query within the Shop type

# Returns a paged list of tags for this shop
tags(isTopLevel: Boolean, sortOrder: SortOrder = asc, sortBy: TagSortByField = createdAt): TagConnection

Both queries return a TagConnection filtered by the arguments provided.

You'll need to implement Tag.relatedTags as a separate resolver. Figure out a way to throw an error if more than 1 level of relatedTags is requested.

Acceptance Criteria

  • Using GraphQL, I can use the tags(shopId: ID!, isTopLevel: Boolean) query to get a TagConnection for a specific shop.
  • Using GraphQL, I can use the Shop.tags(isTopLevel: Boolean) query to get a TagConnection for the parent shop
  • Either query can specify relatedTags and get at most one level of related tags.

Add segment compatible analytics event tracking to the Product Grid

We need to start tracking ecommerce analytics events in our starterkit. Initially we'll be tracking all of the Segment V2 Ecommerce Events. You can read the docs for that here: https://segment.com/docs/spec/ecommerce/v2/

Start by add documentation for the events tracked to our event tracking/analytics documentation, explaining the properties tracked and any mapping decisions that were made.

For our current implementation of the Product Grid, we'll need to track two events:

Product List Viewed
Product Clicked

Add an ability to repeat a previous order («Reorder»)

Expected behavior

It would be nice to provide an ability to customers to repeat their previous orders with a «Reoder» button:
01

An example from Magento 2:
02
03

Actual behavior

There is no such ability...

Steps to reproduce the behavior

Place an order and go to your own account (profile).

Versions

Node: 9.4.0
NPM: 5.6.0
Meteor Node: 8.9.3
Meteor NPM: 5.5.1
Reaction CLI: 0.24.2
Reaction: 1.6.4
Reaction branch: master

Product Grid Pagination

@spencern commented on Tue Apr 03 2018

Create a UI system for paginating the product grid.

This ticket should work with #4119 to fetch the correct data, as well as with #4123 to update the URL with the correct page.


@mikemurray commented on Tue Apr 03 2018

You can use the Material UI Stepper component for pagination. Specifically the MobileStepper component.


@willopez commented on Tue Apr 03 2018

An an example of how to implement cursor based pagination: https://github.com/willopez/reaction-apollo-styled/blob/master/src/pages/groups.js

Product Grid Routing

@spencern commented on Tue Apr 03 2018

Working within the app created in #4114, setup routing for the product grid.

When given a legitimate route or pagination parameters (#4122), we should work with #4119 to fetch the correct set of catalog items to display.

Route examples:
/shop/:shopId/:tag
/tag/:tag
/tag/:tag?first=24&after=cursorOpaqueId

Product grid image size issue

Issue

Product grid items can have different sizes. The height of the medium and large grid items seems to be affected by the image. The height of images should all remain the same, but their widths should be different based on their weights.

The highlighted image below shoun't be tall...

I should be the same height as the item next to it, but just as wide as it is now.

reaction_shop

Possible Solution

Images need to object-fit cover.

Recommend Projects

  • React photo React

    A declarative, efficient, and flexible JavaScript library for building user interfaces.

  • Vue.js photo Vue.js

    🖖 Vue.js is a progressive, incrementally-adoptable JavaScript framework for building UI on the web.

  • Typescript photo Typescript

    TypeScript is a superset of JavaScript that compiles to clean JavaScript output.

  • TensorFlow photo TensorFlow

    An Open Source Machine Learning Framework for Everyone

  • Django photo Django

    The Web framework for perfectionists with deadlines.

  • D3 photo D3

    Bring data to life with SVG, Canvas and HTML. 📊📈🎉

Recommend Topics

  • javascript

    JavaScript (JS) is a lightweight interpreted programming language with first-class functions.

  • web

    Some thing interesting about web. New door for the world.

  • server

    A server is a program made to process requests and deliver data to clients.

  • Machine learning

    Machine learning is a way of modeling and interpreting data that allows a piece of software to respond intelligently.

  • Game

    Some thing interesting about game, make everyone happy.

Recommend Org

  • Facebook photo Facebook

    We are working to build community through open source technology. NB: members must have two-factor auth.

  • Microsoft photo Microsoft

    Open source projects and samples from Microsoft.

  • Google photo Google

    Google ❤️ Open Source for everyone.

  • D3 photo D3

    Data-Driven Documents codes.