⚠️ Notice: This project is on hold, and not under active development. We are not accepting new issues or pull requests. You can learn more at: Upcoming Changes to the CC Open Source Community — Creative Commons Open Source.
Visualize CC Catalog Data
About
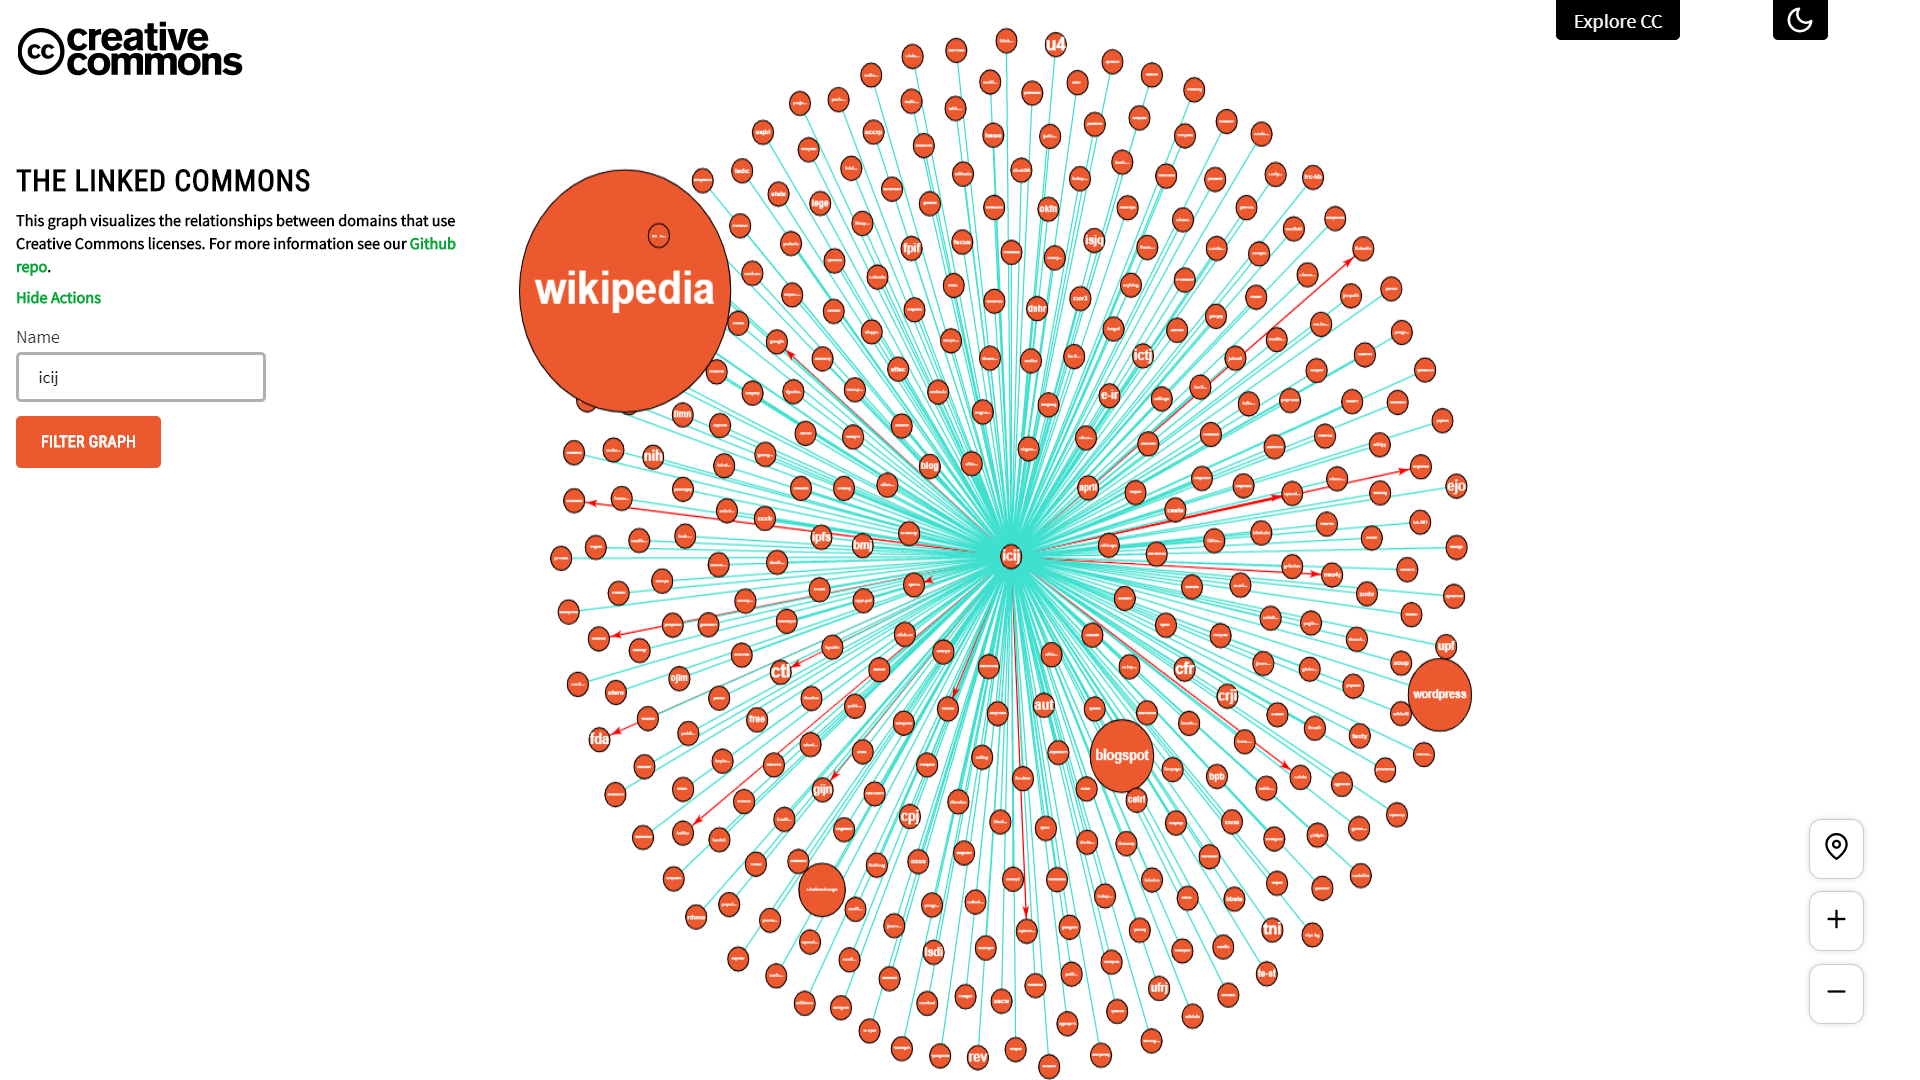
The landscape of openly licensed content is wide and varied. Millions of web pages host and share CC-licensed works—in fact, we estimate that there are over 1.6 billion across the web! With this growth of CC-licensed works, Creative Commons (CC) is increasingly interested in learning how hosts and users of CC-licensed materials are connected, as well as the types of content published under a CC license and how this content is shared. Each month, CC uses Common Crawl data to find all domains that contain CC-licensed content. This dataset contains information about the URL of the websites and the licenses used.
In order to draw conclusions and insights from this dataset, we created the Linked Commons: a visualization that shows how the Commons is digitally connected.
A live demo of the project can be found in here
Getting Started
Directory Structure
src
│   README.md
│   docker-compose.yml # Development docker compose
│
└───GSoC2019
└───data-release # Contains some raw unprocessed tsv files and processed output JSON files
│
└───frontend # Contains react.js app to render the visualization in the browser.
│  |   .env # Contains Backend Server Base Endpoint
│  │   package.json
│  │   package.lock.json
│  │
│  └───src # Contains all React Components
│
└───backend # Includes Django server source code and scripts to build & update the database.
   │   requirements.txt
   │   .env # Contains list of environment variables the project needs
   │
   └───scripts # Contains scripts to parse JSON data and upload it to MongoDB server
   └───src # Contains server side Django Apps which defines the API that feeds data to the visualization
Setting Up Local Development Environment Without Docker
Prerequisites
The frontend application is using react, for which NodeJS v12+ and npm are necessary. NodeJS can be installed from here.
The backend application is using Django, for which Python v3.7+ necessary. Python can be installed from here.
Frontend
- Navigate to
frontend/directory.
cd frontend/- Install all dependencies (Make sure that there exists a package.json in the current path)
npm install- To start the development server, use the following command in the terminal.
npm start- To create an optimized build for production, run the following command in the terminal.
npm run buildBackend and Database
- Navigate to
backend/directory.
cd backend/- Before proceeding further, ensure that all the variables in
.envfile are updated andMONGO_HOSTNAMEis set tolocalhost:27017. - Install all dependencies
pip install -r requirements.txt- Navigate to
src/directory whereDjango-servercode exists
cd src/- To start the development server, use the following command
python manage.py runserver- Now the backend should be live at
localhost:8000. - The server needs a running instance of MongoDB. Start the Mongo DB server and ensure that the
authentication credentialsare exactly same as defined in the.envfile. If you wish to update the data inside the Database, head over to this section. - Happy Contributing to Linked Commons! 🚀🚀🚀
Setting Up Local Development Environment using Docker
- Make sure that the root directory contains
docker-compose.yml. And ensure that thebackend/.envfile is updated andMONGO_HOSTNAMEis set tomongodb:27017. - Run the following command to build and start the container.
docker-compose up- Now the frontend, backend and database should be live.
- The frontend can be accessed at localhost:3000.
- The backend can be accessed at localhost:8000.
- Mongodb server can be accessed at localhost:27017.
- If this is the first time you have built the container, head over to this section to learn how to add data to the MongoDB.
- Any changes in the
backend/andfrontend/will trigger a rebuild process and you will be able to see the changes on server! - Happy Contributing to Linked Commons! 🚀🚀🚀
Building production version
Important: For simiplicity we will be using docker to build the production version. Please note that any changes in project files after build won't get reflected in the running container and you need to rebuild the image again.
- Before building images, ensure that all the variables in
.envfile are updated andMONGO_HOSTNAMEis set tomongodb:27017. - Now, navigate to backend and then build the
django-backendimage.
cd backend/
docker build . -f Dockerfile.prod -t linked_commons/backend- Create a new user-defined bridge network
docker network create --driver=bridge linkedcommons-net- Now run the recently built
linked_commons/backendimage.
docker run --name backend \
   -p 8000:8000 --env-file ./env \
   --network=linkedcommons-net \
--rm -d linked_commons/backend- Now to start the database in an isolated container.
docker run -it --name mongodb \
   --network=linkedcommons-net \
   -p 27017:27017 -v mongodbdata:/data/db \
--env-file ./.env --rm -d mongo:4.0.8-
You can now access the backend at port
8000and database at port27017of localhost. If you wish to add data then head over to this section. -
Now, let's build the
frontend. Navigate to frontend directory and build thereact-frontendimage.
cd frontend
docker build . -f Dockerfile.prod -t linkedcommons/frontend- Now to start the frontend application run the following command.
docker run --name frontend \
-p 3000:80 --rm -d linkedcommons/frontend- Now, the frontend can be accessed at localhost:3000.
Add data to MongoDB
- Navigate to the directory containing
build_db_script.py.
cd backend/scripts- Ensure that the directory contains
fdg_input_file.jsonor update theINPUT_FILE_PATHvariable which will be uploaded to the database. A samplefdg_input_file.jsoncan be found insidedata-release/directory. - Ensure that all the variables in
.envfile are updated with the running mongodb server. - Now run the
build_db_scriptin the terminal.
# It will connect to the database at `localhost:27017` and update the data.
python build_db_script.py localhost- It should take a while depending on the JSON file size.
- Congrats! You have successfully updated the data. 🎉🎉🎉
Archive
GSoC2019 - Google Summer of Code project by María Belén Guaranda

![dependabot[bot] avatar](https://avatars.githubusercontent.com/in/29110?v=4 "dependabot[bot]")


