
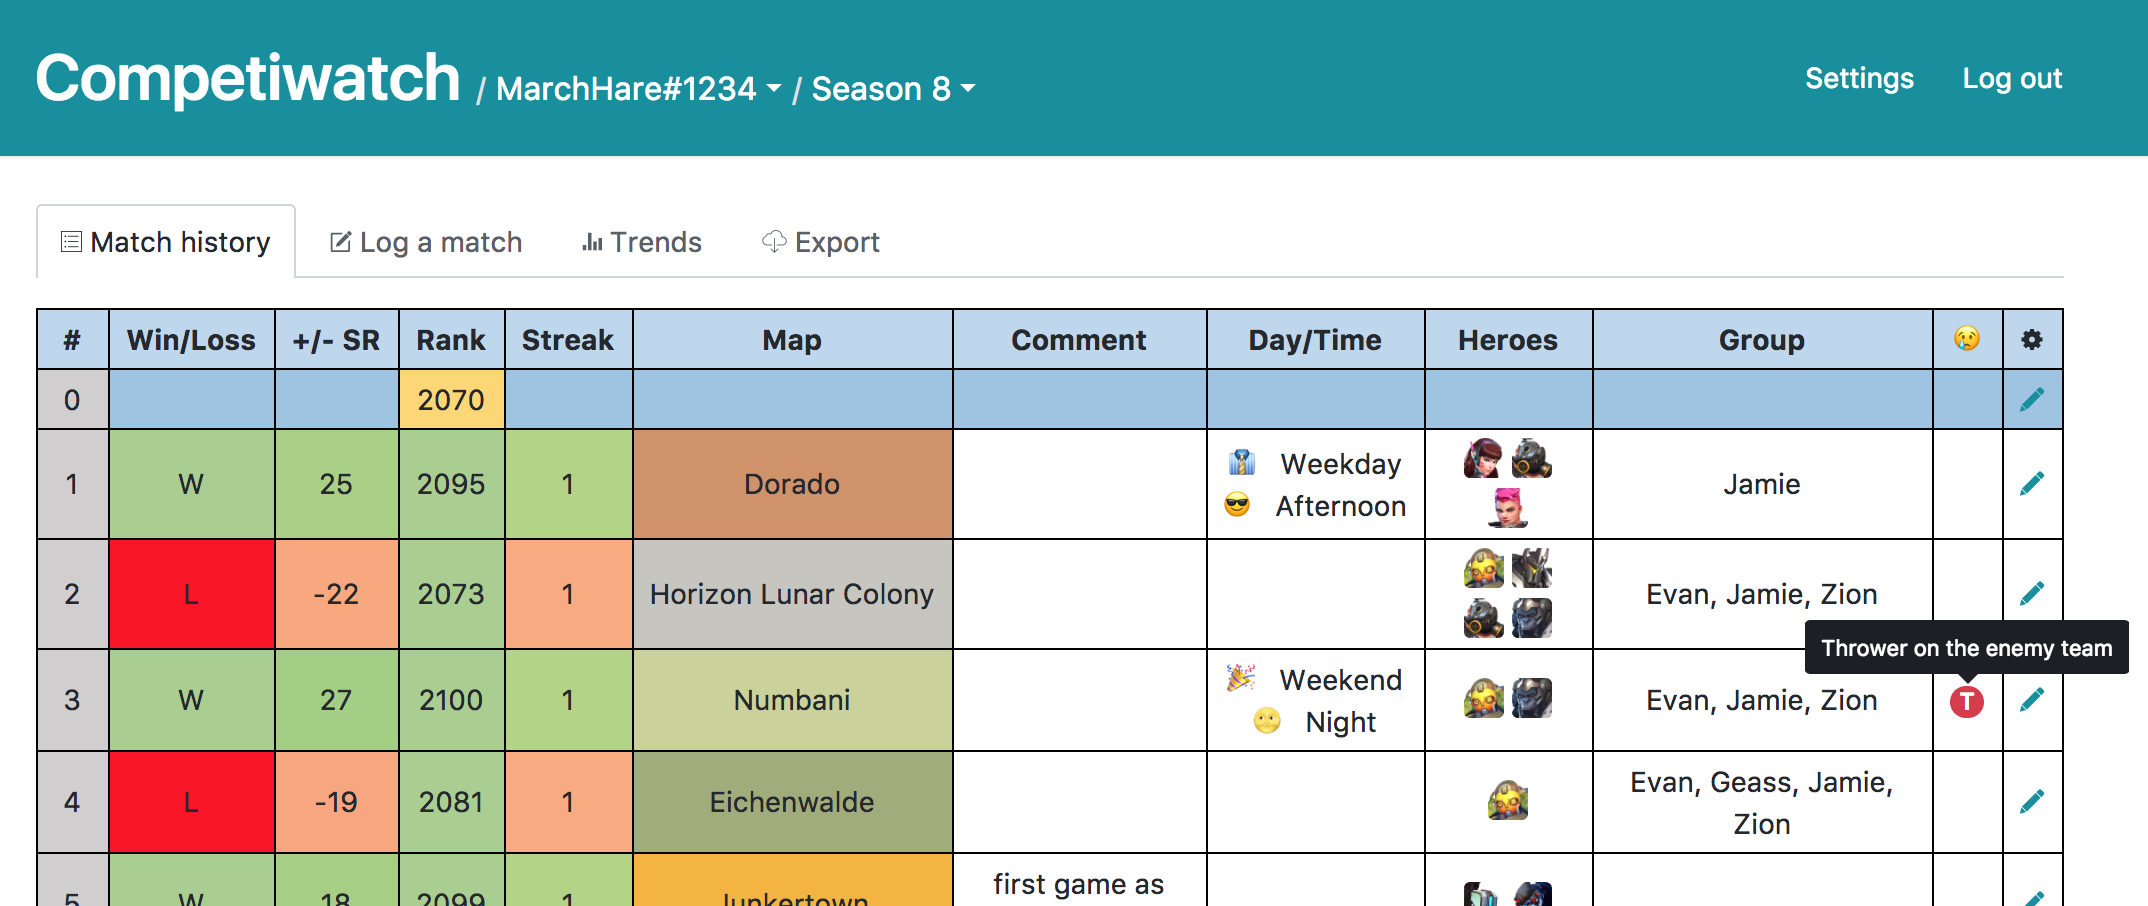
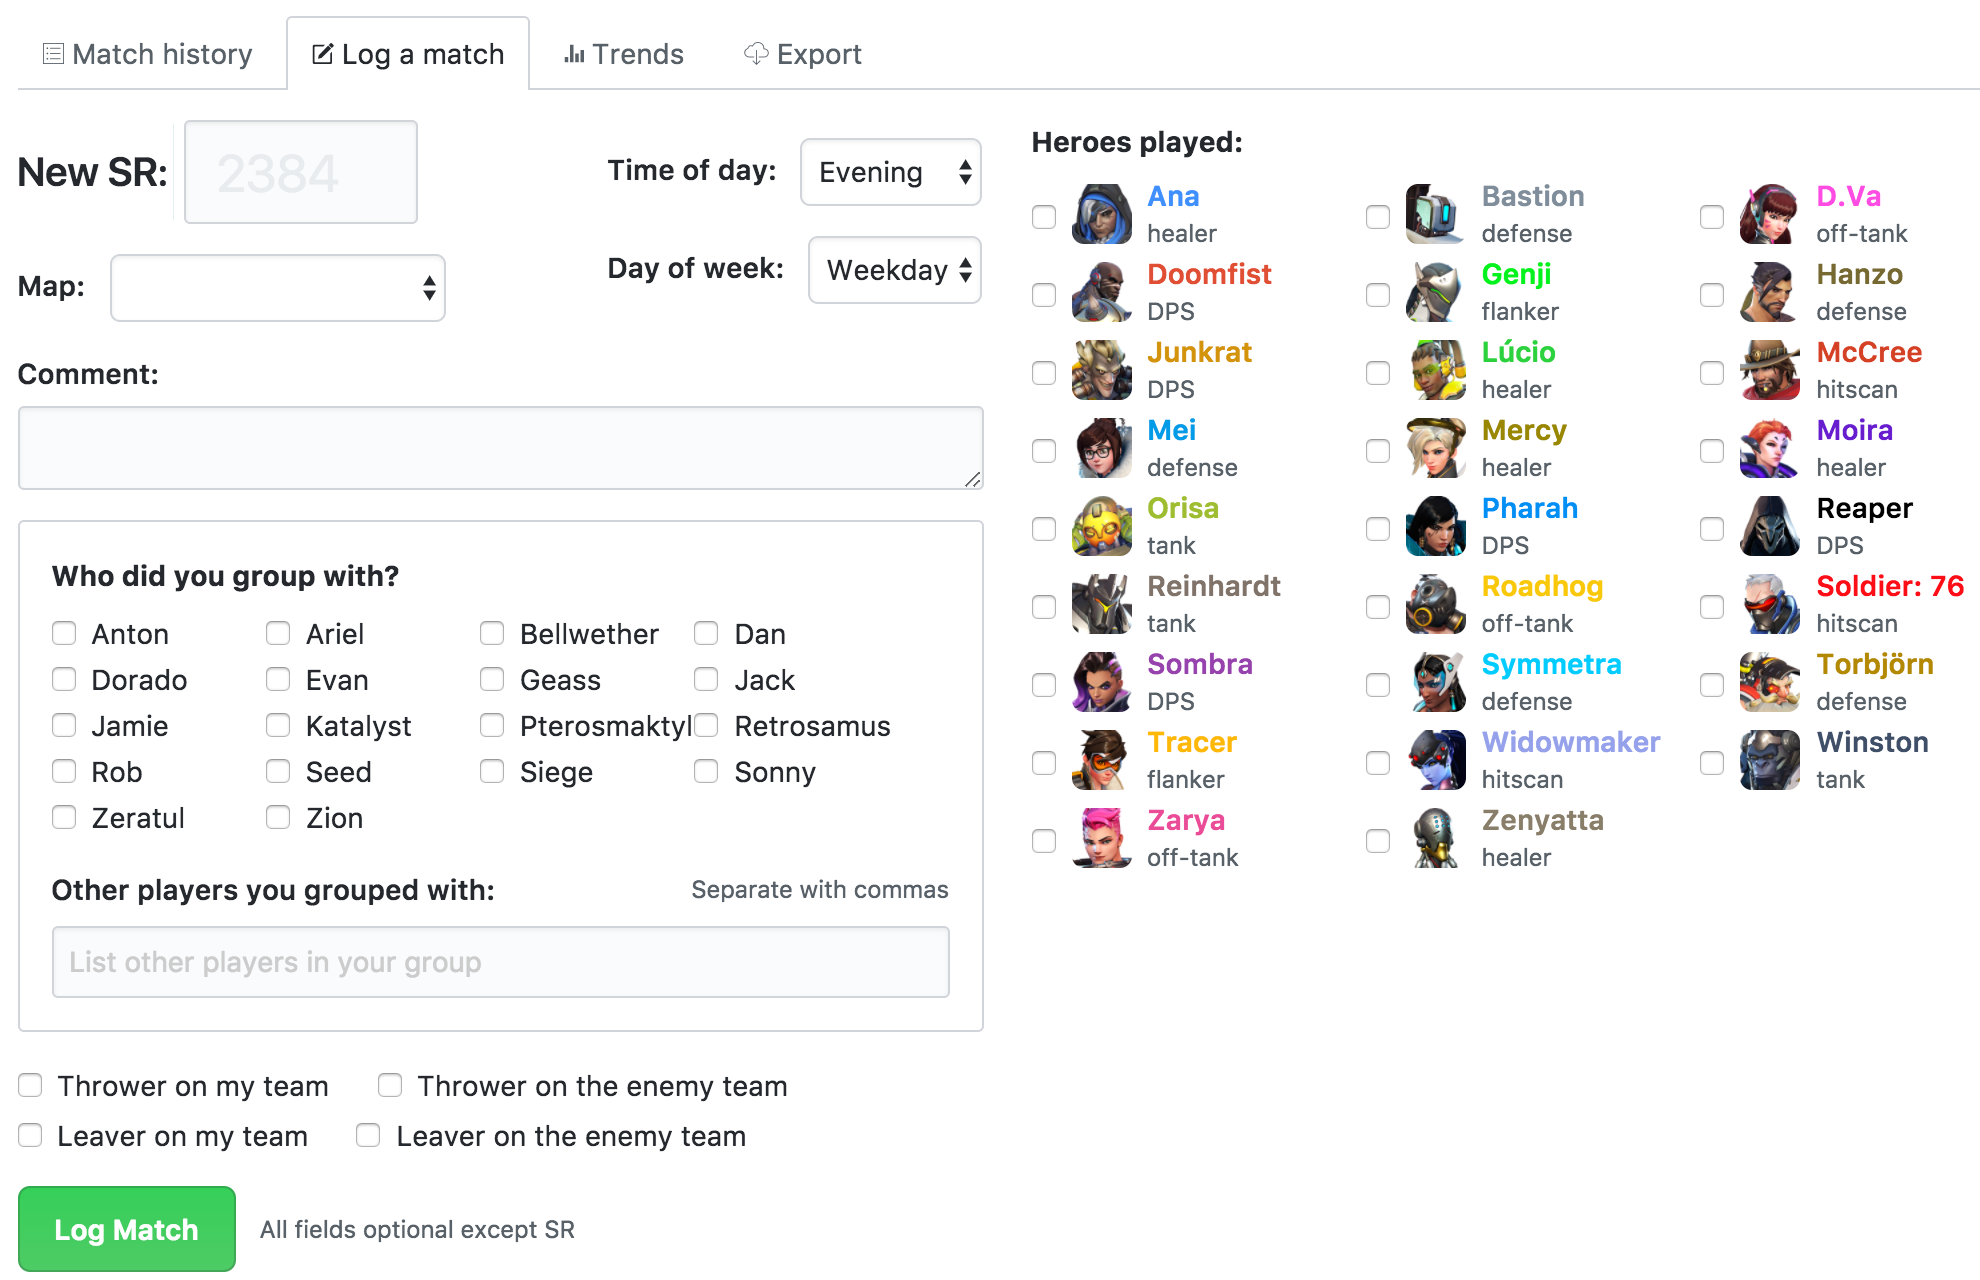
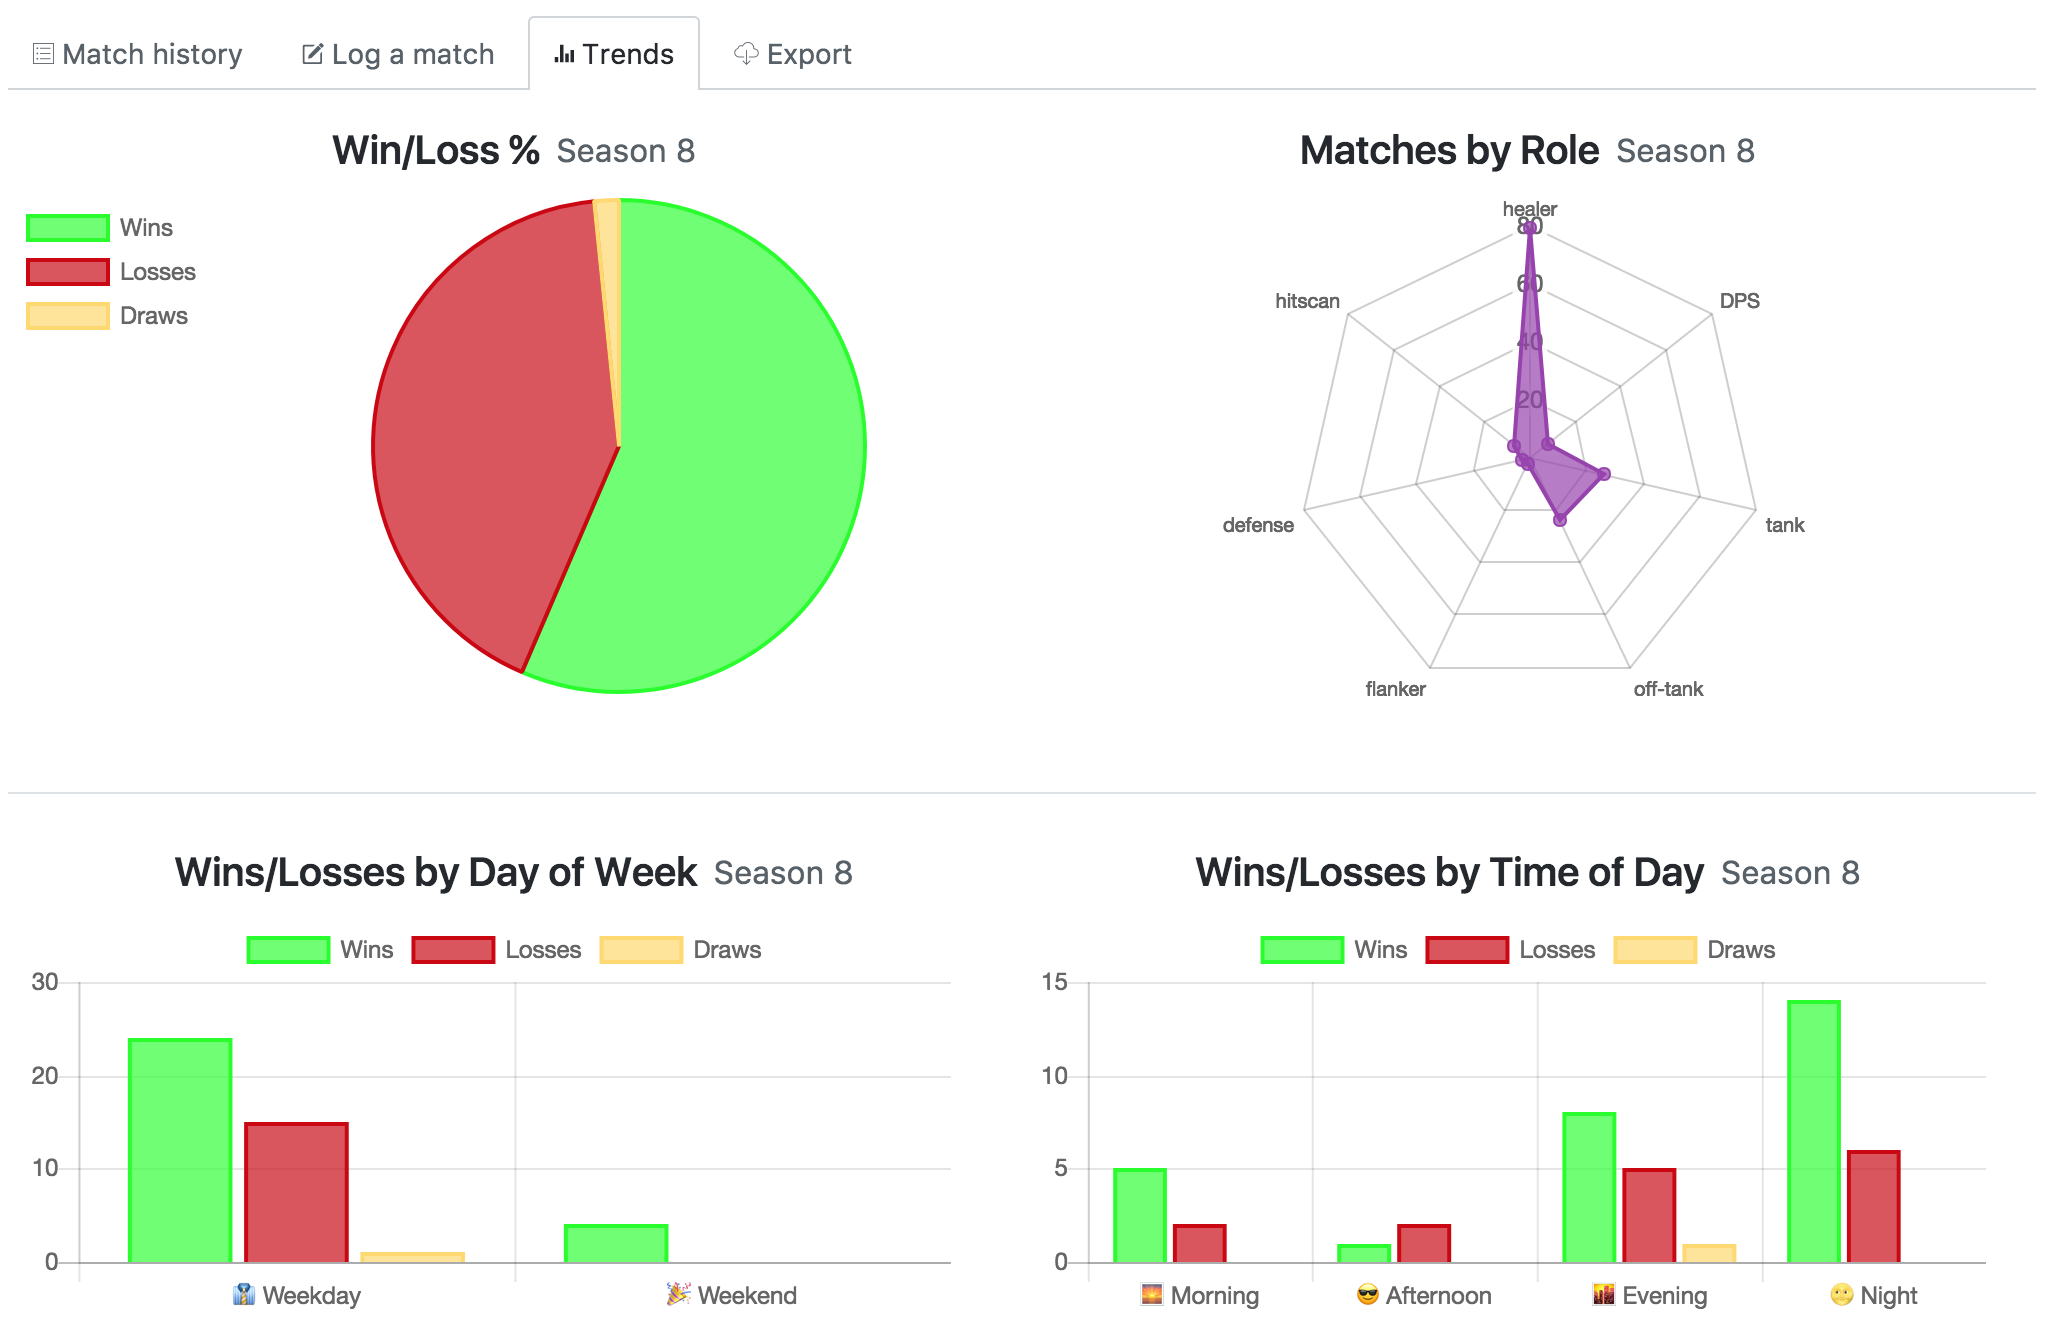
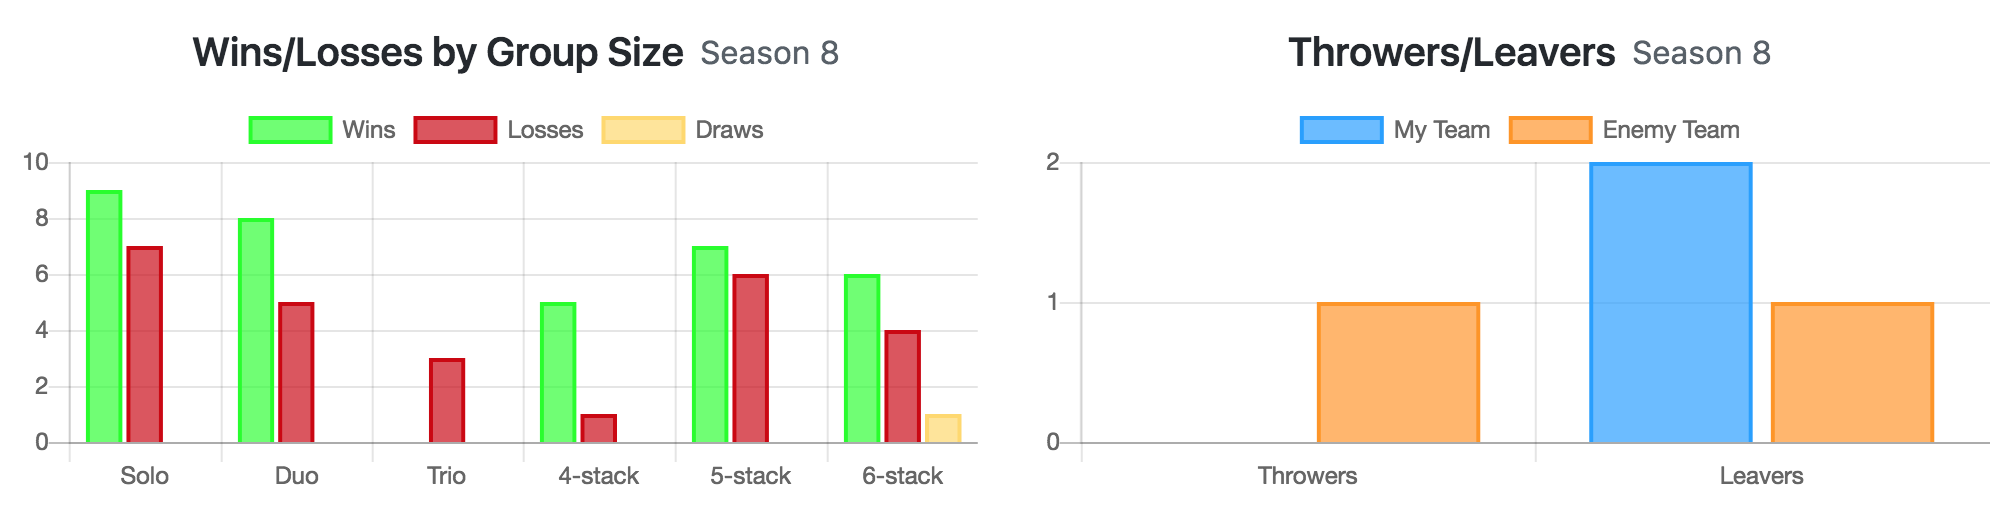
A web app to let you track your competitive match history in Overwatch. Shows charts for each season. Lets you track your SR, what map you played on, which heroes you played, whether there were throwers or leavers in your game, the time of day you played, whether you played on a weekday or weekend, and notes for each game. Allows you to import past seasons from a spreadsheet as well as export your data.
Donations are welcome to help pay for server costs.

You will need Ruby, Bundler, PostgreSQL, and npm installed.
bundle install
npm install
bin/rake db:setup
Create a Battle.net API app, cp dotenv.sample .env, and
copy your Battle.net app key and secret into the .env file as BNET_APP_ID
and BNET_APP_SECRET.
You will also need to use a service like ngrok to have a public URL
that will hit your local server. Start ngrok via ngrok http 3000;
look at the https URL it spits out. In your Battle.net app, set
https://your-ngrok-id-here.ngrok.io/users/auth/bnet/callback as
the "Register Callback URL" value. Set https://your-ngrok-id-here.ngrok.io
as "Web Site". Update .env so that BNET_APP_HOST is set to your your-ngrok-id-here.ngrok.io.
Start the Rails server via bundle exec rails s. Now you should be able to go to
https://your-ngrok-id-here.ngrok.io/ and sign in via Battle.net.
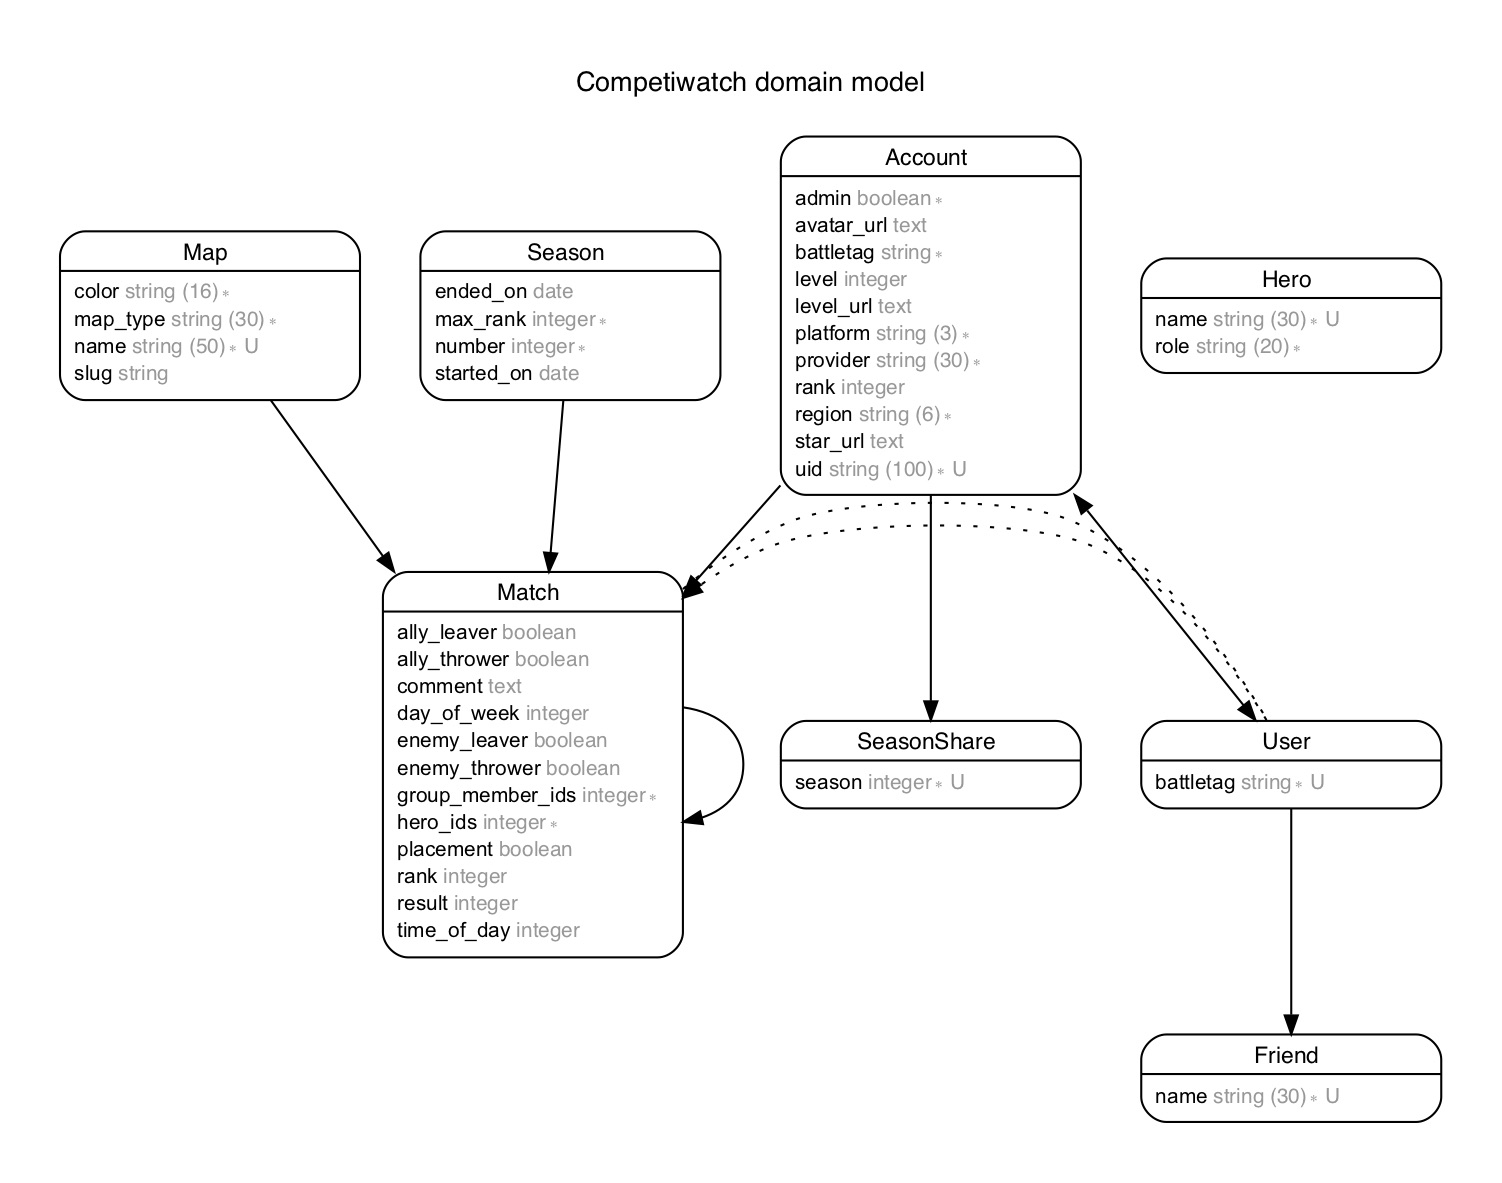
Models in Competiwatch:
Create an app on Heroku.
Create a Battle.net app and set its "Register Callback URL" to
https://your-heroku-app.herokuapp.com/users/auth/bnet/callback. Set
https://your-heroku-app.herokuapp.com as the "Web Site".
heroku git:remote -a your-heroku-app
heroku config:set BNET_APP_ID=your_app_id_here
heroku config:set BNET_APP_SECRET=your_app_secret_here
heroku config:set BNET_APP_HOST=your-heroku-app.herokuapp.com
heroku config:set DONATE_URL="your Patreon/PayPal/etc URL for taking donations"
git push heroku master
heroku run rake db:migrate
heroku ps:scale web=1
heroku open
When deploying a migration to Heroku:
heroku maintenance:on
git push heroku master
heroku run rake db:migrate
heroku maintenance:offThe app is set up for an SSL certificate from Let's Encrypt. When using certbot to generate
a certificate, put the value it gives you in this app's .env file in LETS_ENCRYPT_VALUE.
See this article for steps.
To add a certificate initially:
heroku certs:add /etc/letsencrypt/live/your-domain/fullchain.pem /etc/letsencrypt/live/your-domain/privkey.pemTo renew a certificate:
sudo certbot renewTo update the certificate once it's been renewed:
heroku certs:update /etc/letsencrypt/live/your-domain/fullchain.pem /etc/letsencrypt/live/your-domain/privkey.pemSee Renewing certificates with Certbot.
To back up the database from Heroku, you can use bin/backup-database which will
capture the current state of the Heroku database, download it, and move the dump
file to the directory specified in the BACKUP_DIR environment variable.
Example:
BACKUP_DIR=~/Dropbox bin/backup-databaseYou can set some accounts as administrators that can see general data such as how many
matches have been logged and which Battle.net accounts have signed in. Using a Rails
console, set the admin flag to true. On Heroku, for example:
heroku run rails c
account = Account.find_by_battletag('TheBigBoss#1234')
account.admin = true
account.save
Once an account is marked as an admin, a new 'Admin' link will appear when they sign in using that account. You must sign in as the admin account, you can't sign in as one of the linked accounts tied to the same user.

