In this project let's build an Nxt Assess App by applying the concepts we have learned till now. This project allows you to practice the concepts and techniques learned till React Course and apply them in a concrete project.
You will demonstrate your skills by creating an app that will fetch data from an internal server using a component, displaying that data, routing concepts, authentication and authorization, and adding responsiveness to the website
This is an individual assessment. All work must be your own. You can request for the feedback after your project submission in the discussions.
Click to view
-
What is Figma?
- Figma is a vector graphics editor and prototyping tool which is primarily web-based. You can check more info on the website
-
Create a Free account in Figma.
- Kindly follow the instructions as shown in this video to create a free Figma account. Watch the video upto 00:50
-
How to Check CSS in Figma?
- Kindly follow the instructions as shown in this video to check CSS in a Figma screen. Watch the video upto 02:45.
-
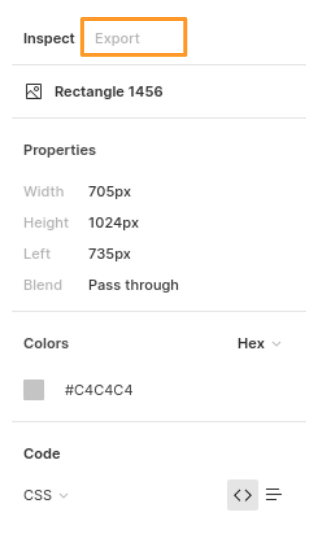
Export Images in Figma screen
- Kindly follow the instructions as shown in this video to export images from a Figma screen.
- Click on the Export button to get Export options as shown in the below image.
-
Upload your exported images from Figma to Cloudinary and get image URLs from Cloudinary. Refer this session for better understanding.
Click to view
- You can check the Design Files for different devices here.
Click to view
- Download dependencies by running
npm install - Start up the app using
npm start
Functionality to be added
The app must have the following functionalities
-
Login Route
- When an invalid credentials are provided and the Login button is clicked, then the respective error message received from the response should be displayed
- When a valid credentials are provided and the Login button is clicked, then the page should be navigated to the Home Route
- When an unauthenticated user tries to access the Home Route, Assessment Route and Results Route, then the page should be navigated to Login Route
- When an authenticated user tries to access the Home Route, Assessment Route and Results Route, then the page should be navigated to the respective route
- When an authenticated user tries to access the Login Route, then the page should be navigated to the Home Route
- When the Show Password checkbox is checked, then the password should be shown
- When the Show Password checkbox is unchecked, then the password should be masked
-
Home Route
- When an authenticated user opens the Home Route,
- When the Start Assessment button is clicked, then the page should be navigated to the Assessment Route
- When an authenticated user opens the Home Route,
-
Assessment Route
-
When an authenticated user opens the Assessment Route,
-
An HTTP GET request should be made to questionsApiUrl
- loader should be displayed while fetching the data
- After the data is fetched successfully,
- The text of the first question, along with its corresponding options from the list of questions received in the response, should be displayed.
- If the
option_typevalue isDEFAULT, then the default options view should be displayed as shown in the Figma - If the
option_typevalue isIMAGE, then the image options view should be displayed as shown in the Figma - If the
option_typevalue isSINGLE SELECT, then the single select options view should be displayed as shown in the Figma
- If the
- The Next Question button should be displayed
- Answered questions count should be
0 - Unanswered questions count should be equal to the total number of questions received from the response
- The timer should start running backwards from the timer limit value set
- The text of the first question, along with its corresponding options from the list of questions received in the response, should be displayed.
- If the HTTP GET request made is unsuccessful, then the failure view should be displayed as shown in the Figma
- When the Retry button is clicked, an HTTP GET request should be made to questionsApiUrl
- When a question number in the question numbers list is clicked,
- If the
option_typevalue isDEFAULT, then the default options view should be displayed as shown in the Figma - If the
option_typevalue isIMAGE, then the image options view should be displayed as shown in the Figma - If the
option_typevalue isSINGLE SELECT, then the single select options view should be displayed as shown in the Figma
- If the
-
When the Next Question button is clicked, then the next question text and its corresponding options should be displayed
-
If the active question has the
option_typevalue as eitherDEFAULTorIMAGEand an option is selected,- Selected option should be highlighted as shown in the Figma
- Answered questions count should be incremented by one
- Unanswered questions count should be decremented by one
-
If the active question has the
option_typevalue asSINGLE_SELECT- First option is selected by default
- Answered questions count should be incremented by one
- Unanswered questions count should be decremented by one
-
When a question number in the question numbers list is clicked, if that has already been answered,
- The user should be able to see the selected option
- The user should be able to change the selected option
- Answered questions count and unanswered questions count should remain the same
-
When the last question number in the question numbers list is clicked,
- The Next Question button should not be displayed
-
When the Submit Assessment button is clicked within the time limit, then the assessment should end, and the page should be navigated to Results Route
-
When the timer has ended,
- Assessment should end, and the page should be navigated to Results Route
-
-
-
Results Route
-
When the Submit Assessment button in the Assessment Route is clicked within the time, then the submit view should be displayed as shown in the Figma
- The score achieved should be displayed
- Time taken to submit the assessment should be displayed
-
When the timer has ended, then the time up view should be displayed as shown in the Figma
- The score achieved before the timer has ended should be displayed
-
When the Reattempt button is clicked,
- Both score and time taken values should be reset to
0 - Page should be navigated to Assessment Route
- User should be able to reattempt the assessment.
- Both score and time taken values should be reset to
-
-
Not Found Route
- When a random path is provided as the URL, then the page should navigate to the Not Found Route
-
Header
- When the website logo image in the Header is clicked, the page should be navigated to the Home Route
- When the Logout button in the Header is clicked in Home or Assessment or Results Route, then the page should be navigated to the Login Route
-
Users should be able to view the website responsively in mobile view, tablet view as well
API Requests & Responses
loginApiUrl
{
  "username": "rahul",
  "password": "rahul@2021"
}Returns a response based on the credentials provided
{
  "jwt_token": "eyJhbGciOiJIUzI1NiIsInR5cCI6IkpXVCJ9.eyJ1c2VybmFtZSI6InJhaHVsIiwicm9sZSI6IlBSSU1FX1VTRVIiLCJpYXQiOjE2MTk2Mjg2MTN9. nZDlFsnSWArLKKeF0QbmdVfLgzUbx1BGJsqa2kc_21Y"
}{
"status_code": 404,
"error_msg": "Username is not found"
}questionsApiUrl
Returns a response containing the list of all questions
{
  "total": 10,
  "questions": [
    {
      "id": "4c08f8e2-d69a-4cfa-9245-b76bdf3588d1",
      "options_type": "DEFAULT",
      "question_text": "React JS is developed by?",
      "options": [
        {
          "id": "a8222953-e043-4873-abee-bc5dae13ee51",
          "text": "Facebook",
          "is_correct": "true"
        },
        {
          "id": "0d5470e9-915e-400f-b495-930291046216",
          "text": "Twitter",
          "is_correct": "false"
        },
        "..."
      ]
    },
    "..."
  ]
}Click to view
The following instructions are required for the tests to pass
-
Note:
- For Mini Projects, You have to use HTML elements to style the React Components. Usage of
styled-components(CSS in JS) to style React components are not supported in Mini Projects. Test cases won't be passed, if you use styled components. - Refer to the below Example for the usage of
data-testidin the HTML elements- Example:
<div data-testid="questionItem" className="question-item"/>
- Example:
- For Mini Projects, You have to use HTML elements to style the React Components. Usage of
-
Routes
-
HomeRoute should consist of/in the URL path -
AssessmentRoute should consist of/assessmentin the URL path -
ResultsRoute should consist of/resultsin the URL path -
Header
- The Nxt Assess Logo image in Header should consist of alt attribute value as
website logo
- The Nxt Assess Logo image in Header should consist of alt attribute value as
-
-
Login Route
- The Nxt Assess Logo image should consist of alt attribute value as
login website logo
- The Nxt Assess Logo image should consist of alt attribute value as
-
Home Route
- The Assessment image should consist of alt attribute value as
assessment. - Kindly follow the assessment instructions as shown in figma.
- The Assessment image should consist of alt attribute value as
-
Assessment Route
- Duration of the Assessment must be 10 minutes
- The Failure View image should consist of alt attribute value as
failure view - Wrap the
Loadercomponent with an HTML container element and add thedata-testidattribute value as loader to it
<div className="loader-container" data-testid="loader">
  <Loader type="ThreeDots" color="#263868" height={50} width={50} />
</div>
- The question with
options_typeisIMAGE, options should have alt attribute value as the value of the keytextof each option item in the corresponding question from the list of questions from the received response
-
Results Route
- The Submit image should consist of alt attribute value as
submit - The Time Up image should consist of alt attribute value as
time up
- The Submit image should consist of alt attribute value as
-
Not Found Route
- The Not Found image should consist of alt attribute value as
not found
- The Not Found image should consist of alt attribute value as
-
For Mini Projects, you can submit the test cases at your own pace. But we suggest you to submit the code to know the percentage of completion through test cases and that score will be considered for your interviews.
-
Also it's important to publish your code frequently using
Step - 4in the Instructions tab.
- All components you implement should go in the
src/componentsdirectory.- Do not remove the pre-filled code
- Want to quickly review some of the concepts you’ve been learning? Take a look at the Cheat Sheets.
