This project provides a Java interface for Cloud Office Print.
To install the Cloud Office Print Java package you can download the .jar file of the project and add it to the build path of your project. The .jar file can be found on the Maven Central Repository. Select the latest version of Cloud Office Print, select Downloads in the top right corner and choose jar to download our .jar file.
In Eclipse create a new Java project or use an existing one. After downloading our .jar file, you can add it to the project by creating a 'lib'-folder on the same level as the 'src'-folder and putting the .jar file inside the 'lib'-folder.
Next, you have to add the .jar file to the classpath of the project. You can do so by right-clicking the root folder of your project and clicking 'Build Path > Configure Build Path...'. Go to the tab 'Libraries', click on 'Classpath' and click on 'Add JARs...'. Navigate to your 'lib'-folder in your project and select our .jar file. Finally, click 'Apply and Close' and we're done.
To use the Cloud Office Print Java package in a Gradle project, you can add it as a dependency to your build.gradle file. This project is uploaded to Maven Central, so in the build.gradle file you have to include the Maven Central repository:
repositories {
    mavenCentral()
}
The entry to put inside the dependencies-object in the build.gradle file can be found on our Maven Central Repository and selecting the latest version. It will look like the following command where the version is changed to the latest version which can be found on our Maven Central Repository.
dependencies {
    implementation 'com.cloudofficeprint:cloudofficeprint:21.2.0'
}
or
dependencies {
    implementation group: 'com.cloudofficeprint', name: 'cloudofficeprint', version: '21.2.0'
}To use the Cloud Office Print Java package in a Maven project, you can add it as a dependency to your pom.xml file. This project is uploaded to Maven Central, so in the pom.xml file you have to include the Maven Central repository. The entry to put inside the pom.xml file can be found on our our Maven Central Repository and selecting the latest version. It will look like the following command where the version is changed to the latest version which can be found on our Maven Central Repository.
<dependencies>
    <dependency>
        <groupId>com.cloudofficeprint</groupId>
        <artifactId>cloudofficeprint</artifactId>
        <version>21.2.0</version>
    </dependency>
</dependencies>- Create a template (docx, xlsx, pptx, HTML, md, txt, csv), for the possible tags, click here.
- Create the input data with this Java SDK
- Send template and data to a Cloud Office Print server and save the response to a file with this Java SDK
To see the JSON-data that is sent to the Cloud Office Print server together with some information about the requests and responses, you can turn on verbose-mode by first creating a Server-object and then calling .setVerbose(true) on that object.
First we add the data needed to fill in the template, which can be seen in the code below. The template and the data need to be sent to a Cloud Office Print server that merges both. This can be done by setting up the configuration for the Cloud Office Print server and passing it to the print job instance, which can also be seen in the code below. You can get your API key by signing up at https://www.cloudofficeprint.com.
package HelloWorld;

import java.util.Hashtable;

import com.cloudofficeprint.PrintJob;
import com.cloudofficeprint.Response;
import com.cloudofficeprint.Output.Output;
import com.cloudofficeprint.RenderElements.ElementCollection;
import com.cloudofficeprint.RenderElements.Property;
import com.cloudofficeprint.RenderElements.RenderElement;
import com.cloudofficeprint.Resources.Base64Resource;
import com.cloudofficeprint.Server.Server;

public class HelloWorld {
	public static void main(String[] args) throws Exception {
		// Main object that holds the data
		ElementCollection collection = new ElementCollection("data");

		// Create the title element and add it to the element collection
		Property title = new Property(
				"title",
				"Hello World!"
		);
		collection.addElement(title);

		// Create the text element and add it to the element collection
		Property text = new Property(
		    "text",
		    "This is an example created with the Cloud Office Print Java SDK"
		);
		collection.addElement(text);

		//Set-Up Cloud Office Print server
        Server copServer = new Server("https://api.cloudofficeprint.com/");
        copServer.setVerbose(true);
        copServer.setAPIKey("YOUR_API_KEY"); // Replace by your own API key

        // Load template
        Base64Resource base64Resource = new Base64Resource();
        base64Resource.setFileFromLocalFile("./data/template.docx");

        // Create the data object which uses the data collection
        Hashtable<String, RenderElement> data = new Hashtable<String, RenderElement>();
        data.put("data", collection);

        // Specify the output configuration and create the print job
		Output output = new Output(null, "raw", "libreoffice", null, null, null, null);
        PrintJob printJob = new PrintJob(data, copServer, output, base64Resource, null, null, null, null);

        // Execute the print job, which sends the template and data to the Cloud Office Print server and receives the server reponse
        Response response = printJob.execute();

        // Save the server response (output file) to your computer
        response.downloadLocally("./data/output");
	}
}To run the HelloWorld.java file in Eclipse, you can right-click inside the editor of the HelloWorld.java file, then choose 'Run As > 1 Java Application'.
To run the HelloWorld.java file in Visual Studio Code, there should be a 'Run'-button in the editor above the main()-function which you can click. Another way to run the HelloWorld.java file in Visual Studio Code is to right-click inside the editor of the HelloWorld.java file and then choose 'Run Java'.
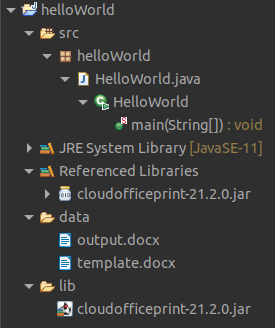
The structure of the Eclipse Java project can be seen below.

Going through the other examples is also recommended as this gives you a good idea on how to use the SDK. The examples are:
- general examples: Examples.java
- multiple request merge example: MultipleRequestMergeExample.java
- pdf signature example: PDFSignatureExample.java
- order confirmation example: OrderConfirmationExample.java
- solar system example: SolarSystemExample.java
- SpaceX example: SpaceXExample.java (the most extensive example)
The examples can be found in the directory 'src/main/java/com/cloudofficeprint/Examples' of the project on Github. Each example has a markdown file explaining everything about that example.
The examples can be run from the Main.java file, which can be found in the directory 'src/com/CloudOfficePrint/' of the project on Github. In the Main.java file you can uncomment the examples you want to run.
See the quickstart example for how to run code in Eclipse. You have to pass your API key as an argument when running the Main.java file. To do this, right-click inside the editor of the Main.java file and select 'Run As > Run Configurations...'. Then open the tab 'Arguments' and enter your API key inside the 'Program arguments' box and click 'Run'.
See the quickstart example for how to run code in Visual Studio Code. You have to pass your API key as an argument when running the Main.java file. To do this, you have to create a launch.json file inside the .vscode-folder with the following structure:
{
    "configurations": [
        {
            "type": "java",
            "name": "Launch Main",
            "request": "launch",
            "mainClass": "com.cloudofficeprint.Main",
            "projectName": "cloudofficeprint-cloudofficeprint",
            "args": "dummy_api",
        }
    ]
}
where you replace dummy_api with your API key.
The documentation for this SDK can be found inside the folder build/docs/javadoc/ on Github.
The Cloud Office Print documentation can be found at the Cloud Office Print docs.
This is a Gradle project.
To check if everything works, you can run the tests.
See the Gradle section.
In VSCode, you can simply run the tests by opening a test file and there should appear a green button next to each test to run it.
To run the tests in Eclipse, you can either right-click a test file in the package explorer or right-click in the editor of an opened test file. Then choose 'Run As > Gradle Test' or 'Run As > JUnit Test'.
To generate the documentation, see the Gradle section. In Eclipse, select the root folder, click 'Project' in the top bar and click 'Generate Javadoc...'.
See the Gradle section.
To compile the Java code in the terminal with javac, you first have to make sure that you have a Java Development Kit installed (JDK). You can check if javac is available by typing javac --version in your terminal and verifying that your version of javac is shown. If you do not have a JDK installed, you can get OpenJDK from their website.
Next, you open a terminal and change your directory to the 'javaProject'-folder. If you are in the 'javaProject'-folder, you can run the following command to compile all the .java files inside the 'src'-folder into a folder called 'bin':
javac -d bin -cp \* $(find src -name '*.java')The -cp \* includes all the .jar files in the 'javaProject'-folder.
Once the project is compiled, a .jar file of the project can be created. This .jar file can then be used to import this Java SDK in a project.
See the Gradle section.
Open the Java SDK project in Eclipse. Right-click on the root folder of the Java SDK and choose 'Export...'. Then open the 'Java'-folder and select 'JAR file'. Finally choose the output directory, leave the default settings and click 'Finish'.
Open a terminal and change your directory to the folder you compiled the project to (e.g. the bin-folder of the previous section). Then enter the following command to create the .jar file:
jar cvf javaProject.jar -C . .To import the project, you can use the created .jar file. Let's say we're working with our HelloWorld example project. The file structure of that project can be seen in this section. After the necessary .jar file is placed in the 'lib'-folder (see HelloWorld example project), we can compile our HelloWorld.java file. We use javac for this and we need to make sure to include the .jar file in the command.
Open a terminal and change the directory to the root folder 'helloWorld'. If you type ls on Linux or dir on Windows, the folders 'bin', 'data', 'lib' and 'src' should be displayed. Then type the following command:
javac -cp "$(printf %s: lib/*.jar)" src/helloWorld/HelloWorld.javaThe -cp "$(printf %s: lib/*.jar)" includes the .jar files inside the 'lib'-folder.
Finally, to run the compiled version of the HelloWorld.java file, you first change your directory to the 'src'-folder. Then you type the following command:
java -cp "$(printf %s: ../lib/*.jar)" helloWorld.HelloWorldAgain, the -cp "$(printf %s: ../lib/*.jar)" includes the .jar files from the 'lib'-folder.
NOTE: to make the HelloWorld example work, you would have to change the template and output paths in the HelloWorld.java file, because we're now running the example from the 'src'-folder:
./data/template.docx -> ../data/template.docx and ./data/output -> ../data/output
First download SDKMAN! by typing in your terminal:
curl -s "https://get.sdkman.io" | bashThen open another terminal (important for SDKMAN! to get recognized) and install Gradle by typing in your terminal:
sdk install gradle 7.2For more information about the installation, see the official installation guide.
./gradlew build./gradlew jar./gradlew test./gradlew javadocAlso see the licenses section.
./gradlew generateLicenseReportIf you want to clear the build-folder:
./gradlew cleanNOTE: this will delete the whole build-folder, so also the .jar file, documentation, dependency licenses and build-files
Because we bundle external dependencies in our .jar file, we add the licenses for all the dependencies to this project. For this we use a Gradle plugin. The licenses can be found in the folder cloudofficeprint/build/reports/dependency-license.
For publishing, uncomment the 'publishing'-block in the build.gradle file and run in your terminal:
./gradlew publishIf you first want to test locally, type in your terminal:
./gradlew publishToMavenLocalThe local Maven project can then be found in the folder ~/.m2/repository/com/cloudofficeprint/ (where ~ is your home folder).
To publish this SDK, these guides are followed:
- https://central.sonatype.org/publish/publish-guide/
- https://docs.gradle.org/current/userguide/publishing_maven.html
- https://medium.com/@nmauti/sign-and-publish-on-maven-central-a-project-with-the-new-maven-publish-gradle-plugin-22a72a4bfd4b
- https://www.albertgao.xyz/2018/01/18/how-to-publish-artifact-to-maven-central-via-gradle/


