Hey! This integration started when I purchased a new home. It's HVAC is a Bryant unit. Sure enough, I bought a house with one of the 5% of units that isn't compatible with Nest thermostats, or any other type of smart thermostat for that matter. The Bryant/Carrier units like mine use a proprietary serial protocol called Infinity to communicate with the thermostat. I started my research on potential options for automation and found the Infinitive project. I had wanted to dig deeper into python so an HA integration with Infinitive seemed like the perfect opportunity. Below are the steps to get you started...
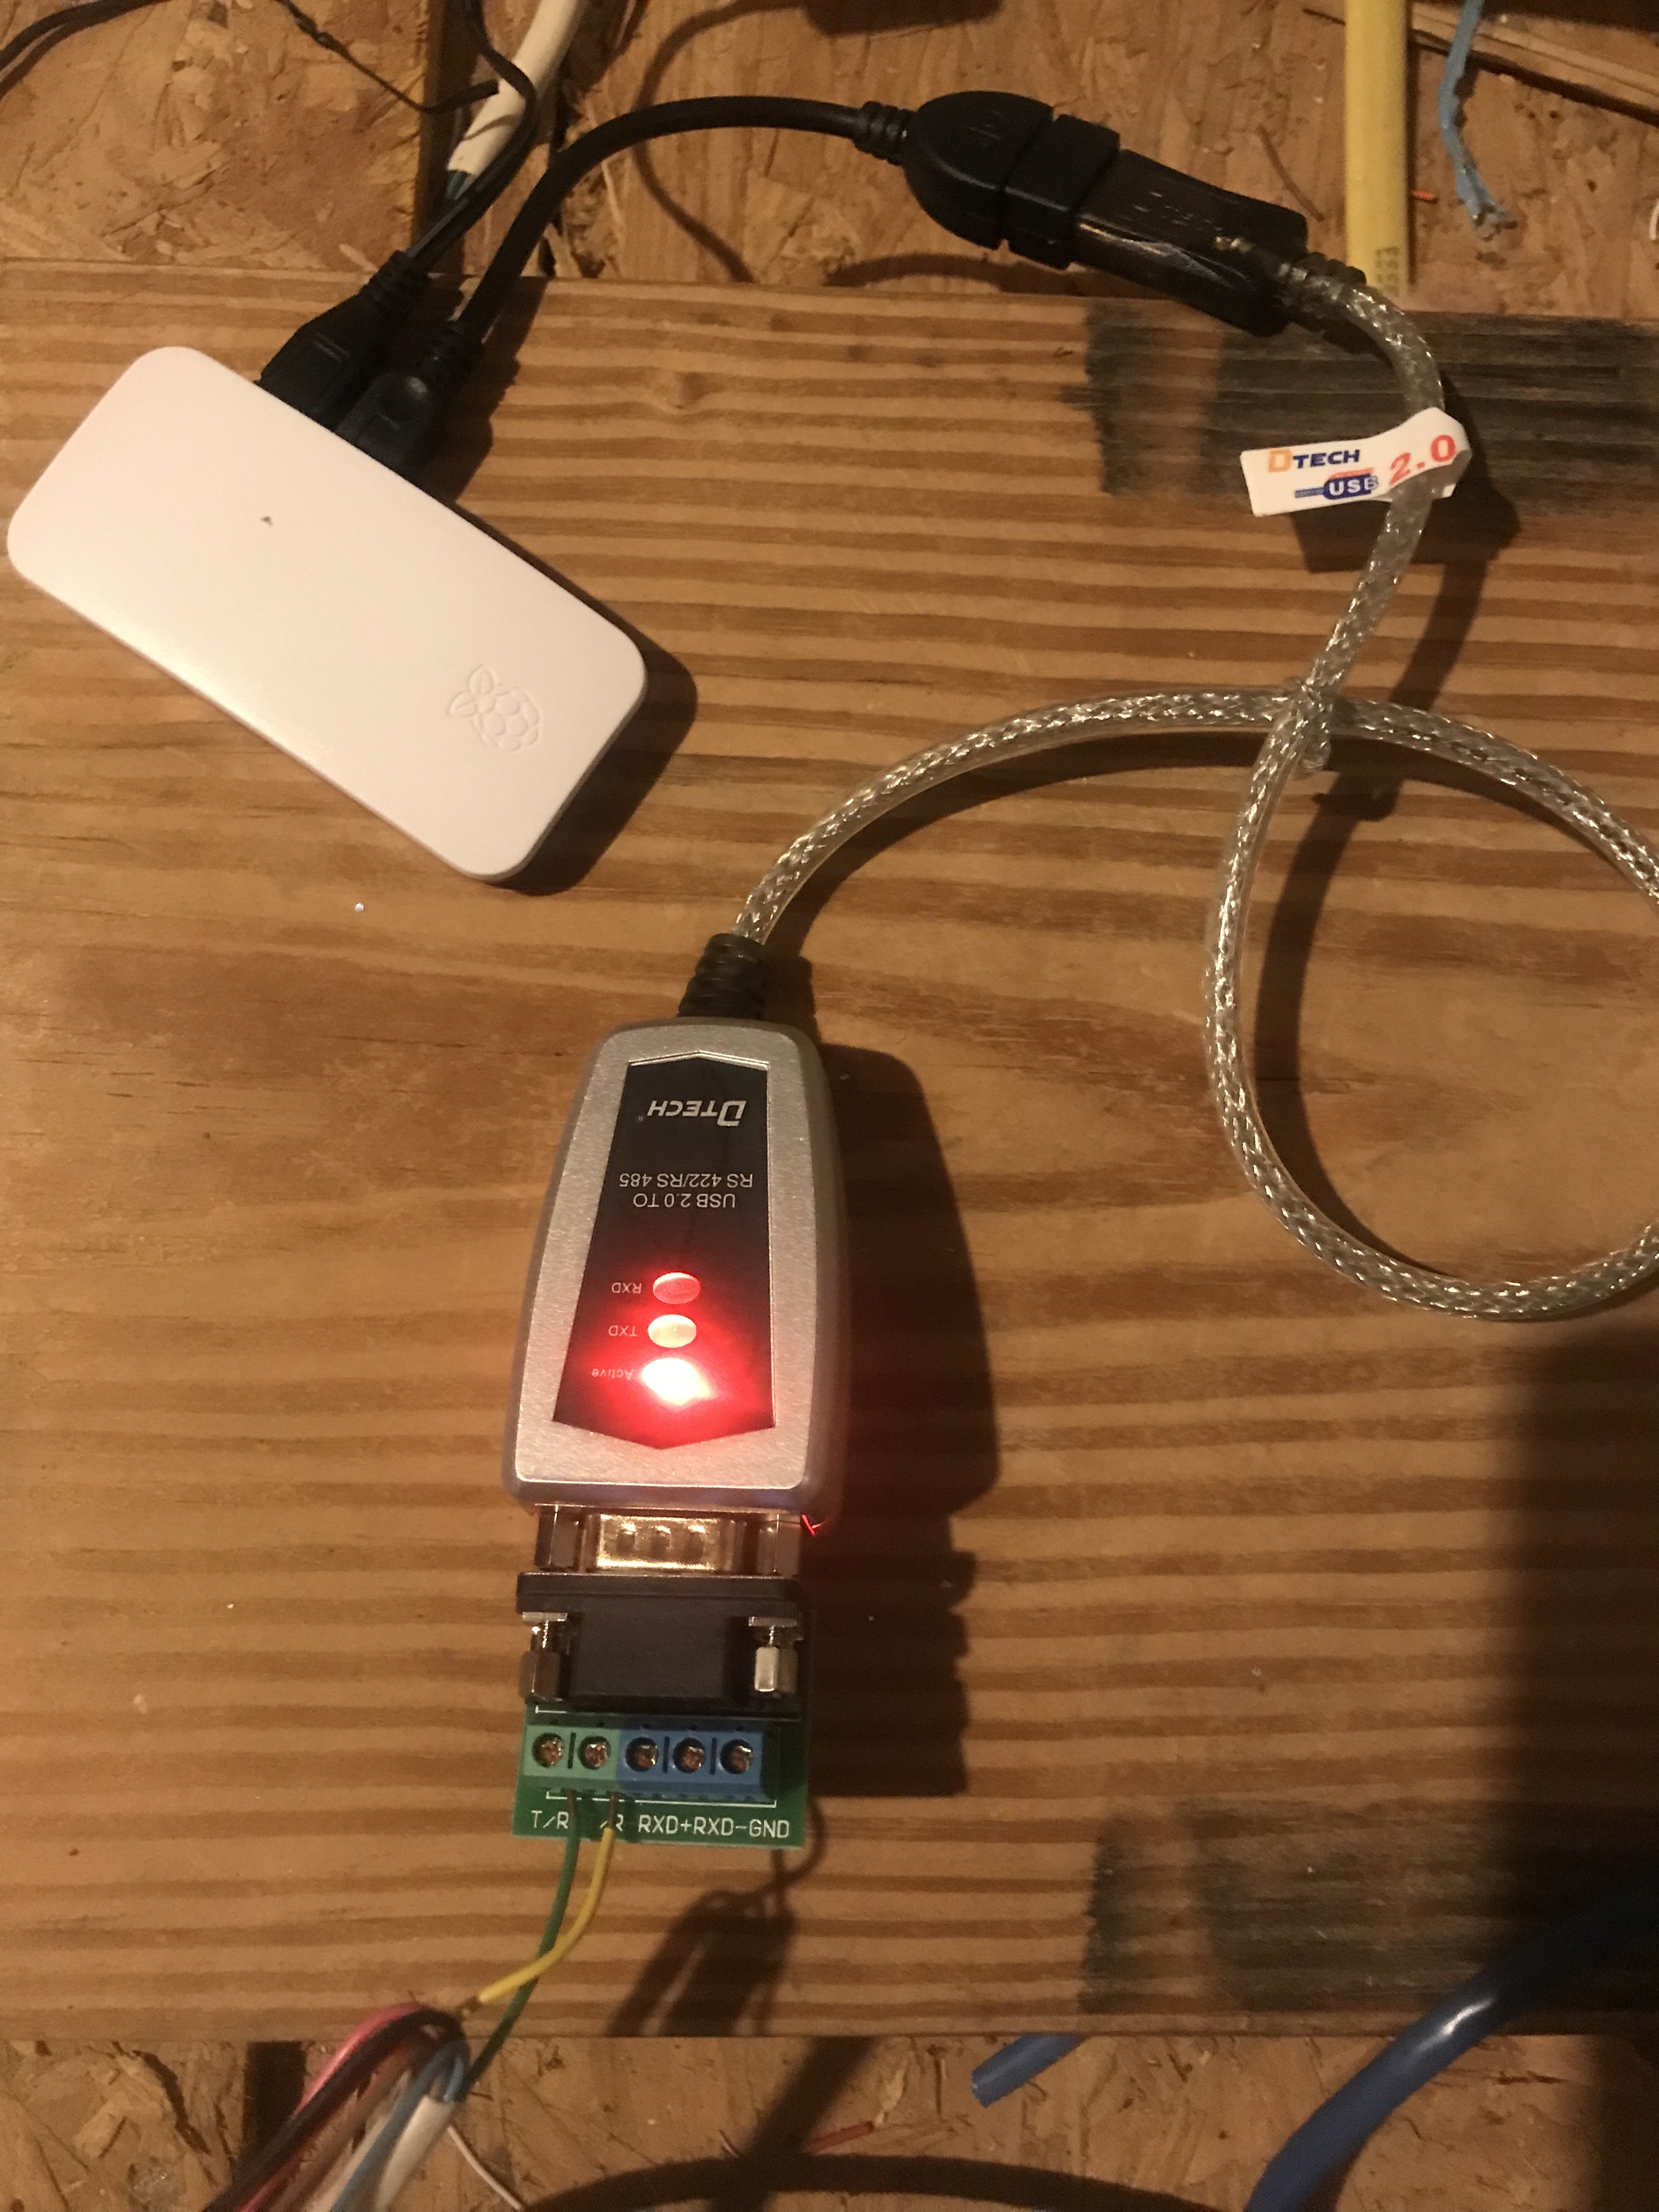
- Buy a Raspberry Pi (Don’t forget to get a micro SD card for it). I'm running mine on a Pi Zero with no issues. Here's the Pi Zero I purchased
- Buy a RS-485 USB adapter 11 for the Raspberry Pi. Here's the RS-485 USB adapter I purchased
- Buy some wire. I think 14/2 romex wire is what I used. You should be able to pick it up at your local hardware store. You need enough to reach from your HVAC unit system board to the location of your RS-485 adapter.
- Flash the latest Lite version of Raspbian to your SD card - Try Belana Etcher if you need an application that can write the Raspbian image to the SD card.
- Setup Raspbian install to have a static IP on your network.
- Once the Pi is on your network, running the folowing:
sudo apt-get install git golang-go
sudo mkdir /opt/go
export GOPATH=/opt/go
cd /opt/go
sudo go get github.com/Will1604/infinitive
sudo go build github.com/Will1604/infinitive
- Place this file at /etc/systemd/system/infinitive.service: Note: if your RS-485 adapter does not show up as /dev/ttyUSB0 please adjust the file below to reflect the proper device name
[Unit]
Description=Infinitive Service
After=network.target
StartLimitIntervalSec=0
[Service]
Type=simple
Restart=always
RestartSec=1
User=root
ExecStart=/opt/go/infinitive -httpport=8080 -serial=/dev/ttyUSB0
[Install]
WantedBy=multi-user.target
- After the infinitive.service file has been created run the following:
sudo systemctl enable infinitive
sudo systemctl start infinitive
- Run
sudo systemctl status infinitiveto ensure that the service is running. - If all went well you should be able to browse to http://[rasbperry_pi_IP]:8080 and be presented with the Infinitive web interface.
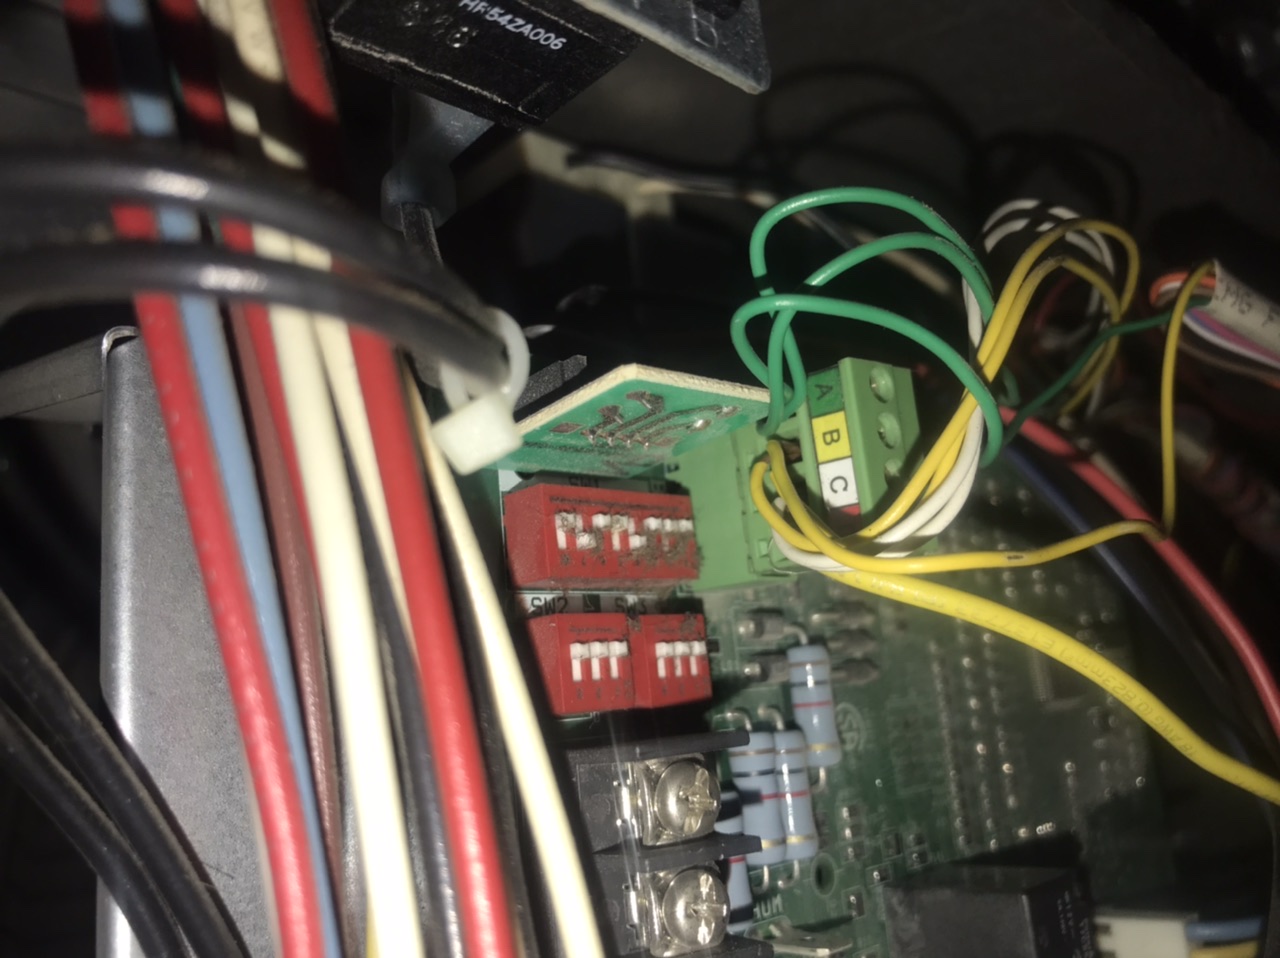
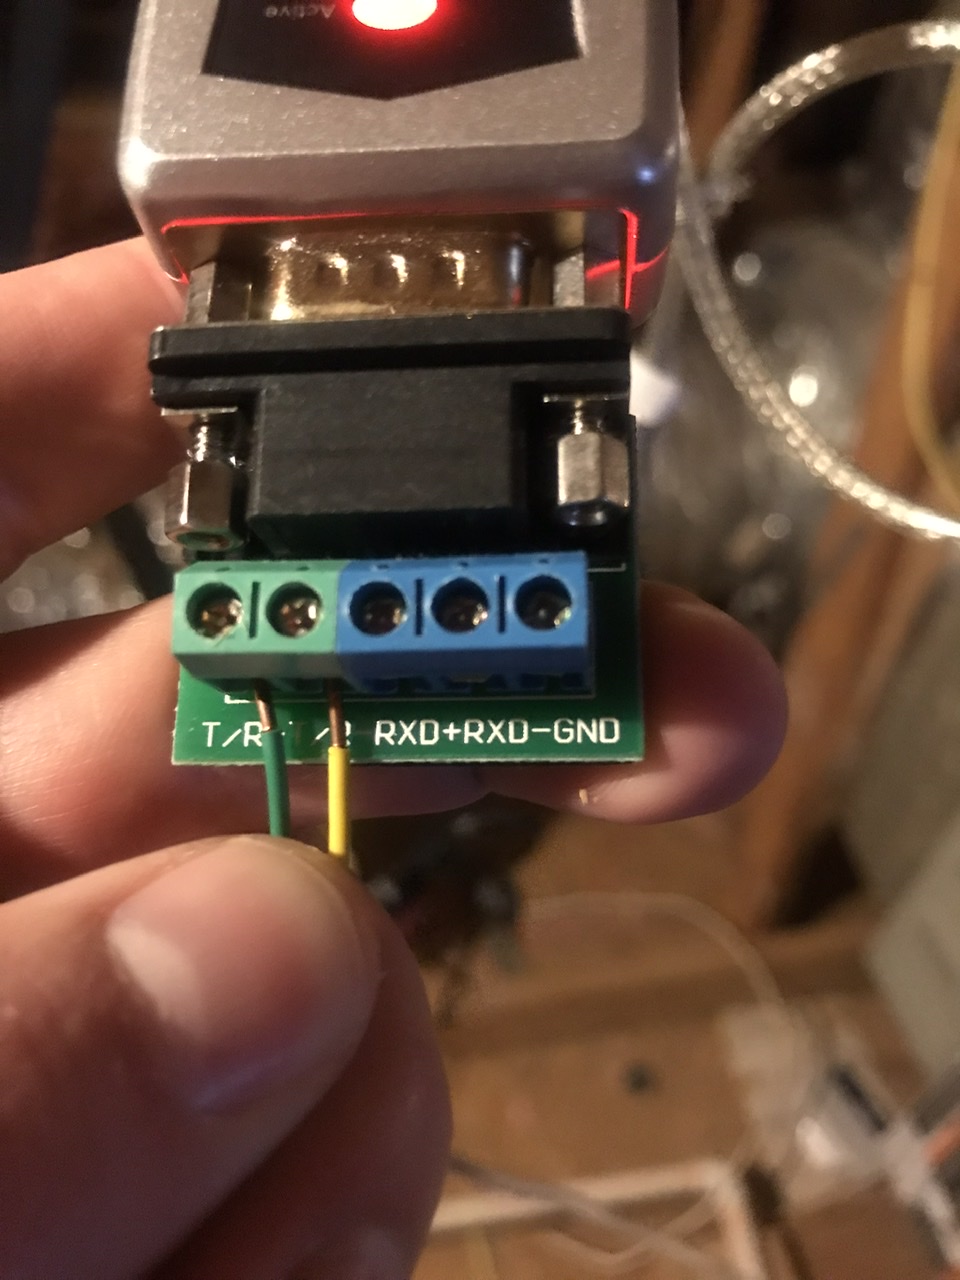
- Using the thermostat wire, connect one end to the RS-485 adapter as shown in the pictures below.
- Green wire connects to the A port on the HVAC system board and to left T/R port on the serial adapter
- Yellow wire connects to the B port on the HVAC system board and to Right T/R port on the serial adapter
-
At this point you can check the Infinitive web interface and ensure that it's populating with the data. If it's not please reach out and I'll try to help where I can.
-
Install and setup HACS if you don't already have it. Here's a link to the HACS Install Process.
-
Open the HACS page in Home Assitant, click the Settings tab.
-
Add
https://github.com/mww012/hass-infinitive.gitas anintegrationunder Custom Repositories. -
Click the Integrations tab and search for "infinitive". Click on the Infinitive integration, then click Install.
-
Add this to your configuration.yaml and restart:
climate:
  - platform: infinitive
  host: [Raspberry Pi IP]
  port: 8080
-
Restart Home Assistant.
-
Your HVAC unit should show up in Home Assistant with entity_id climate.infinitive_thermostat. Good job!
If any problems arise please feel free to open an issue.


