This is the blog package currently used on The Meteor Testing Manual. It will give you a markdown powered blog on your site.
- WYSIWYG Markdown support with in-place editing
- Syntax highlighting using highlight.js
- Customizable styling with the ability to add your own classes to elements!
- Publish / Unpublish / Archive / Unarchive workflows
- I18n Support: the blog engine can be configured to work in any language
- Send email to registered users when a new post is published
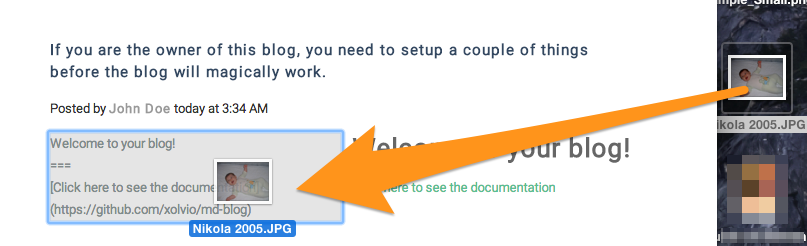
- Click on the "Insert Pictures" button to choose pictures, or Drag & Drop pictures into the editing area, and they will be uploaded and Markdown links created.
##Installation
> meteor add xolvio:md-blog
##Getting Started
There are a couple of steps to carry out before you can start using this package. Don't worry it's very easy!
First you need to define two templates that the blog in your app that look like this:
<template name="blogListLayout">
  {{> yield}}
</template>

<template name="blogPostLayout">
  {{> yield}}
</template>
These are iron-router layouts that you be available at <your site>/blog and <your site>/blog/:_id/:slug.
You may want to customize these template further like adding disqus for instance:
<template name="blogPostLayout">
  {{> yield}}
  {{> disqus}}
</template>You need to ensure you are using a Meteor accounts package like accounts-password, and that the
user you are logged has 'roles' array with the element mdblog-author. Here's an example of a
user object:
{
  "_id": "ixoreoJY5wzmNYMcY",
  "emails": [ {
    "address" : "[email protected]",
    "verified" : true
  } ],
  "profile": { "name" : "Sam Hatoum" },
  "roles": [ "mdblog-author" ]
}
You can also the above pragmatically by calling
Roles.addUsersToRoles(user._id, ['mdblog-author']);
For more information about roles, have a look at the alanning:roles package.
I18n is built-in and uses tap:i18n; as a result, you need to meteor add tap:i18n even if your website is English only.
You also need to enable tap:i18n by creating a file called project-tap.i18n with as a minimum the following code:
{
"helper_name": "_"
}
This blog is designed to be fully customizable and as unopinionated as possible. Here are some of the ways you can configure it.
####Styling
To style the blog list and posts, apply css just like in the demo app.
For syntax highlighting style, you need to add the hljs css file of your choice. Pick a css template from here. You can see this in the demo app, there is a file named hljs.css.
####Custom Classes
You can also add classes to any element of your choice! For this you need to use the settings.json
file. Have a look at the settings.json file below. You can see there's a field named
element-classes. The example above is adding the class
pure-img to all img elements. This is very powerful as it allows you to use your CSS
framework of your choice.
####Overriding Templates Many css frameworks determine the structure of the html and setting classes alone is not enough. So to fully convert the blog to a particular look and feel you may need to create your own templates.
The default templates provided by md-blog can be replaced by your own thanks to the inclusion of nicolaslopezj:reactive-templates
To override the default provide the following code (in a client side Meteor.startup() function for instance):
ReactiveTemplates.set( 'blogList', 'myAppBlogList' );
ReactiveTemplates.set( 'blogPost', 'myAppBlogPost' );
ReactiveTemplates.set( 'blogControls', 'myAppBlogControls' );
The first of these statements tells ReactiveTemplates that you want to override the template for 'blogList' with the template provided in the second parameter. The name 'myAppBlogList' is an arbitary example - give the name of your template.
You can use the default templates that are bundled in a file called 'blog-templates.html' as a starting point.
Please note that to include an overriden template in another template you must call it as Template.dynamic as ReactiveTemplates swaps in the name of the template depending on the value it has had set.
You can include the template for blogControls (the save, publish/unpublish, delete buttons) as follows:
{{> Template.dynamic template=blogControlTemplate}}
The Function that returns the name of the template to be used for blogControlTemplate has been provided for you.
Helpers and events of the default md-blog templates are assigned to your tempates that override them, although if you want to create something special you can.
####Sorting
By default, the blog sorts your posts by date. You can change this by modifying the sortBy
field in the settings file.
####Blog Routes
The blog runs at the default "/blog" route. The archive runs at the default
"/blog/archive" route. For each post, the default is the "blog/:shortId/:slug" route. You can customize where the blog handles requests by
changing the blogPath and archivePath. You can also remove the short id from the blog post path by setting the useUniqueBlogPostsPath to false.
####Settings File Example
{
  "public": {
    "blog": {
      "name": "The Xolv.io md-blog",
      "Description": "Get verbal on your websites.",
      "prettify": {
        "syntax-highlighting": true,
        "element-classes": [
          {
            "locator": "img",
            "classes": ["pure-img"]
          },
          {
            "locator": "button",
            "classes": ["pure-button"]
          }
        ]
      },
      "sortBy": {"date": -1},
      "blogPath": "/blog",
      "archivePath": "/blog/archive",
      "useUniqueBlogPostsPath": true
    }
  }
}
####i18n
The blog engine can be configured to display messages and button texts in any language.
English is the default language, and translations are provided for the French language.
Specify defaultLocale at the same level as the blog name, in the settings.json file:
{
  "public": {
    "blog": {
      ...
      "defaultLocale": "fr"
    }
  }
}
How do I change the language depending on my user's preference?
Simply call Session.set('locale', newLocale)
I need translations for a new language!
-
Refer to the
tap:i18npackage documentation. You should take a look at the sample app first. -
There are two ways to provide additional languages: 1. the preferred way is to submit a Pull Request to integrate the new
i18n/<locale>.i18n.json. 2. The other way is to place this file in your Meteor application. -
When adding a new language, you will also want to configure Moment to display the localized version of
today at hh:mmand other such texts. This is done through themomentobject in the i18n bundle (i18n/language.i18n.json). The following example sets the days and months in French, and configures a few moments in French as well. (Note that this is not comprehensive. Refer to the Moment documentation for more settings.) Due totap:i18nonly supporting Strings and not Objects in its bundles, you have to use a JSON string. The JSON string may be broken down into an array of Strings for better readability.As an example, in order to get:
  "moment": {
    "weekdays": [ "lundi", "mardi", "mercredi", "jeudi", "vendredi", "samedi", "dimanche" ],
    "calendar": {
      "lastDay": "[hier à] LT",
      "sameDay": "[aujourd'hui à] LT",
      "nextDay": "[demain à] LT",
      "lastWeek": "[dernier] dddd [à] LT",
      "nextWeek": "dddd [à] LT",
      "sameElse": "DD/MM/YYYY"
    }
  }
You need to write:
// in app/i18n/language.i18n.json:
  "moment": [
    "{",
    "\"weekdays\": [ \"lundi\", \"mardi\", \"mercredi\", \"jeudi\", \"vendredi\", \"samedi\", \"dimanche\" ],",
    "\"calendar\": {",
      "\"lastDay\": \"[hier à] LT\",",
      "\"sameDay\": \"[aujourd'hui à] LT\",",
      "\"nextDay\": \"[demain à] LT\",",
      "\"lastWeek\": \"dddd [dernier à] LT\",",
      "\"nextWeek\": \"dddd [à] LT\",",
      "\"sameElse\": \"DD/MM/YYYY\"",
      "}",
    "}"
  ]
####Send an email when a new post is published
- Set
emailOnPublishto true:
{
  "public": {
    "blog": {
      ...
      "emailOnPublish": "true"
    }
  }
}- Run
meteor add meteorhacks:ssrto add the SSR package. - Provide a compiled template named
publishEmail. For example, if thepublish_email.htmltemplate sits in theprivatedirectory, make sure to run:
  SSR.compileTemplate('publishEmail',
    Assets.getText('publish_email.html'));
An email will be sent to all registered users (in Bcc) when a post is published. Its sender will be the post's author. Its title will be the post's title. Its body will come from the publishEmail template. The template should contain the blog post's summary and its url. Example:
<h2>{{summary}}</h2>
<a href="{{url}}">Read more...</a>
####Configure pictures max size and Slingshot directive
To understand how to configure edgee:slingshot, read its documentation.
{
  "public": {
    "blog": {
      ...
      "pictures": {
        "maxWidth": "800",
        "maxHeight": "800",
        "Slingshot": {
          "directive": "<directive name>"
          }
        }
    }
  }
}
The demo app will work with Google Cloud Storage if you provide a pem file and a file that contains the GoogleAccessId as Assets (under the private directory).:
{
  "public": {
    "blog": {
      ...
      "pictures": {
        "Slingshot": {
          "pemFile": "google-cloud-service-key.pem",
          "idTextFile": "google-cloud-access-id.txt"
          }
        }
    }
  }
}
##Additional Info
###URL Format The URL format of your blog will look like this:
www.your-site.com/blog
www.your-site.com/blog/7yh22/your-latest-blog-post
The format is /:_id/:slug
The :slug is the title of the blog post with all the spaces replaced with dashes. It's believed
this is good for SEO purposes.
The :_id is a truncated version of the mongo id for the blog entry. This allows you to have
multiple posts with the same title over time.
When you archive blog posts, currently they are removed from the main view but they are still accessible by search engines and external links. To see your archived blog entries, go to:
www.your-site.com/archive
###Environment Variables
If you want the app to delete all the blog entries on startup, set the environment variable
AUTO_RESET=1 when running meteor. For example:
AUTO_RESET=1 meteor##Contribution Yes please!
Todo list:
- Your idea!
- Date Picker
- Author Picker
- Pagination
- Auto draft saving + history


