Git Product home page Git Product logo

openc16ramexpansion's Introduction

OpenC16RamExpansion

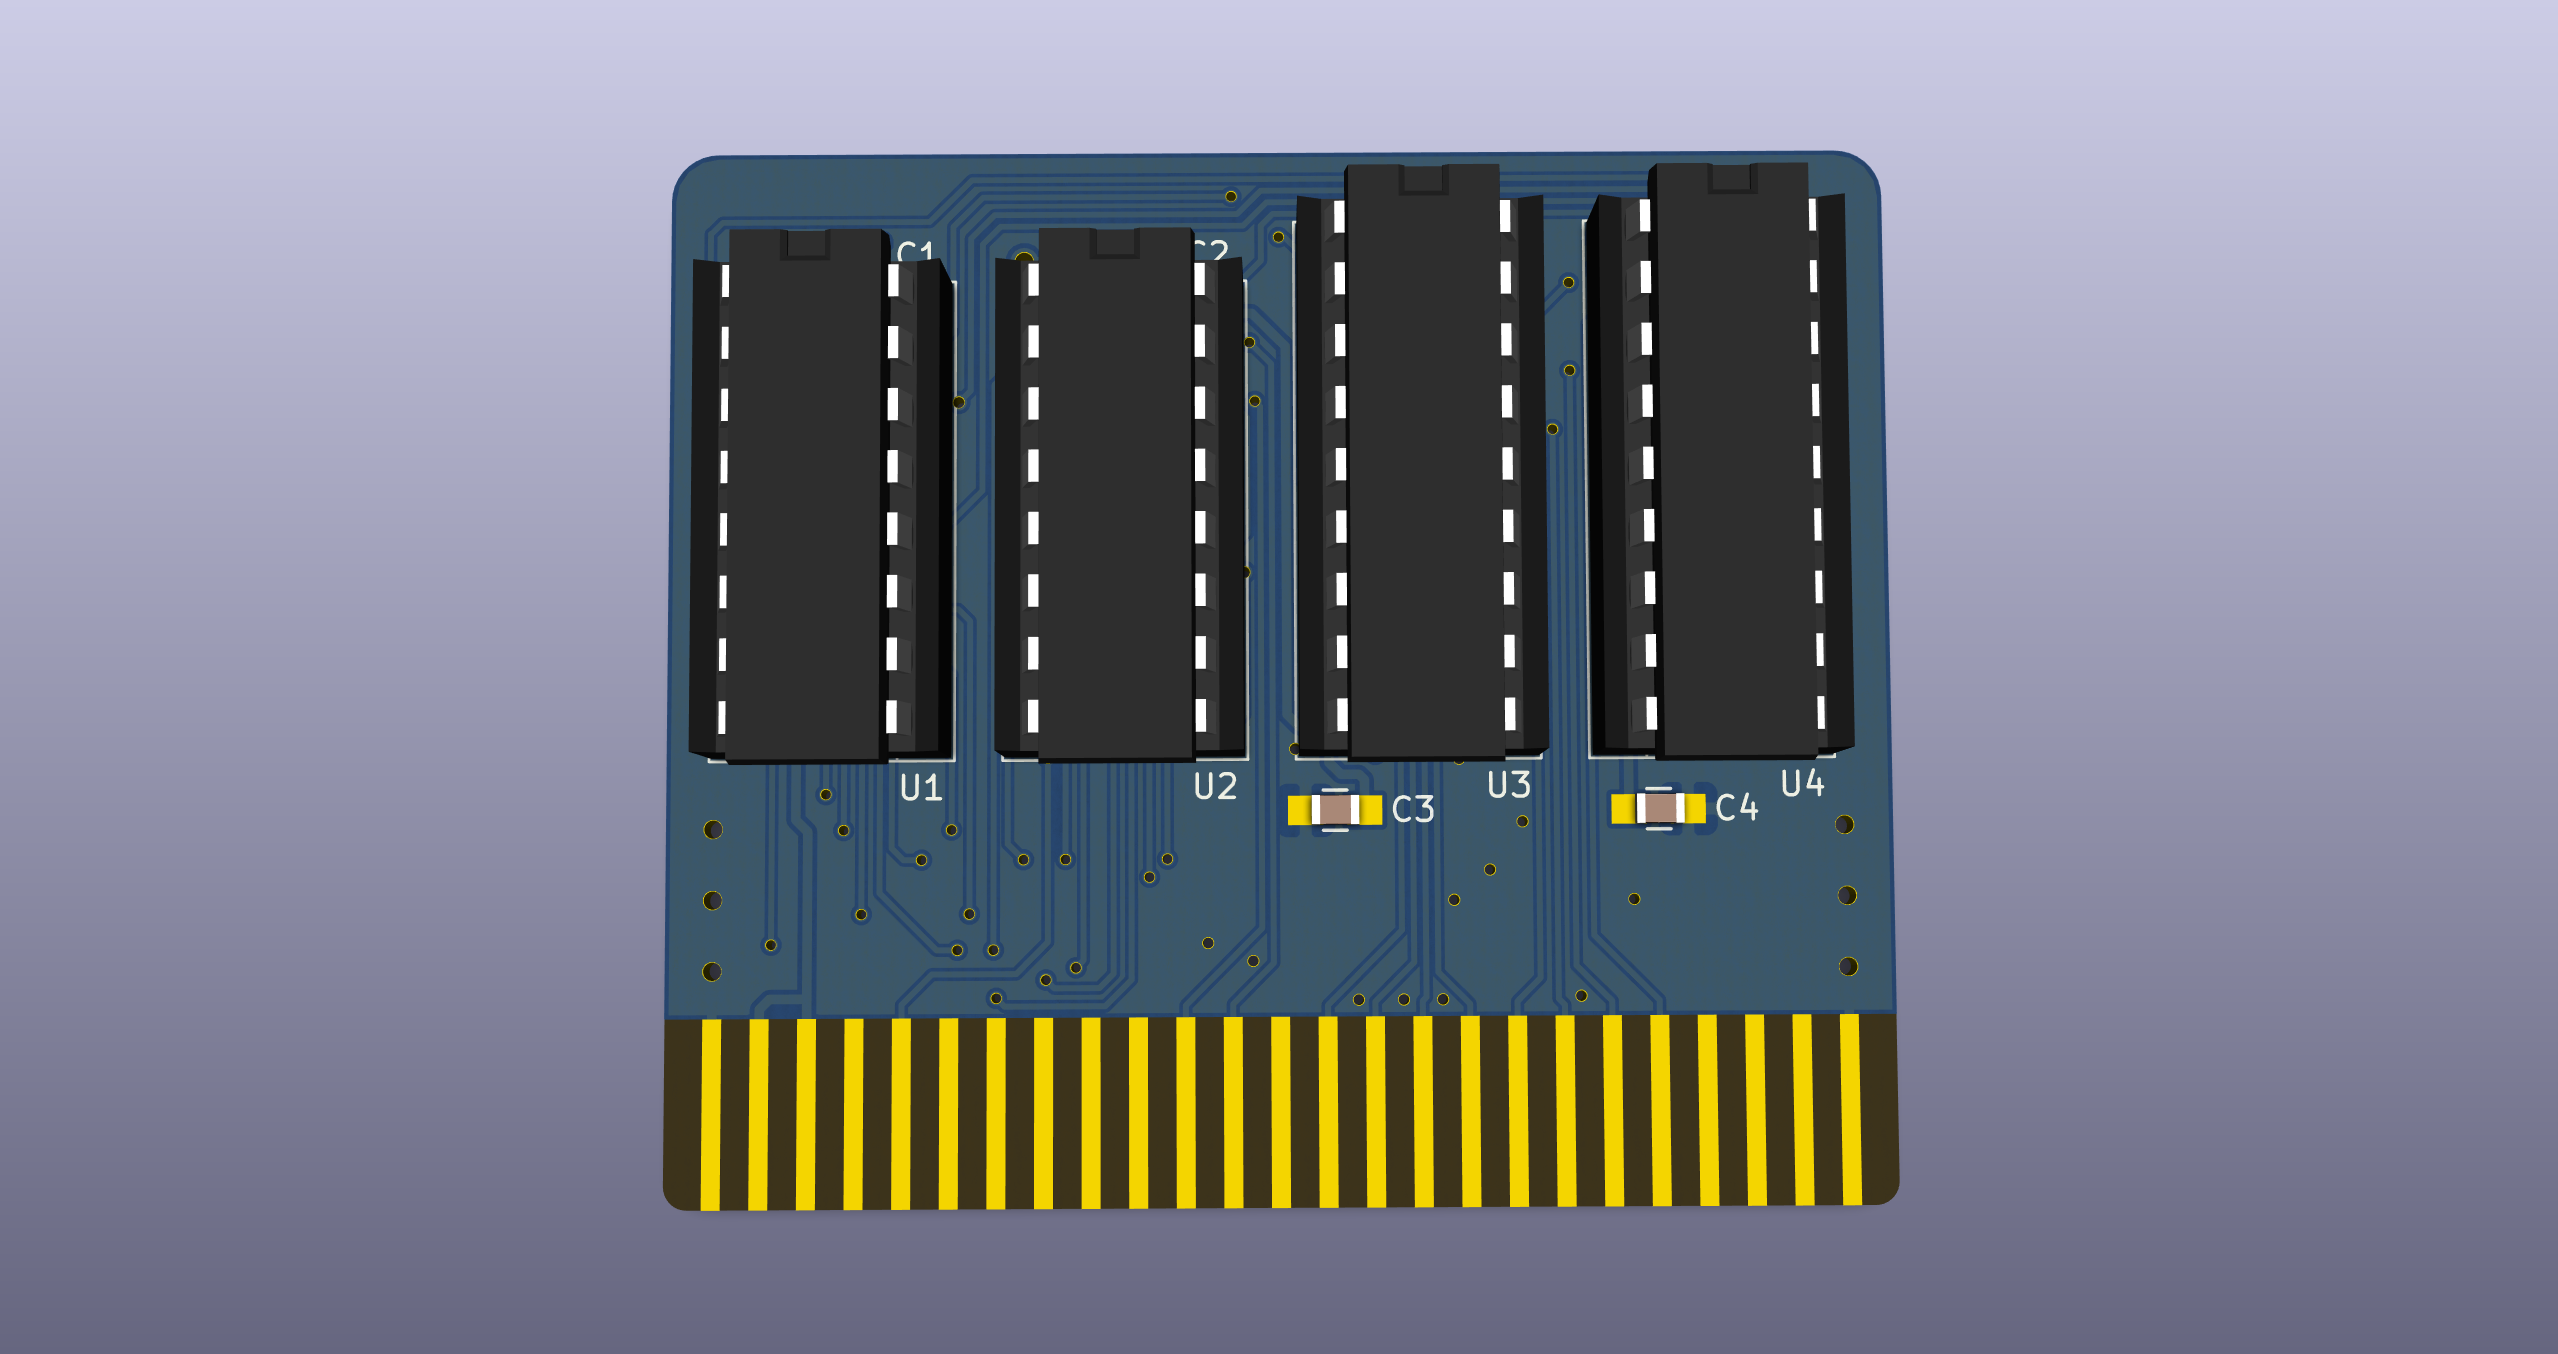
OpenC16RamExpansion is an Open Hardware 64 Kb RAM Expansion board for the Commodore 16.

Board

Summary

The board fits the cartridge/expansion port and, in theory, it should instantly give a C16 64 kilobytes of RAM. Unfortunately, the reality is quite different since the C16 was deliberately designed not to be easily expandable, so that the larger RAM would be a selling point of the Plus/4.

This must have been a long-debated feature, since half of the job is done while the other half is missing. In particular, the /RAS, /CAS and R/W signals that are needed to control RAM chips have been brought to the cartridge slot and these cannot actually serve many other purposes. On the other hand, there is no way to disable the internal RAM when an expansion is plugged in the cartridge slot which means that both RAMs will fight for the bus, amounting to a disasterous effect.

So What!?

Old expansions used to come with instructions saying how to disable the internal RAM, which was usually obtained by barbarically cutting the power pins altogether. This had the obvious side effect that at that point the machine could ONLY work with the external expansion plugged in, preventing the use of other cartridges (not that many were made, but what about a SID Card or a User Port Card?).

Other boards had output transistors that would somehow "overpower" the outputs of the internal RAM or - worse - force the internal /RAS signal to a high level.

Since both these things are quite likely to damage the - already precarious - internals of your C16, I didn't even think about replicating them. Instead, I have come up with a not-too-hard modification implementing the missing half of the job that Commodore left to be desired. It can be carried out on all C16s in order to let them work with both the internal or external RAM when plugged in. If you want to use this Expansion, you will have to perform the following modification:

  1. Connect pin Z of the expansion slot to pin 11 of U12 with a wire.
  2. Disconnect pin 1 of U5 and U6 from the mainboard.
  3. Connect pin 13 of U12 to pin 1 of U5 and U6.
  4. Solder a 10k resistor between pin 12 and pin 14 of U12.
  5. Blob together pins 12 and 13 of U12.

This will disable the internal RAM whenever pin Z on the expansion connector is grounded. This is already done on OpenC16RamExpansion but it should be easy to modify any old cart this way.

Now, if you start up your C16 without any expansion plugged in, it should work as usual and report 12277 bytes free. If you start it up with an expansion, you should get 60671. Actually, this is not yet enough to say that the extra RAM is working properly, since you would get the same even without performing any modification. To make sure it is, enter the following BASIC instructions:

POKE 100, 42 PRINT PEEK 16484

If you get anything else than 42, then the expansion is working correctly. If you get 42, it is not (that would mean the "second" 16kB of RAM are a replica of the first 16kB).

If you are using a LittleSixteen V3 board, there is no need to perform any modification, as it is already built-in.

Releases

If you want to get this board produced, you are recommended to get the latest release rather than the current git version, as the latter might be under development and is not guaranteed to be working.

Every release is accompanied by its Bill Of Materials (BOM) file and any relevant notes about it, which you are recommended to read carefully.

License

The OpenC16RamExpansion documentation, including the design itself, is copyright © SukkoPera 2019-2021 and is licensed under the Creative Commons Attribution-NonCommercial-ShareAlike 4.0 International License.

This documentation is distributed as is and WITHOUT ANY EXPRESS OR IMPLIED WARRANTIES whatsoever with respect to its functionality, operability or use, including, without limitation, any implied warranties OF MERCHANTABILITY, SATISFACTORY QUALITY, FITNESS FOR A PARTICULAR PURPOSE or infringement. We expressly disclaim any liability whatsoever for any direct, indirect, consequential, incidental or special damages, including, without limitation, lost revenues, lost profits, losses resulting from business interruption or loss of data, regardless of the form of action or legal theory under which the liability may be asserted, even if advised of the possibility or likelihood of such damages.

Support the Project

If you want to get some boards manufactured, you can get them from PCBWay through this link:

PCB from PCBWay

You get my gratitude and cheap, professionally-made and good quality PCBs, I get some credit that will help with this and other projects. You won't even have to worry about the various PCB options, it's all pre-configured for you!

Also, if you still have to register, you can use this link to get some bonus initial credit (and yield me some more).

You can also buy me a coffee if you want:

Buy Me a Coffee at ko-fi.com

Credits

This board was laid out only by looking at various C16/Plus/4 schematics and pictures (mostly low-resolution) of similar expansions from back in the day I found on the Net, I have never seen one in real life:

So thanks to the makers of those expansions and to Zimmers and Plus/4 World for cataloguing them.

openc16ramexpansion's People

Contributors

sukkopera avatar

Stargazers

 avatar  avatar  avatar  avatar  avatar  avatar  avatar  avatar  avatar  avatar  avatar  avatar  avatar  avatar

Watchers

 avatar  avatar  avatar  avatar  avatar  avatar  avatar

openc16ramexpansion's Issues

How can this work without disbaling internal ram

Hello SukkoPera,
I have made up a cart using your schematic but cannot get it to detect. On further reading of a few blogs it seems back in the day the original expansion required some hardware mod like cutting the RAS line from the CPU to the ram.
Just wondering how you got yours to work. I only have a single C16 to test.
Thanks

Try to get this working on all machines

AmiBay user eslapion indicates two possible modifications to make this work on all C16's:

  1. The first one is to put a switch on pin 1 (/CE) of the two 4416 of the C16, toggling between ground and 5Vdc - by default they are grounded.

  2. The second one is to use a modified 48 pin socket under the TED which will disconnect CAS from the mainboard and have it on a separate wire going to the 64k RAM cartridge. Just put a pull-up resistor on the 64k RAM cartridge which pulls-up the CAS line of the C16 board.

My opinion:
Solution 1 is well-known but it's not really easy to do, as it requires desoldering the whole chips to get a "clean job".

Solution 2 is more interesting, but I find this would be ok if we wanted to make a board to be sandwiched between the TED and socket, carrying the RAM chips and whatever is needed. An internal expansion that cannot be removed, I mean. This is because the machine would no longer work if the expansion is unplugged at that point (unless you also bring out the /CAS signal going to the chips, add a switch and whatever).

The modification I am looking for would ideally be to add the missing circuitry so that the machine will use the expansion correctly, but so that it will still work correctly if the expansion is unplugged, without any manual intervention. Ideally, this mod would also be easy to install and it shouldn't require to cut any tracks. But I guess the latter is impossible to achieve, as the whole thing implies the splitting of the /RAS (or /CAS) signal in two, one addressing the internal chips and one going to the cartridge slot. Equations are easy:

!ras_int = !ras & (!a14 & !a15) => ras_int = ras | !(!a14 & !a15) => ras_int = ras | a14 | a15
!ras_ext = !ras & (a14 | a15) => ras_ext = ras | !(a14 | a15) => ras_ext = ras | (!a14 & !a15)
ras a14 a15 ras_int ras_ext
0 0 0 0 1
0 0 1 1 0
0 1 0 1 0
0 1 1 1 0
1 0 0 1 1
1 0 1 1 1
1 1 0 1 1
1 1 1 1 1

The point here is to rewrite these in order to use the least possible logic gates and to make sure that the memory detection routine in the ROM always does the right thing.

I think it can be done with a single 74253 or 4052 (Dual 4-TO-1 Multiplexers):

Pin 74253 CD4052B
1 /RAS GND
2 a15 Vcc
3 Vcc ras_int (with pull-up to Vcc)
4 Vcc Vcc
5 Vcc Vcc
6 GND /RAS
7 ras_int (with pull-up to Vcc) GND (power)
8 GND (power) GND (power)
9 ras_ext (with pull-up to Vcc) a15
10 Vcc a14
11 GND GND
12 GND Vcc
13 GND ras_ext (with pull-up to Vcc)
14 a14 GND
15 /RAS GND
16 Vcc (power) Vcc (power)

Another possibility is here.

C116??

Hi.. I got this on eBay with info it works for C116 also.. but in the description i can’t see any info about C116.. the IC Numbers don’t match on the C116. Do you have additional info? It don’t work without any hacks

Recommend Projects

  • React photo React

    A declarative, efficient, and flexible JavaScript library for building user interfaces.

  • Vue.js photo Vue.js

    🖖 Vue.js is a progressive, incrementally-adoptable JavaScript framework for building UI on the web.

  • Typescript photo Typescript

    TypeScript is a superset of JavaScript that compiles to clean JavaScript output.

  • TensorFlow photo TensorFlow

    An Open Source Machine Learning Framework for Everyone

  • Django photo Django

    The Web framework for perfectionists with deadlines.

  • D3 photo D3

    Bring data to life with SVG, Canvas and HTML. 📊📈🎉

Recommend Topics

  • javascript

    JavaScript (JS) is a lightweight interpreted programming language with first-class functions.

  • web

    Some thing interesting about web. New door for the world.

  • server

    A server is a program made to process requests and deliver data to clients.

  • Machine learning

    Machine learning is a way of modeling and interpreting data that allows a piece of software to respond intelligently.

  • Game

    Some thing interesting about game, make everyone happy.

Recommend Org

  • Facebook photo Facebook

    We are working to build community through open source technology. NB: members must have two-factor auth.

  • Microsoft photo Microsoft

    Open source projects and samples from Microsoft.

  • Google photo Google

    Google ❤️ Open Source for everyone.

  • D3 photo D3

    Data-Driven Documents codes.