ssloy / tinyraytracer Goto Github PK
View Code? Open in Web Editor NEWA brief computer graphics / rendering course
Home Page: https://github.com/ssloy/tinyraytracer/wiki
A brief computer graphics / rendering course
Home Page: https://github.com/ssloy/tinyraytracer/wiki
Used the corresponding code in wiki page, but got wrong picture.
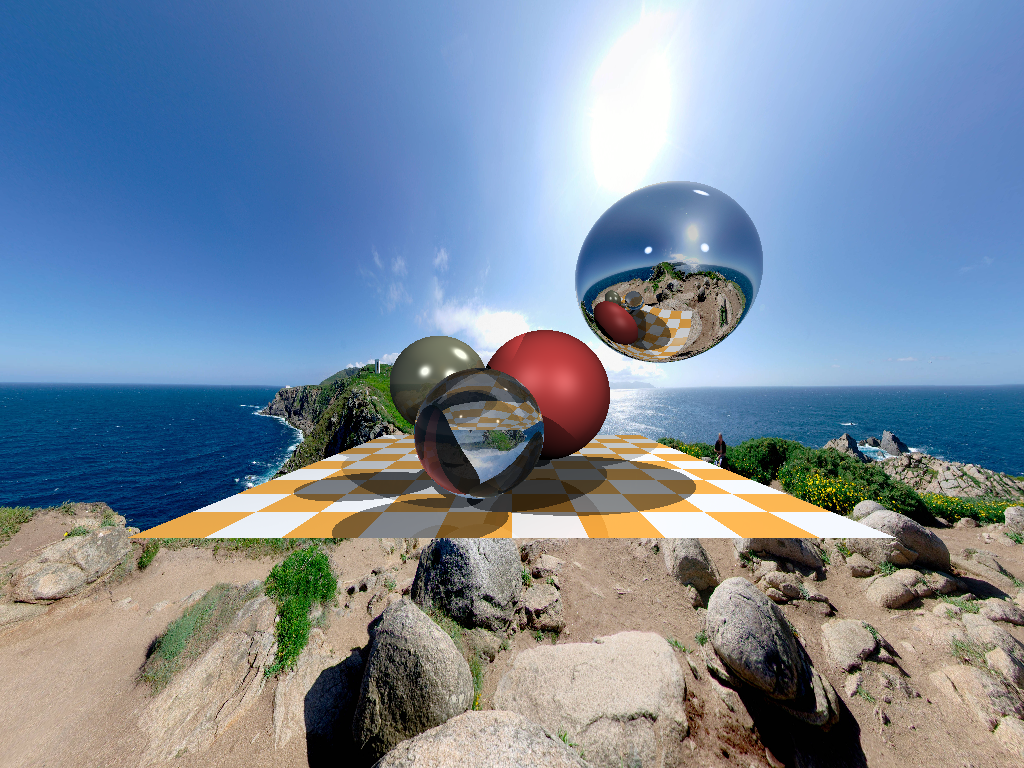
Step 1:

Step 4:

(Also step 2 got a strange picture.)
IDE: visual studio community 2019 16.10.2(/std:c++latest)
CPU: r5 5600x
I have no idea about it. Thank you very much!
Hello and thanks for this génialissime project 👍
Just to let you know I tried your code on ESP32 and it worked just fine with very little modification.
The ESP32 doesn't have that much ram so I applied a direct TFT rendering approach instead of using the framebuffer.
Hi! I was trying to compile this program as you said in README, but when I run the instruction "cmake ..", I got this:
C:\Users\apple\Desktop\Tan GraduateProject\tinyraytracer\build>cmake ..
-- Building for: Visual Studio 16 2019
-- Selecting Windows SDK version 10.0.18362.0 to target Windows 10.0.18363.
-- The C compiler identification is MSVC 19.27.29112.0
-- The CXX compiler identification is MSVC 19.27.29112.0
-- Detecting C compiler ABI info
-- Detecting C compiler ABI info - done
-- Check for working C compiler: C:/Program Files (x86)/Microsoft Visual Studio/2019/Community/VC/Tools/MSVC/14.27.29110/bin/Hostx64/x64/cl.exe - skipped
-- Detecting C compile features
-- Detecting C compile features - done
-- Detecting CXX compiler ABI info
-- Detecting CXX compiler ABI info - done
-- Check for working CXX compiler: C:/Program Files (x86)/Microsoft Visual Studio/2019/Community/VC/Tools/MSVC/14.27.29110/bin/Hostx64/x64/cl.exe - skipped
-- Detecting CXX compile features
-- Detecting CXX compile features - done
-- Performing Test flag_supported
-- Performing Test flag_supported - Success
-- Performing Test flag_supported
-- Performing Test flag_supported - Failed
-- Performing Test flag_supported
-- Performing Test flag_supported - Failed
-- Performing Test flag_supported
-- Performing Test flag_supported - Failed
-- Performing Test flag_supported
-- Performing Test flag_supported - Failed
-- Performing Test flag_supported
-- Performing Test flag_supported - Failed
-- Configuring done
-- Generating done
-- Build files have been written to: C:/Users/apple/Desktop/Tan GraduateProject/tinyraytracer/build
It says configuring was done and generating was done, but when I try to "make" the program, it says:
make: *** No targets specified and no makefile found. Stop.
Apparently I didn't get the makefile in the cmake process, I really don't know what's wrong ,hope you can help me, thanks!
By the way, my running environment is on Windows 10, I was using Cmake 3.18.2, would it be the version problem?
Also, when I was trying to compile your another program, which is called tinyrenderer, I have met the same problem, completely same.
图图
the instruction for step 6 has this line:
Vec3f shadow_orig = light_dir*N < 0 ? point - N*1e-3 : point + N*1e-3;
but i modified it to be something like
if (light_dir*N<0) continue; Vec3f shadow_orig=point+N*1e-3;
and still got the same result given the spheres and lights in the tutorial.
i am kinda convinced that this is another correct way to write it, and it potentially speeds things up a little. am i right?
thanks in advance.
If you want to support Visual Studio's OpenMP which is compiler flag"/openmp" , it has been at version OpenMP 2.0 for around a decade, and complains about size_t for the index and the error says it needs to be a signed int.
tinyraytracer/tinyraytracer.cpp
Lines 123 to 124 in 5888c49
So the above size_t index works when it changed to a signed int for VS compilers.
I didn't want to make a pull since I'm not quite sure what the best way to add "/openmp" to how you have your CMakeLists.txt arranged for Visual Studio.
Can you please post the answers to the homework?
the picture link is: https://github.com/KnewHow/TinyRayTracer/blob/add_background/out.jpg
I have read whole part one article of you tiny ray tracer, some code I'm still not understanding. Can you give me a solution.
the one is checkerboard color with white and light yellow, why you use material.setDiffuse((int(.5 * hit.x + 1000) + int(.5 * hit.z)) & 1 ? vec3f(.3, .3, .3) : vec3f(.3, .2, .1)); // TODO understand to get? the whole code is flowing:
 float checkerboard_t = std::numeric_limits<float>::max();
  if(std::fabs(d.y) > 1e-3) {
        float cb_t= -(orig.y + 4) / d.y; // the checkerboard plane has equation y = -4, cb_t is ray intersect with the checkerboard plane
        vec3f cb_hit_point = orig + cb_t * d; // the point the ray intersect with checkerboard plane
        if(cb_t > 0 && std::fabs(cb_hit_point.x) < 10 &&
            cb_hit_point.z < -10 && cb_hit_point.z > -30 && cb_t < sphere_t) {
                checkerboard_t = cb_t;
                hit = cb_hit_point;
                normal = vec3f(0, 1, 0);
              why
            }
    }
another problem is calculate the background with environment map with following code, I don't understand this formulate.
I if have time, I hope you can do some explain for me. Thank you very much!
 int a = std::max(0, std::min(env.getWidth() -1, static_cast<int>((atan2(d.z, d.x) / (2 * M_PI) + .5)* env.getWidth()))); // TODO understand why
        int b = std::max(0, std::min(env.getHeight() -1, static_cast<int>(acos(d.y) / M_PI * env.getHeight()))); // TODO understand why
        return env.getPixelColor(a, b); // background color
I wanted to thank you for the awesome courses, I wish I had such great teachers in my Uni years!
I ported the whole thing in Go while maintaining the commit-by-commit step approach and the original ideas. I am currently working towards making it more idiomatic to Go, and simplifying the vector and color handling ^^
I would like to point out that an identifier like “__GEOMETRY_H__” does not fit to the expected naming convention of the C++ language standard.
Would you like to adjust your selection for unique names?
How do you change the rotation (yaw, pitch and roll) of the camera?
I wrote a "graphics" demo to show off the true potential of Unicode and colors in Linux terminals. I used tinyraytracer (and tinyraycaster) to provide some 3D graphics.
Video is here: https://www.youtube.com/watch?v=MWcuI2SXA-A
Source code repo (mercurial): https://cavac.at/public/mercurial/demos/terminalvelocity/
The demo itself is written in Perl and uses Inline::CPP to integrate the C++ code.
The official release post explains how this works (also follow the backlinks to my past posts to get more details and how this all evolved): https://perlmonks.org/?node_id=11157774
I enjoyed reading this, so I ported it to javascript!
I added some premature optimization by making it render incrementally via generator functions, and by caching datastructure allocations.. those changes are easily removed if desired.
Here it is running:
http://vectorslave.com/trt/trt.html
Here's the code:
trt-js.zip
Cheers!
Hello!
Thank you for very interesting materials!
I ported most of code to Python (except bunny rendering...).
python-tinyraytracer
It is a bit dirty and not very pythonic, but it works and produces same results.

wont compile in gitpod out of the box, any aditional steps i need to do?

Hello @ssloy ,
Thank you so much for this course! It has really got me interested in software rendering techniques. The content has a very nice balance between conceptual and practical. I've followed all the steps and rewrote the ray tracer in Lua, using my favourite game framework, LÖVE.
Here it is! Thank you again for your hard work, I greatly appreciate the effort you've put into it!
https://github.com/Ulydev/loveray
When I did step 1 copied and stuff.
dropped a ppm file then tried it on a viewer it says it's not a .ppm file so I opened it in notepad.
and this appeared:
P6
1024 768
255
� � � � � � � � � � � � � � � � � � � � � � � � � � � �
� � � � � � � � � � � � � � � � � � � � � � � � � � � � � � � � � � � � � � � � � � � � � � � � � � � � � � � � � � � � � � � � � � � � � � � � ! ! ! ! " " " " # # # # $ $ $ $ % % % % & & & & ' ' ' ' ( ( ( ( ) ) ) ) * * * * + + + + , , , , - - - - . . . . / / / / 0 0 0 0 1 1 1 1 2 2 2 2 3 3 3 3 4 4 4 4 5 5 5 5 6 6 6 6 7 7 7 7 8 8 8 8 9 9 9 9 : : : : ; ; ; ; < < < < = = = = > > > > ? ? ? ? ? @ @ @ @ A A A A B B B B C C C C D D D D E E E E F F F F G G G G H H H H I I I I J J J J K K K K L L L L M M M M N N N N O O O O P P P P Q Q Q Q R R R R S S S S T T T T U U U U V V V V W W W W X X X X Y Y Y Y Z Z Z Z [ [ [ [ \ \ \ \ ] ] ] ] ^ ^ ^ ^ _ _ _ _ a a a a b b b b c c c c d d d d e e e e f f f f g g g g h h h h i i i i j j j j k k k k l l l l m m m m n n n n o o o o p p p p q q q q r r r r s s s s t t t t u u u u v v v v w w w w x x x x y y y y z z z z { { { { | | | | } } } } ~ ~ ~ ~ � � � � � € € € € � � � � ‚ ‚ ‚ ‚ ƒ ƒ ƒ ƒ „ „ „ „ … … … … † † † † ‡ ‡ ‡ ‡ ˆ ˆ ˆ ˆ ‰ ‰ ‰ ‰ Š Š Š Š ‹ ‹ ‹ ‹ Œ Œ Œ Œ � � � � Ž Ž Ž Ž � � � � � � � � ‘ ‘ ‘ ‘ ’ ’ ’ ’ “ “ “ “ ” ” ” ” • • • • – – – – — — — — ˜ ˜ ˜ ˜ ™ ™ ™ ™ š š š š › › › › œ œ œ œ � � � � ž ž ž ž Ÿ Ÿ Ÿ Ÿ ¡ ¡ ¡ ¡ ¢ ¢ ¢ ¢ £ £ £ £ ¤ ¤ ¤ ¤ ¥ ¥ ¥ ¥ ¦ ¦ ¦ ¦ § § § § ¨ ¨ ¨ ¨ © © © © ª ª ª ª « « « « ¬ ¬ ¬ ¬ ® ® ® ® ¯ ¯ ¯ ¯ ° ° ° ° ± ± ± ± ² ² ² ² ³ ³ ³ ³ ´ ´ ´ ´ µ µ µ µ ¶ ¶ ¶ ¶ · · · · ¸ ¸ ¸ ¸ ¹ ¹ ¹ ¹ º º º º » » » » ¼ ¼ ¼ ¼ ½ ½ ½ ½ ¾ ¾ ¾ ¾ ¿ ¿ ¿ ¿ ¿ À À À À Á Á Á Á Â Â Â Â Ã Ã Ã Ã Ä Ä Ä Ä Å Å Å Å Æ Æ Æ Æ Ç Ç Ç Ç È È È È É É É É Ê Ê Ê Ê Ë Ë Ë Ë Ì Ì Ì Ì Í Í Í Í Î Î Î Î Ï Ï Ï Ï Ð Ð Ð Ð Ñ Ñ Ñ Ñ Ò Ò Ò Ò Ó Ó Ó Ó Ô Ô Ô Ô Õ Õ Õ Õ Ö Ö Ö Ö × × × × Ø Ø Ø Ø Ù Ù Ù Ù Ú Ú Ú Ú Û Û Û Û Ü Ü Ü Ü Ý Ý Ý Ý Þ Þ Þ Þ ß ß ß ß à à à à á á á á â â â â ã ã ã ã ä ä ä ä å å å å æ æ æ æ ç ç ç ç è è è è é é é é ê ê ê ê ë ë ë ë ì ì ì ì í í í í î î î î ï ï ï ï ð ð ð ð ñ ñ ñ ñ ò ò ò ò ó ó ó ó ô ô ô ô õ õ õ õ ö ö ö ö ÷ ÷ ÷ ÷ ø ø ø ø ù ù ù ù ú ú ú ú û û û û ü ü ü ü ý ý ý ý þ þ þ þ � � � � � � � � � � � � � � � � � � � � � � � � � � � �
I added the multi-threading for performance. Here is the code for it
// include this header file
#include <execution>

// All the code

// main function
int main(void) {
        // All the constants

        // put this code in place of the usual for loop
        // or you can use conditional inclusion (#if)

        std::vector<int> pixels(width * height); // vector to iterate over pixel indexes
        for (int i = 0; i < width * height; i++) pixels[i] = i; // assigning the values

        // multi-threaded for loop
        std::for_each(std::execution::par, pixels.begin(), pixels.end(), [&](int pix) {
                float dir_x      = (pix % width + 0.5) - width / 2.;
                float dir_y      = -(pix / width + 0.5) + height / 2.;
                float dir_z      = -height / (2. * tan(fov / 2.));
                framebuffer[pix] = cast_ray(vec3{0, 0, 0}, vec3{dir_x, dir_y, dir_z}.normalized());
        });

        // save the file

        return 0;
}I tested this on Intel Core i7-1065G7 4 cores (8 threads) and got the performance of almost 2x. It was tested for 1024x1024 dimension. The results are,
Without multi-threading
gradf@virus:/media/gradf/Personal/tinyraytracer/build$ time ./tinyraytracer

real    0m0.517s
user    0m0.491s
sys     0m0.009s
With multi-threading
gradf@virus:/media/gradf/Personal/tinyraytracer/build$ time ./tinyraytracer

real    0m0.228s
user    0m0.973s
sys 0m0.018sI created a gif that I think looks cool. It's obtained by simply rotating the envmap, and then stitching the images to get a gif.

Thanks @ssloy for this awesome resource!
Haven't figured out refraction yet, but I got this to work in shadertoy rendering at 60fps with some code and scene changes.
You can optimize this even further by adding in just a couple more lines.
for (size_t i=0; i<vector.size(); i++)
evaluates vector.size() on every loop. This essentially tacks on linear search through the vector every time you increment i. Change to the following:
size_t last = vector.size(); for (size_t i=0; i<last; i++)
or even better, to not add any additional lines:
for (auto it=vector.begin(); it!=vector.end(); it++)
I understand that your goal was not to be perfectly optimal, but readable. However, this second suggestion is almost just as readable as the original, while making your program significantly faster, especially as the number of spheres/objects in the scene grows.

How can i add color to the light sources?
How would I calculate the color reflected from a diffuse surface when the light source is not white? Also, does distance factor in differently in this case?
Hello professor. I was just finishing my version of tinyraytracer written in Rust. In order to render the duck, I just implemented a triangle primitive, defining its intersection function (intersection with the plane containing the triangle and then checking through barycentric coordinates if the point lies inside the triangle), and its normal (cross product between two of its sides). If I render the duck using the ivory material, I get the following:

However, if I remove the shadow rendering code, I get a proper image:

Do you have any idea why this might be?

I tried running the source file for this ray tracer and I am getting this error. Should I include extra flags? I did not make any changes to the code after forking this repository.
A declarative, efficient, and flexible JavaScript library for building user interfaces.
🖖 Vue.js is a progressive, incrementally-adoptable JavaScript framework for building UI on the web.
TypeScript is a superset of JavaScript that compiles to clean JavaScript output.
An Open Source Machine Learning Framework for Everyone
The Web framework for perfectionists with deadlines.
A PHP framework for web artisans
Bring data to life with SVG, Canvas and HTML. 📊📈🎉
JavaScript (JS) is a lightweight interpreted programming language with first-class functions.
Some thing interesting about web. New door for the world.
A server is a program made to process requests and deliver data to clients.
Machine learning is a way of modeling and interpreting data that allows a piece of software to respond intelligently.
Some thing interesting about visualization, use data art
Some thing interesting about game, make everyone happy.
We are working to build community through open source technology. NB: members must have two-factor auth.
Open source projects and samples from Microsoft.
Google ❤️ Open Source for everyone.
Alibaba Open Source for everyone
Data-Driven Documents codes.
China tencent open source team.