We combine the power of MariaDB as a data source and DronaHQ as a low code app development solution to create two most popular interfaces – a data collection form to submit data to MariaDB and an admin panel to pull information from the DB and interact with it.
The need to implement custom internal tools that seamlessly integrate with data sources has become paramount. Providing personalized solutions that cater to your team’s specific operations is crucial for achieving goals efficiently. But building an app involves various components, and designing UI elements often consumes a significant portion of a developer’s time when starting from scratch. In this blog, we will guide you through the process of building a frontend that seamlessly connects to MariaDB as a data source.
MariaDB Server stands as one of the most widely-used open-source relational databases. Developed by the original creators of MySQL, MariaDB stands as a testament to innovation and community collaboration. With its widespread adoption across cloud offerings and default inclusion in most Linux distributions, MariaDB Server is built upon the core values of performance, stability, and openness. An active MariaDB community guarantees regular updates, bug fixes, and the introduction of new features.
DronaHQ’s low code platform with the goal to provide developers with a flexible and adaptable environment that complements their skills and maximizes their productivity.
The low code platform revolutionizes the development process, supporting development of a wide range of web and mobile apps and internal tools – data collection forms, dashboards, admin panels, database GUIs, customer portals and more. By leveraging ready to use UI components, integration blocks, and logic elements (among other out of the box functionality) DronaHQ helps developers to save time, streamline workflows, and tailor applications to their specific requirements. Using Javascript, app makers can add custom logic, new UI components, transform data and more.
To illustrate the capabilities of integrating DronaHQ with MariaDB, we will focus on building a web application for a college application process. We are going to create two primary interfaces: a data collection screen with form elements for capturing and submitting data to the database, and an admin panel with a table view to facilitate internal administrators in reviewing the collected data. This use case will serve as a practical example, showcasing the seamless integration between DronaHQ and MariaDB.
Before diving into the technical process, ensure the following prerequisites are met:
-
A running instance of MariaDB or access to a MariaDB server.
Follow these steps to set up MariaDB:
1.Install MariaDB on your local machine or set up a remote MariaDB server.
2.Create a new database within MariaDB specifically for your application.
3.Configure the necessary tables and fields in the database to support the college application process.
Now that we have the foundation in place, we can proceed to integrate DronaHQ with MariaDB. In the upcoming sections, we will guide you through each step, ensuring a seamless connection between your front-end application and the MariaDB data source.
Things are pretty straightforward here. Login to your DronaHQ account (or signup here, its FREE)
Once you are logged in, head over to ‘Connectors’
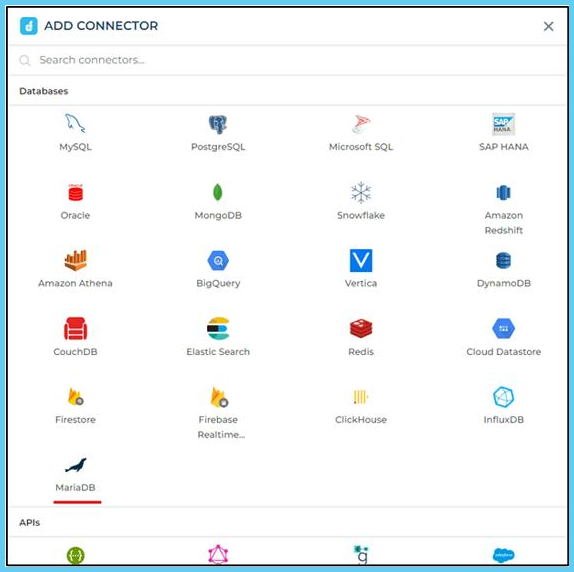
1.Enter the Connector Name.
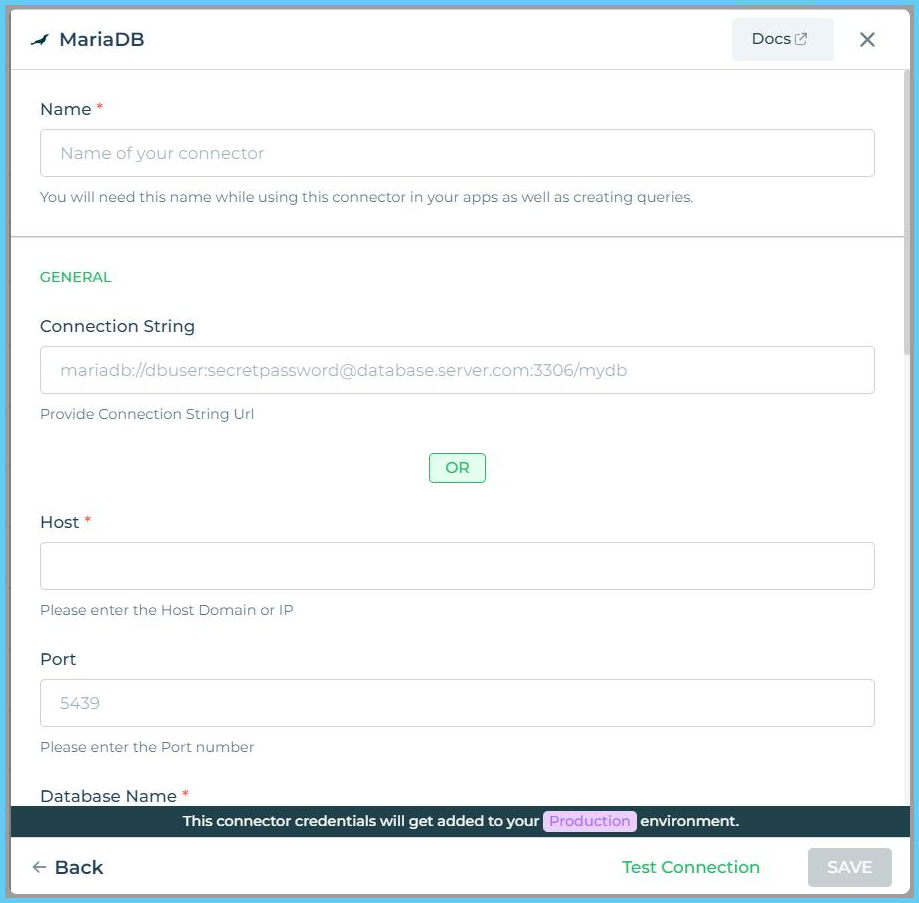
2.The most important part of the process is to provide the connection string. It will be dependent upon the different types of relational databases that you might want to use. You would now need to add the Connection string or the connection parameters –
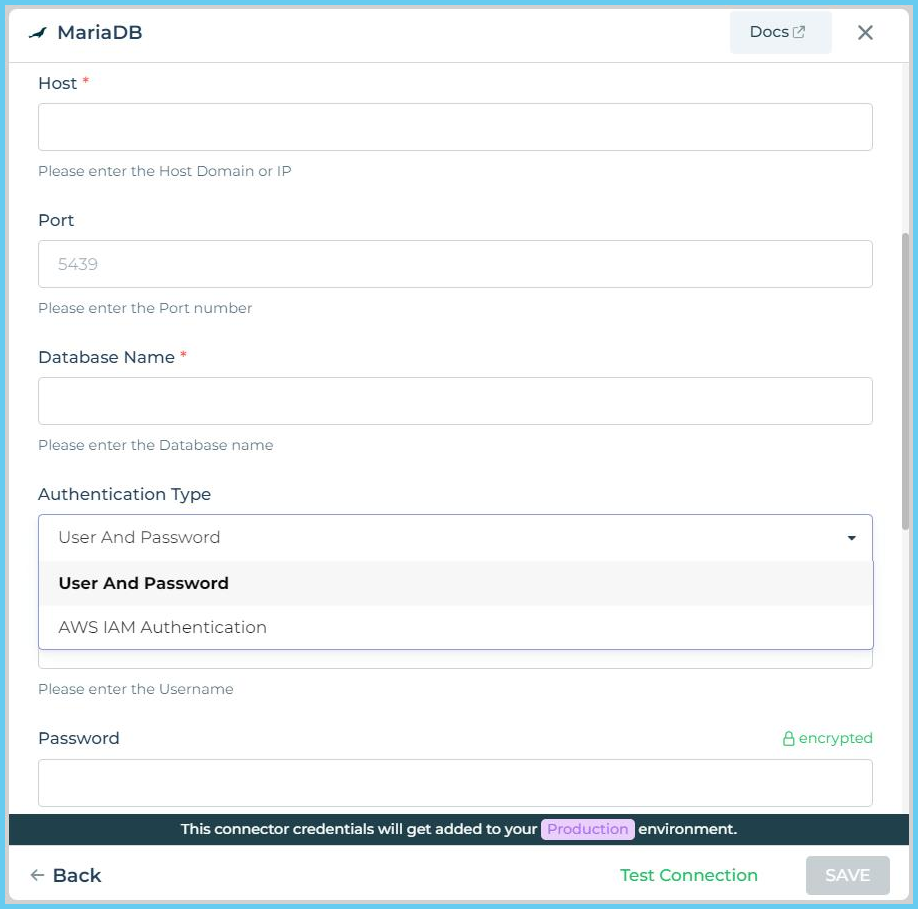
1.Host and database name
2.Port, Username, and Password, also
3.Authentication Type
Once these configurations are added, click Test Connection.
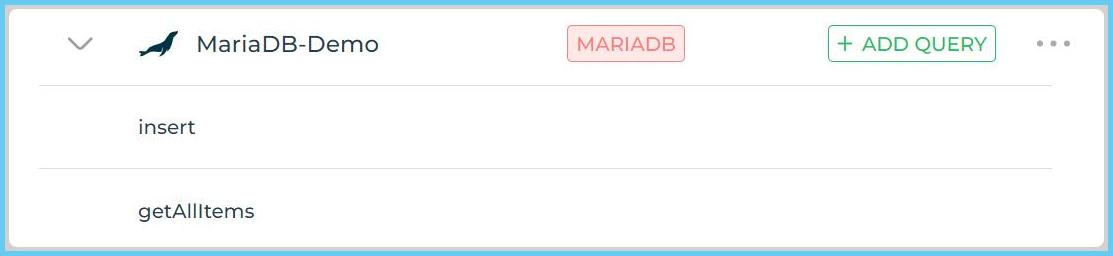
Now that you have configured the connector you will find it under the Custom Database connectors list. Further to fetch data or undertake any other action, click the Add query option available after your connection is ready.

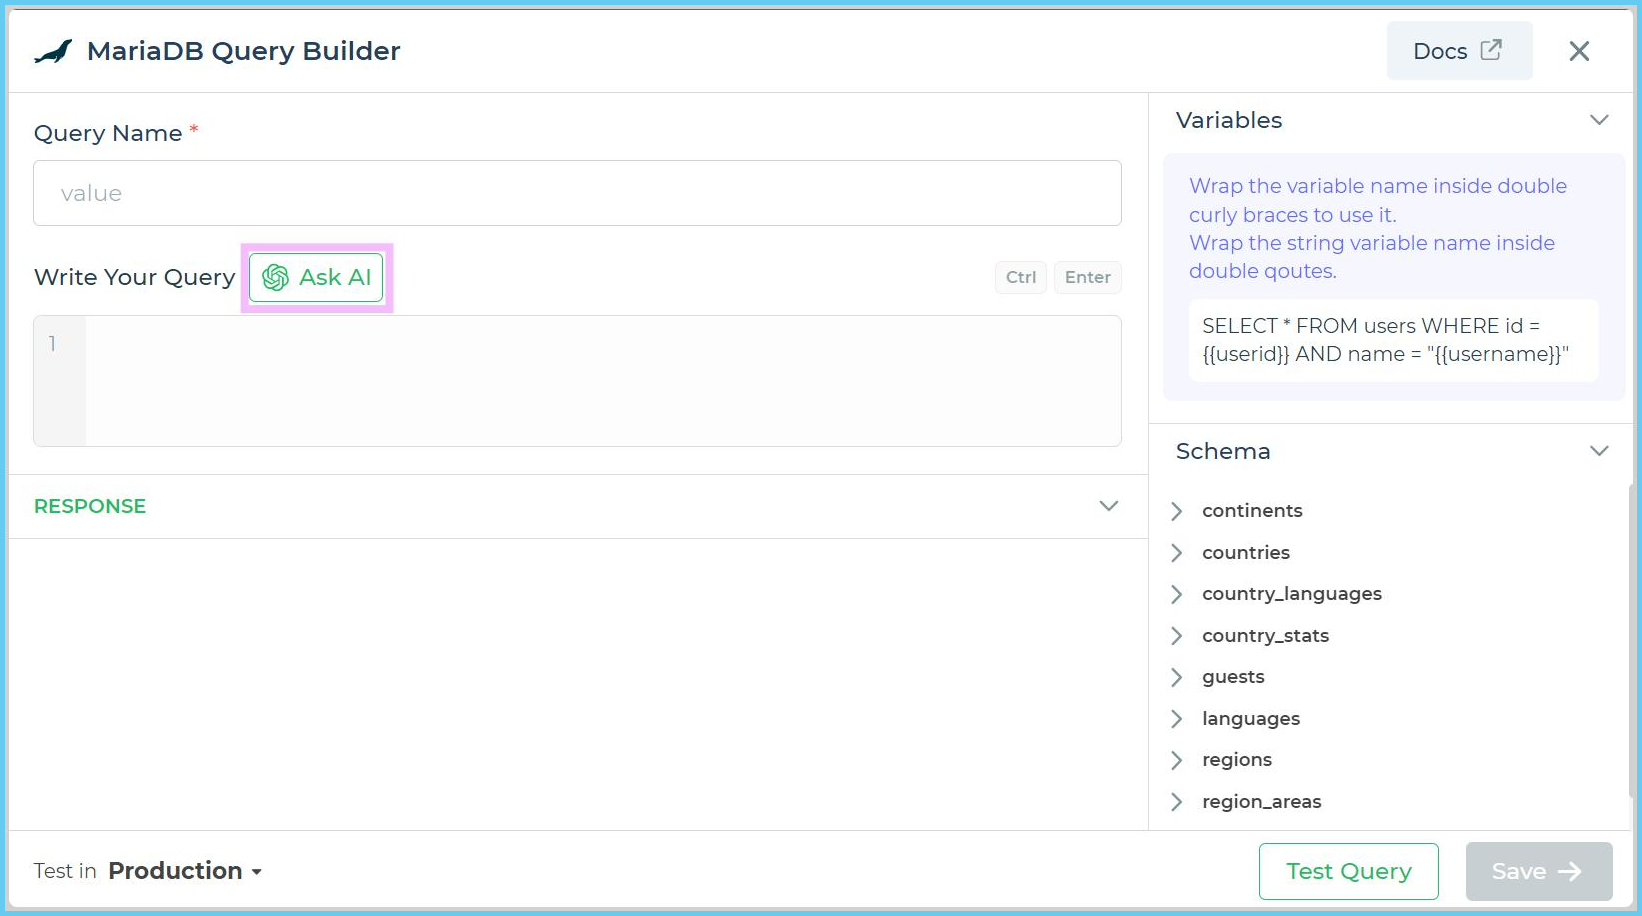
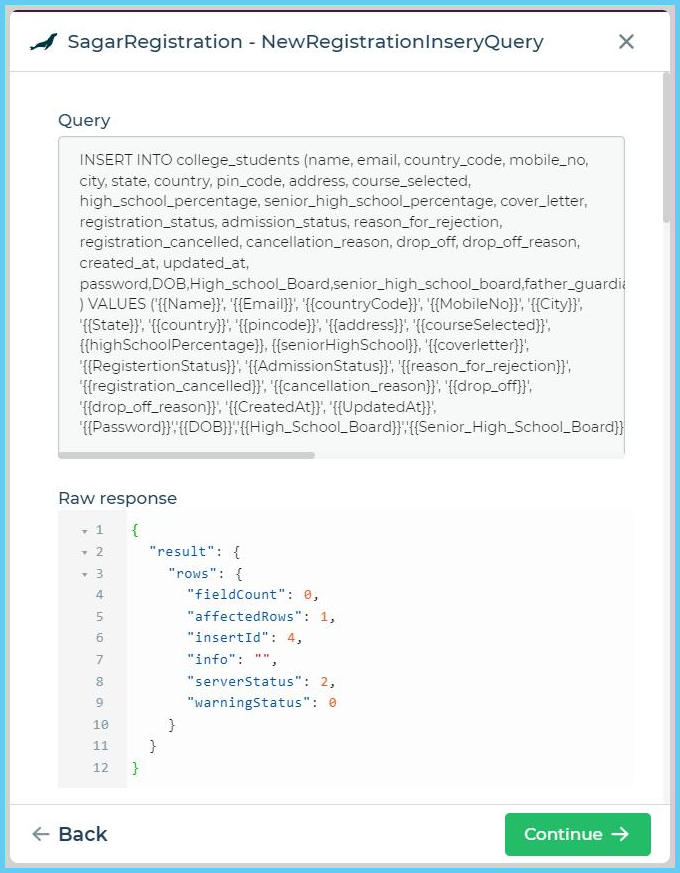
Here you can add your queries – simple as well as complex ones. On the right-hand side of the screen, you can see the list of tables from the database. You can expand the tables to view the fields from the table. You’ll need to configure two queries for our use case –
-
Insert data
-
Get data (here’s how we do it)
[Bonus] Using OpenAI enabled Ask AI you can type prompts to generate queries (read more)
You can now view the queries that you saved for use in your apps later under your specific connector under Custom Database connectors.
We’re going to demonstrate below how we implement data collection for MariaDB and a table to pull info from the database.
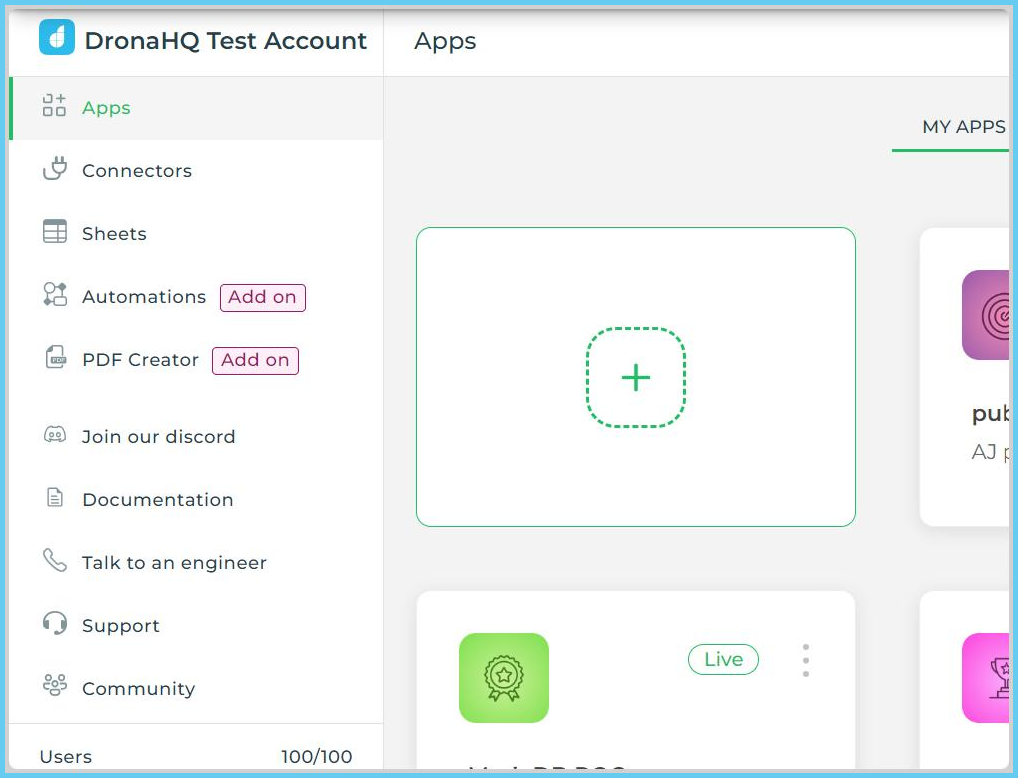
On the left menu, click on “Apps,” and then click on the “ + “ sign to start building your app.
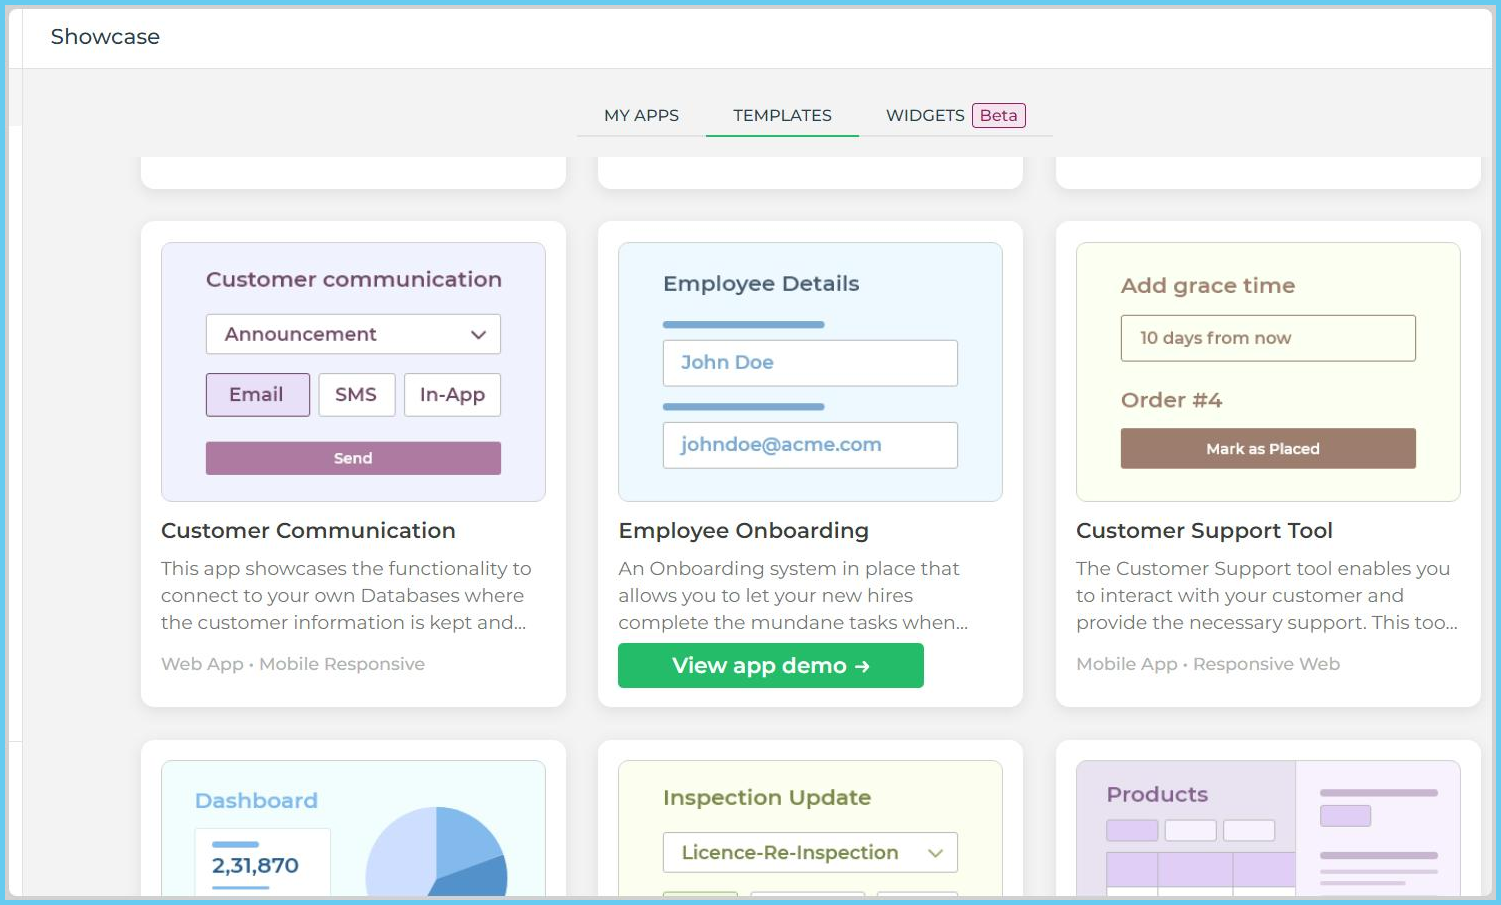
[Bonus] App Templates At this step, you are going to find a app template (like Onboarding, Customer Support Tool, Sales Dashboard, Customer Feedback, Refund Tool, and so on) that can be utilized to speed up app development.
To speed things up lets select the Onboarding template (it’s got the screens defined that can be repurposed for our student application process)
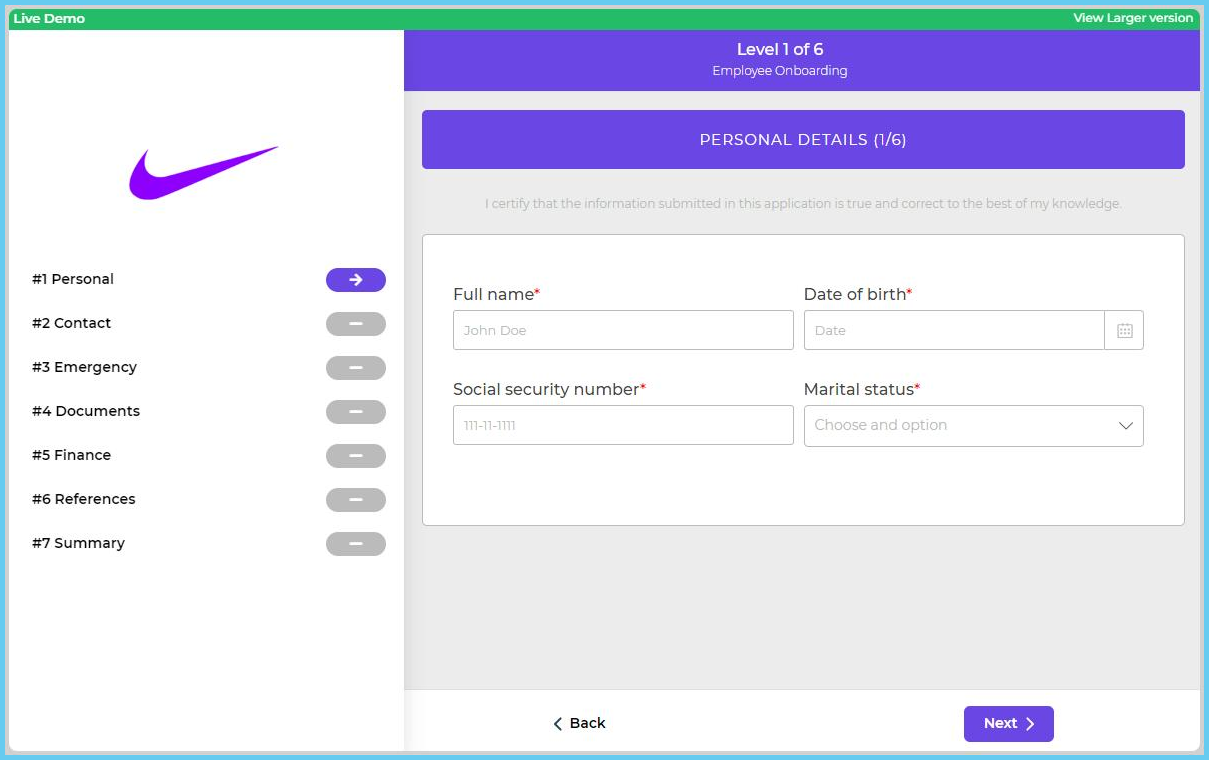
Here is what the template looks like. You can customize the fields and the menu items to match your use case. OR if your use case demands for a single screen data capture form, you can build a form using various ready form fields.
Building a basic form in DronaHQ >
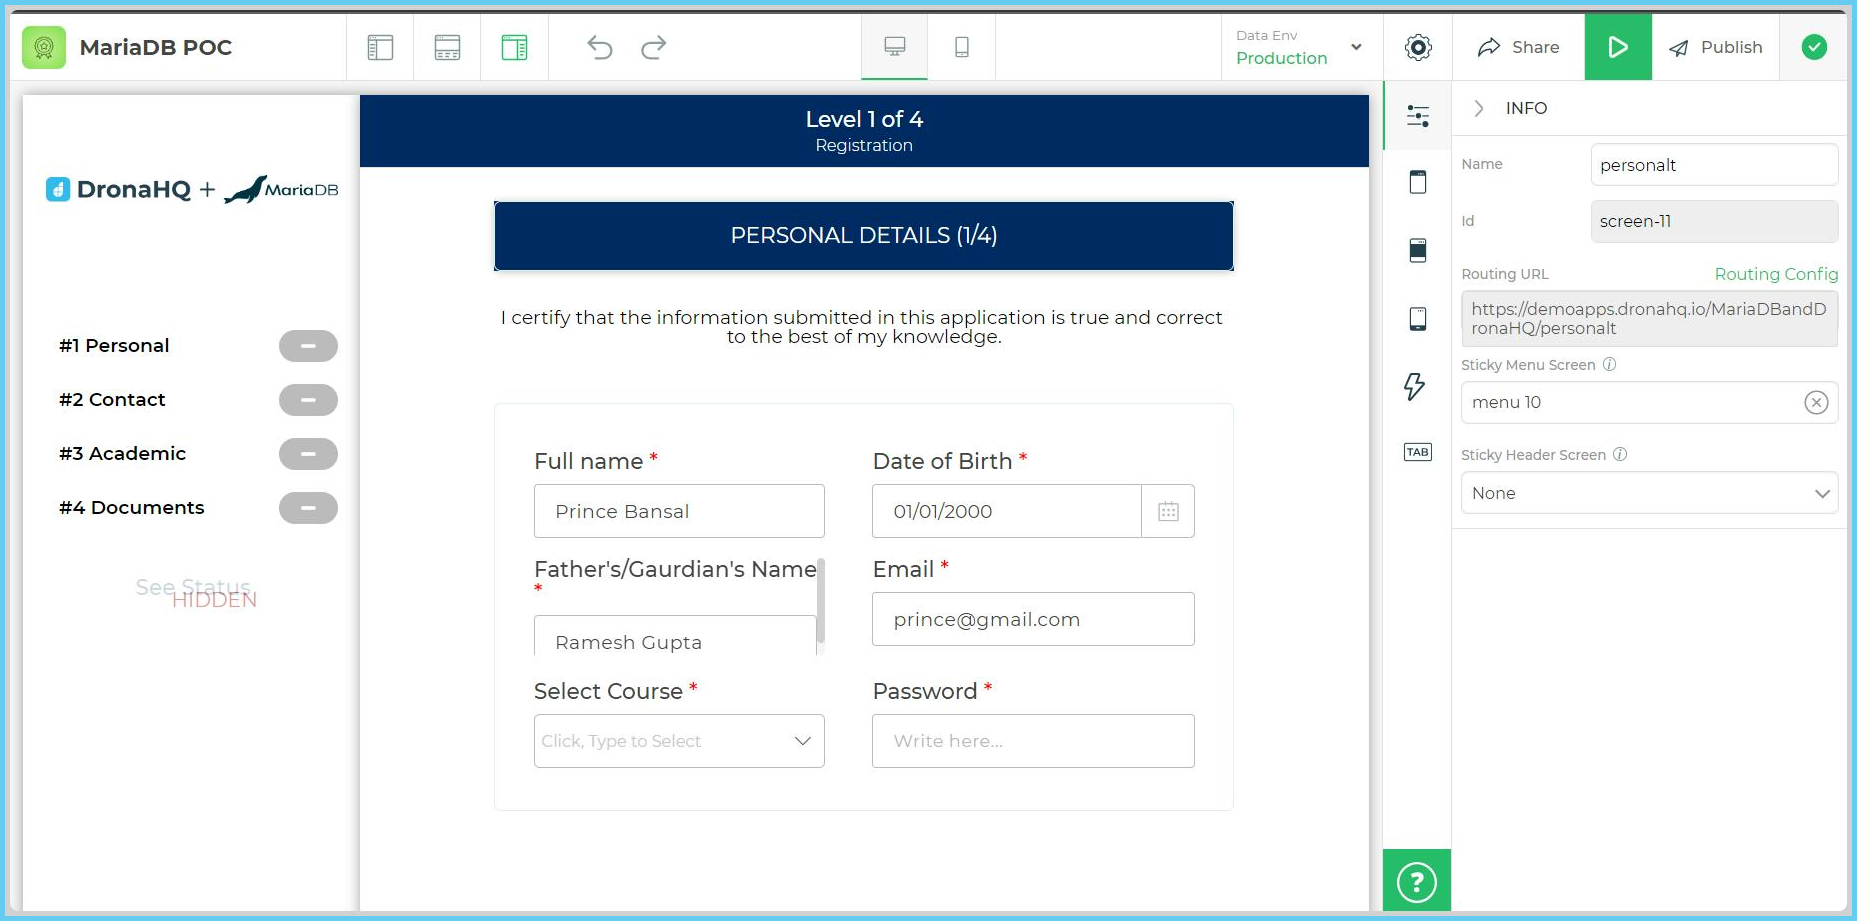
Here is what it looks like after we customized it. For this case, we changed the labels of the UI components to match the candidate application process.
UI components like Text, Date, File Upload, URL can be selected to collect a range of user details.
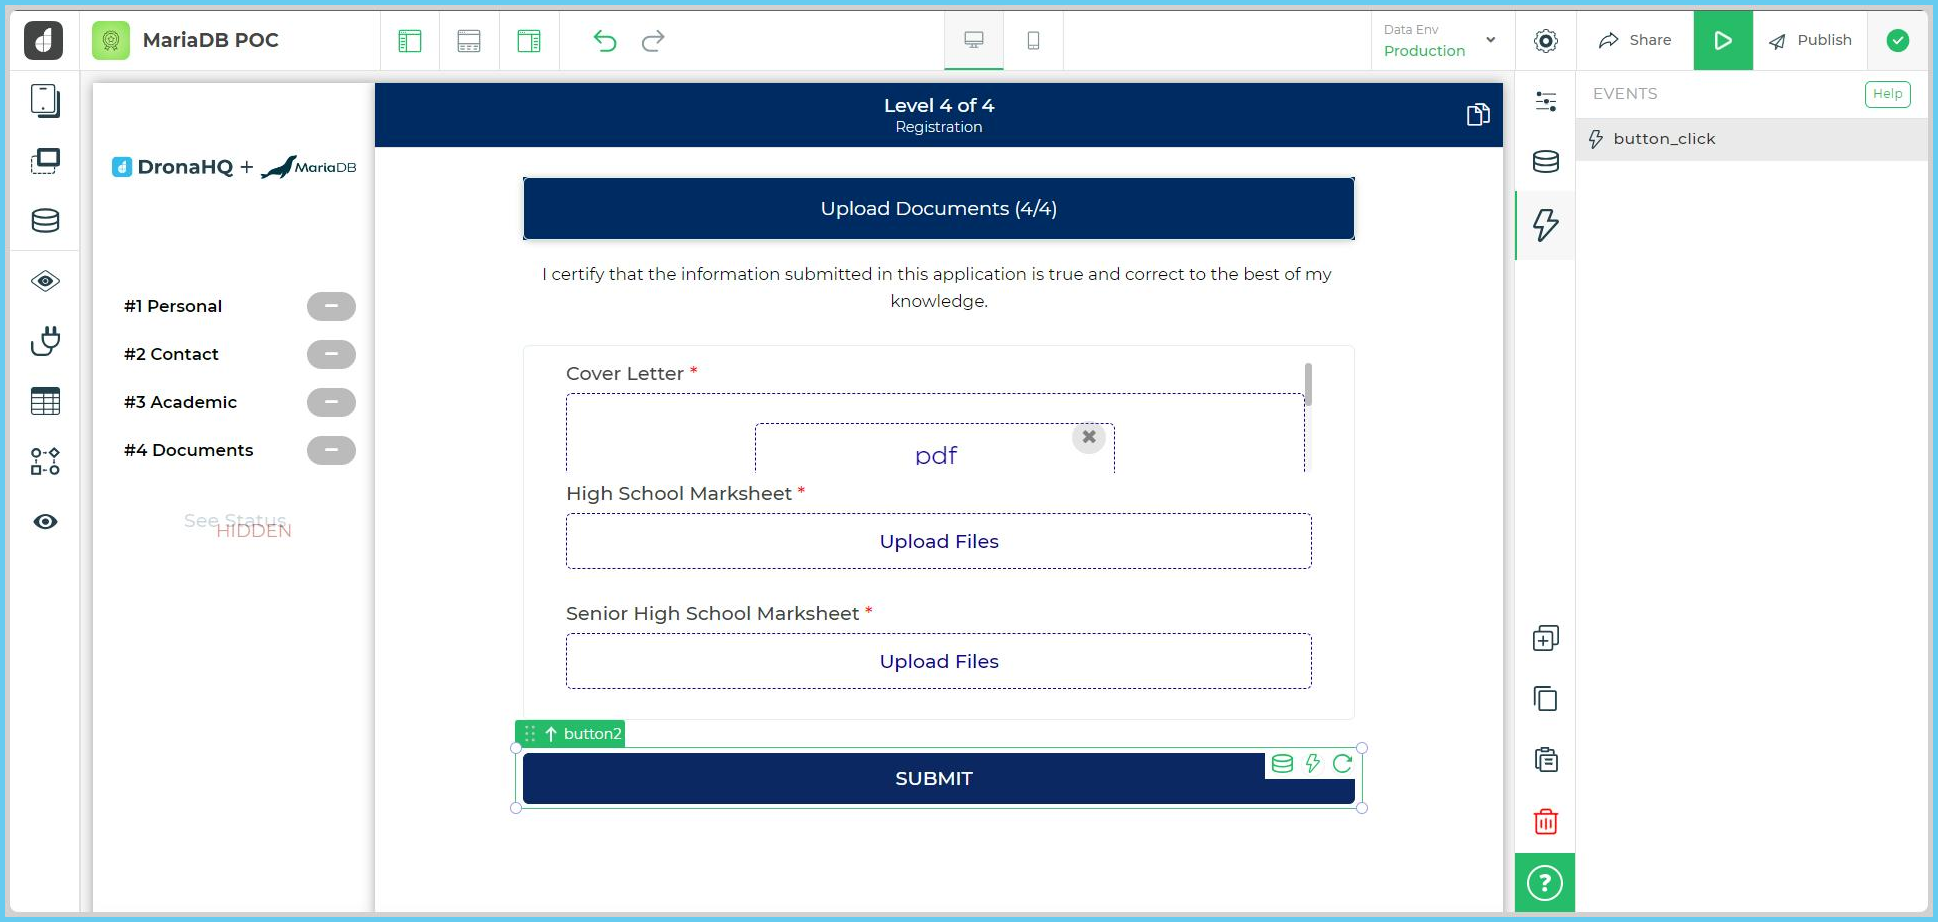
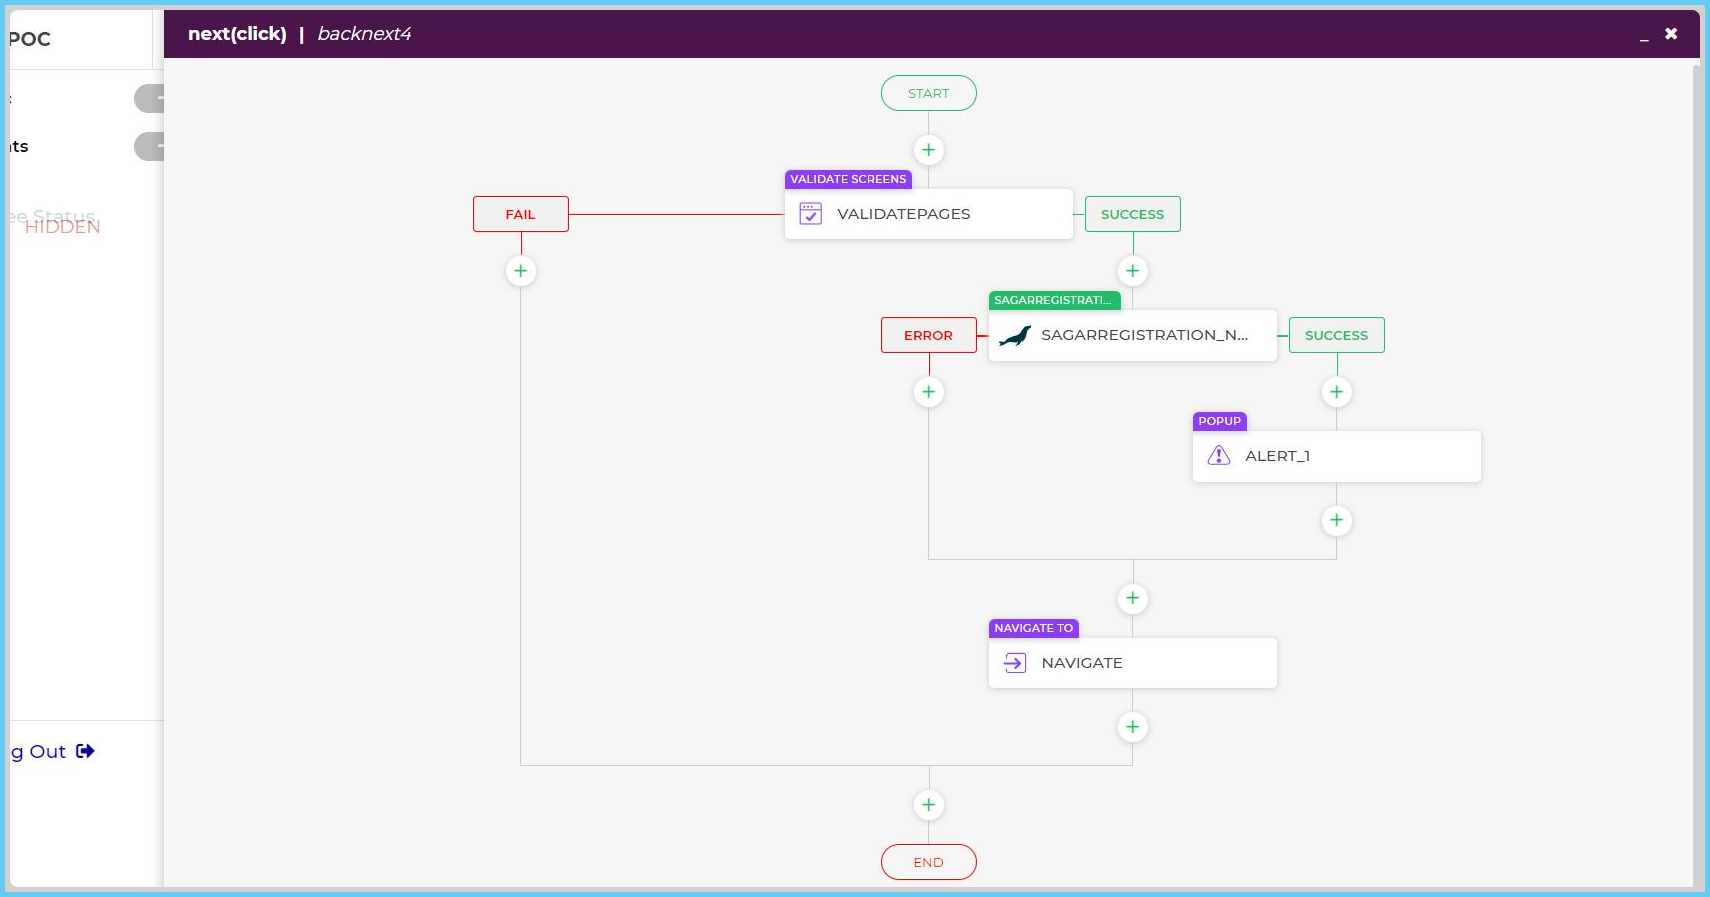
Add a Submit Button to the app. Any UI control in DronaHQ has the ability to trigger a series of task using Actionflows – visual frontend logic builder (more about Actionflows)
Actionflows allow you to set up tasks such as Screen Validation (to ensure the user submits clean and correct data), database updates, navigation and a lot more.

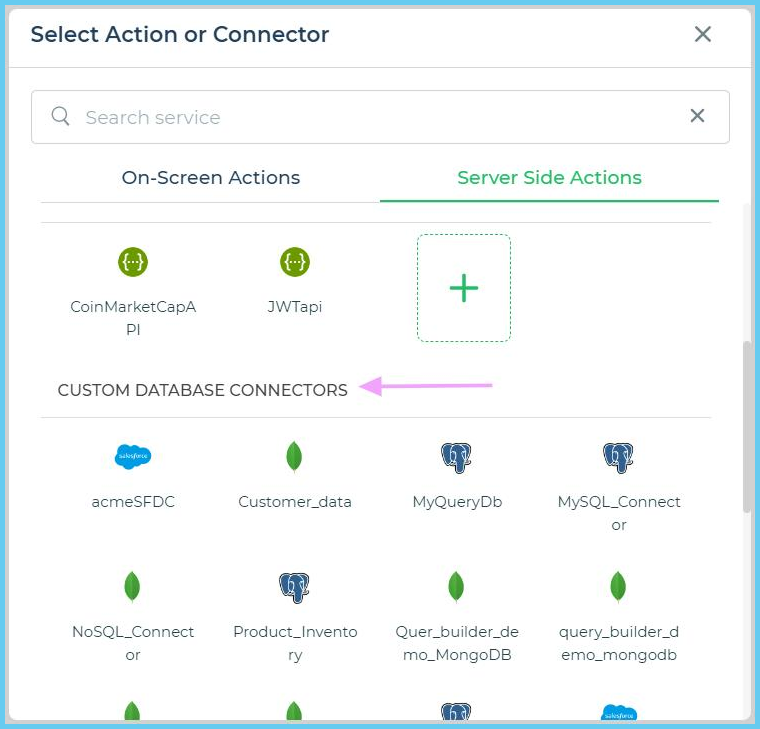
We will add a ‘On-screen’ action Screen validation and a ‘Server-side’ action MariaDB connector.
You will find your connector under ‘Custom Database Connectors’
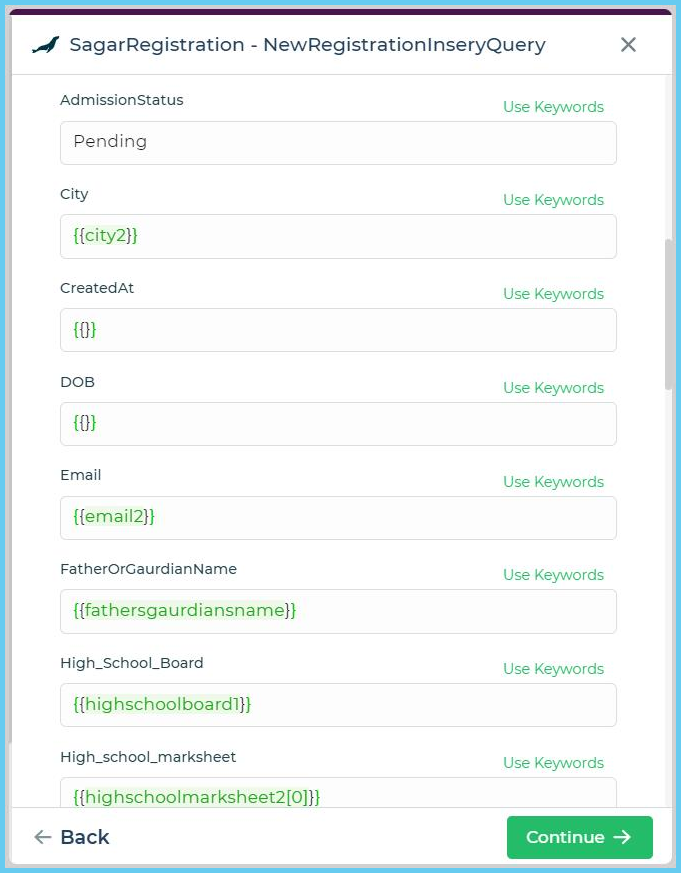
Next up the fields need to be populated with the unique label names of the various UI components you used to capture form data. This maps it to MariaDB.
Continue and Save
By default the workflow branches after this task for success or error. You can configure appropriate Toasts to tell the user the status of their form submission.
Finally you can add a Navigate task to take the user to a thank you screen or back to home screen.
Up next > Creating Admin View.
Add a new screen to your app and drop the ‘Table Grid’

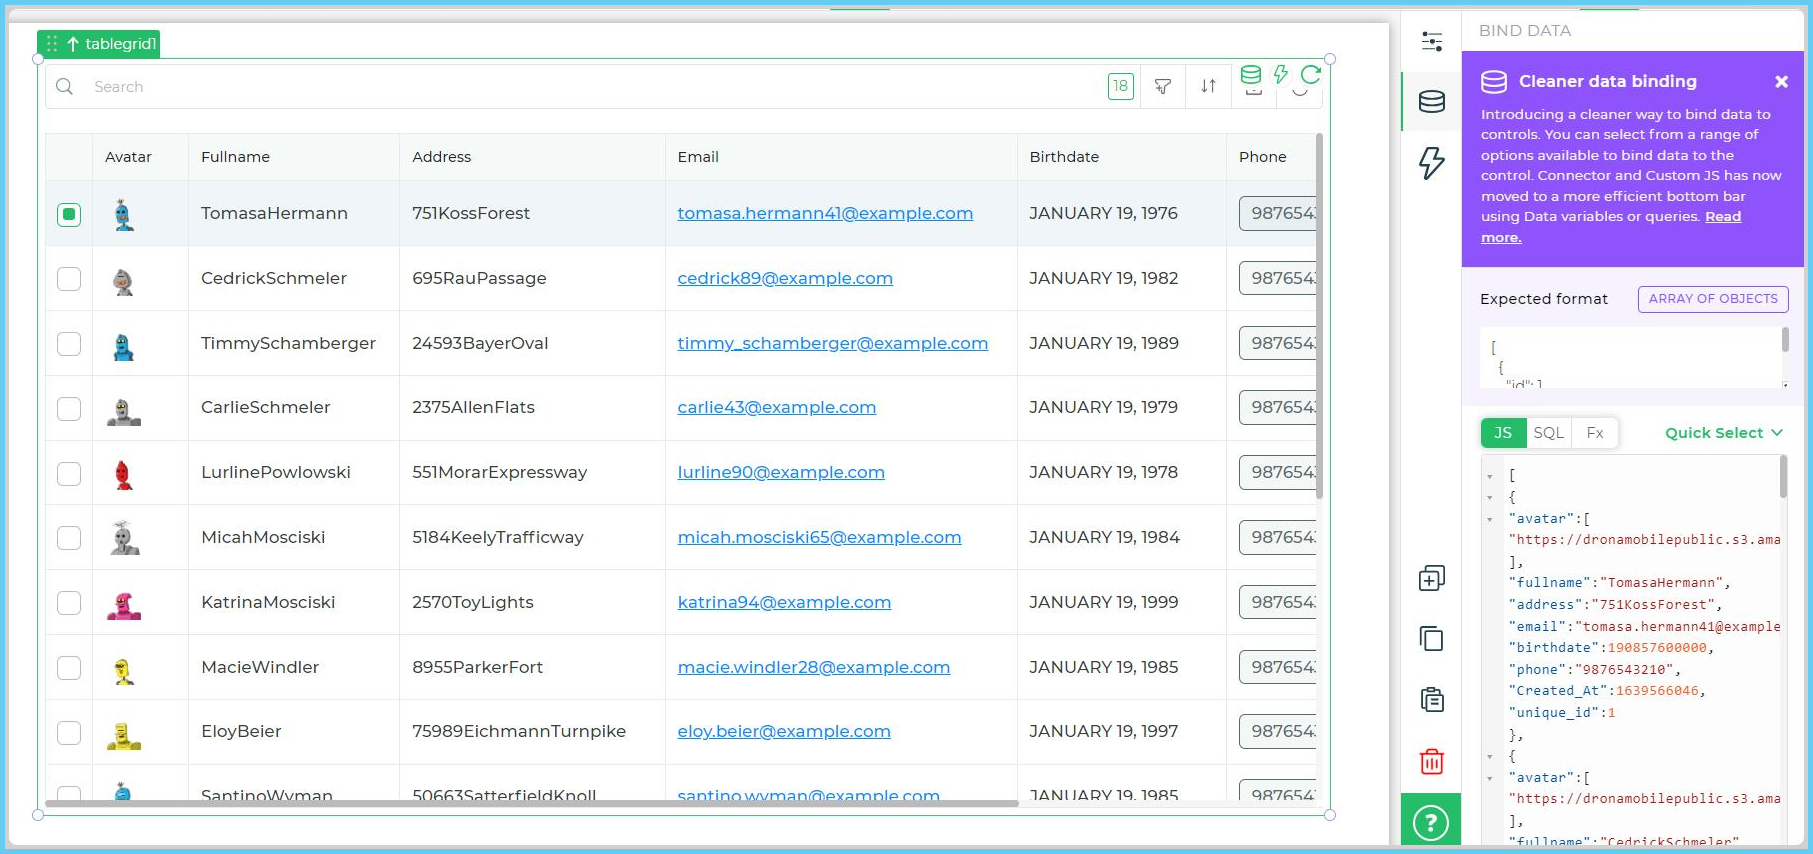
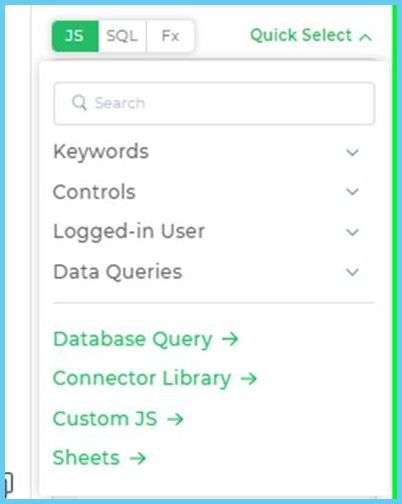
Select table grid control and go to data section of this control and select Quick Select
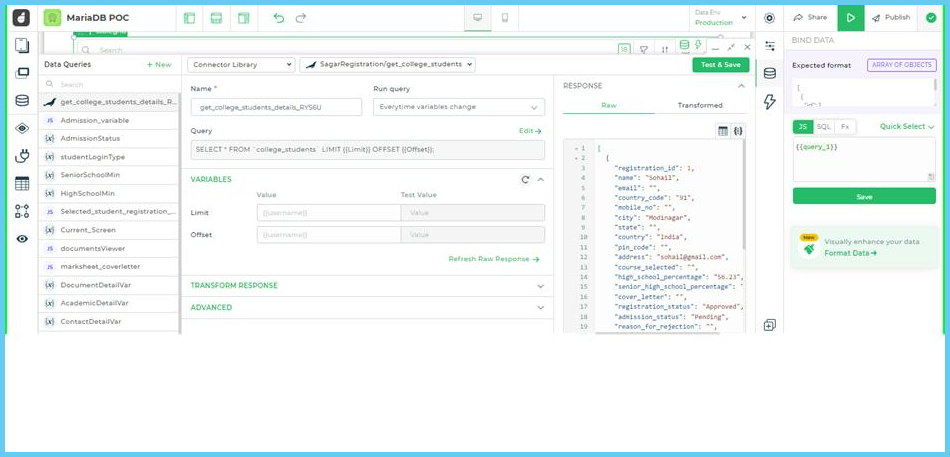
A tray of data queries will open up. Select the required library and query, Give it a name then test and save. Data will populate in the table grid.
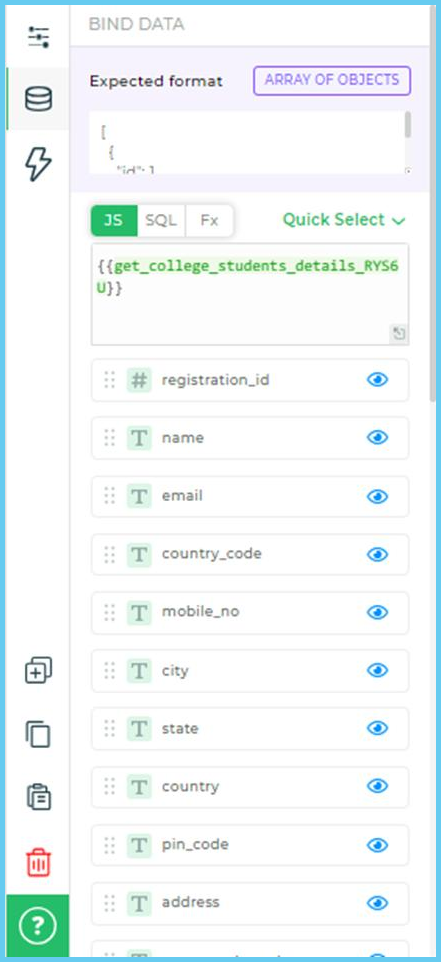
Now head back to the Properties of the Table Grid where you can rename the columns and hide the columns as per requirement. The variable attached with the query variable will look something like –
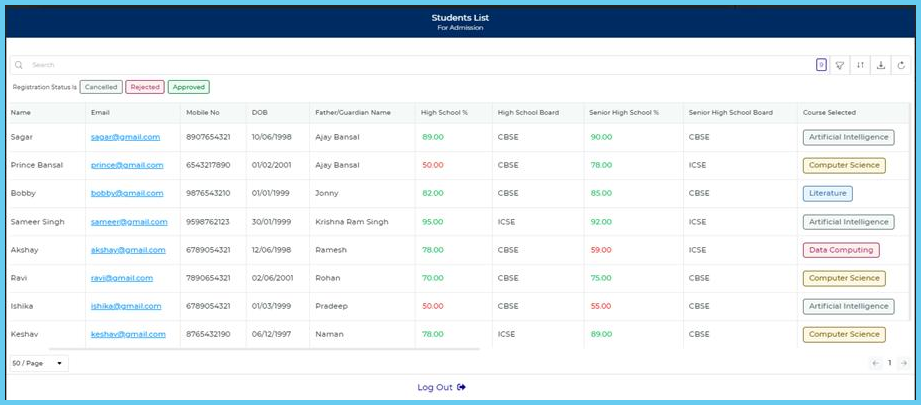
On the screen, data will look like below.
Bonus: Format Data for UI beautification and aesthetic. Learn more
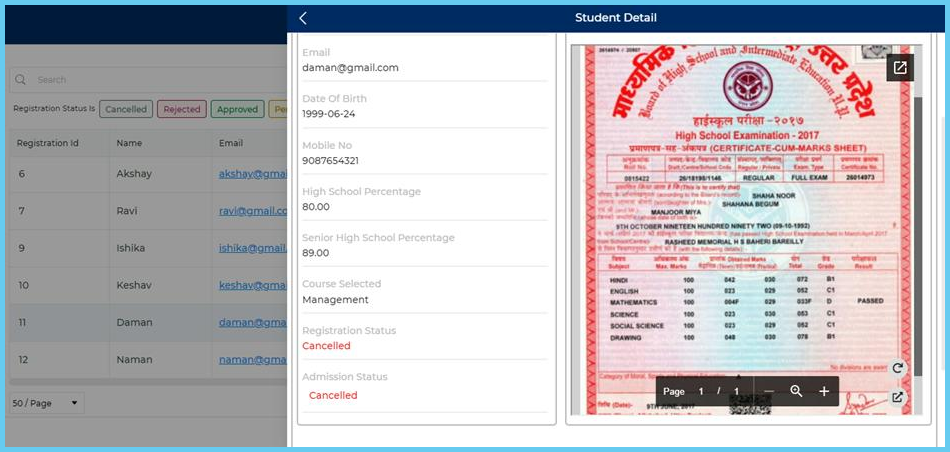
I went ahead and added a new screen with the Detail View UI component.
This UI links perfectly with the Table Grid.
Upon Table Grid row click event I set up a navigate task to open up Detail View screen that shows the information of the applicant and give the admin the option to approve or reject the application. If you’d like to learn how I implemented the same, feel free to drop a message