
RASA is an open-source machine learning framework for automated text and voice-based conversations. Understand messages, hold conversations, and connect to messaging channels and APIs. It's incredibly powerful and is used by developers worldwide to create chatbots and contextual assistants. Before we get into Installation, let's look into some simple concepts that we should know while creating a chatbot.
- Sample Bot
- API Connectivity
- Fullscreen mode
- Show Image(Display Immage)
- Change Chatbot Avatar
💻 Supported Os:
- Ubuntu (18.04/20.04)
- Windows
- Mac Os
- CentOS (7/8)
- Red Hat Enterprise Linux
⚙️Hardware Requirements:
- Dual Core CPU / Quad Core CPU
- 8 GB RAM/ 16 GB RAM
- 20 GB / 50 GB Free Disk Space
💡 Before you begin, make sure you have the following installed:
- Python - 3.7.5
- Visual Studio
- Git
Check Installation Requirement for RASA
- Open Visual Studio and go to Terminal and run the following command
- First check your Python Version installed in your System
python --version- You need to create Virtual Environment which is used to manage Python packages for certain project.Using Virtual Environment Avoids installing Python packages globally.
python -m venv env- You need to Activate Environment once which is created use below command to activate it
env/scripts/activate- Once it is Activated you can Install RASA
pip install rasa==2.8.1- After installing RASA you are able to see the Message 'Successful installed'.
- Create a RASA Project
rasa init- Choose your directory where do you want to create project

- You can able to see project structure of RASA.
.png)
- nlu.yml: This file contains the possible messages from the user and the corresponding intent. This file is used for creating the intent classification model. Whenever the user inputs a message, the classification model automatically classifies the intent of the message.
- Stories.yml: It contains different possible sample interactions between the user and the chatbot. With this sample, the bot will get an idea about what would be the possible reply for user input.
- Domain.yml: This file contains different bot responses list all the intents and entities used while creating the nlu.yml file.
- Actions.py: This is the python file to run the custom actions. This file can be used for an API call or database querying. When the action is "action_hello" the above code will execute and dispatches the text "Hello" as a reply.
- Training: Bot as created a Basic project, now we can train our model based on the data that we have provided. RASA will start to train both nlu and core model and then stores the trained model in the models folder by the following command
rasa train- RASA will create inital project where you can able to talk to the Bot, When it will ask you to train the Intial Bot: Choose "Yes".

-
Model is created Successfully

-
Choose 'Yes' to talk to the Chatbot.

- To know more about the usage of the files, i surely recommend you to refer to RASA Docs
In RASA you can connect Chatbot to different Channels using Credentials.yml.

To integrate chatbot into the web widget, we have to enable the channel integration in "Credentials.yml". Here we are using SocketIO channel which uses WebSockets in real-time. To use the SocketIO channel, use below Credentials to your credentials.yml
socketio:
 user_message_evt: user_uttered
 bot_message_evt: bot_uttered
 session_persistence: true
Need to create one more file in our project that's an HTML file in this file we will be integrating our bot with a web widget and this web widget can be attached to the web project that you want. I am renaming the HTML file as an Index.html, and using a template from RASA documentation in this template javascript code is inbuilt so the onclick operations and triggering we don't need to write the logic everything is done by rasa.
There are Two widget Ui's you can use any of these Ui's Paste this Code in Index.html
<div id="rasa-chat-widget" data-websocket-url="https://localhost:5005/"></div>
<script src="https://unpkg.com/@rasahq/rasa-chat" type="application/javascript"></script> <html>
<head>
<meta name="viewport" content="width=device-width,height=device-height,initial-scale=1.0"/>
<style>
.rw-conversation-container .rw-header{background-color:hsl(250, 69%, 61%);}
.rw-conversation-container .rw-messages-container .rw-message .rw-client{background-color: hsl(250, 69%, 61%);}
.rw-launcher{background-color: hsl(250, 69%, 61%);}
.rw-conversation-container .rw-reply{background-color: hsl(250, 69%, 61%); border: 1px solid hsl(250, 69%, 61%);}
</style>
</head>
<body>
<script>!(function () {
let e = document.createElement("script"),
t = document.head || document.getElementsByTagName("head")[0];
(e.src =
"https://cdn.jsdelivr.net/npm/rasa-webchat/lib/index.js"),
(e.async = !0),
(e.onload = () => {
window.WebChat.default(
{
customData: { language: "en" },
socketUrl: "http://localhost:5005/",
title: 'Lifeeazy',
subtitle: 'Say hi and get started!',
initPayload: '/greet',
profileAvatar: "https://img.icons8.com/fluency/344/chatbot.png",
openLauncherImage: "./assets/svg/comment.svg",
closeImage: "./assets/svg/down.svg",
showMessageDate: true,
inputTextFieldHint: "Type 'Hi' to start the conversation",
embedded: true,
},
null
);
}),
t.insertBefore(e, t.firstChild);
})();
localStorage.clear();
</script>
</body>
</html>The first two configuration value defines the event names used by RASA Open Source when sending or receiving messages over [socket.io].
Restart your RASA server to make the new channel endpoint available to receive messages. You can then send messages to http://<host>:<port>/,
replacing the host (i.e. localhost) and port (i.e. 5005 - its a default port for rasa)

Now you can run these command and Copy file path of index.html and paste it in web browser to see the chat widget
rasa run -m models --enable-api --cors * 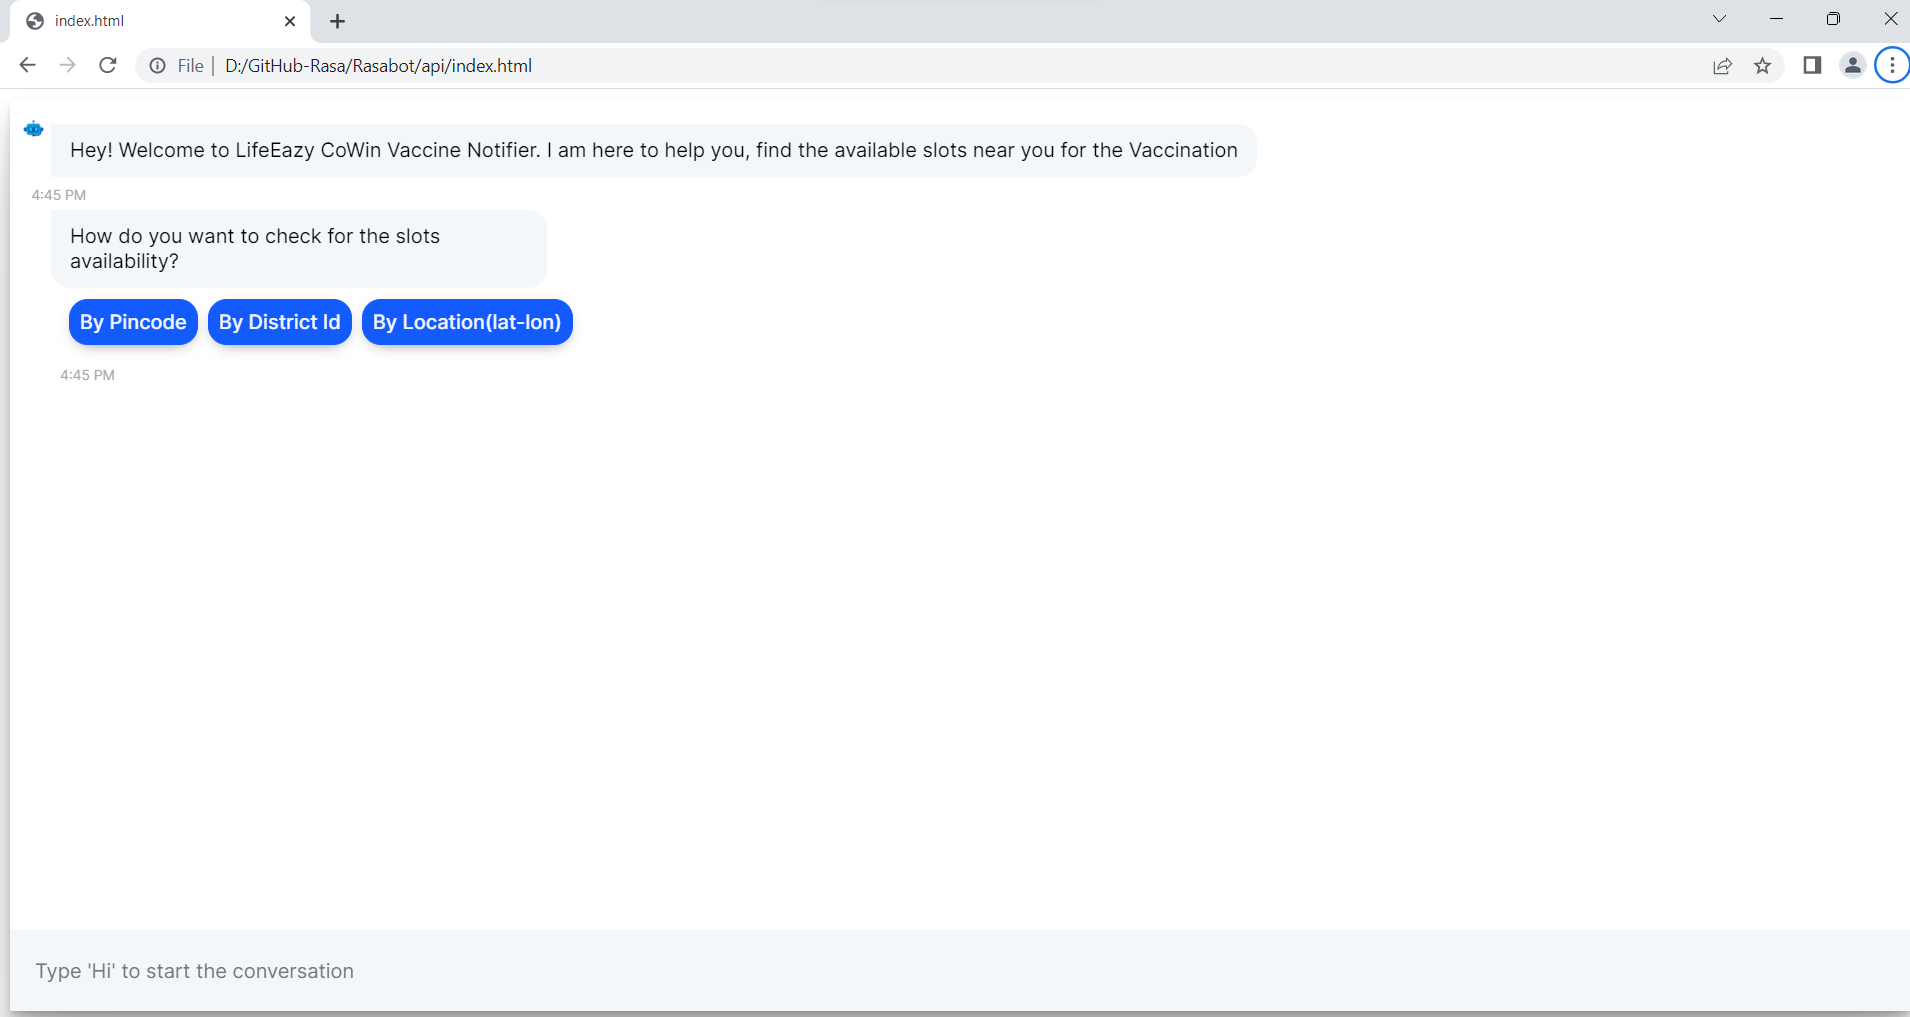
To integrate any logical operations in rasa, we need to use Actions.py file

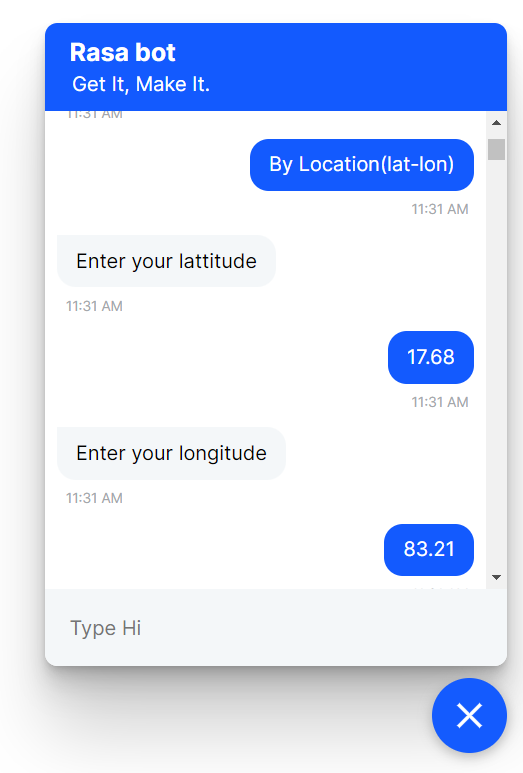
- Create a new file main.py and paste below code, i was making a Get call here using Lattitude and Longitude values passed by the user in Bot.
import requests

def Dose_Availability_Lon_Lat(Lattitude,Longitude):
    api="https://cdn-api.co-vin.in/api/v2/appointment/centers/public/findByLatLong?lat={}&long={}".format(Lattitude,Longitude)
    return main_task(api)

def main_task(api):
    response=requests.get(api)
    data=response.json()['centers']
    output="*"*30
    # print(data)
    for area in data:
        output+="  Hospital Name:" + area['name'] + "*"*30 +"\n"
        output+='''\
pincode: {}
state_name: {}
district_name : {}
block_name : {}
'''.format(area['pincode'],area['state_name'],area['district_name',
area['block_name'])
            output+="*"*30
    return output
User input Values are stored using Slots.
with Domain.yml you can able to see Slots as Longitude and Lattitude
slots:
  lattitude:
    type: rasa.shared.core.slots.TextSlot
    initial_value: null
    auto_fill: true
    influence_conversation: true
  longitude:
    type: rasa.shared.core.slots.TextSlot
    initial_value: null
    auto_fill: true
    influence_conversation: true
and the connection between slots and the actions.py was done in stories.yml and rules.yml
  - rule: Activate location form
  steps:
  - intent: location
  - action: slot_location_form
  - active_loop: slot_location_form

- rule: Submit location form
  condition:
  # Condition that form is active.
  - active_loop: slot_location_form
  steps:
  # Form is deactivated
  - action: slot_location_form
  - active_loop: null
  - slot_was_set:
    - requested_slot: null
  # The actions we want to run when the form is submitted.
  - action: action_location_submit
after connecting all the things you need to train the Bot again
rasa trainto run actions.py you need to run actions command in seperate terminal
rasa run actions |
|
 |
So now you have connected an Open API in RASA Chatbot Web UI. For more details releated to RASA you can always refer to the latest documents and releases on Rasa.com or Rasa Docs


