
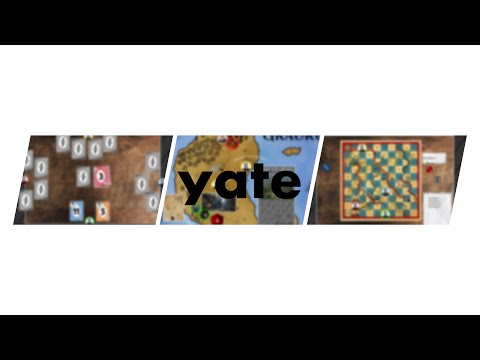
„Yet Another Tabletop Experience" is a simple Node.js/Socket.io-based engine to play games with friends in your browser. This project was initiated due to restrictions regarding personal contacts in early 2020 and the consequential limited options to play games with friends. Originally, yate was intended as an engine solely for playing Pen&Paper games. However, yate has since grown to support many more game elements (like cards or lotteries) needed up to the point where most games can be played out-of-the-box. Its advantage compared to other board game simulations is the compatibility since only a modern browser is required to play. Simply use a search engine to find an image of your favourite board game and/or other materials needed and start playing (see for example the yate vanilla card deck or game of dice board). Also have a look at the YouTube channel for a trailer and demos for the setup and game management.
The host of the game, i.e. the person running the server (this does not need to be the game master), has to install Node.js (the server software) and a few small components. See the demo-playlist for a setup tutorial. Here is a detailed description of what the host has to do to set up yate:
-
Install
Node.jswithnpmfrom here.(Optional: I recommend to add the binary directory of Node.js to your path variablea.)
-
Download the contents of this repository and move them into a clean directory.
-
Open a shell/terminal in the newly created yate directoryb. Execute
npmto install the componentsexpressandsocket.iousing the command$ <path-to-npm>/npm install express socket.io -
Test the server by issuing
$ <path-to-node>/node index.jsin the shell/terminal. If no errors occured, the shell/terminal message shows your public IP-address and the local port on which the server is listening in the format XXX.XXX.XXX.XXX:8080 . Paste this address (or simply localhost:8080 if you are on the same machine) into your browser address bar and connect to the server. You can change the local port in the file
index.js. -
In order to give other people access to your server, you most-likely have to configure your router to forward/map the port accordingly (TCP). Other players can then join your game using the IP-address from above. If you want to use a different local port, simply edit the line
const port = 8080;inindex.js. -
Prepare a list of players (i.e. names of all players) by simply editing the existing file
players.datwith a text editor. The first line of that file is referring to the game master. Note, that this game master will be the only „player" having full control over game elements. You can then add the names of players for your game line by line. If you prefer to have other players to verify themselves, you can add a required passphrase separated by a tabulator behind the player names.c
See the List of Features and demos for more information on how to prepare a simple game.
a The Windows-installer offers to do so automatically. Alternatively, see the instructions for Windows here.
b On Windows use Shift+Right Click in the directory then select the shell option from the context menu (see explanation for Windows here).
c Depending on your OS and choice of text editor the format for line endings may vary. The player list provided in this repository uses Unix (LF) line endings instead of Windows (CR+LF) line endings. If possible, change your editor settings accordingly or simply make a new players.dat file from scratch in the format shown in the setup tutorial.
By additionally installing Jimp you can create thumbnails for all images you placed in the img/ directory. To this end, first install Jimp by entering
$ <path-to-npm>/npm install jimpand after a successful install you can execute
$ <path-to-node>/node makethumbnails.jsThis script will search for compatible image files (jpg or png) in your img/ directory and automatically place thumbnails of those images in img/_thumbnails_/. If you then open an image selection-dialog in yate you get a thumbnail-preview of an image from the autocomplete you hover over with your mouse.
- timer element added: a configurable
Timerelement is now available - sfx volume+test: added a test button and volume slider in
Play Sounddialog - dice roll sfx: animated dice make a dice roll sound on roll; disable globally with game option
disableDieSound; animation has been improved - various minor changes: fixed laggy zoom on
Canvas, added banner shown while holdingSpacebarto place animated pointers, visibility option forCanvas, .. - thispersondoesnotexist support: Pictures of random faces can now be loaded in descriptions of
Tokens. Those images are fetched from thispersondoesnotexist.com/. - Canvas Overhaul: The
Canvastool-window has been reworked for a more intuitive control. Brush types (as in creation of rectangles or ellipsis) and background transparency have been added. - Image Thumbnails: Execution of the script
makethumbnails.jsenables the automated creation of image thumbnails (if Jimp is installed, see Additional Features above for details). During image selection this thumbnail is shown on mouseover in the autocomplete list. - Controls: The context now menu contains an option
Show Controlsopening a window detailing the controls. - New Log Window: The log window can now be dragged and resized.
- Animated Pointers: Players and the game master can place animated pointers by holding
Spacebarand clicking with 'Left Mouse Button'. - Change Indicator on Game Elements: Game elements that have been changed but not pushed to the server yet are highlighted by a blinking border.
- die roll sfx: updated die roll sfx
- card games: fixed some issues when using game option-related settings like drag-to-top
- canvas rectangles: removed bug where rectangles were deleted on resize
- more various changes: see file
changelog.logfor details - various minor fixes: fixed bugged
Markerdescriptions, .. - Canvas: A number of smaller issues have been fixed.
- Thumbnails: Thumbnail-previews are not correctly hidden if an image is selected.
Players can open a list of controls with the option Show Controls from the context menu.
-
Move Camera: Hold
Middle Mouse Buttonand drag your mouse to move your view. -
Zoom In/Out: By turning the
Mouse Wheelyou can zoom in and out of the game. -
Interact: You can drag&drop most game elements (if you are permitted to by the game master) or double click with your
Left Mouse Buttonto interact (e.g. double clicking on aDiewill initiate a dice roll, whereas a double click on aCardwill cause this card to turn over). -
Modify: By clicking with your
Right Mouse Buttonyou can open a context menu of available actions.Game Master Controls: Aside from general settings and actions you will find a section referring to the game element clicked on. This section is initiated with a label containing the type of the game element and its internal id. There the game master can
push,deleteor modify settings of this game element. See below for a detailed description of all functionalities. Most elements can also be manipulated in size or regarding the element layering by holdingShiftorAlt, respectively, while turning theMouse Wheel. Unpushed changes are indicated by an orange flashing or the respective game element's background/border. -
Pointer: By holding
Spacebarand clicking with yourLeft Mouse Buttonyou can place a pointer at that location visible to everyone else. This pointer is temporary and vanishes after a few seconds. The pointer color can be set by opening the context menu while holding downaand clicking onSelect Pointer Color.
Aside from the Die elements that are only visible for their creator, only the game master can create game elements. After creation those elements are initially only a local object until either the Push This or the Push All actions from the context menu are performed. Only then the server receives the information. In general, changes that are made in the configuration of game elements will be local until pushed to the server. In some cases there will also be shown a Restore option to reload the current server-side settings for the given element. Selecting Push Delete will immediately delete the selected element from the server. All updates the server receives are passed on to all clients.
-
Image Element The
Imageelement is simply a static image. Depending on your type of game you may use this for the game board, a table texture, or a map/illustration for your Pen&Paper game. By selectingLoad Imagein the context menu a small window will open prompting you to select an image from a list of files in theimg/directory. If you added new images to this directory after the server was started, clickUpdate Listin order to find that image via the autocomplete functionality. Alternatively, you may upload your image file via drag&drop of the file onto the selection dialog. The file will then be uploaded upon the next push on this game element.The configurable settings for this element are:
- Owner - controls who has permission to drag this element
- Position Streaming - toggle whether changes in the position of this element are streamed to the server
- Visibility - toggle visibility for non-game master on and off
- Lock - toggle whether this element can be moved
- Background - toggle between white and a transparent background for this element
-
Image Label Element The
Labelelement can only be added to an existingImageelement.The configurable settings for this element are:
- Position and Size - note that you can also modify the position and size of this element by holding down
Shift+ dragging withLeft Mouse Buttonor turning theMouse Wheel, respectively - Set Text - specify the text that will be displayed; alternatively using a double click on the
Labelas a shortcut - Set Arc - this setting controls whether the
Labelis displayed in an arc using CircleType.js - Set Angle - this option rotates the
Labelby the specified angle - Set Color - select the color of the
Labelusing jscolor
- Position and Size - note that you can also modify the position and size of this element by holding down
-
Image Marker Element The
Markerelement can only be added to an existingImageelement. By selectingLoad Imagein the context menu a small window will open prompting you to select an image from a list of files in theimg/directory. If you added new images to this directory after the server was started, clickUpdate Listin order to find that image via the autocomplete functionality. Alternatively, you may upload your image via drag&drop of the file onto the selection dialog. The file will then be uploaded upon the next push on this or its parent game element.The configurable settings for this element are:
- Position and Size - note that you can also modify the position and size of this element by holding down
Shift+ dragging withLeft Mouse Buttonor turning theMouse Wheel, respectively - Description - toggle whether a description window will be opened upon clicking with
Left Mouse Button - Set Marker Color - select the
Marker's color from a list of colors
- Position and Size - note that you can also modify the position and size of this element by holding down
-
Token Element The
Tokenelement is intended as player representation, e.g. in a regular board game or a Pen&Paper game. By selectingLoad Imagein the context menu a small window will open prompting you to select an image from a list of files in theimg/directory. If you added new images to this directory after the server was started, clickUpdate Listin order to find that image via the autocomplete functionality. Alternatively, you may upload your image via drag&drop of the file onto the selection dialog. The file will then be uploaded upon the next push on this game element.Any
Tokena player has control over is raised to the top layer making thoseTokensalways accessible.The configurable settings for this element are:
- Image Section - after loading an image you can adjust the image section shown on the token by holding down
Shift+ dragging withLeft Mouse Buttonand turning theMouse Wheel, respectively - Owner - controls who has permission to drag this element
- Position Streaming - toggle whether changes in the position of this element are streamed to the server
- Visibility - toggle visibility for non-game master on and off
- Description - toggle whether a description window will be opened upon clicking with
Left Mouse Button - Set Token Size - specify the size of the selected
Token - Reset Token Image - this restores the default setting for the image section selection
- Set Color - this option allows you to change the color of the
Tokenborder using jscolor - Color From List - this option allows you to quickly change the color of the
Tokenborder by selecting from a preset list of colors
- Image Section - after loading an image you can adjust the image section shown on the token by holding down
-
Token/Marker Description The description name and text of a
Tokenor aMarkercan be edited by first expanding the description. From there the description can either be edited by clickingEditor loaded by clickingLoad. The latter requires a file to be prepared in thedata/directory in the format described in the demo-filedesctest.dat.In case of a
Tokendescription aRandom Face-Button appears after clicking onEdit, which allows to load the current face from thispersondoesnotexist.com/ as temporary image on click. This image is then stored by the server as a file on the nextPush. -
Canvas Element The
Canvaselement based on Fabric.js can be used in very different scenarios like an easy way to make records, quickly sketch surroundings in a Pen&Paper game, or drawing charades.After creation double click with the
Left Mouse Buttonto enter the drawing/editing mode. The menu on the right side of the screen provides the basic settings like brush type (free draw, create rectangles, or ellipsis), size, and color or enables the addition of Fabric.js-objects likeImagesorTextto theCanvas. Using the button on the bottom right or by pressingTabyou can toggle betweenDrawing- andEdit-mode. While inEditmode you can select and manipulate objects previously added to theCanvas. This also includes a context menu for thoseCanvasobjects.The configurable settings for this element are:
- Owner - controls who has permission to draw on this element
- Position Streaming - toggle whether changes in the position of this element are streamed to the server
- Content Streaming - toggle whether content changes of this
Canvasare streamed to the server - Visibility - toggle visibility for non-game master on and off
- Transparent Background - toggle whether the background of this canvas element is transparent
- Lock - toggle whether this element can be moved
- Set Canvas Size - specify the size of the selected
Canvas
-
Card Element Currently,
Cardelements can only be added by the use of theNew Deckoption in the context menu.Upon selecting this option you are prompted with a file selection window from your browser to select a text file containing the information what
Cardsare in that deck. A demo file is located indata/testdeck.datexplaining the format. Every line after the first has to contain four tab-separated values each representing one card. The first two values are the currentCard's width and height. These values can be replaced by-to automatically get the length from the front image file. The third and fourth values are the relative paths to the image files on the server. If you do not need an image for the back of a card, you may enter only a-to indicate an empty card back (i.e. a generic logo).Cardelements have several additional controls/actions that can be performed (some are only available for the game master):- Multi-Card Selection: You can select multiple
Cardsat once by holdingCtrlwhile clicking with theLeft Mouse Button. AllCardsbelow your cursor at the time of the click will be added to the selection. Deselect by clicking again on another game element or the background. Actions like dragging, turning, rotating etc. are then performed on the selected stack ofCards. - Turning Cards: You can turn a
Cardelement (or the current selection) by double clicking with theLeft Mouse Button. - Rotating Cards: You can rotate a
Cardelement (or the current selection) by turning theMouse Wheelwhile thoseCardsare being dragged. - Drawing/Discarding Cards: By opening a context menu on a
Cardor selection ofCardsand if the permission was given to you, you can drawCardsto your hand (an icon will be shown in the top left corner of the card). TheCardwill not be publicly turned but only be visible for you (or others who have drawn thisCard/theseCardsat the same time). The same procedure performed on aCardthat is already on your hand will present you the option to discard thatCardagain. - Turn Face Up/Down - force all selected
Cardsto be turned face up/down - Collect - collect all selected
Cardsand position them in the same location as theCardfor which the context menu was opened - Arrange - collect all selected
Cardsand arrange them with a small relative displacement - Shuffle - shuffle the selected stack of
Cards - Shuffle Angle - shuffle the angle of the selected stack of
Cards - Prepare - perform a forced discard, face down, collection, and shuffle action on the selected deck
- Grab Top N - reduce the current selection of
Cardsto the top NCards; N is always the last input from Grab Top .. - Grab Top .. - you are prompted to enter a number; reduce the current selection of
Cardsto the entered number ofCards
Some of the configurable settings for this element can be changed for the selected
Card, the selected stack ofCards, and the entire deck ofCards; those options are presented in the corresponding submenus:- Moving Rights - controls who has permission to drag this element/these elements
- Viewing Rights - controls who has the permission to view face down
Cardsor drawCardsto their hand - Details
- Change Scale - change the scale the selected
Cardsare displayed in - Border Color - toggle between transparent and white border color
- Highlight Color - toggle between transparent and red highlight color (possibly useful for puzzles, where the orientation should not be revealed)
- Drag to Top - toggle whether
Cardsof this deck will be dragged to the top on initiation of a drag - Randomize Angles - toggle whether the orientation of a
Cardfrom this deck will be randomized by a few degrees on termination of a drag - Angle Increment - set a specific angle increment for turning
Cardsfrom this deck - Set Deck ID - the layering of
Cardsfrom different decks ofCardsis organized in such a way that allCardsfrom a deck with larger ID are always on top ofCardsfrom decks with smaller IDs; use this setting to control what deck ofCardsis on top of which deck
- Change Scale - change the scale the selected
- Delete - remove the selected deck from the game
- Multi-Card Selection: You can select multiple
-
Lottery Element The
Lotteryelement can have very different uses depending on the kind of game. It may serve as an indicator for who's turn it currently is, as a literal lottery enabling to pick randomly from a list of words, or even an emote by using the TTS support. SelectingSet Optionsin aLottery's context menu prompts the game master to enter a list of values separated by line breaks, commas are automatically exchanged by line breaks. The game master is also able to initialize theLotteryby specifying a current option inside theSet Optionsubmenu. The next entry of theLotteryis picked by double clicking with theLeft Mouse Buttonor via theLottery's context menu's optionPick Next.The configurable settings for this element are:
- Owner - controls who has permission to drag this element or pick next result
- Visibility - controls element visibility for players and who will get
Lotteryresults printed to the log - Lock - toggle whether this element can be moved
- Position Streaming - toggle whether changes in the position of this element are streamed to the server
- Select Random - toggle whether next pick will be random from the list of
Lotteryoptions - Turn Indicator - toggle whether this
Lotteryis treated as turn indicator printing changes to the log accordingly - Write Log - toggles whether
Lotteryresults are printed to the log - Use TTS - toggles whether
Lotteryresults are queued as TTS (text-to-speech) tofor all players (except the game master); this ignores the visibility setting
-
Timer Element The
Timerelement can be used to indicate remaining time for a player's turn or to notify if a certain amount of time has passed since theTimerhas been started. If theTimeris set toautorestart, then only the game master can stop the repeated countdown (by using the optionStop Timerin the context menu).The configurable settings for this element are:
- Owner - controls who has permission to drag this element or (re-)start the
Timer - Visibility - controls element visibility for players and who can hear the sfx if enabled
- Position Streaming - toggle whether changes in the position of this element are streamed to the server
- Lock - toggle whether this element can be moved
- Set Duration - specify the timeout duration in seconds
- Autorestart - toggle whether the
Timerwill be restarted automatically after time has run out - Play SFX - toggle whether sfx will be played upon timeout
- Set SFX - select the file for sfx playback
- Play Urgent SFX - toggle whether urgency sfx will be played close to the timeout (maximum of 10s or 10% of total remaining)
- Set Urgent SFX - select the file for urgency sfx playback
- Show Label - toggle whether a digital indicator is shown on the
Timer - Link to Lottery - use this to select a specific Lottery to be triggered on timeout; picking next in lottery causes the
Timerto restart
- Owner - controls who has permission to drag this element or (re-)start the
-
Die Element The
Dieelement is the only kind of game element that all players can create. Also, this element is only visible for the local player and is not being saved when the connection is closed. This element will not be affected by repositioning of the camera or changes of the zoom. It can be rescaled by holdingShiftwhile turning theMouse Wheel. You can roll aDieby double clicking with theLeft Mouse Buttonor by opening its context menu and selectingRoll.The configurable settings for this element are:
- Set Die Color - select the
Die's color from a list of colors - Link to Token - if a
Tokenis in the game you have control over, you can also link thisDieand saidToken; linkedDicecan be rolled from theToken's context menu and the log message will state theToken's name
- Set Die Color - select the
-
Public Die Element The
Public Dieelement has mostly the same features as theDie. Differences are that thePublic Dieis visible for all players and its properties like color and size can only be controlled by the game master.The configurable settings for the element are:
- Owner - controls who has permission to drag or roll this the
Die - Lock - toggle whether this element can be moved
- Set Die Color - select the
Die's color from a list of colors - Set-Able - toggle whether the
Die's value can be set by turning theMouse Wheelwhile hovering over the element - Animation - toggle whether rolling animation is shown after a roll is initiated
- Owner - controls who has permission to drag or roll this the
-
Soundboard Element The
Soundboardelement enables the game master to set up a list of sound effects or TTS-messages that can be played by clicking a single button. The corresponding context menu option is located in thePlay Soundsubmenu.In the
Soundboardclick theAddbutton to open a menu where a newEntrycan be configured and tested. At the top it can be selected whether aFileor aTTSshould be played. Below a label can be specified which will appear on theSoundboard. For the next input depending on the category of effect either select a sound file or enter a TTS-message. If you are setting up a TTS message, you can also configure options for the voice pitch and rate/speed. The input for a volume multiplier can also be accessed after the creation of aSoundboardentry. Lastly, the selection/input can be previewed. If a sound file was added after the server startup, clicking on theUpdate Listbutton updates this file to be listed in the auto completion. Double clicking theSoundboardlabel offers the game master to change the soundboard name. The slider in every entry enables a quick adjustment of the playback volume (changes are pushed automatically).The configurable settings for the element are:
- Owner - controls who has permission to use the
Soundboard
- Owner - controls who has permission to use the
-
Play Sound The game master has multiple options to play sound from files (those need to be located in the
sound/directory) or as text-to-speech (TTS) message for all players.- Play Sound Issues the singular playback of the selected sound file for all players.
- Play Looping Sound Issues the repeated playback of the selected sound file for all players (ambient sounds/music).
- Stop Sound Stop playback of all sounds currently playing for players.
- Queue TTS Send a TTS message to all players.
- Volume Use the slider input to adjust playback volume of sounds and the TTS system. For players this slider is available only if the key
ais pressed while opening the context menu. - Select TTS Voice Select your preferred TTS voice/language from a list of available voices. For players this slider is available only if the key
ais pressed while opening the context menu.
-
Game Options In this submenu it is possible to add arbitrary (previously implemented) modifyers to the game. An example is the option to have
Cardsin a certain deck be dragged to the top layer of the deck on the initiation of aCard-drag (this is recommended for most basic card games). Suppose you want to play a game of cards where theCardthat has been moved last should be raised to the top of the entire deck. For a deck ID of 2 a game optiond2dragtotophas to be added to the game. For the implementation of a custom rule<keyword>you can simply use the conditionif (gameoptions.includes('<keyword>')) {..}to test whether that rule is active. The
<keyword>has only the requirement of containing no spaces. All changes to the list of game options are immediately forwarded to all clients.-
Add Option As described above this is an easy way to implement additional custom rules for yate that are kept track of by the server. You can add multiple options at once separated by a space.
Currently the following game options are implemented:
d<deckid>dragtotop- dragCardsof the deck with corresponding ID to the top on initiation of a drag (see shortcut inDeck→Details)d<deckid>randomizeangles- have the orientation of aCardfrom the deck with corresponding ID be randomized by a few degrees on termination of a drag (see shortcut inDeck→Details)d<deckid>cardturnangleinc<intValue>- use this option to set a specific angle increment for turningCardsfrom a specificDeck(see shortcut inDeck→Details)notes- allow players to open a window where notes can be made; this can be useful for Pen&Paper games where character attributes or inventory may be noted; alternatively, the game master can use this to make player-specific notesyahtzee- adds a 'Roll All' option the context menu of players; selecting this will perform aRollon every die availabledisableDieSound- disable dice roll sfx globallyfontDecorative- change the generic font to a more decorative/Fantasy-style font
-
Remove Options The prompt is automatically filled with all currently set game options. You can remove multiple options at once separated by a space.
-
Show Log Use this to toggle whether player (aside from game master) can see a log in the bottom right corner of their screen.
-
Set This Camera Set the initial view (camera position and zoom) for newly joining clients to the current view.
-
Unset Camera Revert view settings for newly joining clients back to default.
-
Set Global Token Size Use this option to change the size of all
Tokensat once. -
Set Global Marker Size Use this option to change the size of all
Markersat once.
-
-
Rearrange Layering The
Rearrange Layeringaction goes over all present game elements and adjusts the layering of those elements to a predefined hierarchy. The order from lowest to highest layer is:Image/Canvas→Card→Lottery→Token→Public Die. A manual change of layering is possible by holdingAltand turning theMouse Wheel. The changes in layering have to be pushed to become visible for players. Note that aTokenthat a player has control over will always stay on top regardless of other layering. -
Push All Loop over all game elements and perform a push to the server.
-
Force Discard All Force all clients to discard all
Cardsthat are currently visible due to being drawn onto their hand. -
Copy Server Address Try to copy the server's public address (ip + port) to the clipboard.
-
Save/Load
Savecurrent state of the game to orLoada previous state of a game from an XML-file. On issuing aSavethe server writes a savestate to the directorysavestates/and offers the game master to also save this file on their machine. 'Load' requires the game master to select a suitable savestate from their local machine. Note that loading a savestate into a game where game elements exist already causes the elements from the savestate to be added to game additionally (they will not be replaced or deleted). -
Restore All Use this option to restore all game elements from the server where possible/implemented.
-
Delete All Confirming this action cleans up the entire game.
Since yate is written in JavaScript you can easily implement modifications you may need for some specific kind of game. Have a look at the notes in the section regarding Game Options for a comment on how to do this most easily. Feel free to ask for help on implementation of modifications, suggest features, or even provide the code that implements those features to be added to this repository. Please refer to me via mail.
Next on the list of features/changes to be implemented:
- Property Editor Editor window to set up game element properties more comfortable.
- n-die n-sided die.
- Chat: Minimal text chat window.
- Cleanup: Due to the grown nature of yate, it is a (for now persistent) goal to clean up the code base and unify functionalities.
For unstable internet connection some unexpected behavior regarding the synchronicity between server and client has been observed.
Due to the afore mentioned history regarding yate's development the code itself is rather messy. As stated in the Planned Additions section, the cleanup will require more time especially as it is (at the moment) low priority.
Copyright (c) 2020-2021 Steffen Richters-Finger
Permission is hereby granted, free of charge, to any person obtaining a copy of this software and associated documentation files (the "Software"), to deal in the Software without restriction, including without limitation the rights to use, copy, modify, merge, publish, distribute, sublicense, and/or sell copies of the Software, and to permit persons to whom the Software is furnished to do so, subject to the following conditions:
The above copyright notice and this permission notice shall be included in all copies or substantial portions of the Software.
THE SOFTWARE IS PROVIDED "AS IS", WITHOUT WARRANTY OF ANY KIND, EXPRESS OR IMPLIED, INCLUDING BUT NOT LIMITED TO THE WARRANTIES OF MERCHANTABILITY, FITNESS FOR A PARTICULAR PURPOSE AND NONINFRINGEMENT. IN NO EVENT SHALL THE AUTHORS OR COPYRIGHT HOLDERS BE LIABLE FOR ANY CLAIM, DAMAGES OR OTHER LIABILITY, WHETHER IN AN ACTION OF CONTRACT, TORT OR OTHERWISE, ARISING FROM, OUT OF OR IN CONNECTION WITH THE SOFTWARE OR THE USE OR OTHER DEALINGS IN THE SOFTWARE.


