View Code? Open in Web Editor
NEW
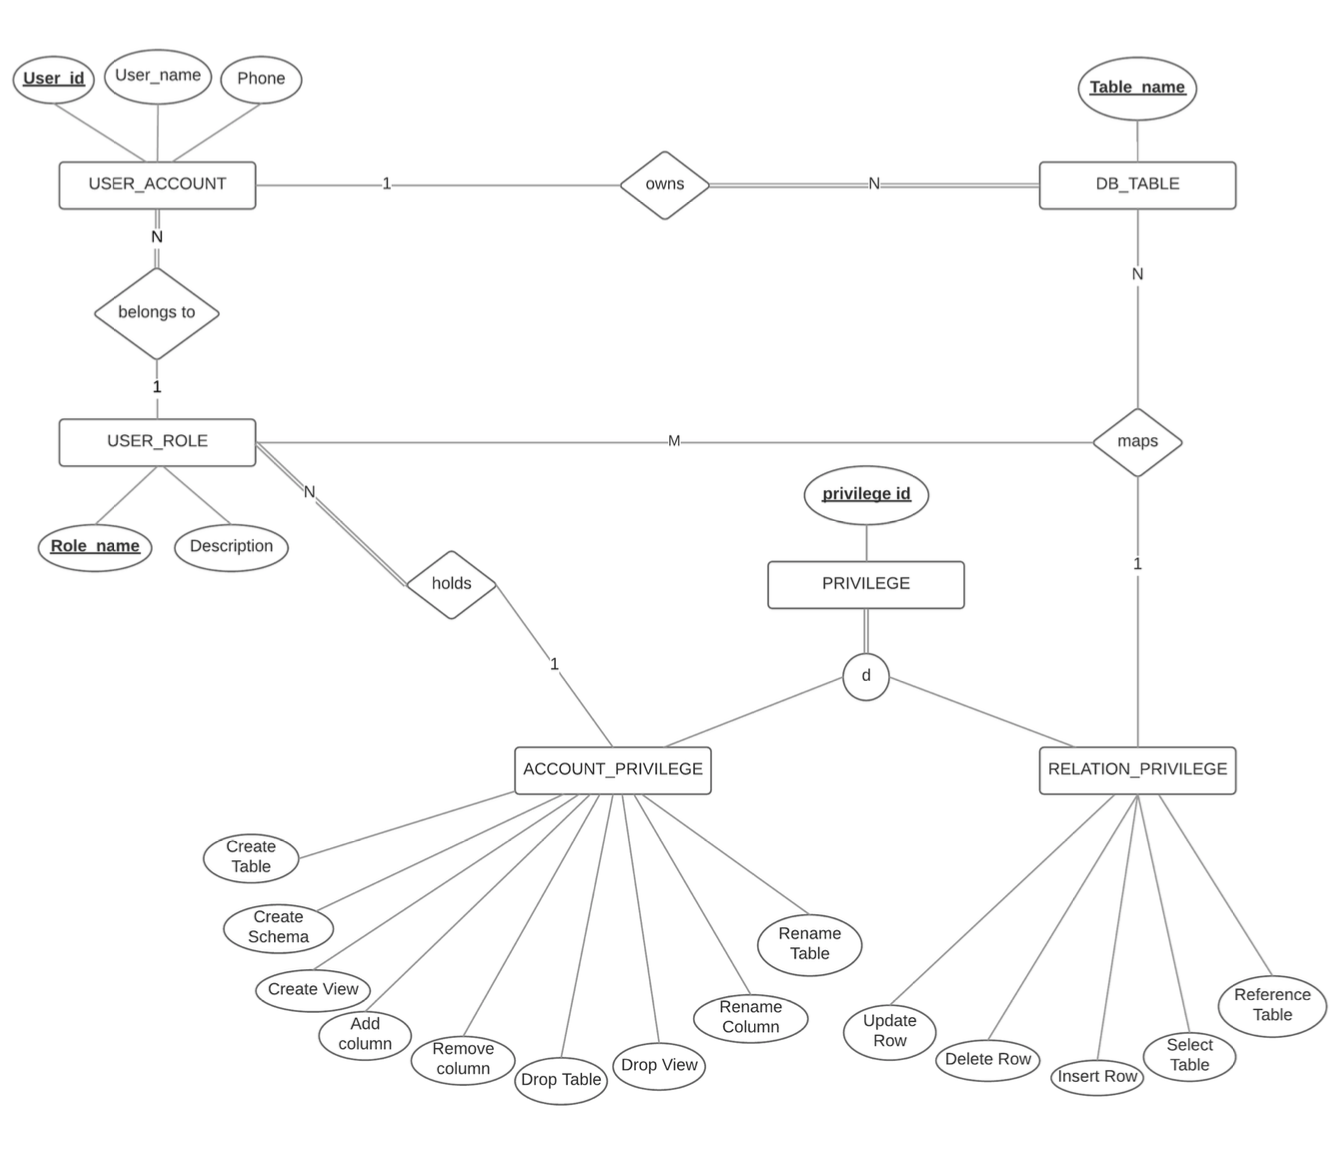
A MySQL database to enforce Discretionary Access Control
Python 39.90%
CSS 0.63%
HTML 59.47%
authorization-database's Introduction
- Python 2.7
- MySQL 5.7.17
- Flask 0.12.1
- Jinja2 2.9.8
- mysql-connector-python-cext 2.1.5

- Install the dependencies (MySQL, Python, etc) and Create the Schema
- Create the database using the create table statements
- Load initial data into the database using SQL INSERT command
- Modify the config.py(flask app -> database -> config.py) file to update the database authorization details
- Execute the flask application using "python2 front.py" command and go to the specified URL (http://127.0.0.1:5000/)
- Choose the table contents to be specified from the 'table drop down list box' and press 'submit'
- Choose the transaction you wish to perform from the 'query drop down list' and press 'submit'
- Enter the data required for the transaction and press 'submit'
authorization-database's People
Contributors

Watchers

