
The Development Kit for GemStone/S features:
- Simplified GemStone/S installation.
- Remote tODE Client installation.
- Scripts for controlling multiple stones.
- tODE development environment.
- Library of projects ported to GemStone/S.
##Development Kit Server Installation The Dev Kit server can be installed on Linux or Mac OS X.
-
Clone the gsDevKitHome project to your GemStone development server and create a unique branch to keep any changes you make for your project isolated from the Dev Kit master branch:
git clone [email protected]:GsDevKit/gsDevKitHome.git
cd gsDevKitHome
git checkout -b  <your project branch name>
Note: If you already have a GitHub account, you should consider forking the Dev Kit project first, as that will make sharing corrections you find much easier.
-
Define the
$GS_HOMEenvironment variable and add$GS_HOME/binto your$PATH:cd gsDevKitHome export GS_HOME=`pwd` export PATH=$GS_HOME/bin:$PATH
It's a good idea to define
$GS_HOMEand$PATHin your.bashrcfile. -
Install GemStone/S and Pharo, build the tODE client image, create a stone, start the stone, start the netldi, start the stamonitors, install tODE in stone and launch the tODE client. The following creates a new stone named
todebased on version 3.2.1 of GemStone/S:installServer devKit 3.2.1
Note that the script will prompt you for your password because it uses sudo to setup up your server for running GemStone.
-
When the above script finishes, the tode client image is opened and you should be able to validate your session description by:
-
Opening a tODE shell on your stone:

-
Opening a
project list:
-
If the
project listopens successfully, then you are done. If an error occurs, see the tODE Test Login section for collecting diagnostics.
-
-
While you are in the Pharo client window, it is a good time to choose a new font. tODE works best with a mono-spaced font and you can choose a font from those installed on your system using the Pharo System Settings menu item:

which opens the
Settings browser:
-
Click on the
Default font buttonand choose a font from those listed in the window that pops up. You may need toUpdateto get the system fonts loaded into the Pharo client. -
Click on the
Force All buttonto get your font choice propogated to the other choices.
Don't forget to save the image after making client-side changes.
-
-
Now is also a good time to change the size of the Pharo client window. When you change the size of the Pharo client window, you need to use the tODE Window Layout menu item to reset or change the window layout. The initial layout (
standard-small) is probably not a good choice for high resolution displays.standard-mediumorstandared-largeare better choices depending upon the resolution of your display and the size of the font that you have chosen.Don't forget to save the image after making client-side changes.
-
Once you have verified that the session description is correct, commit the changes that you've made. (If you've forked the GitHub project, you should push the changes to your GitHub repository as well):
git status                          # see what changes have been made
git add --all                       # stage the changed files
git commit -m"initial installation" # commit changes
The tODE Client can be installed on Linux, Mac OS X, or Windows. See the tODE client installation instructions for details.
##GemStone/S Management Scripts
###stones The stones script produces a report listing Installed Products, Installed Stones, Running Stones, and Running Netldis:
stonesHere's a sample report:
Installed Products:
	2.4.5.2
	3.0.1
	3.1.0.5
	3.1.0.6
	3.2.0
	3.2.1
Installed Stones:
	2.4.5.2	c_2452
	3.0.1	c_301
	3.1.0.5	c_3105
	3.2.1	gemtalk
	3.2.2	j_
	3.3.0	k_
	3.2.0	m_
Running Stones:
	Status       Version    Owner    Pid   Port   Started     Type       Name
	-------     --------- --------- ----- ----- ------------ ------      ----
	exists  3.2.0     dhenrich   2074 52832 Jul 22 10:36 Stone       m_
	exists  3.1.0.5   dhenrich   2450 46781 Jul 22 10:39 Stone       c_3105
	exists  2.4.5.2   dhenrich   2291 45711 Jul 22 10:37 Stone       c_2452
	exists  3.2.2     dhenrich   1980 43002 Jul 22 10:35 Stone       j_
	exists  3.0.1     dhenrich   2365 45327 Jul 22 10:38 Stone       c_301
	exists  3.2.1     dhenrich  18934 47480 Jul 24 10:25 Stone       gemtalk
Running Netldis:
	Status       Version    Owner    Pid   Port   Started     Type       Name
	-------     --------- --------- ----- ----- ------------ ------      ----
	exists  3.2.1     dhenrich  20901 49481 Jul 24 16:17 Netldi      gemtalk_ldi
	exists  3.2.0     dhenrich   2196 37538 Jul 22 10:36 Netldi      m_ldi
	exists  3.1.0.5   dhenrich   2514 38890 Jul 22 10:39 Netldi      c_ldi_3105
	exists  3.2.2     dhenrich   2048 44409 Jul 22 10:35 Netldi      j_ldi
	exists  3.0.1     dhenrich   2426 54616 Jul 22 10:38 Netldi      c_ldi_301
	exists  2.4.5.2   dhenrich   2340 54731 Jul 22 10:37 Netldi      c_ldi_2452
	exists  3.3.0     dhenrich   2274 33236 Jul 22 10:36 Netldi      k_ldi
###createTodeStone The createTodeStone script creates a new stone of the given name and GemStone/S version:
createTodeStone devKit 3.1.0.6The stone is created in the $GS_HOME/gemstone/stones directory.
After the stone is created, the stone and netldi processes are started and then tODE is installed.
Note that the GemStone/S version must be previously installed using the installGemStone script.
###stopStone The stopStone script is used to stop a running stone by name:
stopStone devKitUse the stones script to get a list of the running stones.
###startStone The startStone script is used to start a stone by name:
startStone devKit ###startNetldi The startNetldi script is used to start a netldi for the given stone:
startNetldi devKitBy default, the name of the netldi is constructed by tacking _ldi onto the name of the stone.
If you want to use a different netldi name, edit the $GS_HOME/gemstone/stones/<stone-name>/info.ston file:
GsDevKitStoneInfo {
	#stoneName : 'devKit',
	#gsVers : '3.2.1',
	#username : nil,
	#netldiName : nil
}
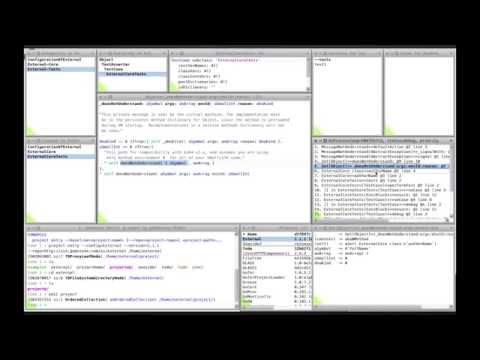
##tODE: the Object-centric Development Environment
Use the todeClient script to start up a tODE client image:
todeClientNote: the -p option allows you maintain and run multiple client images.
###tODE System Menu
The tODE System Menu:

is your entry point for setting up and controlling tODE.
- tODE Shell
- tODE Edit
- tODE Test Login
- tODE Install
- tODE Update
- tODE Workspaces
- tODE Window Layout
- Update tODE Client
- Define Web Edition Root
- Define Dev Kit Root
- Refresh tODE menu
####tODE Shell
Use the tODE Shell menu item to select the stone to log into:

and open the tODE shell console:

####tODE Edit
The tODE Edit menu items allow you to modify the session descriptions from within the client image:

The menu item brings up a client workspace:

Note that the workspace is not a file editor, so you need to execute the workspace to update the session disk.
The name of the session description file is derived from the name of the session description.
If you change the name of the description you are effectively creating a new description.
####tODE Test Login
The tODE Test Login menu item makes it possible to collect diagnostic information when you are having trouble logging into a stone. The menu item is also useful to ping a particular stone to see if it is running.

Besides the menu item the testLogin command can be invoked:
-
via the testLogin: message in a client-side workspace:
TDShell testLogin: 'gemtalk'
-
or, via the command line:

This is an example of a successful test login:

Note that while there was a successful test, the message does indicate that tODE is not installed. See the tODE installTodeStone script for installing tODE on a server.
Here's an example of an error message:

If the test login error message does not give you enough information for you to solve the problem, copy the result of the testLogin command and send mail to the GLASS mailing list.
####tODE Install
Use the tODE Install menu item to install tODE on the selected stone.
Use this menu item if you did not use the createTodeStone script to create the stone:

The menu item executes the tode script located in the file $GS_HOME/tode/client/scripts/installTode:
updateClient --clientRepo=github://dalehenrich/tode:master/repository
installServer --clientScriptPath=scripts
bu backup tode.dbf
mount --todeRoot home /
bu backup home.dbf
cd
Note that the script starts by updating the client-side code and then updates the server-side code.
You can customize installTode script to perform additional commands, if needed.
The server-side load scripts can be found in the $GS_HOME/tode/server/scripts directory.
You are encouraged to use the installTodeServer shell script to install tODE into your Dev Kit server.
####tODE Update
Use the tODE Update menu item update the tODE project on the selected stone:

The menu item executes the tode script located in the file $GS_HOME/tode/client/scripts/updateTode:
updateClient --clientRepo=github://dalehenrich/tode:master/repository
updateServer --clientScriptPath=scripts
bu backup home.dbf
You can customize updateTode script to perform additional commands, if needed.
The server-side load scripts can be found in the $GS_HOME/tode/server/scripts directory.
You are encouraged to use the project load Tode command in the tODE shell to perform updates of the tODE project.
####tODE Window Layout
Use the tODE Window Layout menu item to choose a window layout for your client image:

The window layout is scaled based on the size of the Pharo client window, so you need to re-select a window layout whenever you change the size of the Pharo client window.
Here are samples of three of the available window layouts:
| layout | sample |
|---|---|
| standard-small |  |
| standard-medium |  |
| standard-large |  |
####Define Dev Kit Root
The Define Dev Kit Root menu item:

tells the Pharo client where to find the $GS_HOME/tode directory.
The scripts and session descriptions used by the pharo client are found in the $GS_HOME/tode directory.
A todeClientImage can be retargeted to a different GsDevKit installation by changing the directory.
####Refresh tODE menu
The Refresh tODE menu menu item:

rebuilds the tODE system menu. The menu should automatically update.
This short video describes how to add your own project to tODE. It also serves as an introduction to the tODE development environment:
##Development Kit Projects
Here is a sampling of some of the open source projects that have been ported to GemStone/S:
| Project | Description |
|---|---|
| Magritte | Dynamic Meta-Description Framework |
| Pier | Content Management System |
| Seaside31 | Dynamic Web Development Framework |
| ZincHTTPComponents | Web Server/Client |
By registering projects with tODE:
$GS_HOME/projects/zinc/createProjectEntry devKit
$GS_HOME/projects/seaside31/createProjectEntry devKit Examples Zinc FastCGI
you can ensure that the projects will be loaded exactly the same way whether you use a shell script:
$GS_HOME/projects/seaside31/loadProject devKitor a tODE command:
project load Seaside3For more information about installing optional projects and a complete list of optional projects, visit the GsDevKit Projects page.


