The purpose of this guide is to walk through the process of creating a simple Node.js app that retrieves messages in Office 365 or Outlook.com. The source code in this repository is what you should end up with if you follow the steps outlined here.
This guide assumes:
- That you already have Node.js installed and working on your development machine.
- That you have an Office 365 tenant, with access to an administrator account in that tenant, OR an Outlook.com developer preview account.
Let's dive right in! Create an empty directory where you want to create your new Node.js app. For the purposes of this guide I will assume the name of the directory is node-tutorial, but feel free to use any name you like.
Open a command prompt in the node-tutorial directory, and run the following command:
npm initPress ENTER at all the prompts to accept the defaults. When you are done, you should have a basic package.json file. Using your favorite JavaScript editor, open this file and replace the existing scripts value with the following:
"scripts": {
  "start": "node index.js"
},
Create a new file called server.js. Paste the following code into server.js and save it.
var http = require('http');
var url = require('url');

function start(route, handle) {
  function onRequest(request, response) {
  var pathName = url.parse(request.url).pathname;
  console.log('Request for ' + pathName + ' received.');

  route(handle, pathName, response, request);
  }

var port = 8000;
  http.createServer(onRequest).listen(port);
  console.log('Server has started. Listening on port: ' + port + '...');
}

exports.start = start;
If you're familiar with Node.js, this is nothing new for you. If you're new to it, this is basic code to allow Node to run a web server listening on port 8000. When requests come in, it sends them to the route function, which we need to implement!
Create a new file called router.js, and add the following code.
function route(handle, pathname, response, request) {
  console.log('About to route a request for ' + pathname);
  if (typeof handle[pathname] === 'function') {
  return handle[pathname](response, request);
  } else {
    console.log('No request handler found for ' + pathname);
    response.writeHead(404 ,{'Content-Type': 'text/plain'});
    response.write('404 Not Found');
    response.end();
    }
}

exports.route = route;
This code looks up a function to call based on the requested path. It uses the handle array, which we haven't defined yet. Create a new file called index.js, and add the following code.
var server = require('./server');
var router = require('./router');

var handle = {};
handle['/'] = home;

server.start(router.route, handle);

function home(response, request) {
  console.log('Request handler 'home' was called.');
  response.writeHead(200, {'Content-Type': 'text/html'});
  response.write('<p>Hello world!</p>');
  response.end();
}
At this point, you should have a working app. Open a command prompt to the directory where your files are located, and enter the following command.
npm startYou should get a confirmation saying Server has started. Open your browser and navigate to http://localhost:8000. You should see "Hello world!".
Now that we've confirmed that the app is working, we're ready to do some real work.
Our app will be very simple. When a user visits the site, they will see a link to log in and view their email. Clicking that link will take them to the Azure login page where they can login with their Office 365 or Outlook.com account and grant access to our app. Finally, they will be redirected back to our app, which will display a list of the most recent email in the user's inbox.
Let's begin by replacing the "Hello world!" message with a signon link. To do that, we'll modify the home function in index.js. Open this file in your favorite text editor. Update the home function to match the following.
function home(response, request) {
  console.log('Request handler \'home\' was called.');
  response.writeHead(200, {'Content-Type': 'text/html'});
  response.write('<p>Please <a href="#">sign in</a> with your Office 365 or Outlook.com account.</p>');
  response.end();
}
As you can see, our home page will be very simple. For now, the link doesn't do anything, but we'll fix that soon.
Our goal in this section is to make the link on our home page initiate the OAuth2 Authorization Code Grant flow with Azure AD. To make things easier, we'll use the simple-oauth2 library to handle our OAuth requests. At your command prompt, enter the following command.
npm install simple-oauth2 --saveNow the library is installed and ready to use. Create a new file called authHelper.js. We'll start here by defining a function to generate the login URL.
var credentials = {
  clientID: 'YOUR APP ID HERE',
  clientSecret: 'YOUR APP PASSWORD HERE',
  site: 'https://login.microsoftonline.com/common',
  authorizationPath: '/oauth2/v2.0/authorize',
  tokenPath: '/oauth2/v2.0/token'
}
var oauth2 = require('simple-oauth2')(credentials);

var redirectUri = 'http://localhost:8000/authorize';

// The scopes the app requires
var scopes = [ 'openid',
               'https://outlook.office.com/mail.read' ];

function getAuthUrl() {
  var returnVal = oauth2.authCode.authorizeURL({
  redirect_uri: redirectUri,
  scope: scopes.join(' ')
  });
  console.log('Generated auth url: ' + returnVal);
  return returnVal;
}

exports.getAuthUrl = getAuthUrl;
The first thing we do here is define our client ID and secret. We also define a redirect URI and an array of scopes. The scope array includes the openid and Mail.Read scopes, since we will only read the user's mail. The values of clientId and clientSecret are just placeholders, so we need to generate valid values.
Before we proceed, we need to register our app to obtain a client ID and secret. Head over to https://apps.dev.microsoft.com to quickly get a client ID and secret. Using the sign in buttons, sign in with either your Microsoft account (Outlook.com), or your work or school account (Office 365).

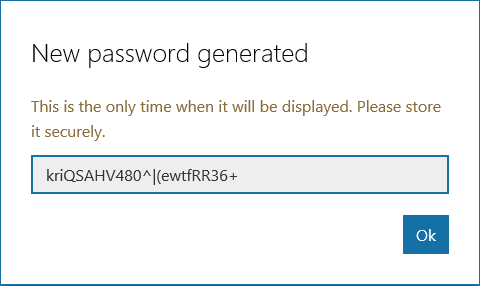
Once you're signed in, click the Add an app button. Enter node-tutorial for the name and click Create application. After the app is created, locate the Application Secrets section, and click the Generate New Password button. Copy the password now and save it to a safe place. Once you've copied the password, click Ok.
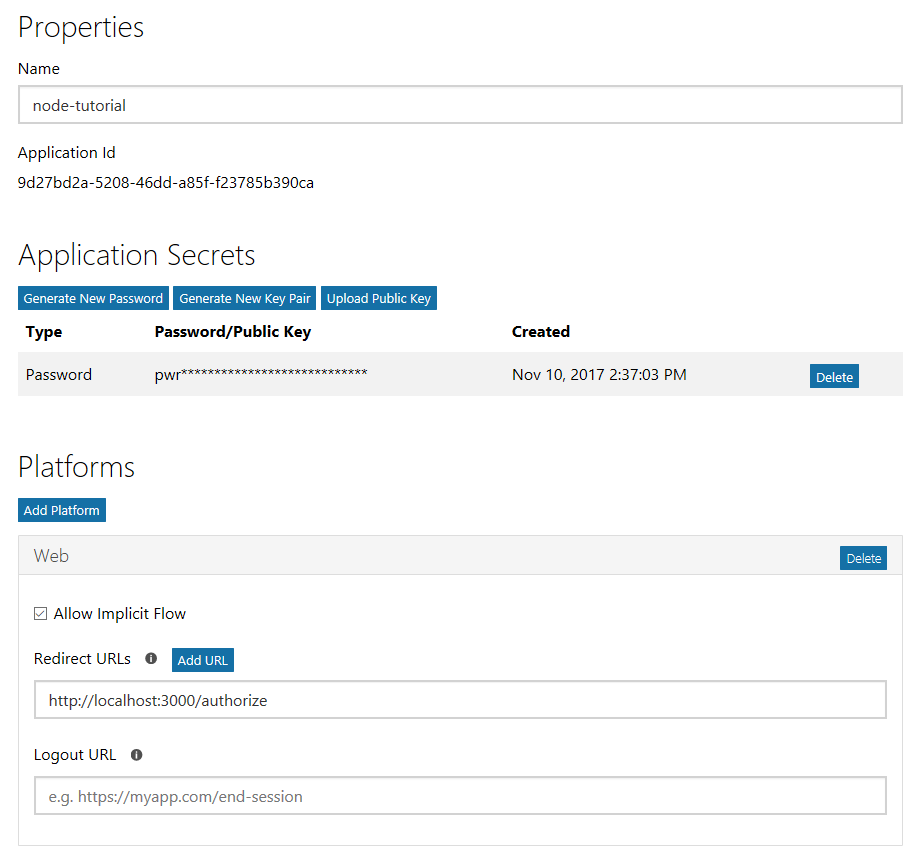
Locate the Platforms section, and click Add Platform. Choose Web, then enter http://localhost:8000/authorize under Redirect URIs. Click Save to complete the registration. Copy the Application Id and save it along with the password you copied earlier. We'll need those values soon.
Here's what the details of your app registration should look like when you are done.
Replace the YOUR APP ID HERE with the application ID and YOUR APP PASSWORD HERE with the password you generated and save your changes.
Now that we have actual values for the client ID and secret, let's put the simple-oauth library to work. Modify the home function in the index.js file to use the getAuthUrl function to fill in the link. You'll need to require the authHelper file to gain access to this function.
var server = require('./server');
var router = require('./router');
var authHelper = require('./authHelper');

var handle = {};
handle['/'] = home;

server.start(router.route, handle);

function home(response, request) {
  console.log('Request handler 'home' was called.');
  response.writeHead(200, {'Content-Type': 'text/html'});
  response.write('<p>Please <a href="' + authHelper.getAuthUrl() + '">sign in</a> with your Office 365 or Outlook.com account.</p>');
  response.end();
}
Save your changes and browse to http://localhost:8000. If you hover over the link, it should look like:
https://login.microsoftonline.com/common/oauth2/authorize?redirect_uri=http%3A%2F%2Flocalhost%3A8000%2Fauthorize&scope=openid+https%3A%2F%2Foutlook.office.com%2Fmail.read&response_type=code&client_id=<SOME GUID>
The <SOME GUID> portion should match your client ID. Click on the link and you should be presented with a sign in page:

Sign in with your Office 365 or Outlook.com account. Your browser should redirect to back to our app, and you should see a lovely error:
404 Not Found
The reason we're seeing the error is because we haven't implemented a route to handle the /authorize path we hard-coded as our redirect URI. Let's fix that error now.
First, let's add a route for the /authorize path to the handle array in index.js.
var handle = {};
handle['/'] = home;
handle['/authorize'] = authorize;
The added line tells our router that when a GET request comes in for /authorize, invoke the authorize function. So to make this work, we need to implement that function. Add the following function to index.js.
var url = require('url');
function authorize(response, request) {
  console.log('Request handler \'authorize\' was called.');

  // The authorization code is passed as a query parameter
  var url_parts = url.parse(request.url, true);
  var code = url_parts.query.code;
  console.log('Code: ' + code);
  response.writeHead(200, {'Content-Type': 'text/html'});
  response.write('<p>Received auth code: ' + code + '</p>');
  response.end();
}
Restart the Node server and refresh your browser (or repeat the sign-in process). Now instead of an error, you should see the value of the authorization code printed on the screen. We're getting closer, but that's still not very useful. Let's actually do something with that code.
Let's add another helper function to authHelper.js called getTokenFromCode.
function getTokenFromCode(auth_code, callback, response) {
  var token;
  oauth2.authCode.getToken({
  code: auth_code,
  redirect_uri: redirectUri,
  scope: scopes.join(' ')
  }, function (error, result) {
    if (error) {
    console.log('Access token error: ', error.message);
    callback(response, error, null);
    }
    else {
    token = oauth2.accessToken.create(result);
    console.log('Token created: ', token.token);
    callback(response, null, token);
    }
  });
}

exports.getTokenFromCode = getTokenFromCode;Our first use of the access token will be to get the user's email address from the Outlook API. You'll see why we want this soon.
In order to use the Outlook API, install the node-outlook library from the command line.
npm install node-outlook --saveThen require the node-outlook library by adding the following line to index.js.
var outlook = require('node-outlook');Add a new function getUserEmail to index.js.
function getUserEmail(token, callback) {
  // Set the API endpoint to use the v2.0 endpoint
  outlook.base.setApiEndpoint('https://outlook.office.com/api/v2.0');

  // Set up oData parameters
  var queryParams = {
    '$select': 'DisplayName, EmailAddress',
  };

  outlook.base.getUser({token: token, odataParams: queryParams}, function(error, user){
    if (error) {
      callback(error, null);
    } else {
      callback(null, user.EmailAddress);
    }
  });
}
Let's make sure that works. Modify the authorize function in the index.js file to use these helper functions and display the return values. Note that getToken function is asynchronous, so we need to implement a callback function to receive the results.
function authorize(response, request) {
  console.log('Request handler 'authorize' was called.');

  // The authorization code is passed as a query parameter
  var url_parts = url.parse(request.url, true);
  var code = url_parts.query.code;
  console.log('Code: ' + code);
  authHelper.getTokenFromCode(code, tokenReceived, response);
}function tokenReceived(response, error, token) {
if (error) {
console.log('Access token error: ', error.message);
response.writeHead(200, {'Content-Type': 'text/html'});
response.write('<p>ERROR: ' + error + '</p>');
response.end();
}
else {
getUserEmail(token.token.access_token, function(error, email) {
if (error) {
console.log('getUserEmail returned an error: ' + error);
response.write('<p>ERROR: ' + error + '</p>');
response.end();
} else if (email) {
response.writeHead(200, {'Content-Type': 'text/html'});
response.write('<p>Email: ' + email + '</p>');
response.write('<p>Access token: ' + token.token.access_token + '</p>');
response.end();
}
});
}
}If you save your changes, restart the server, and go through the sign-in process again, you should now see the user's email and a long string of seemingly nonsensical characters. If everything's gone according to plan, that should be an access token.
Now let's change our code to store the token and email in a session cookie instead of displaying them.
function tokenReceived(response, error, token) {
  if (error) {
    console.log('Access token error: ', error.message);
    response.writeHead(200, {'Content-Type': 'text/html'});
    response.write('<p>ERROR: ' + error + '</p>');
    response.end();
  }
  else {
    getUserEmail(token.token.access_token, function(error, email){
      if (error) {
        console.log('getUserEmail returned an error: ' + error);
        response.write('<p>ERROR: ' + error + '</p>');
        response.end();
      } else if (email) {
        var cookies = ['node-tutorial-token=' + token.token.access_token + ';Max-Age=4000',
                       'node-tutorial-email=' + email + ';Max-Age=4000'];
        response.setHeader('Set-Cookie', cookies);
        response.writeHead(302, {'Location': 'http://localhost:8000/mail'});
        response.end();
      }
    });
  }
}
Let's also add a helper function to read cookie values.
function getValueFromCookie(valueName, cookie) {
  if (cookie.indexOf(valueName) !== -1) {
    var start = cookie.indexOf(valueName) + valueName.length + 1;
    var end = cookie.indexOf(';', start);
    end = end === -1 ? cookie.length : end;
    return cookie.substring(start, end);
  }
}Access tokens returned from Azure are valid for an hour. If you use the token after it has expired, the API calls will return 401 errors. You could ask the user to sign in again, but the better option is to refresh the token silently.
In order to do that, the app must request the offline_access scope. Add this scope to the scopes array in authHelper.js:
// The scopes the app requires
var scopes = [ 'openid',
               'offline_access',
               'https://outlook.office.com/mail.read' ];
This will cause the token response from Azure to include a refresh token. Let's update the tokenReceived function to save the refresh token and the expiration time in a session cookie.
function tokenReceived(response, error, token) {
  if (error) {
    console.log('Access token error: ', error.message);
    response.writeHead(200, {'Content-Type': 'text/html'});
    response.write('<p>ERROR: ' + error + '</p>');
    response.end();
  }
  else {
    getUserEmail(token.token.access_token, function(error, email){
      if (error) {
        console.log('getUserEmail returned an error: ' + error);
        response.write('<p>ERROR: ' + error + '</p>');
        response.end();
      } else if (email) {
        var cookies = ['node-tutorial-token=' + token.token.access_token + ';Max-Age=4000',
                       'node-tutorial-refresh-token=' + token.token.refresh_token + ';Max-Age=4000',
                       'node-tutorial-token-expires=' + token.token.expires_at.getTime() + ';Max-Age=4000',
                       'node-tutorial-email=' + email + ';Max-Age=4000'];
        response.setHeader('Set-Cookie', cookies);
        response.writeHead(302, {'Location': 'http://localhost:8000/mail'});
        response.end();
      }
    });
  }
}
Now let's add a helper function in index.js to retrieve the cached token, check if it is expired, and refresh it if so.
function getAccessToken(request, response, callback) {
  var expiration = new Date(parseFloat(getValueFromCookie('node-tutorial-token-expires', request.headers.cookie)));

  if (Date.compare(expiration, new Date()) === -1) {
    // refresh token
    console.log('TOKEN EXPIRED, REFRESHING');
    var refresh_token = getValueFromCookie('node-tutorial-refresh-token', request.headers.cookie);
    authHelper.refreshAccessToken(refresh_token, function(error, newToken){
      if (error) {
        callback(error, null);
      } else if (newToken) {
        var cookies = ['node-tutorial-token=' + newToken.token.access_token + ';Max-Age=4000',
                       'node-tutorial-refresh-token=' + newToken.token.refresh_token + ';Max-Age=4000',
                       'node-tutorial-token-expires=' + newToken.token.expires_at.getTime() + ';Max-Age=4000'];
        response.setHeader('Set-Cookie', cookies);
        callback(null, newToken.token.access_token);
      }
    });
  }
  else {
    // Return cached token
    var access_token = getValueFromCookie('node-tutorial-token', request.headers.cookie);
    callback(null, access_token);
  }
}
Finally, let's add the refreshAccessToken function to authHelper.js.
function refreshAccessToken(refreshToken, callback) {
  var tokenObj = oauth2.accessToken.create({refresh_token: refreshToken});
  tokenObj.refresh(callback);
}

exports.refreshAccessToken = refreshAccessToken;Now that we can get an access token, we're in a good position to do something with the Mail API. Let's start by creating a mail route and function. Open the index.js file and update the handle array.
var handle = {};
handle['/'] = home;
handle['/authorize'] = authorize;
handle['/mail'] = mail;
Then add the mail function.
function mail(response, request) {
  getAccessToken(request, response, function(error, token) {
    console.log('Token found in cookie: ', token);
    var email = getValueFromCookie('node-tutorial-email', request.headers.cookie);
    console.log('Email found in cookie: ', email);
    if (token) {
      response.writeHead(200, {'Content-Type': 'text/html'});
      response.write('<p>Token retrieved from cookie: ' + token + '</p>');
      response.end();
    }
    else {
      response.writeHead(200, {'Content-Type': 'text/html'});
      response.write('<p> No token found in cookie!</p>');
      response.end();
    }
  });
}
For now all this does is read the token back from the cookie and display it. Save your changes, restart the server, and go through the signon process again. You should see the token displayed. Now that we know we have access to the token in the mail function, we're ready to call the Mail API. Update the mail function to query the inbox.
function mail(response, request) {
  getAccessToken(request, response, function(error, token) {
    console.log('Token found in cookie: ', token);
    var email = getValueFromCookie('node-tutorial-email', request.headers.cookie);
    console.log('Email found in cookie: ', email);
    if (token) {
      response.writeHead(200, {'Content-Type': 'text/html'});
      response.write('<div><h1>Your inbox</h1></div>');

      var queryParams = {
        '$select': 'Subject,ReceivedDateTime,From',
        '$orderby': 'ReceivedDateTime desc',
        '$top': 10
      };

      // Set the API endpoint to use the v2.0 endpoint
      outlook.base.setApiEndpoint('https://outlook.office.com/api/v2.0');
      // Set the anchor mailbox to the user's SMTP address
      outlook.base.setAnchorMailbox(email);

      outlook.mail.getMessages({token: token, odataParams: queryParams},
        function(error, result){
          if (error) {
            console.log('getMessages returned an error: ' + error);
            response.write('<p>ERROR: ' + error + '</p>');
            response.end();
          }
          else if (result) {
            console.log('getMessages returned ' + result.value.length + ' messages.');
            response.write('<table><tr><th>From</th><th>Subject</th><th>Received</th></tr>');
            result.value.forEach(function(message) {
              console.log('  Subject: ' + message.Subject);
              var from = message.From ? message.From.EmailAddress.Name : 'NONE';
              response.write('<tr><td>' + from +
                '</td><td>' + message.Subject +
                '</td><td>' + message.ReceivedDateTime.toString() + '</td></tr>');
            });

            response.write('</table>');
            response.end();
          }
        });
    }
    else {
      response.writeHead(200, {'Content-Type': 'text/html'});
      response.write('<p> No token found in cookie!</p>');
      response.end();
    }
  });
}
To summarize the new code in the mail function:
- It uses the
outlook.base.setApiEndpointfunction to set the API endpoint,https://outlook.office.com/api/v2.0. - It uses the
outlook.base.setAnchorMailboxfunction to set the anchor mailbox to the user's SMTP address. The library uses this to set theX-AnchorMailboxheader on API requests, which enables the API endpoint to route API calls to the appropriate backend mailbox server more efficiently. This is why we went to the trouble to extract the user's email from the ID token earlier. - It uses the
outlook.mail.getMessagesfunction to get inbox messages, using theparameters.odataParamsparameter to control the request:- It uses the
$orderbyquery parameter with a value ofReceivedDateTime descto get the newest messages first. - It uses the
$selectquery parameter to only request theReceivedDateTime,From, andSubjectproperties. - It uses the
$topquery parameter with a value of10to limit the results to the first 10.
- It uses the
- It loops over the results and prints out the sender, the subject, and the date/time the message was received.
Save the changes and sign in to the app. You should now see a simple table of messages in your inbox.

Now that you've created a working sample, you may want to learn more about the capabilities of the Mail API. If your sample isn't working, and you want to compare, you can download the end result of this tutorial from GitHub.
Copyright (c) Microsoft. All rights reserved.
Connect with me on Twitter @JasonJohMSFT
Follow the Exchange Dev Blog


