- Planner
To run the app in your browser, click here.
- Clone this repo to your computer.
- Open a terminal and go the folder in which you cloned this repo.
- Run
npm installto download and install all the packages inpackage.jsonto thenode_modulesdirectory. - Run
npm run startto launch the webpack dev server on localhost port 8080.
- Make all the changes to HTML, CSS, images (ie, static assets) in the
distfolder because this is directory that Webpack will compile and run on localhost whennpm run startis executing. This is because we are not using awebpack.config.jsfile and this is the default behavior. - To make JS code changes, apply these to the
srcfolder.
- Any changes made to the
distfolder will not affect thedocsfolder (which is used for deployment to GitHub Pages). - In order to enable webpack-dev-server to automatically deploy changes to static assets and JS, when running, the following option had to be enabled devServer.watchContentBase
Once all the HTML, JS, CSS files have been updated, make sure to run:
npm run build
cp -r dist/* docs/
git push
This will generate the Webpack bundle (dist/main.js) and it will copy it to
the folder that is served by GitHub Pages (docs/).
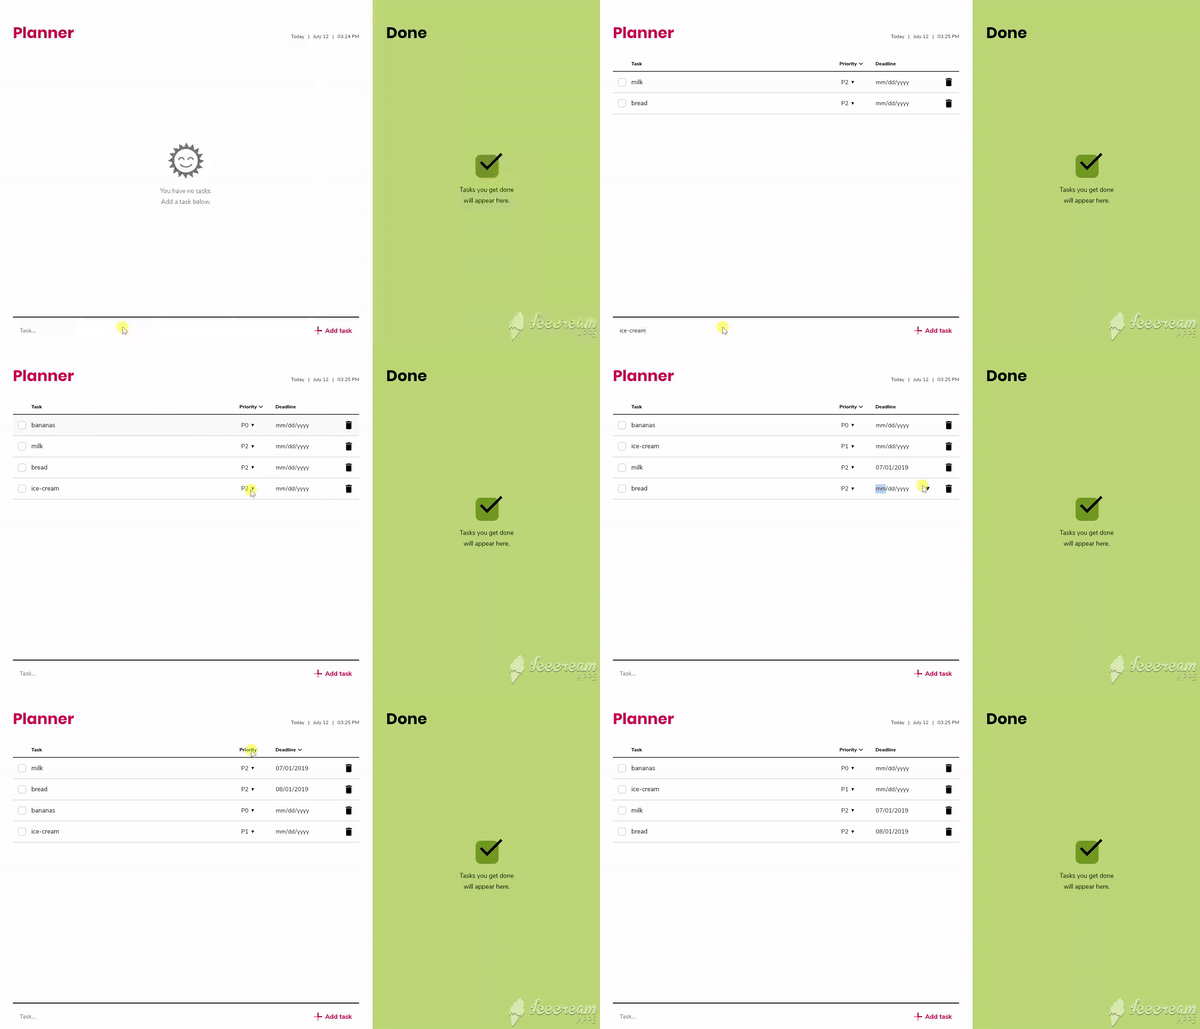
Responsive web application to plan, organize and track tasks.
- Vanilla JS (no frameworks).
- ES6 (template literals, arrow functions, classes, modules, spread syntax, multiline strings, let and const).
- CSS grid and CSS Flexbox for page layouts.
- CSS Variables.
- CSS and JS media queries for responsive design.
- Webpack.
- ESLint.
- JS event delegation.
- JS events (keyboard events, mouse events, form events, resource events).
- DOM manipulation.
- Autosize, stand-alone script to automatically adjust textarea to fit text.
-
Add a task (by using keyboard shortcut Enter or a "+ Add task" button).
- Task highlighting - When a task is added, it's background will be highlighted light gray. This helps to identify the added task from the rest of the tasks if more than one task is present.
-
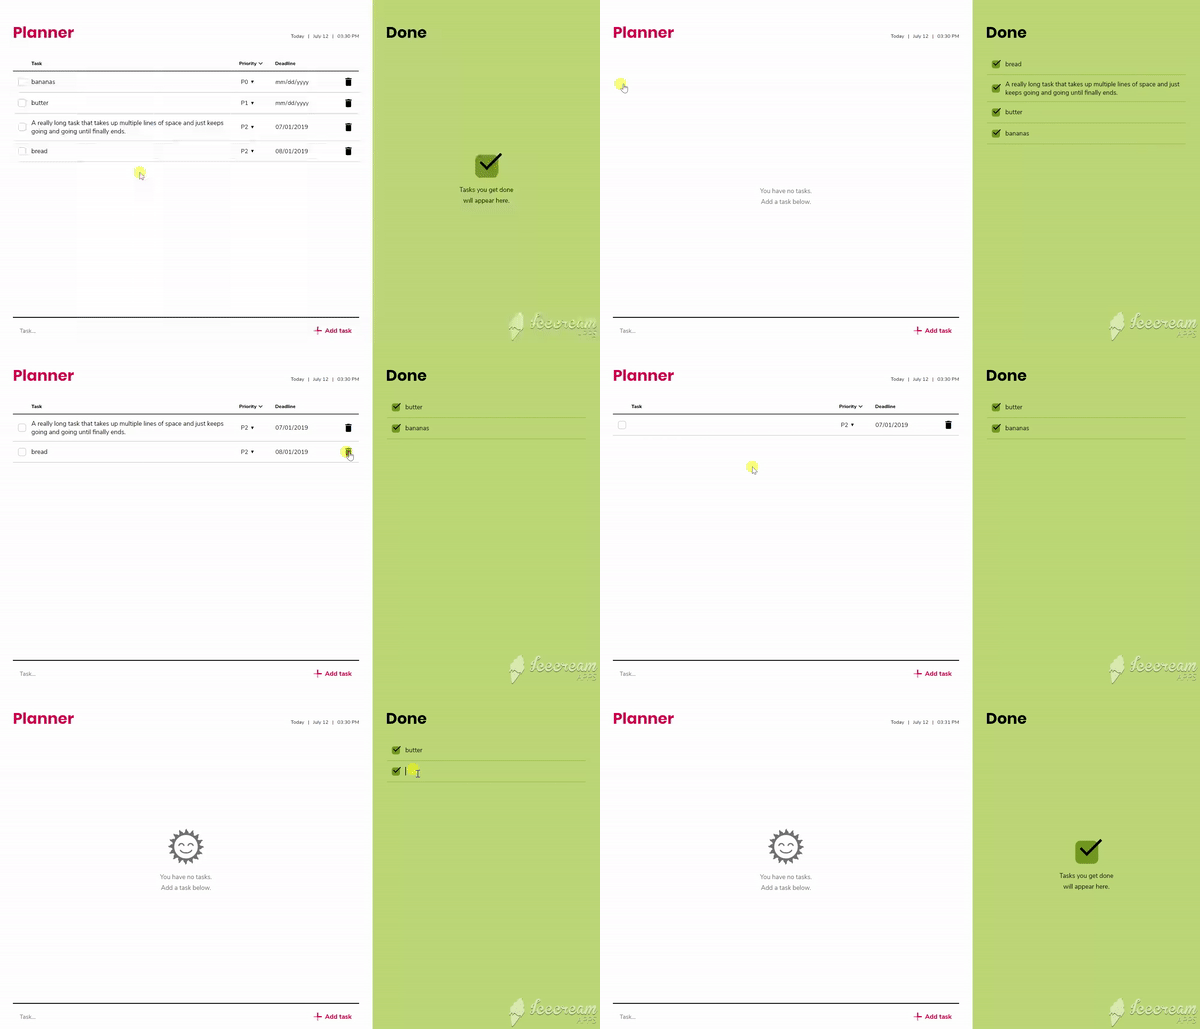
Mark task done
- Checkbox - If the user hovers over empty checkbox, checked icon will appear. This is to visually indicate that the task will be marked done if the checkbox is clicked.
-
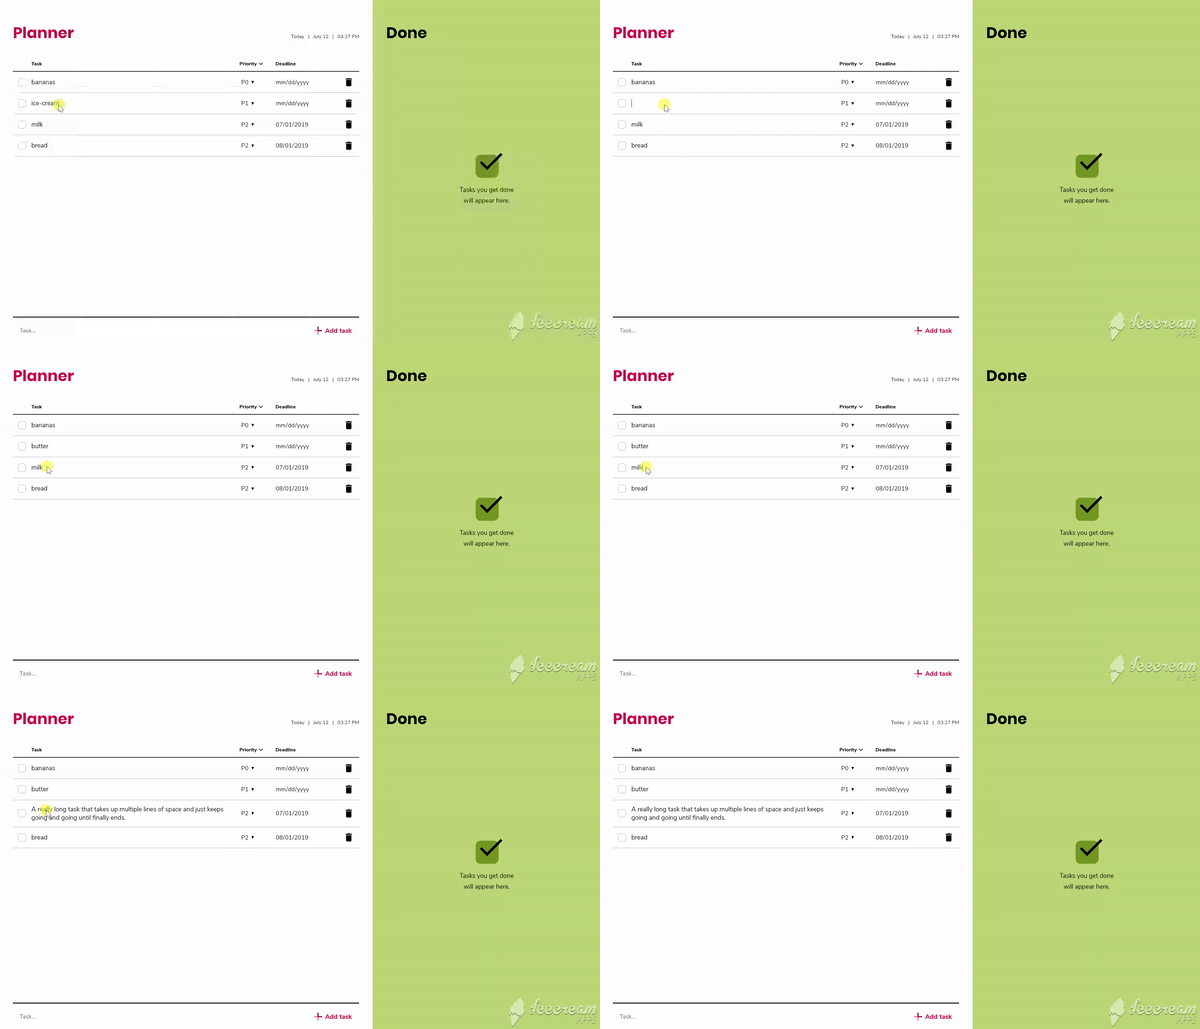
Edit task text
-
Add a priority to a task (P0, P1 or P2)
-
Add a deadline to a task
-
Delete a task
- Click on the trash bin icon.
- Remove all text inside of task and click out of the textarea.
- Mark task undone
- Checkbox - If the user hovers over the checked checkbox, an arrow pointing left icon will appear. This is to visually indicate that task will be marked undone and move back to the left side of the screen if the checked checkbox is clicked.
- Delete a task done
- Remove a task text and click out of the text area.
If there are no tasks present in the planner section, then the empty state will appear stating that the user has no tasks and can add a task below on the screen.
Same works for done tasks section. If no tasks are present, then empty state will appear stating that tasks that get done will appear in this section.
Sort tasks by priority or by deadline. I used the array sort() with compare
function to implement this.
The app stores tasks, tasks that are done, and UI state data in local storage.
Here is a list of UI state data:
- How the tasks are sorted, by priority or by deadline.
- If browser viewport is <= 800px, then the user sees one section on the screen, either planner with tasks or done section with tasks that are done.
- If browser viewport is >= 801px, then the user sees two sections on screen, both planner with tasks and also done section with the tasks that are done.
Today's date and time appear on the right top area above the tasks. This is to
make setting deadlines for tasks easier. I used the setTimeout() function to
re-render the time / date section of the UI every 1000 ms.
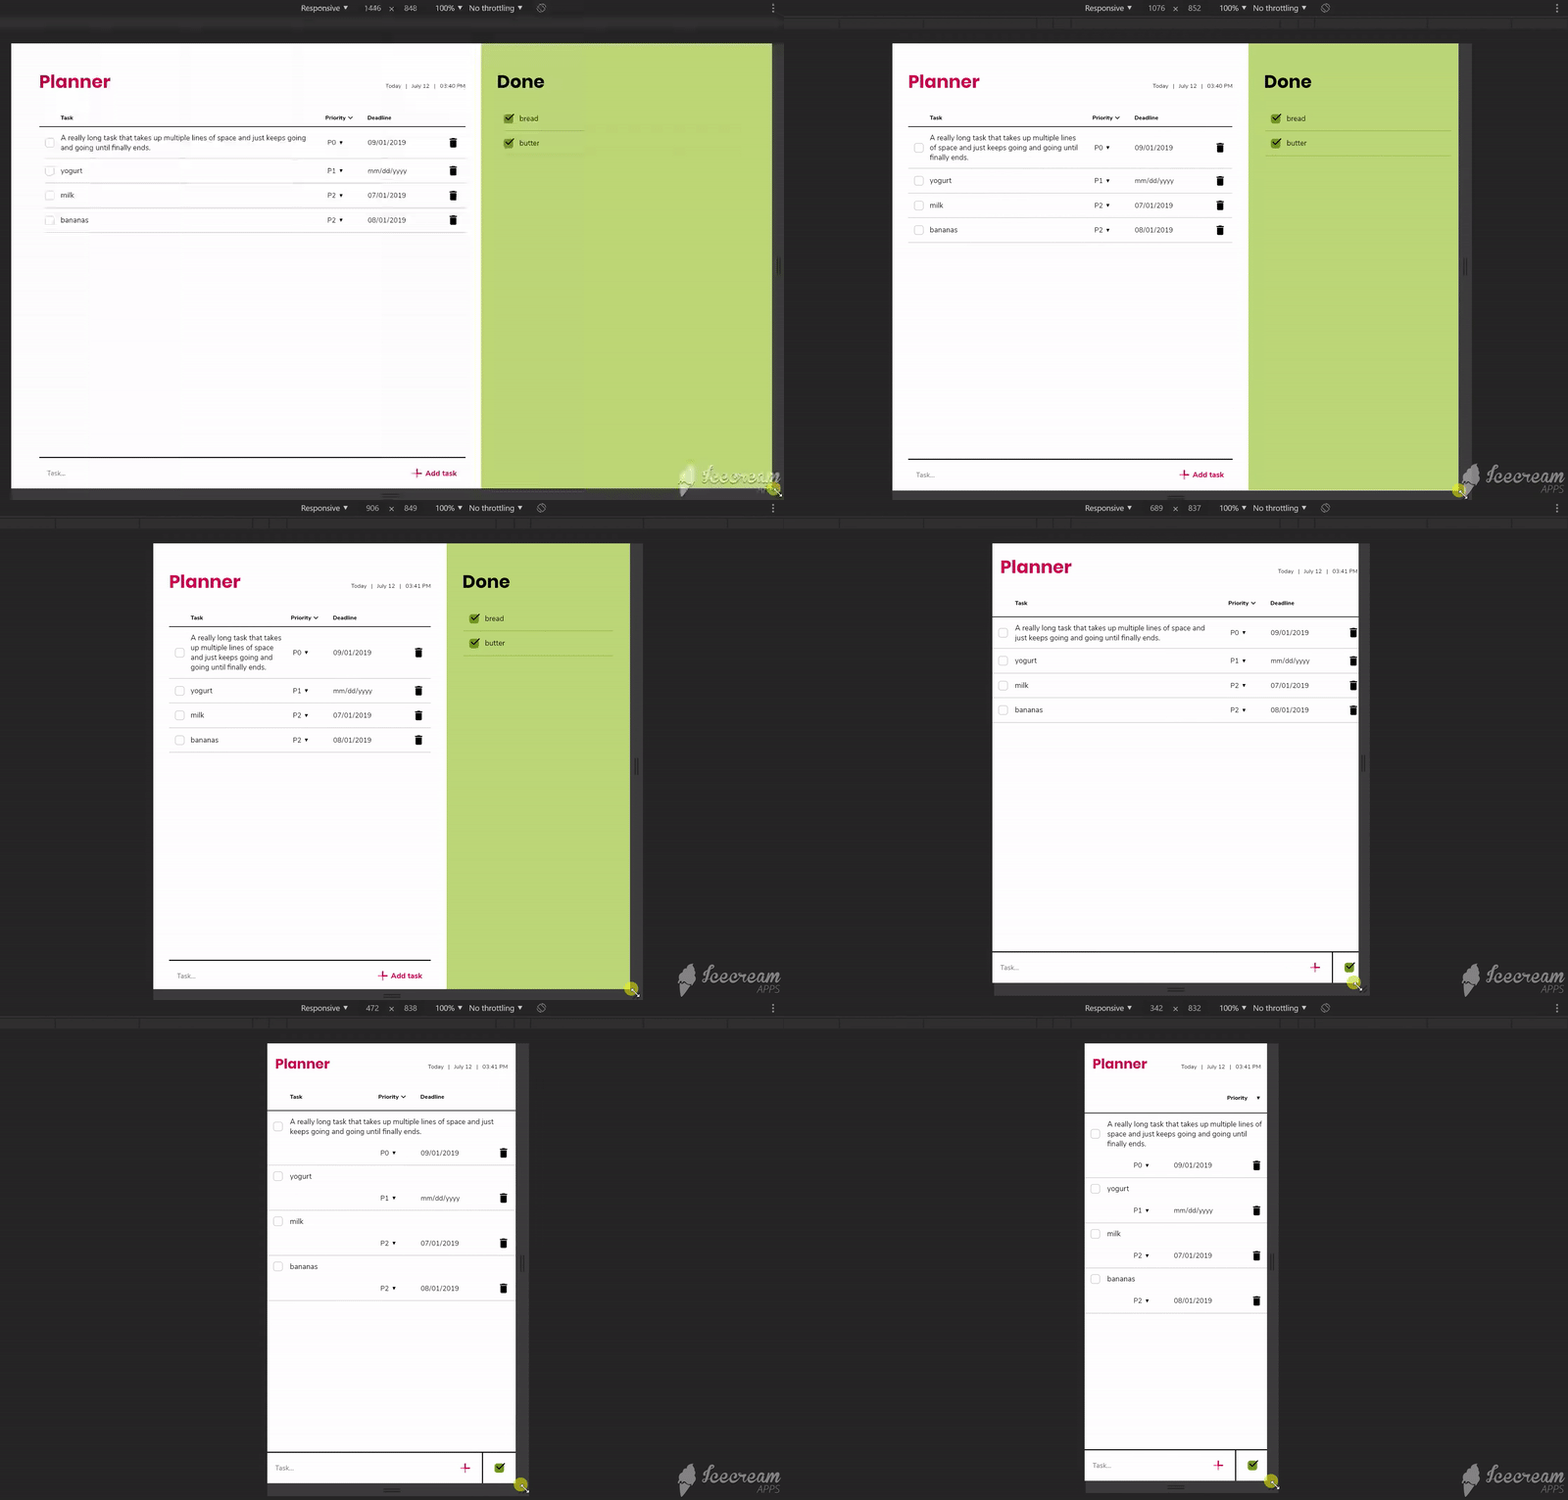
I created 6 media query breakpoints based on usability and aesthetics of the web app. Maximum design width is set to 1400px.
- Viewport >= 801px
- The viewport will show two sections, planner and done, at the same time.
- Viewport <= 800px
- New button with a checkbox icon to view done tasks is made visible with CSS.
- The viewport will show only one section, planner or done, at the time. Which panel is shown depends on what state is stored on local storage. JS checks the local storage and if the checkbox icon button has been clicked then done tasks section is visible and if not, then the tasks section is visible.
- Extra padding is added for clickable table headings.
- "+ Add task" button is removed with CSS.
- A smaller version of "+ Add task" button is made visible with CSS.
- Viewport <= 550px (minor breakpoint)
- Minor aesthetics changes.
- Viewport <= 500px
- Task layout changes. The viewport has become too small to have a checkbox, task text, priority, deadline and delete icon all in the same line. So I used the CSS grid to break content from one line into two lines. The first line has a checkbox and task text. The second line has priority, deadline and delete icon.
- Viewport >= 361px
- In JS I check the local storage how tasks are sorted (by priority or by deadline). Then I paint the new tasks heading which highlights are tasks sorted by priority or by deadline.
- Viewport <= 360px
- Tasks headings are hidden in CSS.
- Dropdown to sort tasks is made visible in CSS.
- In JS I check the local storage how tasks are sorted and then paint the sorted by dropdown with that value selected.
Make web application responsive
- Add this link to make application responsive:
<meta name="viewport" content="width=device-width, initial-scale=1.0">
Design mobile first
- I designed the largest viewport design first because I had already in mind how the smallest viewport will look like. I recommend designing smallest viewport design first. If you can make something work for a small viewport, then it's much easier to generate a large viewport version of the same design.
Use tools to test usability in mobile devices
-
As a designer, use tools like Skala Preview to make sure that fonts and clickable areas are large enough for Android and iOS phones.
-
As a developer, use Chrome Dev Tools to debug the web app on a remote device like a smartphone. To debug in Chrome Dev Tools:
- Plug in your phone to your computer. Make sure USB debugging is connected on Android. Open Chrome on your phone.
- Open Chrome Dev Tools on your computer.
- Click on the overflow icon (three vertical dots) on the top right corner.
- More tools -> Remote devices
- Wait until my device appears in Remote devices tab on the bottom of the dev tools section.
- In Port forwarding section add a rule
localhost:8080or whatever network port Webpack uses to run the code. - On the left hand of the dev tools under "Devices", click on the device you are testing on.
- Enter the
localhost:8080or whatever port you use and click Open. - Click on Inspect button beside
localhost:8080.
- Keyboard shortcut (Shift + Enter) for exiting task after finishing editing task text.
- Allow users to create a profile and store the data using Firebase.
- Custom build and design date picker that looks the same in all browsers.
- Add a button "Add deadline" instead of "mm/dd/yyyy 🔽" in web and empty area with 🔽 icon in Android web.
- Format date into month and day (e.g. Dec 15).
- Add CSS animation.
- Add option to add multiple lists and a search all lists feature.
- Add option to rearrange tasks by drag and drop.


