| page_type | languages | products | description | urlFragment | |||
|---|---|---|---|---|---|---|---|
sample |
|
|
Azure function to capture GitHub traffic in Cosmos DB |
github-traffic-tracker |
GitHub offers insights about the traffic activity in your repository, but that data is only available for 14 days. Using a Python Azure Function and Cosmos DB you can quickly capture this data and keep it for as long as you need.
Outline the file contents of the repository. It helps users navigate the codebase, build configuration and any related assets.
| File/folder | Description |
|---|---|
github_tracker |
Sample Azure Function |
.funcignore |
Azure Function Artifact |
host.json |
Azure Function Artifact |
proxies.json |
Azure Function Artifact |
requirements.txt |
Python dependencies |
.gitignore |
Define what to ignore at commit time. |
CHANGELOG.md |
List of changes to the sample. |
CONTRIBUTING.md |
Guidelines for contributing to the sample. |
README.md |
This README file. |
LICENSE |
The license for the sample. |
- Azure account - Sign up for free
- VS Code installed
- Have Azure Functions and Python extensions for VS Code installed
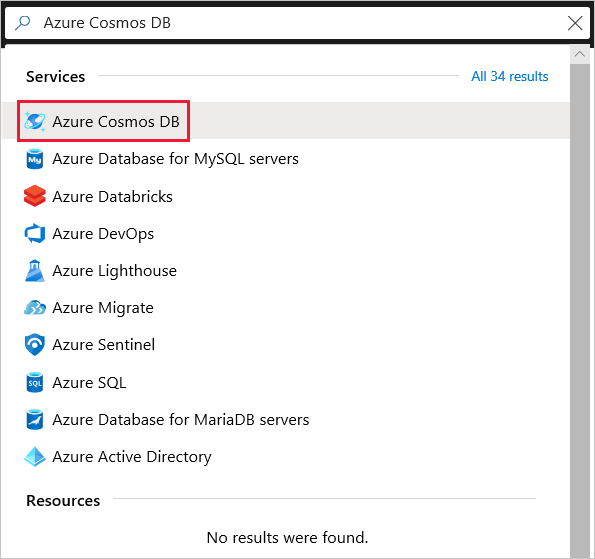
Go to the Azure portal to create an Azure Cosmos DB account. Search for and select Azure Cosmos DB.
-
Select Add.
-
On the Create Azure Cosmos DB Account page, enter the basic settings for the new Azure Cosmos account.
Setting Value Description Subscription Subscription name Select the Azure subscription that you want to use for this Azure Cosmos account. Resource Group Resource group name Select a resource group, or select Create new, then enter a unique name for the new resource group. Account Name A unique name Enter a name to identify your Azure Cosmos account. Because documents.azure.com is appended to the name that you provide to create your URI, use a unique name.
The name can only contain lowercase letters, numbers, and the hyphen (-) character. It must be between 3-31 characters in length.API The type of account to create Select Core (SQL) to create a document database and query by using SQL syntax. Apply Free Tier Discount Apply or Do not apply With Azure Cosmos DB free tier, you will get the first 400 RU/s and 5 GB of storage for free in an account. Learn more about free tier. Location The region closest to you Select a geographic location to host your Azure Cosmos DB account. Use the location that is closest to you for fastest access to the data. Account Type Non-Production Select Non-Production. This is an Azure resource tag setting that tunes the Portal experience but does not affect the underlying Azure Cosmos DB account. You can change this value anytime. Geo-Redundancy Disable Disable global distribution on your account. You can add more regions to your account later. Multi-region Writes Disable Multi-region writes capability allows you to take advantage of the provisioned throughput for your databases and containers across the globe. Availability Zones Disable Availability Zones help you further improve availability and resiliency of your application.
You can have up to one free tier Azure Cosmos DB account per Azure subscription and must opt-in when creating the account. If you do not see the option to apply the free tier discount, this means another account in the subscription has already been enabled with free tier.

-
Select Review + create. You can skip the Network and Tags sections.
-
Review the account settings, and then select Create. It takes a few minutes to create the account. Wait for the portal page to display Your deployment is complete.
-
Select Go to resource to go to the Azure Cosmos DB account page.


You can use the Data Explorer in the Azure portal to create a database and container.
-
Select Data Explorer from the left navigation on your Azure Cosmos DB account page, and then select New Container.
You may need to scroll right to see the Add Container window.

-
In the Add container pane, enter the settings for the new container.
Setting Suggested value Description Database ID GitHubTraffic Enter GitHubTraffic as the name for the new database. Database names must contain from 1 through 255 characters, and they cannot contain /, \\, #, ?, or a trailing space. Check the Provision database throughput option, it allows you to share the throughput provisioned to the database across all the containers within the database. This option also helps with cost savings.Throughput 400 Leave the throughput at 400 request units per second (RU/s). If you want to reduce latency, you can scale up the throughput later. Container ID Metrics Enter Metrics as the name for your new container. Container IDs have the same character requirements as database names. Partition key /repo The sample described in this article uses /repo as the partition key. Don't add Unique keys for this example. Unique keys let you add a layer of data integrity to the database by ensuring the uniqueness of one or more values per partition key. For more information, see Unique keys in Azure Cosmos DB.
-
Next, select Keys from the left navigation.
-
Copy the Primary Connection String you'll need this in the next section.
For a more detailed setup follow this tutorial
-
Open the repo folder in VS Code
-
When prompted select Yes

-
Select python from the drop down menu

-
Select a local installation of Python 3.8 to create a virtual environment with.
-
Create a file called local.settings.json
-
Copy and paste the code below into the file and save it.
{ "IsEncrypted": false, "Values": { "AzureWebJobsStorage": "", "FUNCTIONS_WORKER_RUNTIME": "python", "GithubApiKey": "", "CosmosDBConnectionString":"" } } -
Follow the steps in this tutorial to generate you GitHub api key.
-
Copy and paste the key into local.settings.json in the GithubApiKey field
-
Paste the Primary Connection String from the pervious section in the CosmosDBConnectionString.
-
Save the file
Next you'll need to update the variable in the code.
-
Open init.py
-
The list of repositories can be set manually, or data can be retrieved for all repos for the user or organization.
-
For a manual list of repositories, fill the repos dict with the repos you'd like to track
repos = {
"<REPO-NAME>": "<REPO-URL-EXTENSION>",
}
Note: the url extension must match the url extension for GitHub. For example the extension for this repo is github-traffic-tracker.
-
For all repos for a user or organization, delete the declaration of the
reposdictionary, and uncomment the lines in themainfunction that retrieve the orgs.def main(mytimer: func.TimerRequest): # Uncomment this to load the repos from GitHub each time user_or_org = UserOrOrg("<USER-OR-ORG>", os.getenv("GithubApiKey")) repos = user_or_org.repos()
Replace
<USER-OR-ORG>with the GitHub user name or organization name.This will retrieve all the repositories for the user, and gather traffic data for all of these.
Note: by doing this you won't be able to set a human-readable name for the repos in the cosmos database, they will all use the repo name.
-
-
Add the database and container names when initializing CosmosDB.
cosmos_db = Database(
            os.getenv("CosmosDBConnectionString"),
            "<YOUR-DATABASE-NAME>",
            "<YOUR-CONTAINER-NAME>"
            )
If you used the name given in the example they are GitHubTraffic and Metrics.
-
Add the repo owner
repo = Repo("<REPO-OWNER>", name, url, os.getenv("GithubApiKey"))
This is likely your username or the name of the organization that this repo belongs to.
A function app requires an Azure Storage account for data and a hosting plan. All of these resources are organized within a single resource group.
-
In the Azure: Functions explorer, select the Deploy to Function App command, or open the Command Palette (F1) and select the Azure Functions: Deploy to Function App command. Again, the function app is where your Python project runs in Azure.
-
When prompted, select Create New Function App in Azure, and provide a name that's unique across Azure (typically using your personal or company name along with other unique identifiers; you can use letters, numbers, and hyphens). If you previously created a Function App, its name appears in this list of options.
-
When prompted, select a Python version and Azure location.
-
The extension performs the following actions, which you can observe in Visual Studio Code popup messages and the Output window (the process takes a few minutes):
- Create a resource group using the name you gave (removing hyphens) in the location you selected.
- In that resource group, create the storage account, hosting plan, and function app. By default, a Consumption plan is created. To run your functions in a dedicated plan, you need to enable publishing with advanced create options.
- Deploy your code to the function app.
The Azure: Functions explorer also shows progress:
-
Once deployment is complete, the Azure Functions extension displays a message with buttons for three additional actions:


The Upload settings button in the deployment message popup applies any changes you've made to your local.settings.json file to Azure. You can also invoke the command on the Azure Functions explorer by expanding the Functions project node, right-clicking Application Settings, and selecting Upload local settings. You can also use the Command Palette to select the Azure Functions: Upload Local Settings command.
Uploading settings updates any existing settings and adds any new settings defined in local.settings.json. Uploading doesn't remove any settings from Azure that aren't listed in the local file. To remove those settings, expand the Applications Settings node in the Azure Functions explorer, right-click the setting, and select Delete Setting. You can also edit settings directly on the Azure portal.
To apply any changes you make through the portal or through the Azure Explorer to the local.settings.json file, right-click the Application Settings node and select the Download remote settings command. You can also use the Command Palette to select the Azure Functions: Download Remote Settings command.
Your code will run automatically at 1 am UTC each day and capture the data from the day before. To test your code locally you can edit the NCRONTAB timer to run more frequently. The steps below outline how to do that.
- Open function.json
- Edit the "schedule" entry to "0 * * * * *"
The code will now run once a minute.
- Edit the "schedule" entry back to "0 0 1 * * *" and save the file
This project welcomes contributions and suggestions. Most contributions require you to agree to a Contributor License Agreement (CLA) declaring that you have the right to, and actually do, grant us the rights to use your contribution. For details, visit https://cla.opensource.microsoft.com.
When you submit a pull request, a CLA bot will automatically determine whether you need to provide a CLA and decorate the PR appropriately (e.g., status check, comment). Simply follow the instructions provided by the bot. You will only need to do this once across all repos using our CLA.
This project has adopted the Microsoft Open Source Code of Conduct. For more information see the Code of Conduct FAQ or contact [email protected] with any additional questions or comments.


