- The Java Tutorial from Oracle
- Games Fleadh
- The Nature of Code
- The git manual - read the first three chapters
- A video tutorial all about git/github
- The Processing language reference
- Introduction to Maven
- Email: [email protected]
- Twitter: @skooter500
-
Week 11 Lab Test 20%
-
Week 12 Assignment Submission - 30%
-
End of Year exam - 50%
A video from Monday's class:
- Learn how to fork a git repository
- Learn how to use the Processing map function
- Learn how to iterate over an ArrayList
- Use accessor methods
In todays lab we will plot the elements from the ArrayList of Star objects to the screen
Firstly! If you havent already, fork the repository for the course to your own git repository. To do this, login to github, find my repositoy and hit the fork button. Now you have a personal copy of the repository stored in your github account that you can commit to and also keep updated from my repository.
Clone your fork by typing:
git clone URL_TO_YOUR_REPO
Replace URL_TO_YOUR_REPO with the URL to your repo. It will be something like
http://github.com/JimKirkStudent/OOP-2018-2019
Check to make sure the remotes are set correctly by typing:
cd OOP-2018-2019
git remote -v
You should see something like this:
origin        http://github.com/JimKirkStudent/OOP-2018-2019 (fetch)
origin        http://github.com/JimKirkStudent/OOP-2018-2019 (push)
upstream  http://github.com/skooter500/OOP-2018-2019 (fetch)
upstream  http://github.com/skooter500/OOP-2018-2019 (push)
origin should alias your repository and upstream should alias my repository. You might need to add the upstream if you just did the fork and clone:
git remote add upstream THE_URL
You can also modify an alias by typing:
git remote set-url origin THE_URL
Where origin in the above is the alias you want to update. You can update the upstream alias in a similar manner.
Let's keep the master branch clean and never commit code on it. Instead, create and push branches for your work.
You can pull my changes into your master branch by typing:
git checkout master
git pull upstream master
This checks out your master branch if it is not already checked out and then pulls from my upstream branch into your local master branch. Commit and push your changes:
git add .
git commit -m "message"
git push
Ok! If you want a refresher on what we did in Monday's class, watch the video above.
The goal of today's lab is to plot the dataset we loaded into the ArrayList. Make sure you study the code from Monday before you move on. Here is some more documentation on the ArrayList you can read.
Basically, to add an element use:
Star s = new Star();
al.add(s);
To retrieve an element use:
Star s = al.get(i);Or iterate over the ArrayList using:
for(Star s:stars)
{
...
...
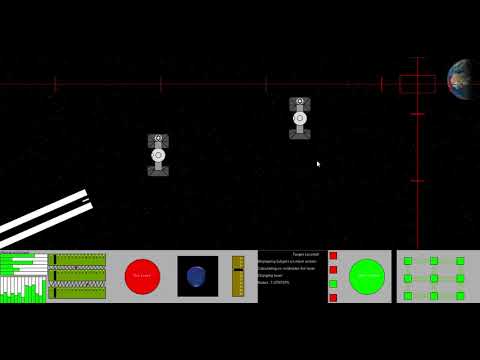
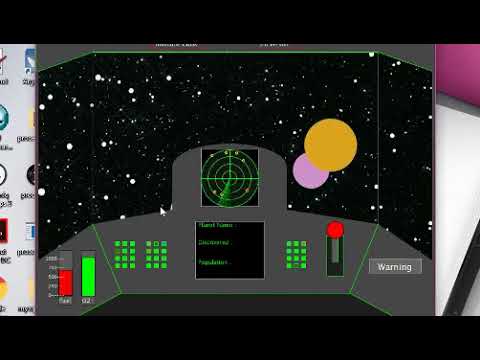
}Here is what the finished program should look like:

- Create a branch in your forked repository for your code today
- read about the processing map function. It's super useful.
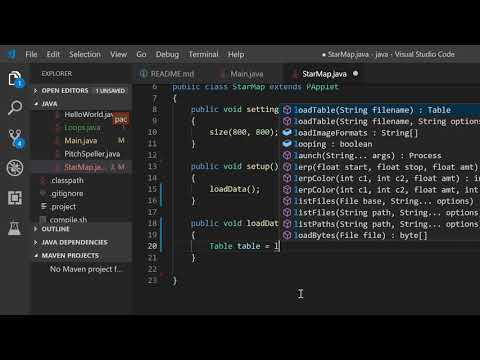
- Write a method in the StarMap class called
drawGridthat draws the grid lines and the numbers along the grid. Use the map function! - Write a method called
drawStarsthat plots the stars onto the grid, using the xG and yG fields in the star to map onto the grid. Use the accessor methods on the Star objects. - Draw a yellow cross at the center of the star and a circle of diameter absMag field of the star. To do this you will have to iterate over the ArrayList of Star's
- Use the text method to print the name of the star. You can use the textAlign method to align the text. Look these up in the Processing reference if you need.
Advanced!
In the video, you can click on a start and then click on a second star to print the distance between them. See if you can implement this!
Check out Arrays.java for the program we wrote in the class today
- Know to to declare and assign values to an array
- Know how to iterate over an array
- Practice problem solving with arrays
Clone the repo for the course if you need it or switch to the master branch and pull the changes to get the Arrays example. Create a new branch for your work today called lab4
Modify the class Arrays.java to draw this trend line graph. You should probably add a method to do this and call it from draw()

- You might find the following Processing methods useful:
- line
- The Processing map method
- text - Prints text to the screen at x and y coordinates
- textAlign
These two arrays give the frequencies of music notes and the corresponding note name in a notation called ABC notation. The names of music notes are called "spellings".
float[] frequencies = {293.66f, 329.63f, 369.99f, 392.00f, 440.00f, 493.88f, 554.37f, 587.33f
			, 659.25f, 739.99f, 783.99f, 880.00f, 987.77f, 1108.73f, 1174.66f};
String[] spellings = {"D,", "E,", "F,", "G,", "A,", "B,", "C", "D", "E", "F", "G", "A", "B","c", "d", "e", "f", "g", "a", "b", "c'", "d'", "e'", "f'", "g'", "a'", "b'", "c''", "d''"};- Write a class called PitchSpeller that has the above 2 arrays as fields. It should have a method
public String spell(float frequency)that takes a frequency as a parameter and returns the spelling which is closest to that frequency. Test your solution by adding code to the main method. For example:
PitchSpeller ps = new PitchSpeller();
System.out.println(ps.spell(330));
System.out.println(ps.spell(420));
System.out.println(ps.spell(1980));
Should print:
E,
A,
b
You can use the Math.abs method in your solution to get the absolute value of a number.
Check out Loops.java in the repo for some examples
- Know how to write a for loop
- Know how to write a while loop
- Know when to use either type of loop
- Practice computational thinking
Clone/pull the repository for the course as you need. If you are cloning a new repository, don't forget to create the bin folder inside the java folder.
Create a branch for your work today:
cd OOP-2018-2019
git checkout -b lab3
You can add your code to the Loops class.
To set colors, you can use the methods:
stroke
fill
background
These are methods on the PApplet class that take either one parameter (a greyscale value) or three parameters (RGB). Another way of generating colors is by using the HSB colorspace. HSB stands for Hue, Saturation and Brightness. In Processing, these values go between 0-255. Hue is the color, saturation is the amount of grey and brightness is the brightness. It is much easier to generate interesting colors procedurally using HSB colorspace. To use HSB colorspace, call:
colorMode(HSB);
In the setup method.
Ok here are some patterns you can generate using loops. I suggest you modify the Loops class and add a seperate method to generate each of the patterns so you can keep your code modular. Don't forget to call the methods you write from draw(). Also you can call colorMode, stroke and fill in each method you write as appropriate for the problem you are trying to solve.


These next two require nested loops...


for loops are probably a better choice for most of these, but you should try writing one or two of them using while loops for practice:
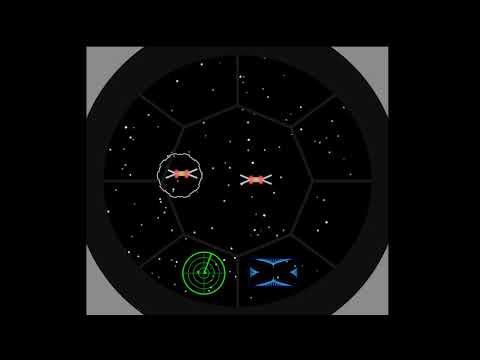
- Check out the HelloProcessing class in the repo
- We drew the all seeing eye using the Processing drawing methods

- Practice drawing stuff and working out co-ordinates
- Practice using variables and if statements in Java
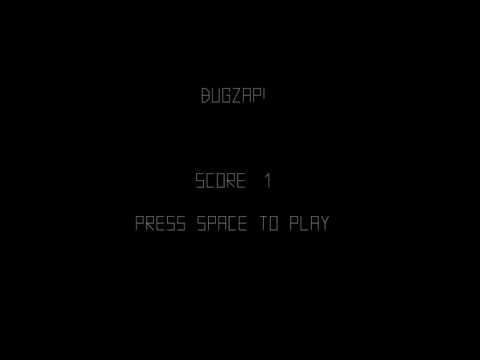
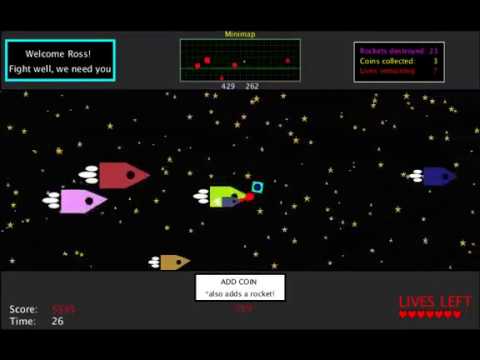
This is a video of a silly game called Bugzap made in Java using the Processing libraries. Today we can make a part of this game in order to get some practice using variables in Java.
How you should do it:
Ok let's get the main game working first and not worry about the splash screen and the game over screen
- Clone the repository for the course, or pull from the remote repository to get the changes I made over the last couple of days
- Get the HelloProcessing example working. See these instructions.
- Start bash and make sure you are in the java folder in the repository. Create a branch for your work today by typing:
git checkout -b lab2
- Create a new class called BugZap.java in the ie.dit folder. Make it extend
PAppletand add thesettings,setupanddrawmethods. Check out HelloProcessing.java if you need examples for these. - Call
sizeinsettingsto set the size of the drawing window. - Edit the file Main.java so that it starts the BugZap class instead of the HelloProcessing class. I'll let you figure out how to do this.
- Make sure everything works by compiling and running your program before continuing!
Now we can draw the bug.
- Make fields of type
floatin the BugZap class forplayerX,playerYandplayerWidthand give these default values. You can decide what these should be. There are built in variables called width and height that give the width and height of the drawing window. These only get assigned after size has been called, so if you want to use these to give values to playerX, playerY etc. put the code into the setup method. - Write a method called void
void drawPlayer(float x, float y, float w)that draws the player character, centered around the parameters x, y. You can use the line method to do this. You can pass variables as parameters to this method and also things likex + 20,w * 0.5fetc. I made an extra variable in this method called h for the height and set it to be half the w parameter. Don't forget to set the stroke color! - Call this method from
draw, passing in the parameters playerX, playerY and playerWidth. - Compile and run everything to make sure it's working before continuing.
- If everything is working ok, you should see the bug on the screen
Now lets get the player moving in response to the keys
Add this method to BugZap.java:
public void keyPressed()
	{
		if (keyCode == LEFT)
		{
			System.out.println("Left arrow pressed");
		}
		if (keyCode == RIGHT)
		{
			System.out.println("Right arrow pressed");
		}
		if (key == ' ')
		{
			System.out.println("SPACE key pressed");
		}
} - If you compile and run the program again you will see that some messages get printed out when you press various keys. If you are running in Visual Studio Code, you will see these messages appear in the Debug Console
- Modify this method to increment and decrement the playerX variable instead and you should be able to get the player to move left and right
- You might want to add if statements to this method to stop the player moving off the left and right side of the screens. If statements in Java are almost the same as in C
- When the player presses SPACE you will want to draw a line for the player's laser.
The Bug
- In a similar way to how you made the player, make the Bug. Make variables and drawBug method. Don't forget to call the method from draw()
- To move the bug you can add a random amount to it's x coordinate on intervals. To generate a random number you can use the random function.
- One way to make stuff happen on an interval rather than every frame is to use the frameCount variable. This variable is a field in PApplet and it gets incremented automatically every time draw is called. Because draw gets called 60 times a second, you can do something every second with this code:
if ((frameCount % 60) == 0)
{
    // Do something
}- You can print text to the screen using the text function.
Ok you should now have the basics working. See if you can figure out how to check to see if the player hits the bug, add scoring, splash screen, game over screen and sound.
Some assignments from previous years:


- Use git
- Make your first Java classes
Create an account for yourself on github. Sign up for the github student pack to enable you to create private repositories.
Create a new empty folder using Windows Explorer and then right click on the folder and choose git bash here. Alternatively you can start the bash and cd to the new folder. To clone the repository for the course to the empty folder type:
git clone https://github.com/skooter500/OOP-2018-2019
cd OOP-2018-2019
Now lets create a branch to store your work for today. Type:
git checkout -b lab1All your changes from now on will be on this branch rather than the master branch.
Type
lsAnd you will see the folder OOP-2018-2019 has been created. Type:
cd OOP-2018-2019/javaMake a folder called bin by typing:
mkdir binThis is where the java compiler will place generated .class files compiled from the Java source files in the src folder. The bin folder and compiled class files will not be in the git repo as it just stores source code and not the output of the build process. To compile, type:
javac -d bin src/ie/dit/*.javaTo run your program type:
java -cp bin ie.dit.HelloWorldYou should see:
Hello world
Misty
Woof!
Meow!
Felix
Appear on the console. Congratulations! You compiled and ran your first Java program.
Now open up the Java code files in Notepad++ or Visual Studio code if you are using your own computer. Modify the Cat class:
- Add a private field for numLives of type int on the Cat class
- Make accessors (set and get methods) for numLives, similar to how this was done in the Dog class
- Write a default public Constructor for the cat that sets the number of lives to be 1. A default constructor is a method with the following characteristics:
- No return type!
- Same name as the class
- Takes no parameters
- Gets called when the object is created
- Write a method on the Cat class called kill. It should subtract 1 from numLives if numLives is > 0 and print the message "Ouch!". If numLives is 0, you should just print the message "Dead"
- In the Main class, construct a Cat instance and in a loop, call kill until the Cat is dead.
Commit your changes to the branch by typing:
git add .
git commit -m "Added kill method to the Cat class"
Switch back to the master branch by typing:
git checkout masterNotepad++ will reload your files and you will see that your changes are gone.
Change back to the lab1 branch by typing:
git checkout lab1
And you will find your changes there
- Clone the repo for the course last year. The URL is https://github.com/skooter500/OOP-2017-2018
- cd into the java folder of the newly cloned repository
- To compile the code, type:
./compile.sh
- To run the code type:
./run.sh
If you edit the file Main.java, you can comment out the line main.matrixMultiplication(); and instead uncomment any of the other lines to see some of the examples we made last year. In particular, the tuineFinder1 example is pretty cool. It loads up a recording of a tune played on the tinwhistle, transcribes the audio to music notes and then finds a match for the tune in an SQLite database of tunes
//main.matrixMultiplication();
//main.editDistance();
//main.strings();
//main.dictionary();
//main.transform();

main.matrixMultiplication();
//main.tuneFinder1();
