Point to Point TUN link via NRF24L01 radio modules
This software is distributed free of charge under GNU GPLv2 license.
If you found my work helpful, consider supporting it through a donation
- How it works
- Error Correction
- Performance
- PCB
- Installation (RPi)
- Usage
- Systemd Service
- Wiring
- Stability Advice
- Setting up video streaming
- RPi as wireless AP
Upon launch, the program creates the TUN interface (arocc) and sets up for the selected radio.
The code structure is designed with expandability in mind, enabling fast addition of different radio modules, packetizers and packet sources.
Scheme:

There are 3 core components:
| TUN handler | Handles packets from the packetizer, into the linux system and vice versa. Sets everything about the system interface (be it TUN, UART or else). |
| Packetizer | Receives packets from the TUN handler, splits them into segments suitable for radio transfer and recomposes them on the latter end of the bridge. |
| Radio | Handles everything regarding a particular radio. Receives segments from the packetizer and sends them through the medium. Reads segments from the medium and sends them to the packetizer. |
You must select each component using the config files (look into the presets folder)
You must also declare which is the primary and secondary radio.
Almost everything can be done through the config files.
Primary and secondary have these addresses respectively: 192.168.10.1 and 192.168.10.2 (unless you change them)
| two-RF24 | The primary radio streams their packets (and if configured, empty packets) and reads the Ack Payloads of the secondary radio. Note: A good portion of the total received packets are discarded automatically from the modules in the two-RF24 setup, just because there usually are a couple corrupted bytes out of 32. |
| four-RF24 | Full duplex communication with higher performance compared to the two-RF24 setup. Each end of the bridge has two NRF24L01 radio modules. The four-RF24 setup is strongly recommended because it allows for advanced error correction, meaning theoretically larger range. |
| Pico RF24 adapter | You can enable non-raspberry debian computers to connect to the bridge by building a pico adapter: it's a raspberry pico board with two NRF24L01 modules and a program to exchange settings and packets with rf24tunlink. Works via USB |
Here is a representation of the errors in close range, before RS ECC was implemented

Here is one test done after implementing the RS ECC

Note that error correction is available only for the four-RF24 setup.
Unfortunately for two-RF24 you cannot disable ack payloads unless you intend to send a one way stream (unsupported at the moment)
Results depend on the configuration used.
For a four-RF24 setup, with 30 bytes of data and 2 bytes for ECC:
Throughput (close range): 1.2Mbps
Ping: 2-4ms
A realistic expectation would be using more bytes for ECC and streaming continously no more than 200-400Kbps. You will experience increased ping and/or dropped packets if signal is lost for too long.
A PCB is in the works and will be released later this year.
Meant for a stable point to point communication or a remote-RC car/drone setup.
Have a look at this announcement page
Sneak peek:
|
|
- You need a pair of Raspberry Pi boards. Raspberry 3B and 4 are tested but virtually every linux board should work.
- Enable the SPI interface using
raspi-config
From here, an automated install script is available:wget -qO /tmp/install_script.sh https://raw.githubusercontent.com/LollosoSi/rf24tunlink/main/install_script.sh && bash /tmp/install_script.sh
- If you intend to use the dual radio setup add this in your config.txt
dtoverlay=spi1-3cs - Install the build essential, make, cmake, git and g++:
sudo apt-get install build-essential cmake make git g++ -y - Installing pigpio is recommended at this point
- Install the RF24 library following the instructions from their site.
- This project is set to look for the RF24 Core installation from your home folder (~/). You will end up with
~/rf24libs(run install.sh in your home folder). - SPIDEV is the tested driver for this application.
- If you can't compile rf24tunlink due to rf24 not found, try running install.sh with sudo
- This project is set to look for the RF24 Core installation from your home folder (~/). You will end up with
- Download the rf24tunlink source code in your home folder.
cd ~; git clone https://github.com/LollosoSi/rf24tunlink.git - In case of issues with permissions, run commands using sudo.
- With the terminal into the folder, run:
./build.shorcmake .; make - rf24tunlink executable should appear
Note: During the transition to version 2, not all features might be available.
CSV exporting or the bridge info are some of the unfinished features.
You can generate a text file with all the available settings (most have comments with explanations in them) by running the program with no arguments: ./rf24tunlink2.
Just create your files or use the ones in presets.
Presets might not always be updated and I might change them as a result of testing, it's a good idea to have a look into them when downloading for the first time.
Examples of config files can be found in the presets folder.
Once everything is tuned to your liking, run the program with all your files as arguments.
Here is an example which runs the four-RF24 setup:
Primary device:sudo ./rf24tunlink2 presets/tunlink_config.txt presets/harq_config.txt presets/radio_config.txt presets/primary
Secondary device:sudo ./rf24tunlink2 presets/tunlink_config.txt presets/harq_config.txt presets/radio_config.txt presets/secondary
This is cool beacuse you can edit your configs once then sync everything in one folder.
Use this after you've found and tested a working configuration
Install the service to run rf24tunlink at boot by running
./installservice.sh primary/secondary
A file named .progconf will be created. This one contains the config file paths. Edit as necessary.
Note: rs_config and radio_pb_config are used to change the data bytes, ECC bytes and the NRF24L01 modules data rate and power on the fly.
You lose this ability if these lines are removed.
To change these settings during execution, use the scripts./power_bitrate_config.sh (0 to 3: power) (0 to 2: bitrate) and ./ecc_config.sh (data) (ecc) with the correct arguments.
Data+ECC should always be 32 or less if using NRF24L01. Performance will be worse if you use less than 32 bytes total.
Shortcuts to control the service are provided: ./stopservice.sh ./startservice.sh ./servicestatus.sh ./restartservice.sh
You can select CE, CSN and IRQ based on your project needs.
|
Radio 0 CE: GPIO 25 CSN: GPIO 8 (CE 0) - write 0 in the config for CE 0, or 1 for CE 1 MISO: GPIO 9 MOSI: GPIO 10 SCK: GPIO 11 IRQ: GPIO 5 |
Radio 1 CE: GPIO 26 CSN: GPIO 18 (CE 1.0) - write 10 in the config (for CE 1.1, write 11. And for 1.2, write 12) MISO: GPIO 19 MOSI: GPIO 20 SCK: GPIO 21 IRQ: GPIO 6 |
- Radio on higher power settings may be unstable if the supply isn't adequate
- Buy shielded PA+LNA modules, or consider making this DIY shielding
- Use short cables, usage of jumper cables is discouraged in the final product
- If using jumpers, wrap the GND cable at least around MOSI, MISO, VCC cables
- Citing the RF24 page: Add capacitor(s) close to the VCC and GND pins of the radio. Typically, 10uF is enough
- If not using capacitors, one of these modules should take care of everything
- Software fix: try setting a slower SPI speed. Default is 10MHz, try 5MHz.
In order to land a long range communication you must check a couple things first:
-
In all cases, line of sight is required. 2.4GHz radio waves tend to move straight, thus it's hard for the signal to pass around objects in the way.
Some people mentioned the fresnel zone under this video, that's where my knowledge ends (for now). -
Are both ends of your bridge fixed? If that is, you could consider using a Yagi antenna (directional). Similar to the one in the linked video.
Otherwise, you could consider an omnidirectional antenna of 6dBi or higher.
Note: some antennas are RP-SMA, you will need an adapter to attach to the RF24L01 module (RP-SMA to SMA). -
Tune the radio power appropriately to comply with the law, at least when you've found a stable configuration.
e.g. EIRP states a 20dB limit, that means antenna dBi + transmit power must be 20 or less. -
Determine if you want a two way or one way channel.
One way used to work in the first iterations of the program, but isn't supported at the moment.
Could be cheaper if you intend to use the yagi antennas.
Range with mixed yagi for tx and omni for rx or vice versa is currently untested. Feel free to report your findings.
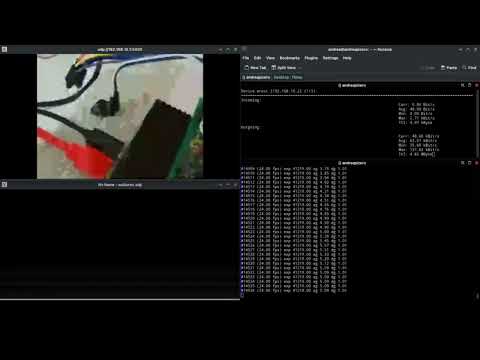
I've tested this command for streaming to the primary device of the link:
rpicam-vid -t 0 --inline --level 4.2 -b 50k --framerate 24 --width 480 --height 360 --codec libav --libav-video-codec h264_v4l2m2m -o udp://192.168.10.1:5000
Edit bitrate (-b 50k) and resolution (--width 480 --height 360) to fit your needs.
Consider the worst case scenario first: must work in 250Kbps modulation, then tune it up.
Later on, we could always consider including some kind of speed negotiation based on packet latency and signal losses.
Optional: in the receiver RPi, reroute the packets to multicast in the local network:
sudo socat udp-listen:5000,reuseaddr,fork udp-datagram:239.255.0.1:5001,sp=5000
Note that you can't do this in things like phone hotspots and these might add latency. It's best to use your home network or use the receiving RPi as access point
And in the machine(s) where you want to watch the stream:
ffplay udp://@239.255.0.1:5001 -fflags nobuffer -flags low_delay -framedrop
Adjust the address if you aren't using multicast.
To enable RPi as hotspot I put together this bash script and seems to work with low enough latency (RPi 4)
#!/bin/bash

# Stop dnsmasq service
systemctl stop dnsmasq

# Delete any existing connection named TEST-AP
nmcli con delete TEST-AP

# Add a new Wi-Fi connection in Access Point mode
nmcli con add type wifi ifname wlan0 mode ap con-name TEST-AP ssid TEST autoconnect false

# Configure Wi-Fi settings
nmcli con modify TEST-AP wifi.band bg
nmcli con modify TEST-AP wifi.channel 3
nmcli con modify TEST-AP wifi.cloned-mac-address 00:12:34:56:78:9a

# Configure Wi-Fi security
nmcli con modify TEST-AP wifi-sec.key-mgmt wpa-psk
nmcli con modify TEST-AP wifi-sec.proto rsn
nmcli con modify TEST-AP wifi-sec.group ccmp
nmcli con modify TEST-AP wifi-sec.pairwise ccmp
nmcli con modify TEST-AP wifi-sec.psk "mypassword"

# Configure IP settings
nmcli con modify TEST-AP ipv4.method shared ipv4.address 192.168.4.1/24
nmcli con modify TEST-AP ipv6.method disabled

# Bring up the connection
nmcli con up TEST-AP

# Set the transmit power of the wlan0 interface to a low value (e.g., 1 dBm)
iw dev wlan0 set txpower fixed 100

# Enable multicast on wlan0 interface
# ip link set dev wlan0 multicast on

ip route add 224.0.0.0/4 dev wlan0
Dependencies: RF24 library, CMake, pigpio

