
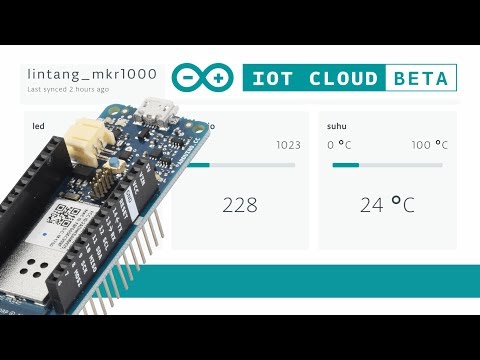
Video 1: MKR1000 & Arduino IoT Cloud, uploaded on Feb 18, 2019
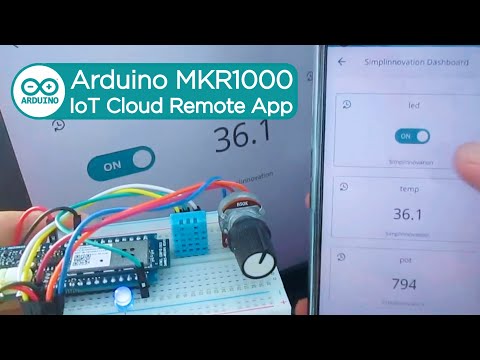
Video 2: Arduino MKR1000, IoT Cloud & Its Cloud Remote App, uploaded on Oct 5, 2020
- In this tutorial I'll use Arduino MKR 1000. You can use any Arduino boards that are compatible with the Arduino IoT Cloud, for example:
- MKR WiFi 1010
- MKR 1000
- MKR NB 1500
- MKR GSM 1400
- MKR WAN 1300
- Nano 33 IoT
- Portenta H7
- 1x LED light
- 1x Potentiometer
- 1x DHT11 sensor
- 1x Breadboard
- Some jumper wires
-
Connect all parts to Arduino MKR1000 as the following diagram:

-
Signup/login to arduino.cc then go to Arduino IoT Cloud page (create.arduino.cc/iot).
-
Go to Devices menu to configure your IoT device. First click Add Device button then you will be noticed to download & install Arduino Create Agent. After that you will be asked to connect your IoT device to your computer. Arduino Create Agent will scan your device then inform you about your IoT device type & connected port. Simply click Configure button, wait till finish & your device is ready to go.

-
Go to Things menu to create your Thing (project) with all respected Properties (sensor/actuator). In this tutorial I create a Thing called
Simplinnovationwith 3 properties:led,potandtemp.
-
Click Edit Sketch button to code your IoT device using Arduino Web Editor. On Secret tab, insert SSID (WiFi name) & its password, that will be used by your IoT device to connect to the internet. Then write these lines on
.inofile tab:
#include "thingProperties.h"
#include "DHT.h"

#define DHTPIN 5
#define LEDPIN 4
#define DHTTYPE DHT11
DHT dht(DHTPIN, DHTTYPE);

void setup() {
    setDebugMessageLevel(2);
    Serial.begin(9600);
    delay(1500);
    initProperties();
    ArduinoCloud.begin(ArduinoIoTPreferredConnection);
    led = false;
    dht.begin();
}

void loop() {
    ArduinoCloud.update();
    pot = analogRead(A0);
    temp = dht.readTemperature();
}

void onLedChange() {
    digitalWrite(LEDPIN, led);
}
Verify & upload the sketch to your device.
-
After done uploading, on Arduino Web Editor click Go To IoT Cloud button to create a dashboard. Click Dashboard menu then create your own dashboard to monitor & control your device through the internet. In this tutorial, I create a switch widget to control LED & 2 value widgets to monitor my DHT11 & potentiometer value. To actvate your dashboard, click Use Dashboard button.

-
Now you can control & monitor your device via Arduino IoT Cloud Dashboard. You can also use its IoT Cloud Remote App to control & monitor your device on smartphone. Download it from Google Play Store (Android) or Apple App Store (iOS). Enjoy!


