

Never write a ViewModel class again! Conquer the world with clean dynamic UIs!
This library uses a variation of elmish, an Elm architecture implemented in F#, to build Xamarin.Forms applications. Elmish was originally written for Fable applications, however it is used here for mobile applications using Xamarin.Forms. This is a sample and may change.
To quote @dsyme:
In my work for Xamarin, I'm asking myself "what will appeal to F# devs who want to do Xamarin programming?". These devs are very code-oriented and know F#. People are liking Elm and React via Elmish and also React Native. Can we apply some of the lessons to Xamarin programming?
- Create a blank F# Xamarin Forms app in Visual Studio or Visual Studio Code. Make sure your shared code is an F# .NET Standard 2.0 Library project.
- Add nuget package
Elmish.XamarinFormsto to your shared code project. - Put the sample code below in your shared app library
Alternatively clone and adapt the Simple Calculator Project.
Here is a full example of an app:
/// The messages dispatched by the view
type Msg =
    | Pressed

/// The model from which the view is generated
type Model =
    { Pressed: bool }

/// Returns the initial state
let init() = { Pressed=false }

/// The funtion to update the view
let update (msg:Msg) (model:Model) =
    match msg with
    | Pressed -> { model with Pressed = true }

/// The view function giving updated content for the page
let view (model: Model) dispatch =
    if model.Pressed then
        Xaml.Label(text="I was pressed!")
    else
        Xaml.Button(text="Press Me!", command=(fun () -> dispatch Pressed))

type App () =
    inherit Application ()

    let runner =
        Program.mkSimple init update view
        |> Program.withConsoleTrace
        |> Program.withDynamicView
        |> Program.run
The init function returns your initial state, and each model gets an update function for message processing. The view function computes an immutable Xaml-like description. In the above example, the choice between a label and button depends on the model.Pressed value.
Some advantages of using an immutable model are:
- It is easy to unit test your
init,updateandviewfunctions - You can save/restore your model relatively easily
- It makes tracing causality usually very simple
The sample CounterApp contains a slightly larger example of Button/Label/Slider controls.
The sample AllControls contains examples of instantiating most controls in Xamarin.Forms.Core.
Screenshots from Anrdoid (Google Pixel):


Dynamic view functions are written using an F# DSL, see Elmish.XamarinForms.DynamicViews.
Dynamic Views excel in cases where the existence, characteristics and layout of the view depends on information in the model. React-style differential update is used to update the Xamarin.Forms display based on the previous and current view descriptions.
Notes:
- The F# DSL is generated from a declarative model using a code generator adapted from @praeclarum's ImmutableUI generator.
- There is only one UI element type (XamlElement, an immutable property bag).
- Safe creation is done through helpers such as
Xaml.Button(...). - There are some additional F# DSL helpers, e.g.
button |> withText "Hello"(note: you don't have to use these, and the samples don't use them).
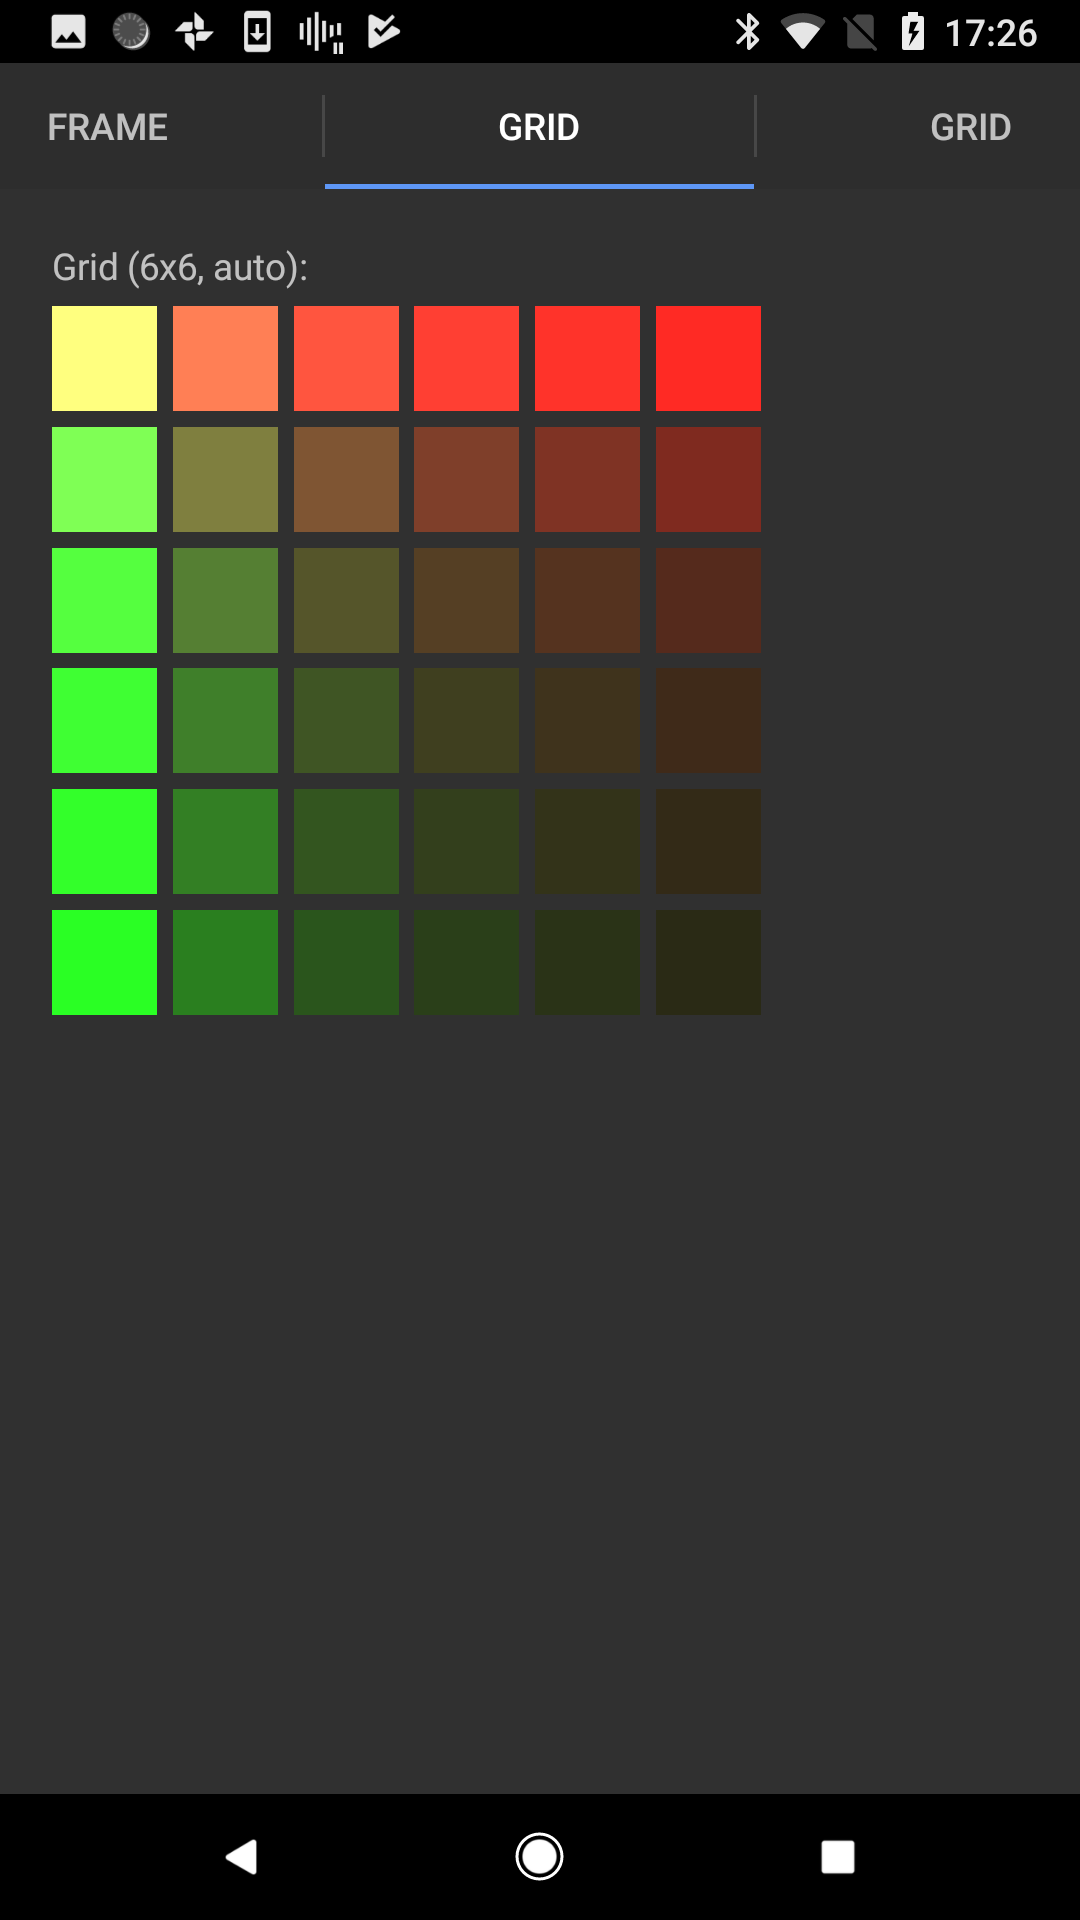
Dynamic views are only efficient for large UIs if the unchanging parts of a UI are "memoized", returning identical
objects on each invocation of the view function. This must be done explicitly, currently using dependsOn. Here is an example for a 6x6 Grid that depends on nothing, i.e. never changes:
let view model dispatch =
    ...
    dependsOn () (fun model () ->
        Xaml.StackLayout(
          children=
            [ Xaml.Label(text=sprintf "Grid (6x6, auto):")
              Xaml.Grid(rowdefs= [for i in 1 .. 6 -> box "auto"],
                        coldefs=[for i in 1 .. 6 -> box "auto"],
                        children = [ for i in 1 .. 6 do for j in 1 .. 6 ->
                                       Xaml.BoxView(Color((1.0/float i), (1.0/float j), (1.0/float (i+j)), 1.0) )
                                              .GridRow(i-1).GridColumn(j-1) ] )
            ])
Inside the function - the one passed to dependsOn - the model is rebound to be inaccessbile with a DoNotUseMe type so you can't use it. Here is an example where some of the model is extracted:
let view model dispatch =
    ...
    dependsOn (model.CountForSlider, model.StepForSlider) (fun model (count, step) ->
        Xaml.Slider(minimum=0.0, maximum=10.0, value= double step,
                    valueChanged=(fun args -> dispatch (SliderValueChanged (int (args.NewValue + 0.5)))),
                    horizontalOptions=LayoutOptions.Fill))
    ...
In the example, we extract properties CountForSlider and StepForSlider from the model, and bind them to count and step. If either of these change, the section of the view will be recomputed and no adjustments will be made to the UI.
If not, this section of the view will be reused. This helps ensure that this part of the view description only depends on the parts of the model extracted.
You can also use
- the
fixfunction for portions of a view that have no dependencies at all (besides the "dispatch" function) - the
fixffunction for command callbacks that have no dependencies at all (besides the "dispatch" function)
In Elmish.XamarinForms, resources dictionaries are just "simple F# programming", e.g.
let horzOptions = LayoutOptions.Center
let vertOptions = LayoutOptions.CenterAndExpand
is basically the eqivalent of Xaml:
<ContentPage.Resources>
    <ResourceDictionary>
        <LayoutOptions x:Key="horzOptions"
                     Alignment="Center" />

        <LayoutOptions x:Key="vertOptions"
                     Alignment="Center"
                     Expands="True" />
    </ResourceDictionary>
</ContentPage.Resources>
In other words, you can normally forget about resource dictionaries and just program as you would normally in F#.
Other kinds of resources like images need a little more attention and you may need to ship multiple versions of images etc. for Android and iOS. TBD: write a guide on these, in the meantime see the samples.
Multiple pages are just generated as part of the overall view.
Four multi-page navigation models are shown in AllControls:
- MasterDetail
- NavigationPage (using push/pop)
- TabbedPage
- CarouselPage
The basic principles are easy:
- Keep some information in your model indicating the page stack (e.g. a list of page identifiers or page models)
- Return the current visual page stack in the
pagesproperty ofNavigationPage. - Set
HasNavigationBarandHasBackButtonon each sub-page according to your desire - Dispatch messages in order to navigate, where the corresponding
updateadjusts the page stack in the model
let view model dispatch =
    Xaml.NavigationPage(pages=
        [ for page in model.PageStack do
            match page with
            | "Home" ->
                yield Xaml.ContentPage(...).HasNavigationBar(true).HasBackButton(true)
            | "PageA" ->
                yield Xaml.ContentPage(...).HasNavigationBar(true).HasBackButton(true)
            | "PageB" ->
                yield Xaml.ContentPage(...).HasNavigationBar(true).HasBackButton(true)
])A modal page is done by yielding an additional page in the NavigationPage. For example, here is an "About" page example:
type Model =
    { ShowAbout: bool
      ...
    }

type Msg =
    | ...
    | ShowAbout of bool

let view model dispatch =
    ...
    Xaml.NavigationPage(pages=
        [ yield Xaml.ContentPage(title="Root Page", content=Xaml.Button(text="About", command=(fun () -> dispatch (ShowAbout true))))
          if model.ShowAbout then
              yield
                  Xaml.ContentPage(title="About",
                      content= Xaml.StackLayout(
                          children=[
                              Xaml.Label(text = "Elmish.XamarinForms, version " + string (typeof<XamlElement>.Assembly.GetName().Version))
                              Xaml.Button(text = "Continue", command=(fun () -> dispatch (ShowAbout false) ))
                          ]))
])A toolbar can be added to a navigation page using .ToolbarItems([ ... ]) as follows:
let view model dispatch =
    ...
    Xaml.NavigationPage(pages=
        [ Xaml.ContentPage(...)
.ToolbarItems([Xaml.ToolbarItem(text="About", command=(fun () -> dispatch (ShowAbout true))) ] )Return a TabbedPage from your view:
let view model dispatch =
Xaml.TabbedPage(children= [ ... ])Return a CarouselPage from your view:
let view model dispatch =
Xaml.CarouselPage(children= [ ... ])Principles:
- Keep some information in your model indicating the current detail being shown
- Return a
MasterDetailPagefrom yourviewfunction
See the AllControls sample
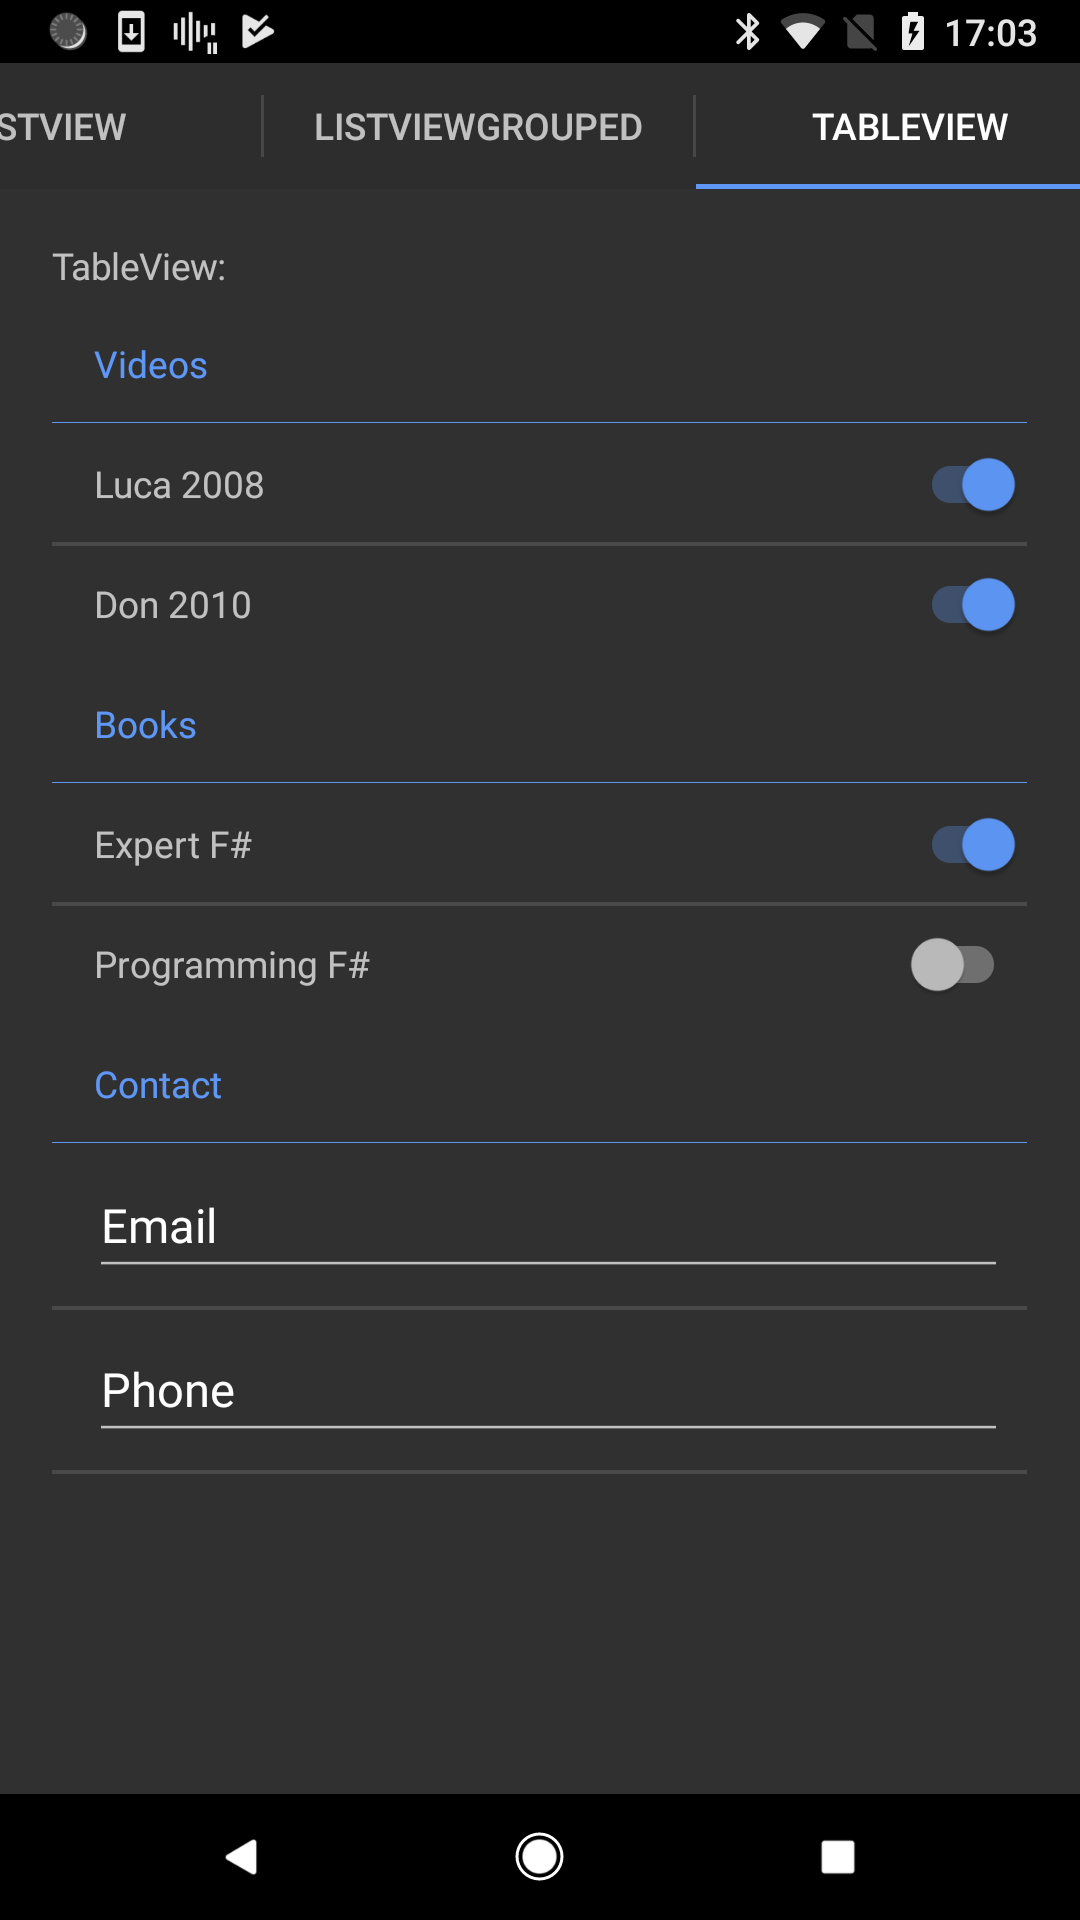
The programming model supports several more bespoke uses of the underlying ListView control from Xamarin.Forms.Core. In the simplest form, just called ListView, the items property specifies a collection of visual elements:
    Xaml.ListView(items = [ Xaml.Label "Ionide"
                            Xaml.Label "Visual Studio"
                            Xaml.Label "Emacs"
                            Xaml.Label "Visual Studio Code"
                            Xaml.Label "JetBrains Rider"],
                  itemSelected=(fun idx -> dispatch (ListViewSelectedItemChanged idx)))
In the underlying implementation, each visual item is placed in a ContentCell.
Currently the itemSelected callback uses integers indexes for
keys to identify the elements (NOTE: this may change in future updates).
There is also a ListViewGrouped for grouped items of data.
"Infinite" (really "unbounded") lists are created by using the itemAppearing event to prompt a message which nudges the
underlying model in a direction that will then supply new items to the view.
For example, consider this pattern:
type Model =
    { ...
      LatestItemAvailable: int
    }

type Message =
    ...
    | GetMoreItems of int

let update msg model =
    match msg with
    | ...
    | GetMoreItems n -> { model with LatestItemAvailable = n }

let view model dispatch =
    ...
    Xaml.ListView(items = [ for i in 1 .. model.LatestItemAvailable do
                              yield Xaml.Label("Item " + string i) ],
                  itemAppearing=(fun idx -> if idx >= max - 2 then dispatch (GetMoreItems (idx + 10) ) )  )
    ...
Note:
- The underlying data in the model is just an integer
LatestItemAvailable(normally it would really be a list of actual entities drawn from a data source) - On each update to the view we produce all the visual items from
Item 1onwards - The
itemAppearingevent is called for each item, e.g. when item10appears - When the event triggers we grow the underlying data model by 10
- This will trigger an update of the view again, with more visual elements available (but not yet appearing)
Surprisingly even this naive technique is fairly efficient. There are numerous ways to make this more efficient (we aim to document more of these over time too). One simple one is to memoize each individual visual item using dependsOn:
                  items = [ for i in 1 .. model.LatestItemAvailable do
                              yield dependsOn i (fun model i -> Xaml.Label("Item " + string i)) ]
With that, this simple list views scale to > 10,000 items on a modern phone, though your mileage may vary.
There are many other techniques (e.g. save the latest collection of visual element descriptions in the model, or to use a ConditionalWeakTable to associate it with the latest model). We will document further techniques in due course.
Thre is also an itemDisappearing event for ListView that can be used to discard data from the underlying model and restrict the
range of visual items that need to be generated.
There are a few different kinds of list in view descriptions:
- lists of raw data (e.g. data for a chart control, though there are no samples like that yet in this library)
- long lists of UI elements that are used to produce cells (e.g.
ListView, see above) - short lists of UI elements (e.g. StackLayout
children) - short lists of pages (e.g. NavigationPages
pages)
The perf of incremental update to these is progressively less important as you go down that list above.
For all of the above, the typical, naive implementation of the view function returns a new list
instance on each invocation. The incremental update of dynamic views maintains a corresponding mutable target
(e.g. the Children property of a Xamarin.Forms.StackLayout, or an ObservableCollection to use as an ItemsSource to a ListView) based on the previous (PREV) list and the new (NEW) list. The list diffing currently does the following:
- trims of excess elements from TARGET down to size LIM = min(NEW.Count, PREV.Count)
- incrementally updates existing elements 0..MIN-1 in TARGET (skips this if PREV.[i] is reference-equal to NEW.[i])
- creates elements LIM..NEW.Count-1
This means
- Incremental update costs minimally one transition of the whole list.
- Incremental update recycles visual elements at the start of the list and handles add/remove at end of list relatively efficiently
- Returning a new list that inserts an element at the beginning will recreate all elements down the way.
Basically, incremental update is faster if items are being added/removed at the end, rather than the beginning of the list.
The above is sufficient for many purposes, but care must always be taken with large lists and data sources, see ListView above for example. Care must also be taken whenever data updates very rapidly.
Styling is a significant topic in Xamarin.Forms programming. See the extensive Xamarin.Forms documentation on styling.
One approach is to manually code up styling simply by using normal F# programming to abstract away commonality between various parts of your view logiv.
We do not give a guide here as it is routine application of F# coding. The Fulma approach to styling may also be of interest and provide inspiration.
There are many upsides to this approach. The downsides are:
- styling is done using F# coding, and some UI designers may prefer to work with CSS or another styling technique
- there is no easy way to provide default styling base on selectors like "All buttons" (except of course to carefully code your F# to make sure all button creations go through a particular helper)
- you may end up hand-rolling certain selector queries and patterns from other styling languages.
- create a CSS file with appropriate selectors and property specifications, e.g.
stacklayout {
    margin: 20;
}

.mainPageTitle {
    font-style: bold;
    font-size: medium;
}

.detailPageTitle {
    font-style: bold;
    font-size: medium;
    text-align: center;
}
where stacklayout referes to all elements of that type, and .mainPageTitle refers to a specific element style-class path.
-
Add the style sheet to your app as an
EmbeddedResourcenode -
Load it into your app:
type App () as app =
    inherit Application ()
    do app.Resources.Add(StyleSheet.FromAssemblyResource(Assembly.GetExecutingAssembly(),"MyProject.Assets.styles.css"))
- Set
StyleClassfor named elements, e.g.
      Xaml.Label(text="Hello", styleClass=detailPageTitle")
      ...
Xaml.Label(text="Main Page", styleClass="mainPageTitle")You can also use "Xaml styling" by creating specific Style objects using the Xamarin.Forms APIs directly
and attaching them to your application. See the Xamarin.Forms documentation. We don't go into details here
Validation is generally done on updates to the model, storing error messages from validation logic in the model so they can be correctly and simply displayed to the user. Here is an example of a typical pattern.
    type Temperature =
       | Value of double
       | ParseError of string

    type Model =
        { TempF: Temperature
          TempC: Temperature }

    /// Validate a temperature in Farenheit, can be shared between client/server
    let validateF text =  ... // return a Result

    /// Validate a temperature in celcius, can be shared between client/server
    let validateC text = // return a Result

    let update msg model =
        match msg with
        | SetF textF ->
            match validateF textF with
            | Ok newF -> { model with TempF = Value newF }
            | Error msg -> { model with TempF = ParseError msg }

        | SetC textC ->
            match validateC textC with
            | Ok newC -> { model with TempC = Value newC }
            | Error msg -> { model with TempC = ParseError msg }
Note that the same validation logic can be used in both your app and a service back-end.
Application state is very simple to save by serializing the model into app.Properties. For example, you can store as JSON as follows using FsPickler and FsPickler.Json, which use Json.NET:
open MBrace.FsPickler.Json

type Application() =
    ....
    let modelId = "model"
    override __.OnSleep() =
        app.Properties.[modelId] <- FsPickler.CreateJsonSerializer().PickleToString(runner.Model)

    override __.OnResume() =
        try
            match app.Properties.TryGetValue modelId with
            | true, (:? string as json) ->
                runner.SetCurrentModel(FsPickler.CreateJsonSerializer().UnPickleOfString(json), Cmd.none)
            | _ -> ()
        with ex ->
            program.onError("Error while restoring model found in app.Properties", ex)

override this.OnStart() = this.OnResume()Asynchronous actions are triggered by having the update function return "commands", which can trigger later dispatch of further messages.
- Change
Program.mkSimpletoProgram.mkProgram
let program = Program.mkProgram App.init App.update App.view- Change your
updatefunction to return a pair of a model and a command. For most messages the command will beCmd.nonebut for basic async actions useCmd.ofAsyncMsg.
For example, here is one pattern for a timer loop that can be turned on/off:
    type Model =
        { ...
          TimerOn: bool
        }

    type Message =
        | ...
        | TimedTick
        | TimerToggled of bool

    let timerCmd =
        async { do! Async.Sleep 200
                return TimedTick }
        |> Cmd.ofAsyncMsg

    let update msg model =
        match msg with
        | ...
        | TimerToggled on -> { model with TimerOn = on }, (if on then timerCmd else Cmd.none)
        | TimedTick -> if model.TimerOn then { model with Count = model.Count + model.Step }, timerCmd else model, Cmd.none
The state-resurrection OnResume logic of your application (see above) should also be adjusted to restart
appropriate async actions accoring to the state of the application.
NOTE: Making all stages of async computations (and their outcomes, e.g. cancellation and/or exceptions) explicit can add additional messages and model states. This comes with pros and cons. Please discuss concrete examples by opening issues in this repository.
You can also set up global subscriptions, which are events sent from outside the view or the dispatch loop. For example, dispatching ClockMsg messages on a global timer:
    let timerTick dispatch =
        let timer = new System.Timers.Timer(1.0)
        timer.Elapsed.Subscribe (fun _ -> dispatch (ClockMsg System.DateTime.Now)) |> ignore
        timer.Enabled <- true
        timer.Start()

    ...
    let runner =
        ...
        |> Program.withSubscription (fun _ -> Cmd.ofSub timerTick)
        ...
In some circumstances there are advantages to using static Xaml, and static bindings from the model to those views. This is called "Half Elmish" and is the primary technique used by Elmish.WPF at time of writing. (It was also the original technique used by this repo and the prototype Elmish.Forms).
See HALF-ELMISH.md
See ROADMAP.md, a list of TODOs.
See DEVGUIDE.md.
Please contribute to this library through issue reports, pull requests, code reviews and discussion.
This library is inspired by Elmish.WPF, Elmish.Forms and elmish, written by et1975. This project technically has no tie to Fable, which is an F# to JavaScript transpiler that is definitely worth checking out.


