Git Product home page Git Product logo

pxt-lets-steam's Introduction

MakeCode STM32 pxt-buildtarget

This is an experimental code editor for STM32 boards - try it at https://makecode.st.com.

Who is this for?

This editor is meant for STM32 micro-controllers that are friendly to breadboarding. The editor is based on Microsoft MakeCode.

Local Dev Server

The local server lets you to run the editor and serve the documentation from your own computer.

Setup

  1. Install Node.js 8.9.4 or higher.
  2. Install Docker if you are going to edit any .cpp files.
  3. Clone the pxt repository, install the dependency and build it.
git clone https://github.com/microsoft/pxt
cd pxt

npm install
npm run build
cd ..
  1. Clone the Microsoft/pxt-common-packages repository and install the dependency
git clone https://github.com/microsoft/pxt-common-packages
cd pxt-common-packages
npm install
cd ..
  1. Clone the jacdac/jacdac-ts repository, install the dependency and build it
git clone https://github.com/jacdac/jacdac-ts.git
cd jacdac-ts
npm install
npm run build
cd ..
  1. Clone the Microsoft/pxt-stm32-iot-node repository
git clone https://github.com/microsoft/pxt-stm32-iot-node
cd pxt-stm32-iot-node
  1. Install the PXT command line (add sudo if asked).
npm install -g pxt
  1. Install the dependencies.
npm install
  1. Link pxt-stm32-iot-node back to base pxt repo
rm -R node_modules/@jacdac/jacdac-ts
rm -R node_modules/pxt-core
rm -R node_modules/pxt-common-packages
pxt link ../jacdac-ts
pxt link ../pxt
pxt link ../pxt-common-packages

If you want to know if your folders are link, run ls -l and it will indicate them.

ls -l node_modules/

Note the above command assumes the folder structure of

       makecode.st.com
          |
  ----------------------------------------------------------
  |       |                        |                       |
  pxt     pxt-common-packages      pxt-stm32-iot-node      jacdac-ts

Refresh dal.d.ts files

Whenever you make changes to the #defines in the .cpp files, you will have to refresh the dal.d.ts files. For that, run

pxt builddaldts

CODAL changes

If you need to do changes to CODAL itself, follow these steps.

  • create a new project in the web editor, then close the web server. Select the hardware you want to work with.
  • using a command prompt, open the projects folder and find the subfolder with your new project
  • open the folder in Visual Studio Code
code .
  • open pxt.json and edit the dependencies to use the file:... path instead of *
   dependencies: {
        "adafruit-metro-m0-express": "file:../../libs/adafruit-metro-m0-express"
   }
  • from the command line, set the PXT_NODOCKER environment variable to 1
export PXT_NODOCKER=1
  • run a local build that will create a CODAL checkout automatically. If you are missing tools, you will be notified by the build script.
pxt build --local --force
  • go to the built/dockercodal folder and open all CODAL in a new Visual Studio Code instance
cd built/dockercodal
code libraries/*
  • go to the Git tab in VS Code, and change the branch of the CODAL repository to work on to master. You can create a new branch to start doing your work and pull requests.

  • to build CODAL directly, run built/codal

python build.py
  • to rebuild your project from pxt, run pxt build --local --force from the project folder

Running

Run this command from inside pxt-stm32 to open a local web server

pxt serve

If the local server opens in the wrong browser, make sure to copy the URL containing the local token. Otherwise, the editor will not be able to load the projects.

If you need to modify the .cpp files (and have installed yotta), enable yotta compilation using the --localbuild flag:

pxt serve --localbuild

Updates

Make sure to pull changes from all repos regularly. More instructions are at https://github.com/microsoft/pxt#running-a-target-from-localhost

Repos

The pxt-stm32 target depends on several other repos. The main ones are:

pxt-lets-steam's People

Contributors

adrienvirieux avatar charly-sketch avatar dependabot[bot] avatar github-actions[bot] avatar jnthbdn avatar man-bal avatar nedseb avatar pascal-flores avatar

Stargazers

 avatar  avatar

Watchers

 avatar

pxt-lets-steam's Issues

Improve the readability of the sensor's gauge

The text of sensor gauges is currently black on a simulator background dark grey. It's a bit hard to read, I think we need to use use the correct style to use the same styling as any other text on the simulation.

PWM

D2 n'est pas un PWM (Donc music ne doit pas être sur D2)
PWM sur D3 ne marche pas

flickering of the simulator

Describe the bug
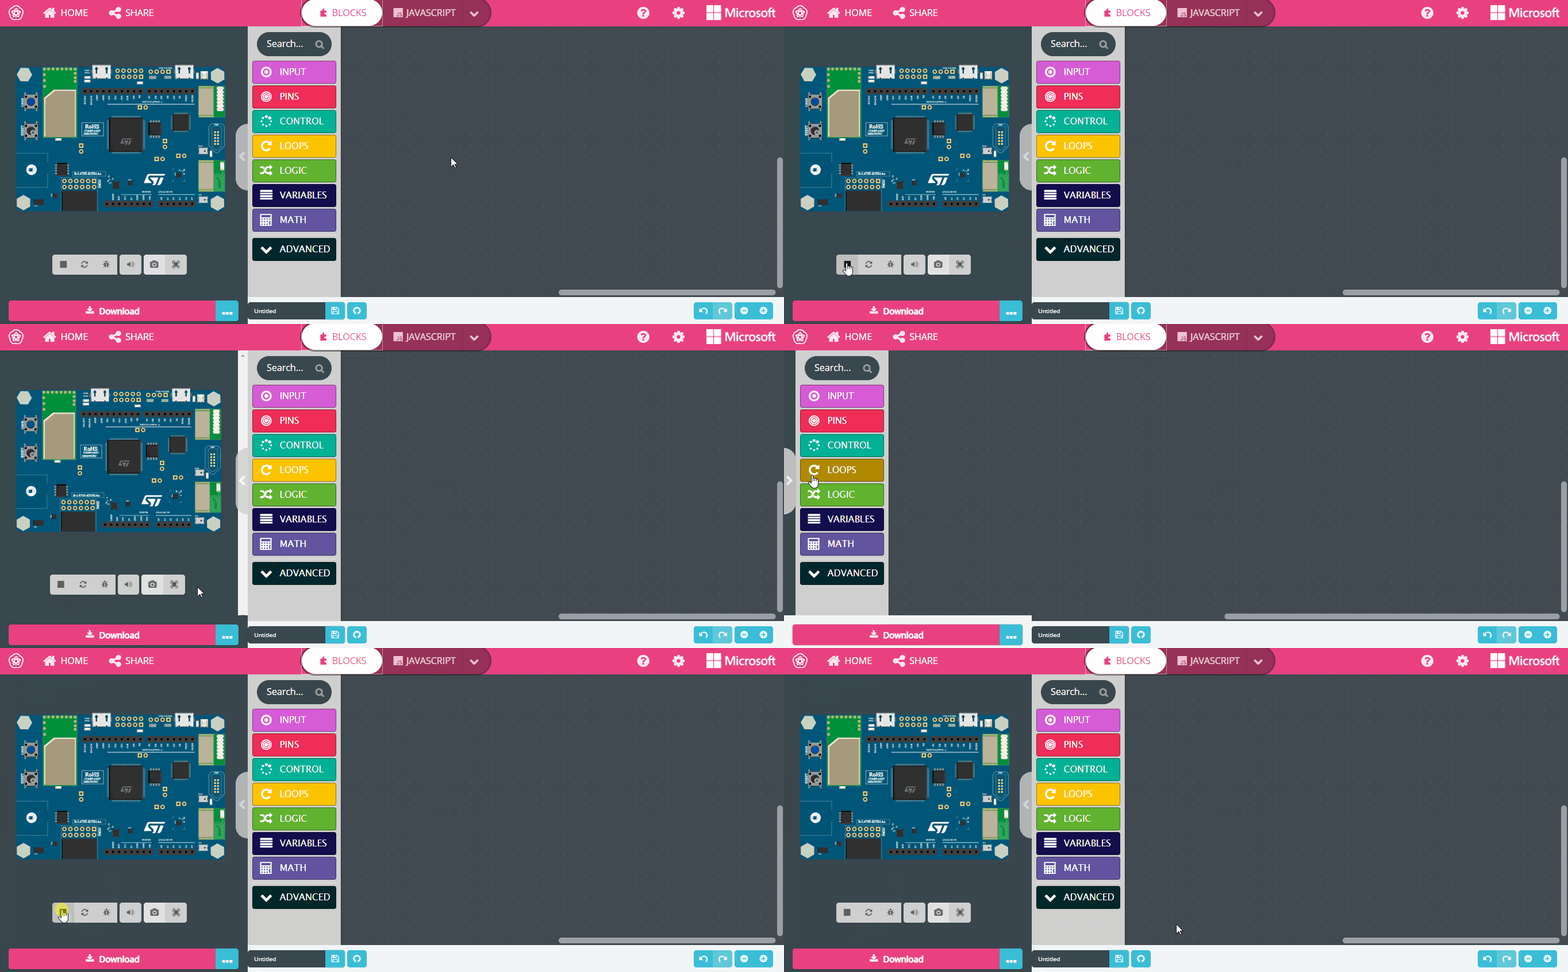
When launching the interface, you can see a flickering of the simulator.
It can be solved by hiding and displaying the simulator again (see illustration).

To Reproduce
image

Desktop (please complete the following information):

  • OS: Windows 10
  • Browser chrome
  • Version 89.0.4389.114

Need to export a bin file in place of the default hex file

By default, makecode export a hex file that could be used to program the board with a CMSIS-DAP programmer. On the board from STMicroelectronics, the STLINK Programmer, only support bin files. So to ease the user workflow, an editor extension should be added to provide directly the more easy to program file.

WebUSB

On Linux, the board may not be accessible. To fix this, it needs to add a udev rule

  1. Create the udev rule file:
    echo 'SUBSYSTEM=="usb", ATTR{idVendor}=="0d28", ATTR{idProduct}=="0204", MODE="0666"' | sudo tee /etc/udev/rules.d/70-dev-board.rules
  2. Reload udev rules :
    1. sudo udevadm control --reload-rules
    2. sudo udevadm trigger

If you are using a snap package (e.g. brave). Add the raw-usb connection: snap connect brave:raw-usb.

Hex file doesn't run on the DISCO_L475VG_IOT

When we program the DISCO_L475VG_IOT Board with the hex produced by the Blinky target, the program is not working.
Further investigation needs to be done in order to understand the exact nature of this bug. The details will be added to this issue during the process

Improve the SSD1306 lib.

Currently each function call screen->show() which is super slow. Instead, it could be better to create a show bloc to improve the speed, and the user experience when he look at the screen.

DAPLink integration on STM32L475/WB55

  • Flash STM32F103xx avec le DapLink
  • Charger programme via le Mass Storage (STM32L475/WB55)
  • Accéder au "Serial" depuis makecode
  • Charger un programme sur la carte

Actuellement tout fonctionne sauf, le chargement du programme dans la carte cible (via DapJS), l'erreur NetworkError: A transfer error has occurred..
Visiblement d'après wireshark, il n'y a que 3 paquets (fichier .HEX) qui sont envoyés à la carte, puis le système plante.

Les adresses (flash et RAM) des targets et du daplink (f103) sont correct. La configuration du DAPLink a pris pour base celle du Microbit (v2).

Etat d'avancement et modification du code DAPLink : https://github.com/jnthbdn/DAPLink/tree/experimental_compilers

Cloud build is blocking the import of an extension

Our target is static packaged so theoretically, we don't need access to the cloud build system from Microsoft. All our codal targets are compiled during the build of the static version.

When we add an extension, the editor is blocking with the message "Compiling (this step can take a minute)". When we look inside the console of the browser, we see a request to the cloud build system that failed with the message "Cannot read property 'length' of null" and "The hex file is not available, please connect to the internet and try again".

When I look at the content of the JSON requested by the cloud build process (https://makecode.com/compile/12a61f211a7da7635b403649a4243bb5bc70b2f1e5c067955fa4be50ad476e97.json), it appears that the build failed but the build log seems to indicate that everything is going to the end (https://makecode.com/compile/12a61f211a7da7635b403649a4243bb5bc70b2f1e5c067955fa4be50ad476e97.log).

Recommend Projects

  • React photo React

    A declarative, efficient, and flexible JavaScript library for building user interfaces.

  • Vue.js photo Vue.js

    🖖 Vue.js is a progressive, incrementally-adoptable JavaScript framework for building UI on the web.

  • Typescript photo Typescript

    TypeScript is a superset of JavaScript that compiles to clean JavaScript output.

  • TensorFlow photo TensorFlow

    An Open Source Machine Learning Framework for Everyone

  • Django photo Django

    The Web framework for perfectionists with deadlines.

  • D3 photo D3

    Bring data to life with SVG, Canvas and HTML. 📊📈🎉

Recommend Topics

  • javascript

    JavaScript (JS) is a lightweight interpreted programming language with first-class functions.

  • web

    Some thing interesting about web. New door for the world.

  • server

    A server is a program made to process requests and deliver data to clients.

  • Machine learning

    Machine learning is a way of modeling and interpreting data that allows a piece of software to respond intelligently.

  • Game

    Some thing interesting about game, make everyone happy.

Recommend Org

  • Facebook photo Facebook

    We are working to build community through open source technology. NB: members must have two-factor auth.

  • Microsoft photo Microsoft

    Open source projects and samples from Microsoft.

  • Google photo Google

    Google ❤️ Open Source for everyone.

  • D3 photo D3

    Data-Driven Documents codes.