| Home Screen | Detail Screen | New Screen |
|---|---|---|
 |
 |
 |
- Node.js
- Git
- Visual Studio Code
- Expo CLI:
npm install -g expo-cli - Emulator (or Smartphone) with the Expo-Client installed (https://docs.expo.dev/get-started/installation/#requirements)
- Expo-Docs: https://docs.expo.dev
- create a new empty repo (without Readme.md and .gitignore file) called
my-favorite-food-2021on GitHub, copy the clone url and clone the project cd my-favorite-food-2021expo init .(don't forget the dot! select the blank template in managed workflow)npm start
The app.json (docs) file contains configuration options for your project.
We need to change the following ones:
name=>my-favorite-food(the name of your app)slug=>my-favorite-food(the friendly URL name for publishing. For example,my-favorite-foodwill refer to theexpo.io/@project-owner/my-favorite-foodproject)icon=>./assets/logo.png(app icon - download)splash.backgroundColor=>#ff9100(color to fill the loading screen background)web.favicon=>./assets/logo.png(web favicon - download)
- set the
backgroundColorfrom#fffto#ff9100 - add a new style for the text. set the text
colorto#fff
We want to set the background color of the status bar (docs) to #ff9100:
- install StatusBar package
expo install expo-status-bar - import package
import {StatusBar} from 'expo-status-bar';- make usage of the StatusBar Component
<StatusBar backgroundColor={'#ff9100'} translucent={true} style='light' />- On android devices the StatusBar is not correct until the expo app has been loaded. We can adjust this in the
app.jsonfile. Add the following options:
"androidStatusBar": {
    "backgroundColor": "#ff9100",
    "barStyle": "light-content"
}- convert code in the App.js file to an ES6 arrow function
const HomeScreen = () => {
  return (
    <View style={{flex: 1, alignItems: 'center', justifyContent: 'center'}}>
      <Text>Home Screen</Text>
    </View>
  );
};- create folder
components
- create file
Text.jsin thecomponentsfolder - create a Headline component (use Text from react-native) and assign the following styles
fontSize: 30, color: 'black' - create a Paragraph component (use Text from react-native) and assign the following styles
fontSize: 16, color: 'black' - keep in mind to handle passed props (props.children => text to show in this case)
- export components (multiple exports)
- use both components in App.js
- create file
ImagePreview.jsin thecomponentsfolder - create a ImagePreview component (use Image from react-native) and assign the following styles:
width: '100%', height: 200, resizeMode: 'cover' - keep in mind to handle passed
sourceprop (use as source in the Image component) - export component (default export)
- use component with local download and remote (https://github.com/andreas-arkulpa/my-favorite-food/blob/main/assets/pizza.jpg) sources in App.js
- create file
Button.jsin thecomponentsfolder - create a Button component (use TouchableOpacity and Text from react-native) and assign the following styles.
- Wrapper (TouchableOpacity) :
{
    display: 'flex',
    alignItems: 'center',
    backgroundColor: '#ff9100',
    borderRadius: 10,
    padding: 20,
    width: '100%'
}- Label (Text):
{
    textTransform: 'uppercase',
    fontSize: 14,
    fontWeight: 'bold',
    color: 'white',
    textAlign: 'center'
}- keep in mind to handle passed
onPressprop (use as onPress in the TouchableHighlight component) - keep in mind to handle passed
labelprop (use as text-value in the Text component) - export component (default export)
- use component in App.js
There are multiple libraries to handle navigation in react-native. One of the most used is react-navigation. See the docs here
If you think of a website, you know that there different URLs that you can go to - some libraries call these Routes. In a mobile app you don't have URLs, but you can have different views, which we call "Screens".
- install the following packages
npm install @react-navigation/native

expo install react-native-gesture-handler react-native-reanimated react-native-screens @react-native-community/masked-view

npm install @react-navigation/stack
- we need to import
react-native-gesture-handlerat the top of ourApp.jsfile. Used for handling native touch and gestures in react-navigation
import 'react-native-gesture-handler';- create NavigatioContainer in
App.js
import { NavigationContainer } from '@react-navigation/native';

...

<NavigationContainer>{/* Rest of your app code */}</NavigationContainer>- add Stack to the Navigation
import { createStackNavigator } from '@react-navigation/stack';

...

const Stack = createStackNavigator();

...

const HomeScreen = () => {
  return (
    <View style={{ flex: 1, alignItems: 'center', justifyContent: 'center' }}>
      <Text>Home Screen</Text>
    </View>
  );
}

....

<NavigationContainer>
    <Stack.Navigator>
        <Stack.Screen name="Home" component={HomeScreen} />
    </Stack.Navigator>
</NavigationContainer>- create folder
screens - create file
HomeScreen.jsin thescreensfolder - make usage of our components and render some of these
- copy the file
HomeScreen.jsand rename it toDetail.js(also rename the function component in the file) - copy the file
HomeScreen.jsand rename it toNew.js(also rename the function component in the file) - create two new
Stack.Screenentries for new ScreensDetailandNew
- create file
Container.jsin thecomponentsfolder - create a Container component (use View from react-native) and assign the following styles (depending on the passed
fillprop). - if
fillis not provided assign these styles
{
    display: 'flex',
    flexDirection: 'column',
    padding: 20,
},- and these if
fillis provided
{
    flex: 1,
    display: 'flex',
    flexDirection: 'column',
}- make sure to pass the
childrenprops to the View - make use of the component in our Screens
- create file
Screen.jsin thecomponentsfolder - create a Screen component (use
Viewfromreact-native) and assign the following styles
{
    display: 'flex',
    flexDirection: 'column',
    flex: 1,
    backgroundColor: '#fff'
}- make sure to pass the
childrenprops to the View - make use of the component in our Screens
- create file
Spacer.jsin thecomponentsfolder - create a Spacer component (use
Viewfromreact-native) and assign the following styles
{
    height: 25,
    width: 25
}- make use of the component in our Screens
- create file
Header.jsin thecomponentsfolder - install
expo install expo-constants(docs) - create the following component
import React from 'react';
import {SafeAreaView, StyleSheet, View, Text} from 'react-native';
import Constants from 'expo-constants';

const headerStyles = StyleSheet.create({
  safeAreaView: {
    backgroundColor: '#ff9100',
    borderBottomRightRadius: 20,
    borderBottomLeftRadius: 20,
  },
  wrapper: {
    paddingHorizontal: 20,
    paddingTop: Constants.statusBarHeight + 30,
    paddingBottom: 40,
  },
  label: {fontSize: 25, color: 'white', fontWeight: 'bold', textAlign: 'center'},
});

const Header = (props) => (
  <SafeAreaView style={headerStyles.safeAreaView}>
    <View style={headerStyles.wrapper}>
      <Text style={headerStyles.label}>{props.label}</Text>
    </View>
  </SafeAreaView>
);- create file
FoodItem.jsin thecomponentsfolder - create the following component
import React from 'react';
import {StyleSheet, View, Text, Image, TouchableOpacity} from 'react-native';
import Spacer from './Spacer';

const foodItemStyles = StyleSheet.create({
  wrapper: {
    display: 'flex',
    flexDirection: 'row',
    alignItems: 'center',
    padding: 10,
    borderBottomColor: 'lightgray',
    borderBottomWidth: 1,
  },
  image: {
    marginRight: 10,
    height: 50,
    width: 50,
  },
  title: {fontSize: 20, color: 'black', textAlign: 'left'},
});

const FoodItem = (props) => (
  <TouchableOpacity onPress={() => props.onPress()}>
    <View style={foodItemStyles.wrapper}>
      <Image
        resizeMode='cover'
        source={{
          uri: props.item.image,
        }}
        style={foodItemStyles.image}
      />
      <Text style={foodItemStyles.title}>{props.item.title}</Text>
    </View>
  </TouchableOpacity>
);- create file
Input.jsin thecomponentsfolder - create a Input component (use
TextInputfromreact-native) and assign the following styles
{
    borderColor: '#ff9100',
    borderWidth: 1,
    borderRadius: 10,
    paddingHorizontal: 20,
    paddingVertical: 12
}- make sure to pass the
value,onChangeTextandplaceholderprops to the TextInput - make use of the component in our Screens
An asynchronous, unencrypted, persistent, key-value storage API.
- install
expo install @react-native-async-storage/async-storage(docs) - create some helper functions to store and read from Async Storage
- create folder
helpers - create file
storage.jsin thehelpersScreen - import Async Storage
import AsyncStorage from '@react-native-async-storage/async-storage';- define a storage key for the key-value pair
const STORAGE_KEY = 'my-favorite-food/items';- storeData
export const storeData = async (value) => {
  try {
    const json = JSON.stringify(value);
    await AsyncStorage.setItem(STORAGE_KEY, json);
  } catch (error) {
    console.log(error);
  }
};- getData
export const getData = async () => {
  try {
    const json = await AsyncStorage.getItem(STORAGE_KEY);
    if (json === null) return null;
    return JSON.parse(json);
  } catch (error) {
    console.log(error);
  }
};- addData
export const addData = async (value) => {
  let data = [];
  const existing = await getData();
  if (existing) data = [...existing];
  data.push(value);
  await storeData(data);
};- we need to combine everything and make sure we have the following code for the different screen
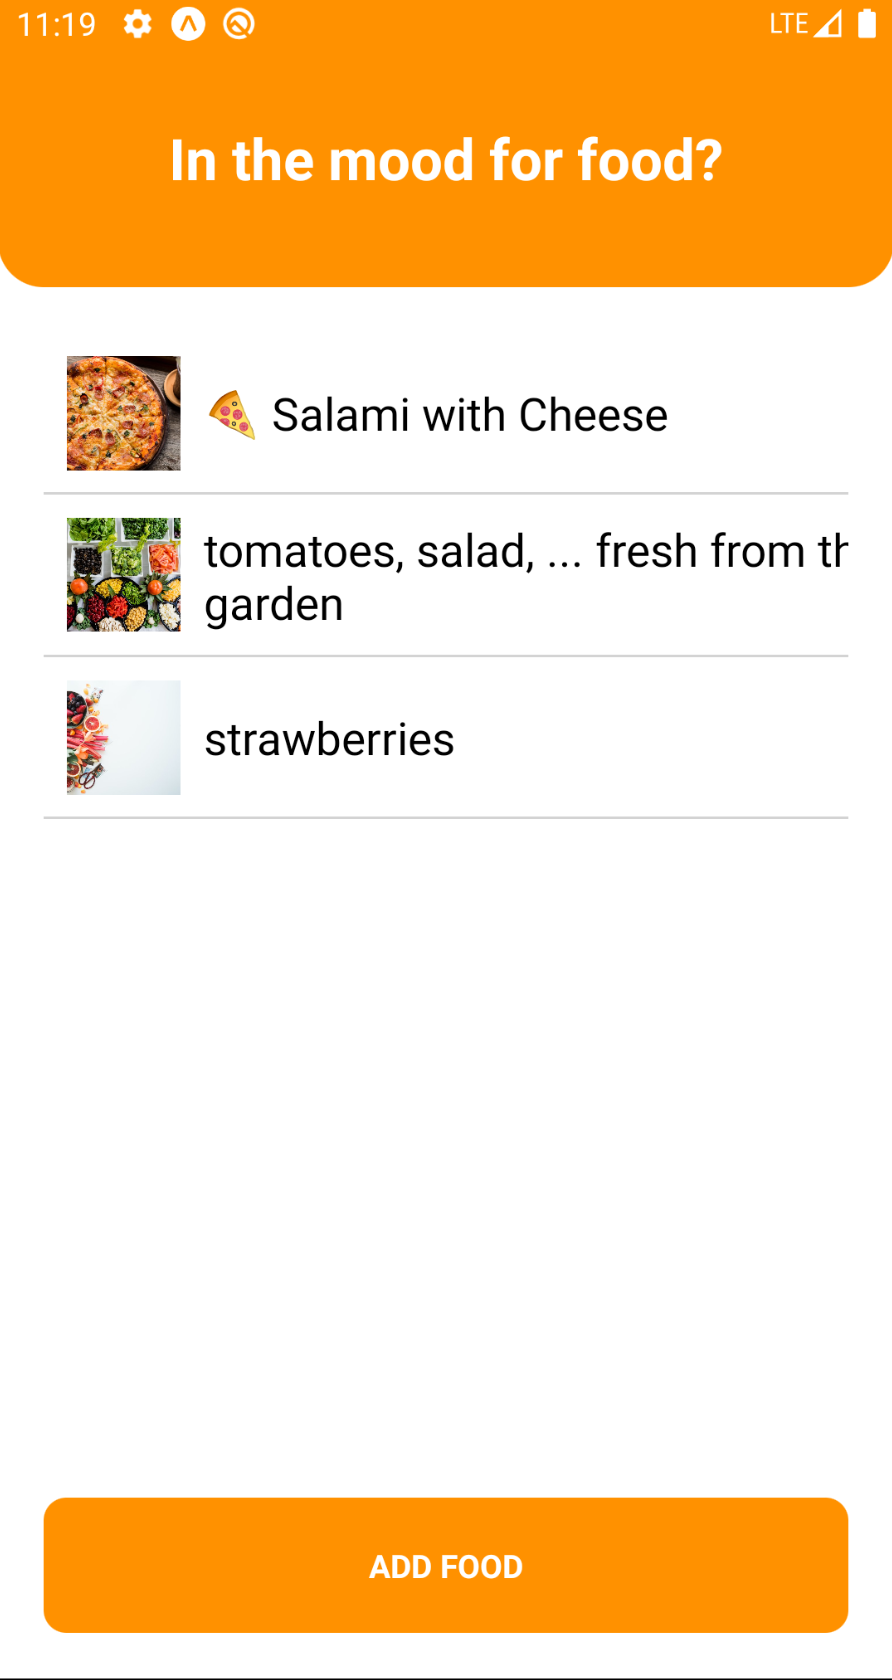
- Home Screen
import React, {useEffect, useLayoutEffect, useState} from 'react';
import Button from '../components/Button';
import Screen from '../components/Screen';
import Spacer from '../components/Spacer';
import {Headline, Paragraph} from '../components/Text';
import Header from '../components/Header';
import Container from '../components/Container';
import FoodItem from '../components/FoodItem';
import {useFocusEffect, useNavigation} from '@react-navigation/native';
import {getData} from '../helpers/storage';
import {ScrollView} from 'react-native';

const Home = () => {
  const navigation = useNavigation();
  const [items, setItems] = useState([]);
  useFocusEffect(() => {
    getData().then((data) => {
      if (data) setItems(data);
    });
  });
  return (
    <Screen>
      <Header label='In the mood for food?' />
      <Container fill>
        {items.length > 0 && (
          <ScrollView style={{flex: 1}}>
            <Container>
              {items.map((item, index) => (
                <FoodItem key={index} item={item} onPress={() => navigation.navigate('Detail', {item})} />
              ))}
            </Container>
          </ScrollView>
        )}
      </Container>
      <Container>
        <Button
          label='add food'
          onPress={() => {
            navigation.navigate('New');
          }}
        />
      </Container>
    </Screen>
  );
};

export default Home;- Detail Screen
import React from 'react';
import Button from '../components/Button';
import Screen from '../components/Screen';
import Spacer from '../components/Spacer';
import {Headline} from '../components/Text';
import Header from '../components/Header';
import Container from '../components/Container';
import {ScrollView} from 'react-native';
import {addData} from '../helpers/storage';
import {useNavigation} from '@react-navigation/native';
import ImagePreview from '../components/ImagePreview';

const Detail = (props) => {
  const navigation = useNavigation();
  const {params} = props.route;
  return (
    <Screen>
      <Header label={params.item.title} />
      <Container fill>
        <ScrollView style={{flex: 1}}>
          <Container>
            {params.item.image && (
              <ImagePreview
                source={{
                  uri: params.item.image,
                }}
              />
            )}
          </Container>
        </ScrollView>
      </Container>
      <Container>
        <Button label='go back' onPress={() => navigation.goBack()} />
      </Container>
    </Screen>
  );
};

export default Detail;- New Screen
import React, {useState} from 'react';
import Button from '../components/Button';
import Screen from '../components/Screen';
import Spacer from '../components/Spacer';
import {Headline} from '../components/Text';
import Header from '../components/Header';
import Container from '../components/Container';
import {ScrollView} from 'react-native';
import {addData} from '../helpers/storage';
import {useNavigation} from '@react-navigation/native';
import * as ImagePicker from 'expo-image-picker';
import ImagePreview from '../components/ImagePreview';
import Input from '../components/Input';

const New = () => {
  const navigation = useNavigation();
  const [title, setTitle] = useState('');
  const [image, setImage] = useState(null);

  const selectImage = async () => {
    let permissionResult = await ImagePicker.requestMediaLibraryPermissionsAsync();
    if (permissionResult.granted === false) {
      alert('Permission to access camera roll is required!');
      return;
    }
    let pickerResult = await ImagePicker.launchImageLibraryAsync();
    if (pickerResult.cancelled === true) {
      return;
    }
    setImage(pickerResult.uri);
  };

  const save = async () => {
    await addData({title, image});
    navigation.goBack();
  };
  return (
    <Screen>
      <Header label='What food do you like most?' />
      <Container fill>
        <ScrollView style={{flex: 1}}>
          <Container>
            <Input value={title} onChangeText={(text) => setTitle(text)} placeholder={'insert Title'} />
            <Spacer />
            {image && (
              <Fragment>
                <ImagePreview
                  source={{
                    uri: image,
                  }}
                />
                <Spacer />
              </Fragment>
            )}
            <Button label='select image' onPress={() => selectImage()} />
          </Container>
        </ScrollView>
      </Container>
      <Container>
        <Button label='save' disabled={title === '' || !image} onPress={() => save()} />
      </Container>
    </Screen>
  );
};

export default New;
Step 12 - Bonus: React-Native with tailwindcss (docs)
- we need to add an empty tailwind config to our project -
tailwind.config.js
module.exports = {
  theme: {
    extend: {},
  },
};- we need to add a new script to package.json
"tailwind-codegen": "npx trnc-create-styles"-
install vs-code extension: Tailwind CSS IntelliSense
-
adjust vs-code settings and add the following entry:
"tailwindCSS.experimental.classRegex": [
  [
    "tailwind\\(([^)]*)\\)",
    "[\"'`]([^\"'`]*).*?[\"'`]"
  ]
],-
install
tailwind-react-native-classnamesnode-module with the follwing commandnpm i tailwind-react-native-classnames -
run the command:
npm run tailwind-codegen -
add new file called
tailwind.jsto the helpers folder:
import {create} from 'tailwind-react-native-classnames';

import styles from '../tw-rn-styles.json'; // <-- your path may differ

// this function works just like the default package export
// except it is customized according to your `tailwind.config.js`
const tailwind = create(styles).style;

export default tailwind;- basic usage:
import tailwind from '../helpers/tailwind';

const Header = (props) => (
  <SafeAreaView style={tailwind('bg-orange rounded-b-3xl')}>
    <View style={tailwind('px-5 pb-10', {paddingTop: Constants.statusBarHeight + 30})}>
      <Text style={tailwind('text-white font-bold text-center text-2xl')}>{props.label}</Text>
    </View>
  </SafeAreaView>
);


