4月24日,Burberry亚太地区规模最大的旗舰店在上海开幕。Burberry突破性地运用了诸多创新的数字营销模式,借助与腾讯的合作,为更多未能到场的用户创造了一个“平行的体验”,也正式开启了Burberry的创新数字营销之旅。
腾讯的营销页面:

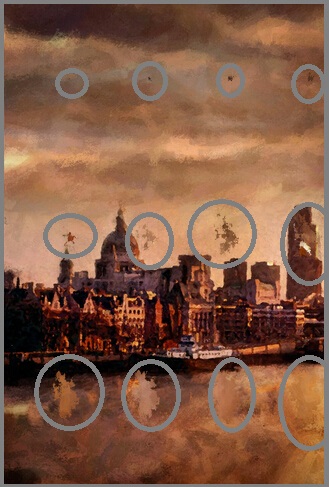
其中多次用到了类似于云雾褪去的效果,如下图。
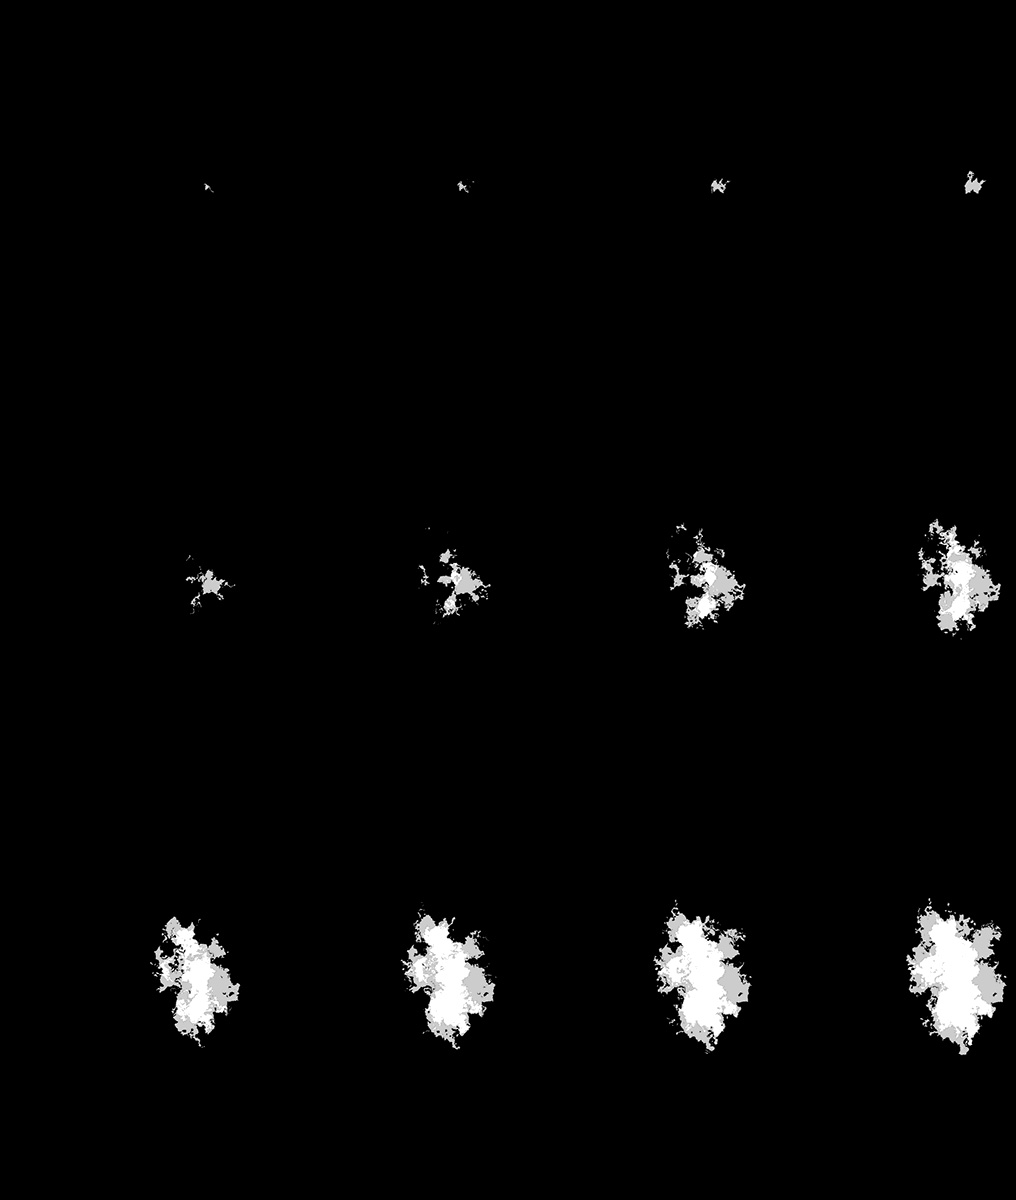
我对这种神奇的特效产生的极大的兴趣,于是通过chrome的审查元素里面Resources找到下面这张图片(由于图片是白色的png,为了让大家看清楚我将背景调成了黑色)。
于是效果的实现方式就显而易见了,是利用css3的-webkit-mask来实现的。
-webkit-mask类似于photoshop里面的蒙板,在背景图片上加上一层蒙板,背景中的图片会透过蒙板中的白色部分显示出来,蒙板中的透明部分则遮挡住了背景。
####Step1.为背景加上蒙板
<body>
	<div class="stage">
		<div class="sprite1"></div>
	</div>
</body>.stage{
width: 320px;
height: 480px;
position: absolute;
left: 50%;
top: 50%;
margin-top:-240px;
margin-left:-160px;
background: url('./img/bg.jpg') no-repeat;
background-size: auto 100%;
}
.stage .sprite1{
width: 100%;
height: 100%;
background: url('./img/bg2.jpg') no-repeat;
background-size: auto 100%;
-webkit-mask:url('./img/Touch1.png') no-repeat;
-webkit-mask-size: 100% 100%;
}这里为了在桌面浏览器中观看方便,将画面大小调整成了320*480并居中。在sprite1中添加background的同时也增加了蒙板。
-webkit-mask:url('./img/Touch1.png') no-repeat;
-webkit-mask-size: 100% 100%;
我们这里将蒙板的大小设置为100%来观察蒙板的效果。图中画圈圈的地方就是sprite1透过蒙板展示出来的部分。
我们看到这个蒙板Touch1.png应该是一个序列帧组成的图片,我们只需要将其一帧帧的显示出来就可以实现动画了。
点击查看历史代码
####Step2.序列帧动画
.stage .sprite1{
	......
	-webkit-mask-size: 400% 300%;
	-webkit-mask-position: 0% 0%;
}Touch1.png是序列帧的整合图片,其中一排有4帧一共有3排,所以我们将-webkit-mask-size设为400% 300%。将-webkit-mask-postion设为0% 0%表示从第一帧开始。做动画时只需要依次修改-webkit-mask-position的x与y值,每次将x增加33.3333%(100/每排的帧数4-1)直到100%,y增加50%(100/每牌的帧数3-1)直到100%。我们需要将每一帧的position状态在不同的时间赋给sprite1,这只需要用setTimeout就可以了。
我们新建一个spriteClip类,并传入(dom,w,h,time)四个参数,其中dom用来定位sprite1这个元素,w为一排有几帧,h为一共有几行,time为每一帧之间的间隔。
function spriteClip(dom,w,h,time){
	if(dom){
		this.dom = dom;
		this.w = w ||0;
		this.h = h ||0;
		this.time = time || 0;
	}else{
		return false;
	}
}
新建run方法。遍历w与h算出时间与位置,用setTimeout设置好延时执行
spriteClip.prototype.run = function(){
	for(var w=0;w<this.w;w++){
		for(var h =0;h<this.h;h++){
			//这里使用闭包以免w,h值随循环改变。
			(function(w,h,self){
				//计算时间
				var time = (h*self.time*self.w+w*self.time);
				setTimeout(function(){
					//计算位置
					self.dom.style.webkitMaskPosition = (100/(self.w-1))*w+'% '+(100/(self.h-1))*h+'%';
				},time);
			})(w,h,this);
		}
	}
}
新建并运行spriteClip。
var sprite1 = document.querySelector('.sprite1');
var sp1 = new spriteClip(sprite1,4,3,50);
sp1.run();
运行代码:
点击查看历史代码
####Step3.添加动画控制
有了sprite1后,再添加3个sprite,将所有的动画按照顺序播放来形成完整的转场。为了实现按照顺序的播放,我们需要为动画添加播放控制。即在播放动画完成后给dom触发一个finish事件,dom接到完成事件后执行下一个动画。同时添加show和hide用来控制动画的显示/隐藏。
function spriteClip(dom,w,h,time){
	if(dom){
		......
		//记录dom初始的display状态
		this.display = this.dom.style.display;
		//记录动画是否播放过
		this.played = false;
	}else{
		return false;
	}
}
spriteClip.prototype.run = function(){
	//如果动画已经播放过则不做任何动画
	if(this.played)
		return false;
	//标记为已播放完成
	this.played = true;
	//让dom显示
	this.show();
	for(var w=0;w<this.w;w++){
		for(var h =0;h<this.h;h++){
			(function(w,h,self){
				var time = (h*self.time*self.w+w*self.time);
				setTimeout(function(){
					......
					if(w >= self.w-1 && h>=self.h-1){
						//动画结束
						var event = document.createEvent('HTMLEvents');
	                    event.initEvent('finish', true, true);
	                    event.eventType = 'message';
	                    event.content =  'finish';
	                    //触发finish事件
	                    self.dom.dispatchEvent(event);
					}
				},time);
			})(w,h,this);
		}
	}
}
//隐藏dom
spriteClip.prototype.hide = function(){
	this.dom.style.display = 'none';
}
//显示dom
spriteClip.prototype.show = function(){
	this.dom.style.display = this.display;
}
//接收finish时间并用callback函数处理
spriteClip.prototype.finish = function(callback){
	this.dom.addEventListener('finish',callback);
}
var sprite1 = document.querySelector('.sprite1');
var sp1 = new spriteClip(sprite1,4,3,50);
//在做动画之前让sprite隐藏
sp1.hide();
document.addEventListener('touchend',function(){
	//手指抬起后运行动画
	sp1.run();
});
document.addEventListener('click',function(){
	//点击后运行动画
	sp1.run();
});
sp1.finish(function(){
	//动画完成
	console.log('finish');
});
下面添加剩下的3个sprite。
......
.stage .sprite2{
	width: 100%;
	height: 100%;
	position: absolute;
	left: 0px;
	top: 0px;
	background: url('./img/bg2.jpg') no-repeat;
	background-size: auto 100%;
	-webkit-mask:url('./img/Touch2.png') no-repeat;
	-webkit-mask-size: 400% 300%;
	-webkit-mask-position: 0% 0%;
}
.stage .sprite3{
	width: 100%;
	height: 100%;
	position: absolute;
	left: 0px;
	top: 0px;
	background: url('./img/bg2.jpg') no-repeat;
	background-size: auto 100%;
	-webkit-mask:url('./img/Touch3.png') no-repeat;
	-webkit-mask-size: 400% 300%;
	-webkit-mask-position: 0% 0%;
}
.stage .sprite4{
	width: 100%;
	height: 100%;
	position: absolute;
	left: 0px;
	top: 0px;
	background: url('./img/bg2.jpg') no-repeat;
	background-size: auto 100%;
	-webkit-mask:url('./img/Touch4.png') no-repeat;
	/* Touch4是4*5 */
	-webkit-mask-size: 400% 500%;
	-webkit-mask-position: 0% 0%;
}
......
<div class="stage">
	<div class="sprite1"></div>
	<div class="sprite2"></div>
	<div class="sprite3"></div>
	<div class="sprite4"></div>
</div>
.....
//新建4个sprite
var sprite1 = document.querySelector('.sprite1');
var sprite2 = document.querySelector('.sprite2');
var sprite3 = document.querySelector('.sprite3');
var sprite4 = document.querySelector('.sprite4');
var sp1 = new spriteClip(sprite1,4,3,80);
var sp2 = new spriteClip(sprite2,4,3,80);
var sp3 = new spriteClip(sprite3,4,3,80);
var sp4 = new spriteClip(sprite4,4,5,80);
sp1.hide();
sp2.hide();
sp3.hide();
sp4.hide();
document.addEventListener('touchend',function(){
	sp1.run();
});
document.addEventListener('click',function(){
	sp1.run();
});
sp1.finish(function(){
	//sprite1结束后运行sprite2
	sp2.run();
});
sp2.finish(function(){
	//sprite2结束后运行sprite3
	sp3.run();
});
sp3.finish(function(){
	//sprite3结束后运行sprite4
	sp4.run();
})
......
运行代码: