


SideMenu is an easy-to-use side menu container controller written in Swift 5.
Besides all the features a Side Menu should have, it supports:
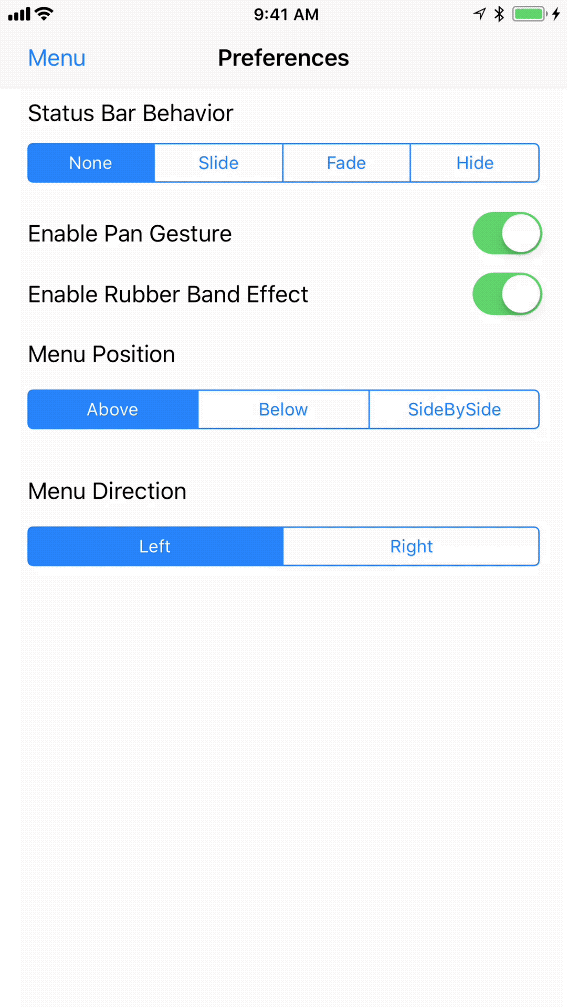
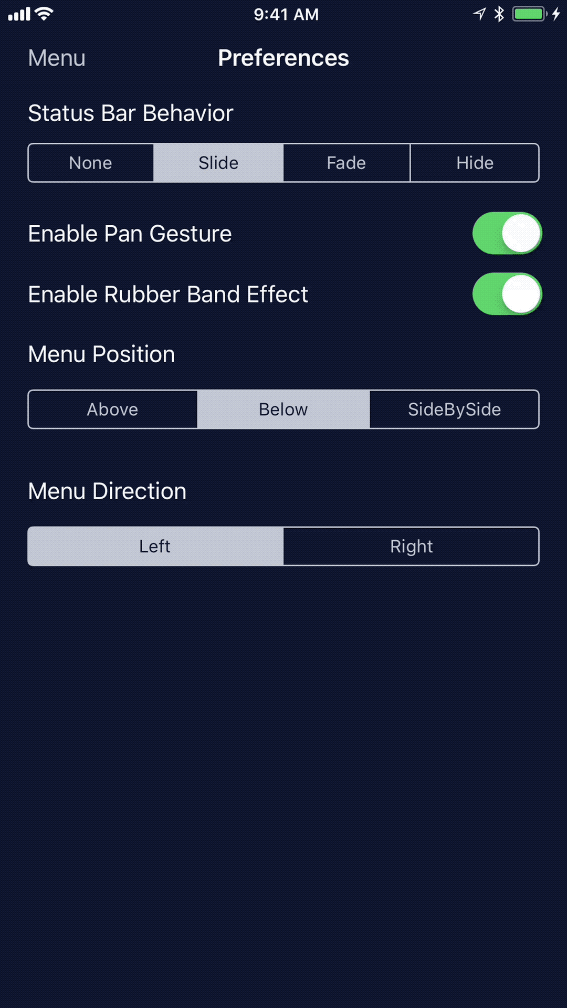
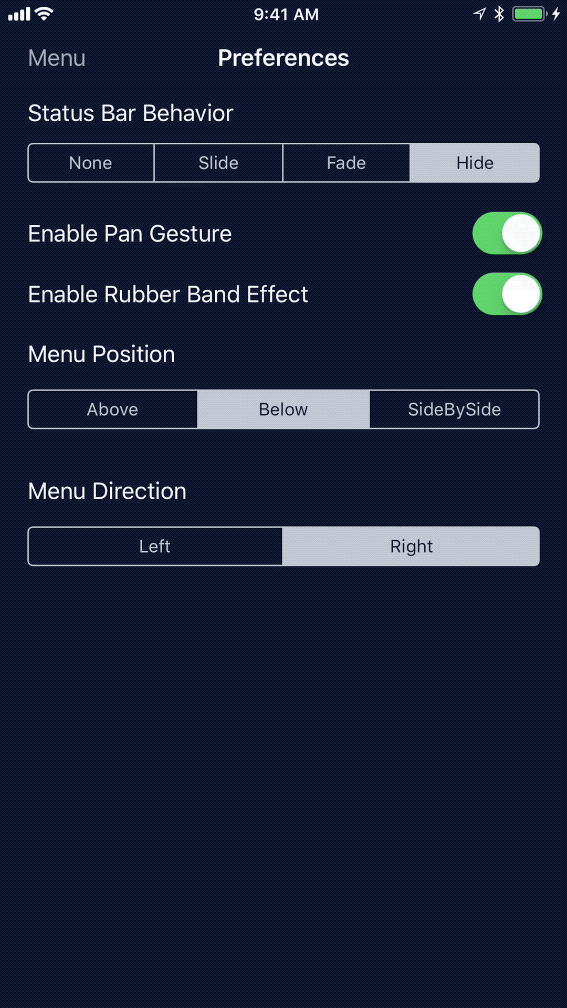
- Four kinds of status bar behaviors (iOS 12 and earlier)
- Three different menu position
- Both storyboard and programmatically
- Caching the content view controller and lazy initialization
- Rubber band effect while panning
- Custom transition animation
- RTL supports
- API References
Menu Position / Status Menu Behavior
| Above + None | Below + Slide |
|---|---|
 |
 |
| SideBySide + Fade | SideBySide + HideOnMenu |
|---|---|
 |
 |
We call the left/right view controller as the menu view controller, the central view controller as content view controller.
For Swift 5, please use 2.0.0 or later version.
For Swift 4.0, please using 0.5.1 or earlier version. For Swift 4.2, please using 1.x
To install SideMenu with CocoaPods, add the below line in your Podfile:
pod 'SideMenuSwift'
# Note it's NOT 'SideMenu'To install SideMenu with Carthage, add the below line in your Cartfile:
github "kukushi/SideMenu" "master"
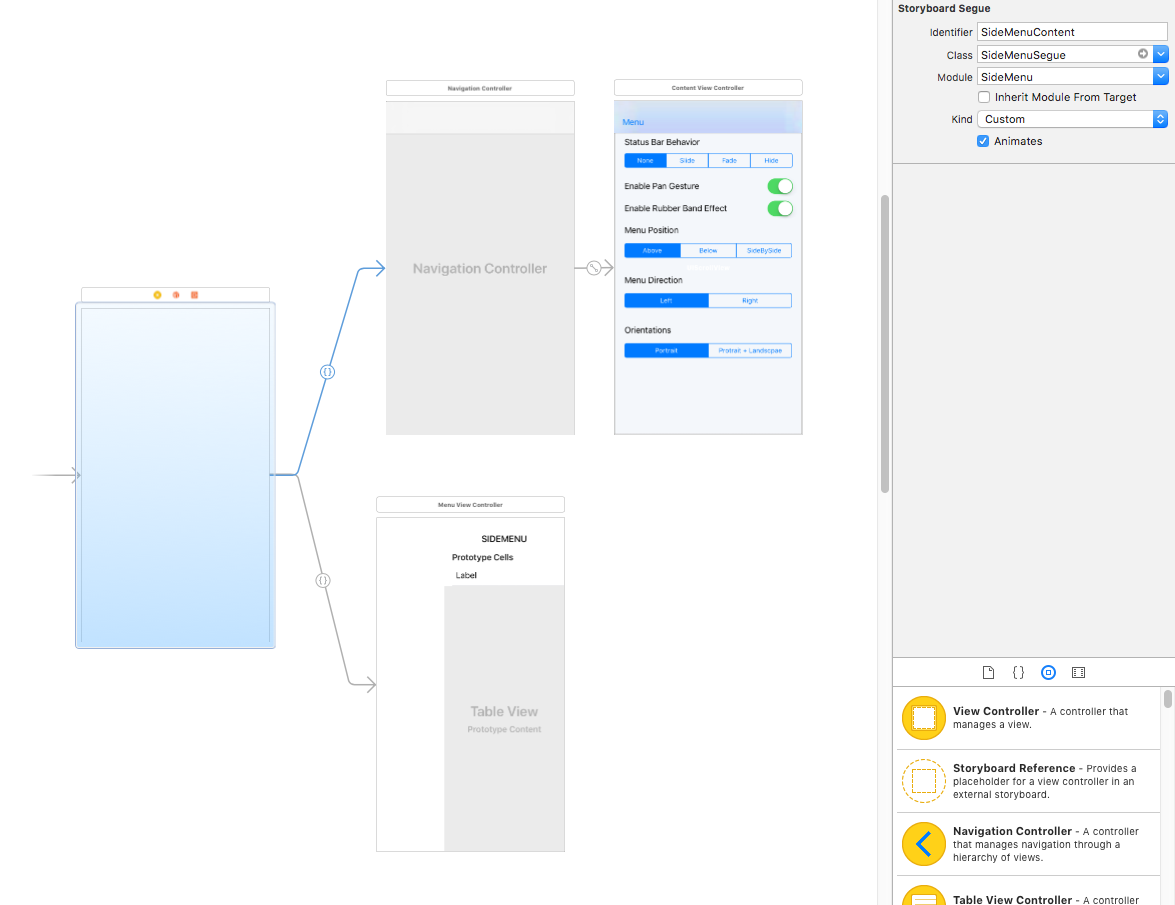
To set up `SideMenu` in storyboard:
- Open the view controller's Identity inspector. Change its Class to
SideMenuControllerand Module toSideMenuSwift. - Set up the menu view controller and the initial content view controller in your Storyboard. Add a Custom segue from the
SideMenuControllerto each of them.- Change the menu segue's identifier to
SideMenu.Menu, Class toSideMenuSegueand Module toSideMenuSwift. - Change the content segue's identifier to
SideMenu.Content, Class toSideMenuSegueand Module toSideMenuSwift.
- Change the menu segue's identifier to
- (Optional) If you want to use custom segue identifier:
- Open the
SideMenuController's Attribute inspector. - In the Side Menu Controller section, modify the Content SegueID/Menu SegueID to the desired value and change the corresponding segue's identifier.
- Open the
- It's done. Check this screenshot a for clear view.
To start the app with `SideMenu` programmatically:
import UIKit
import SideMenuSwift
// If you are using Carthage, uses `import SideMenu`

@UIApplicationMain
class AppDelegate: UIResponder, UIApplicationDelegate {

    var window: UIWindow?

    @objc func applicationDidFinishLaunching(_ application: UIApplication) {
        let contentViewController = ...
        let menuViewController = ...

        window = UIWindow(frame: UIScreen.main.bounds)
        window?.rootViewController = SideMenuController(contentViewController: contentViewController,
        menuViewController: menuViewController)

        window?.makeKeyAndVisible()
        return true
    }
}
Use the sideMenuController method which provided in UIViewController's extension to get the parent SideMenuController:
viewController.sideMenuController?.revealMenu()All the preferences of SideMenu can be found in SideMenuController.preferences. Its recommend to check out the Example to see how those options will take effect.
SideMenuController.preferences.basic.menuWidth = 240
SideMenuController.preferences.basic.statusBarBehavior = .hideOnMenu
SideMenuController.preferences.basic.position = .below
SideMenuController.preferences.basic.direction = .left
SideMenuController.preferences.basic.enablePanGesture = true
SideMenuController.preferences.basic.supportedOrientations = .portrait
SideMenuController.preferences.basic.shouldRespectLanguageDirection = true

// See a lot more options on `Preferences.swift`.One of the coolest features of SideMenu is caching.
// Cache the view controllers somewhere in your code
sideMenuController?.cache(viewController: secondViewController, with: "second")
sideMenuController?.cache(viewController: thirdViewController, with: "third")

// Switch to it when needed
sideMenuController?.setContentViewController(with: "second")
What about the content view controller initialized from the Storyboard? We can use the preferences to apply a default key for it!
SideMenuController.preferences.basic.defaultCacheKey = "default"What if we can't want to load all the content view controllers so early? We can use lazy caching:
sideMenuController?.cache(viewControllerGenerator: { self.storyboard?.instantiateViewController(withIdentifier: "SecondViewController") }, with: "second")
sideMenuController?.cache(viewControllerGenerator: { self.storyboard?.instantiateViewController(withIdentifier: "ThirdViewController") }, with: "third")- Xcode 10 or later
- iOS 9.0 or later
SideMenu is available under the MIT license. See the LICENSE file for more info.


![dependabot[bot] avatar](https://avatars.githubusercontent.com/in/29110?v=4 "dependabot[bot]")


