![]()
Teams:

- The Java Tutorial from Oracle
- Games Fleadh
- The Nature of Code
- The git manual - read the first three chapters
- A video tutorial all about git/github
- The Processing language reference
- Email: [email protected]
- Web: http://bryanduggan.org
-
Week 5 - Teams Submission
-
26 April - Lab Test 20%
-
4 May Assignment Submission - 30%
-
End of Year exam - 50%
- https://github.com/skooter500/OOP-Test-2022
- https://github.com/skooter500/OOP-LabTest-2020-Starter
- https://github.com/skooter500/OOP-LabTest-2020/
- https://github.com/skooter500/OOP-Test-2019-Starter
- https://github.com/skooter500/OOP-Test-2019-Solution
- https://github.com/skooter500/OOP-2018-Lab-Test-2
- https://github.com/skooter500/OOP_Labtest1_2017_Starter
- https://github.com/skooter500/OOP-LabTest1-2016
- Practice drawing stuff and working out co-ordinates
- Practice using variables and if statements in Java
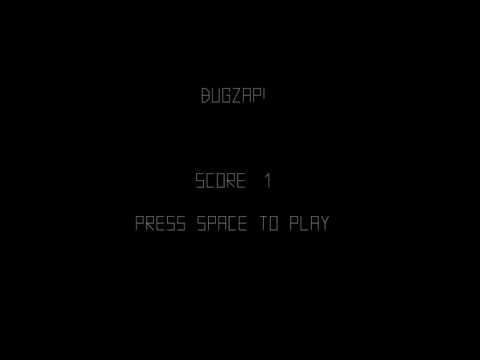
This is a video of a silly game called Bugzap made in Java using the Processing libraries.
How you should do it:
Ok let's get the main game working first and not worry about the splash screen and the game over screen
- Update your fork of the repository from the master branch. To do this, cd to the folder where you have cloned your repository, (or clone it somewhere if you need to) and type:
git checkout master
git pull upstream master- Create a branch for your work today by typing:
git checkout -b lab2
- Create a new class called BugZap.java in the ie.tudublin folder. Make it extend
PAppletand add thesettings,setupanddrawmethods. Check out HelloProcessing2.java if you need examples for these. This class also has examples of the drawing methods with comments. You can also check out the Processing reference if you are unsure about any of the methods. - Call
sizeinsettingsto set the size of the drawing window. - Edit the file Main.java so that it starts the BugZap class instead of the HelloProcessing2 class. I'll let you figure out how to do this :-)
- Make sure everything works by compiling and running your program before continuing!
Now we can draw the bug.
- Make fields of type
floatin the BugZap class forplayerX,playerYandplayerWidthand give these default values. You can decide what these should be. There are built in variables calledwidthandheightthat give the width and height of the drawing window. These only get assigned after size has been called, so if you want to use these to give values to playerX, playerY etc. put the code into the setup method. - Write a method called void
void drawPlayer(float x, float y, float w)that draws the player character, centered around the parameters x, y. You can use the line method to do this. You can pass variables as parameters to this method and also things likex + 20,w * 0.5fetc. I made an extra variable in this method called h for the height and set it to be half the w parameter. Don't forget to set the stroke color! - Call this method from
draw, passing in the parameters playerX, playerY and playerWidth. - Compile and run everything to make sure it's working before continuing.
- If everything is working ok, you should see the bug on the screen
Now lets get the player moving in response to the keys
Add this method to BugZap.java:
public void keyPressed()
	{
		if (keyCode == LEFT)
		{
			System.out.println("Left arrow pressed");
		}
		if (keyCode == RIGHT)
		{
			System.out.println("Right arrow pressed");
		}
		if (key == ' ')
		{
			System.out.println("SPACE key pressed");
		}
} - If you compile and run the program again you will see that some messages get printed out when you press various keys. If you are running in Visual Studio Code, you will see these messages appear in the Debug Console
- Modify this method to increment and decrement the playerX variable instead and you should be able to get the player to move left and right
- You might want to add if statements to this method to stop the player moving off the left and right side of the screens. If statements in Java are almost the same as in C!
- When the player presses SPACE you will want to draw a line for the player's laser.
The Bug
- In a similar way to how you made the player, make the Bug. Make variables and drawBug method. Don't forget to call the method from draw()
- To move the bug you can add a random amount to it's x coordinate on intervals. To generate a random number you can use the random function.
- One way to make stuff happen on an interval rather than every frame is to use the frameCount variable. This variable is a field in PApplet and it gets incremented automatically every time draw is called. Because draw gets called 60 times a second, you can do something every second with this code:
if ((frameCount % 60) == 0)
{
    // Do something
}- You can print text to the screen using the text function.
Ok you should now have the basics working. See if you can figure out how to check to see if the player hits the bug, add scoring, splash screen, game over screen and sound.
- Set up Java, Visual studio code and the Java Extensions
- Fork the repo, configure the upstream remotes
- Write your first Java code using command line tools
- Test out Visual Studio Code
Install the software you will need for this module and set up your path to the Java Development Kit. This document explains what you need.
Firstly fork this repository by clicking the fork button above, so that you get your own copy of the course repo to work on this semester. Now create a new empty folder on your computer somewhere right click on the folder and choose git bash here. Alternatively you can start the bash and cd to the new folder. To clone the repository for your fork:
git clone https://github.com/YOURGITUSERNAME/OOP-2023Replace YOURGITUSERNAME with your github username. You can also copy the URL to the repo from your browser and paste it into the console. To paste into the bash on Windows is right click. You can use Cmd + C, Cmd + V on the Mac.
Now cd into the repo and check the origin and upstream remotes are set up correctly
cd OOP-2023
git remote -v
You should see something like this:
origin  https://github.com/YOURGITUSERNAME/OOP-2023 (fetch)
origin  https://github.com/YOURGITUSERNAME/OOP-2023 (push)
upstream  https://github.com/skooter500/OOP-2023 (fetch)
upstream  https://github.com/skooter500/OOP-2023 (push)
If you don't see the upstream remote, you can set it up by typing
git remote add upstream https://github.com/skooter500/OOP-2023You can read more about forking a git repository and setting up the upstream remote in this article
Once the upstream is setup, you will be able to push code to your own repo and also keep it up to date with the master branch of the changes I make each class.
If you already forked the repo before the lab, you may need to update your master branch from my master branch to get the changes I made:
git fetch
git checkout master
git pull upstream master
git pushOpen the OOP-2023 folder in Visual Studio Code. You can run your program by choosing Run | Start Debugger. Important for users of the Lab computers In the labs you should use the shell scripts compile.sh and run.sh located in the Java folder to compile and run your code. You can run these from the Bash.
You should see
Hello world
Tara
Tara
On the terminal. If you do, then congratulations! You have successfully compiled and run your first Java program. Now create a branch to store your changes today. Best not to modify the master branch so you can keep it up to date with my changes:
git checkout -b lab1-
Make a private
intfield on the Cat class called numLives. -
Write public accessors for the field (see how I did this for the name field on the Animal class)
-
Set the value of this field to 9 in the Cat constructor
-
Write a method (functions are called methods in Java) on the Cat class called kill. It should subtract 1 from numLives if numLives is > 0 and print the message "Ouch!". If numLives is 0, you should just print the message "Dead"
-
Create a new instance of the Cat class like this
Cat ginger = new Cat("Ginger");
-
In the Main class in a loop, call kill on ginger until ginger is dead.
-
Compile and run your program until you have no bugs and you get the desired output.
Commit and push your changes:
git add .
git commit -m "killing the cat"
git push --set-upstream origin lab1
The "--set-upstream origin lab1" option is only required the first time you commit onto a new branch. After that you can just type "git push"
Checkout the branch HelloProcessing by typing
git checkout HelloProcessing from the bash
Press F5 and if all goes well, you should see something that looks like this:

Use the shell scripts I mentioned above if you are using a lab computer.
If you are done check out the references for classes, packages, constructors and accessors below.
Also! Read the first three chapters of the git manual.
Some assignments from previous years:
