Git Product home page Git Product logo

gordicaleksa / pytorch-deepdream Goto Github PK

View Code? Open in Web Editor NEW
355.0 8.0 81.0 44.29 MB

PyTorch implementation of DeepDream algorithm (Mordvintsev et al.). Additionally I've included playground.py to help you better understand basic concepts behind the algo.

Home Page: https://youtube.com/c/TheAIEpiphany

License: MIT License

Python 0.54% Jupyter Notebook 99.46%
deepdream machine-learning deep-learning python pytorch deep-dream-tutorial deep-learning-tutorial

pytorch-deepdream's Introduction

Deep Dream 💻 + 🌊💤 = ❤️

This repo contains a PyTorch implementation of the Deep Dream algorithm (:link: blog by Mordvintstev et al.).

It's got a full support for the command line usage and a Jupyter Notebook!

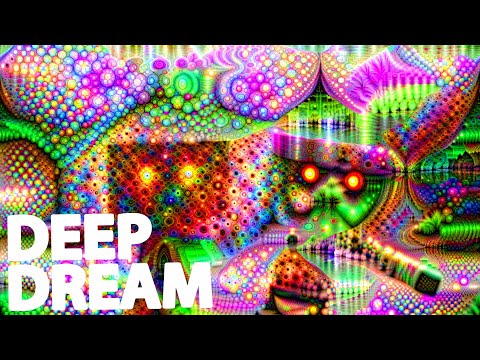
And it will give you the power to create these weird, psychedelic-looking images:

Not bad, huh?

I strongly suggest you start with the Jupyter notebook that I've created!

Note: it's pretty large, ~10 MBs, so it may take a couple of attempts to load it in the browser here on GitHub.

Table of Contents

What is DeepDream algorithm?

In a nutshell the algorithm maximizes the activations of chosen network layers by doing a gradient ascent.

So from an input image like the one on the left after "dreaming" we get the image on the right:

Who would have said that neural networks had this creativity hidden inside? 🎨

Why yet another Deep Dream repo?

Most of the original Deep Dream repos were written in Caffe and the ones written in PyTorch are usually really hard to read and understand. This repo is an attempt of making the cleanest DeepDream repo that I'm aware of + it's written in PyTorch! ❤️

Static Image Examples

Here are some examples that you can create using this code!

Optimizing shallower layers = Amplify low-level features

By using shallower layers of neural networks you'll get lower level patterns (edges, circles, colors, etc.) as the output:

Here the first 2 images came from ResNet50 and the last one came from GoogLeNet (both pretrained on ImageNet).

Optimizing deeper Layers = Amplify high-level features

By using deeper network layers you'll get higher level patterns (eyes, snouts, animal heads):

The 1st and 3rd were created using VGG 16 (ImageNet) and the middle one using ResNet50 pretrained on Places 365.

Dataset matters (ImageNet vs Places 365)

If we keep every other parameter the same but we swap the pretrained weights we get these:

Left: ResNet50-ImageNet (we can see more animal features) Right: ResNet50-Places365 (human built stuff, etc.).

Impact of increasing the pyramid size

Dreaming is performed on multiple image resolutions stacked "vertically" (we call this an image pyramid).

Going from left to right the only parameter that changed was the pyramid size (from left to right: 3, 7, 9 levels).

Impact of increasing the pyramid ratio

Playing with pyramid ratio has a similar/related effect - the basic idea is that the relative area of the image which the deeper neurons can modify and "see" (the so-called receptive field of the net) is increasing and we get increasingly bigger features like eyes popping out (from left to right: 1.1, 1.5, 1.8):

Note: you can see the exact params used to create these images encoded into the filename!

Make sure to check out the Jupyter notebook!, I've explained this thoroughly.

Ouroboros Video Examples

Here are some further examples that you can create using this code!

The idea here is that whatever the network dreams just feed that back to it's input and apply a geometric transformation.

Ouroboros: Zoom transform

If we apply only central zoom we get this:

Ouroboros: Zoom and Rotation transforms

Applying central zoom and at the same time applying a 3 degree rotation per frame yields this:

Ouroboros: Translation

Finally if we do a simple translation (5 px per frame top left to bottom right direction):

Hopefully these did not break your brain - it feels like web 1.0 early 2000s. Bear with me.

DeepDream Video Examples

Instead of feeding the output back to input we just apply the algorithm per frame and apply some linear blending:

Linear blending just combines the current frame with the last one so as to reduce the flicker (here I used 0.85)

Note: all of the deepdream images/GIFs were produced by me, credits for original image artists are given bellow.

Setup

  1. git clone https://github.com/gordicaleksa/pytorch-deepdream
  2. Open Anaconda Prompt and navigate into project directory cd path_to_repo
  3. Run conda env create from project directory (this will create a brand new conda environment).
  4. Run activate pytorch-deepdream (for running scripts from your console or setup the interpreter in your IDE)

That's it! It should work out-of-the-box executing environment.yml file which deals with dependencies.

Note: If you wish to use video functions I have - you'll need ffmpeg in your system path.


PyTorch pip package will come bundled with some version of CUDA/cuDNN with it, but it is highly recommended that you install a system-wide CUDA beforehand, mostly because of the GPU drivers. I also recommend using Miniconda installer as a way to get conda on your system. Follow through points 1 and 2 of this setup and use the most up-to-date versions of Miniconda and CUDA/cuDNN for your system.

Usage

Option 1: Jupyter Notebook

Just run jupyter notebook from you Anaconda console and it will open up a session in your default browser.
Open The Annotated DeepDream.ipynb and you're ready to play!

Note: if you get DLL load failed while importing win32api: The specified module could not be found
Just do pip uninstall pywin32 and then either pip install pywin32 or conda install pywin32 should fix it!

Option 2: Use your IDE of choice

You just need to link the Python environment you created in the setup section.

Option 3: Command line

Navigate to/activate your env if you're using Anaconda (and I hope you do) and you can use the commands I've linked below.


Tip: Place your images/videos inside the data/input/ directory and you can then just reference your files (images/videos) by their name instead of using absolute/relative paths.

DeepDream images

To create some static Deep Dream images run the following command:

python deepdream.py --input <img_name> --img_width 600

This will use the default settings but you'll immediately get a meaningful result saved to:

data/out-images/VGG16_EXPERIMENTAL_IMAGENET/

Note: the output directory will change depending on the model and pretrained weights you use.

Ouroboros videos

To get the out-of-the-box Ouroboros 30-frame video do the following:

python deepdream.py --input <img_name> --create_ouroboros --ouroboros_length 30

It will dump the intermediate frames to data/out-videos/VGG16_EXPERIMENTAL_IMAGENET/ and it will save the final video to data/out-videos.

DeepDream videos

To create a Deep Dream video run this command:

python deepdream.py --input <mp4 video name>

It will dump the intermediate frames to data/out-videos/tmp_out and it will save the final video to data/out-videos.


Well, enjoy playing with this project! Here are some additional, beautiful, results:

Hardware requirements

A GPU with 2+ GBs will be more than enough.

You'll be able to create DeepDream images, Ouroboros and DeepDream videos.

If you don't have a GPU, the code will automatically run on the CPU but somewhat slower (especially for videos).

Learning material

If you're having difficulties understanding DeepDream I did an overview of the algorithm in this video:

The GAT paper explained

And also the Jupyter Notebook I created is the best place to start!

Acknowledgements

I found these repos useful (while developing this one):

I found the images I was using here:

Other images are now already classics in the NST and DeepDream worlds.

Places 365 pretrained models came from this awesome repo.

Citation

If you find this code useful for your research, please cite the following:

@misc{Gordić2020DeepDream,
  author = {Gordić, Aleksa},
  title = {pytorch-deepdream},
  year = {2020},
  publisher = {GitHub},
  journal = {GitHub repository},
  howpublished = {\url{https://github.com/gordicaleksa/pytorch-deepdream}},
}

Connect with me

If you'd love to have some more AI-related content in your life 🤓, consider:

Licence

License: MIT

pytorch-deepdream's People

Contributors

botoxparty avatar gordicaleksa avatar

Stargazers

 avatar  avatar  avatar  avatar  avatar  avatar  avatar  avatar  avatar  avatar  avatar  avatar  avatar  avatar  avatar  avatar  avatar  avatar  avatar  avatar  avatar  avatar  avatar  avatar  avatar  avatar  avatar  avatar  avatar  avatar  avatar  avatar  avatar  avatar  avatar  avatar  avatar  avatar  avatar  avatar  avatar  avatar  avatar  avatar  avatar  avatar  avatar  avatar  avatar  avatar  avatar  avatar  avatar  avatar  avatar  avatar  avatar  avatar  avatar  avatar  avatar  avatar  avatar  avatar  avatar  avatar  avatar  avatar  avatar  avatar  avatar  avatar  avatar  avatar  avatar  avatar  avatar  avatar  avatar  avatar  avatar  avatar  avatar  avatar  avatar  avatar  avatar  avatar  avatar  avatar  avatar  avatar  avatar  avatar  avatar  avatar  avatar  avatar  avatar  avatar

Watchers

 avatar  avatar  avatar  avatar  avatar  avatar  avatar  avatar

pytorch-deepdream's Issues

no clear instructions on how to use any other model

!python deepdream.py --input pink.jpg --img_width 2000 --num_gradient_ascent_iterations 10 --pyramid_size 4 --pyramid_ratio 1.2 --smoothing_coefficient 0.5 --model SupportedModels=0 --pretrained_weights IMAGNET

usage: deepdream.py [-h] [--input INPUT] [--img_width IMG_WIDTH]
[--model {SupportedModels.VGG16,SupportedModels.VGG16_EXPERIMENTAL,SupportedModels.GOOGLENET,SupportedModels.RESNET50,SupportedModels.ALEXNET}]
[--pretrained_weights {SupportedPretrainedWeights.IMAGENET,SupportedPretrainedWeights.PLACES_365}]
[--layers_to_use LAYERS_TO_USE]
[--pyramid_size PYRAMID_SIZE]
[--pyramid_ratio PYRAMID_RATIO]
[--num_gradient_ascent_iterations NUM_GRADIENT_ASCENT_ITERATIONS]
[--lr LR] [--is_video IS_VIDEO]
[--video_length VIDEO_LENGTH]
[--frame_transform {SupportedTransforms.ZOOM,SupportedTransforms.ZOOM_ROTATE,SupportedTransforms.TRANSLATE}]
[--blend BLEND] [--should_display SHOULD_DISPLAY]
[--spatial_shift_size SPATIAL_SHIFT_SIZE]
[--smoothing_coefficient SMOOTHING_COEFFICIENT]
[--use_noise USE_NOISE]
deepdream.py: error: argument --model: invalid choice: 'SupportedModels=0' (choose from <SupportedModels.VGG16: 0>, <SupportedModels.VGG16_EXPERIMENTAL: 1>, <SupportedModels.GOOGLENET: 2>, <SupportedModels.RESNET50: 3>, <SupportedModels.ALEXNET: 4>)

what am i doing wrong?? 😞😪

Error loading Resnet50 pretrained on places_365 on a CPU

Hello! Firstly, let me just thank you for this great repo. Its the clearest practical explanation of Deep Dream I've found online!

The issue:
When I try to run the following command (on a CPU-only machine)

python deepdream.py model_name RESNET50 --pretrained_weights PLACES_365 --layers_to_use layer3

I get the following error

Dreaming started!
Traceback (most recent call last):
  File "C:/Users/Asus/Desktop/My stuff/DeepDream NFT/pytorch-deepdream/deepdream.py", line 235, in <module>
    img = deep_dream_static_image(config, img=None)  # img=None -> will be loaded inside of deep_dream_static_image
  File "C:/Users/Asus/Desktop/My stuff/DeepDream NFT/pytorch-deepdream/deepdream.py", line 69, in deep_dream_static_image
    model = utils.fetch_and_prepare_model(config['model_name'], config['pretrained_weights'], DEVICE)
  File "C:\Users\Asus\Desktop\My stuff\DeepDream NFT\pytorch-deepdream\utils\utils.py", line 132, in fetch_and_prepare_model
    model = ResNet50(pretrained_weights, requires_grad=False, show_progress=True).to(device)
  File "C:\Users\Asus\Desktop\My stuff\DeepDream NFT\pytorch-deepdream\models\definitions\resnets.py", line 28, in __init__
    state_dict = torch.load(resnet50_places365_binary_path)['state_dict']
  File "C:\Users\Asus\Desktop\My stuff\DeepDream NFT\DeepDream_venv\lib\site-packages\torch\serialization.py", line 713, in load
    return _legacy_load(opened_file, map_location, pickle_module, **pickle_load_args)
  File "C:\Users\Asus\Desktop\My stuff\DeepDream NFT\DeepDream_venv\lib\site-packages\torch\serialization.py", line 930, in _legacy_load
    result = unpickler.load()
  File "C:\Users\Asus\Desktop\My stuff\DeepDream NFT\DeepDream_venv\lib\site-packages\torch\serialization.py", line 876, in persistent_load
    wrap_storage=restore_location(obj, location),
  File "C:\Users\Asus\Desktop\My stuff\DeepDream NFT\DeepDream_venv\lib\site-packages\torch\serialization.py", line 176, in default_restore_location
    result = fn(storage, location)
  File "C:\Users\Asus\Desktop\My stuff\DeepDream NFT\DeepDream_venv\lib\site-packages\torch\serialization.py", line 152, in _cuda_deserialize
    device = validate_cuda_device(location)
  File "C:\Users\Asus\Desktop\My stuff\DeepDream NFT\DeepDream_venv\lib\site-packages\torch\serialization.py", line 136, in validate_cuda_device
    raise RuntimeError('Attempting to deserialize object on a CUDA '
RuntimeError: Attempting to deserialize object on a CUDA device but torch.cuda.is_available() is False. If you are running on a CPU-only machine, please use torch.load with map_location=torch.device('cpu') to map your storages to the CPU.

After looking into it, I think the issue may be that the saved model contains GPU tensors. This would make torch.load load those tensors to GPU by default, which causes the CUDA error.

Adding the argument map_location='cpu' to torch.load fixes the issue. I can create a pull request with this fix if you agree with it.

train from scratch

Thanks for sharing your code. My goal is to use GoogleNet on face data. You mentioned that the result of the model depends on the dataset. Does this mean if I want to see components of human face in the deep dream images I need to train the model from scratch on human face. I tried to fine-tune the model although it gave me good accuracy but it didn't give me dream-like images and if it gave me any dream like image it contained human face components. Do you have any idea or suggestion how to approach this?

Error with Resnet Command line

Hi, when I try to run the following command I am returned in error:
python3 deepdream.py --input cl_00001.png --img_width 1920 --pyramid_size 2 --model_name RESNET50 --pretrained_weights PLACES_365
Dreaming started!
Invalid layer names ['relu4_3'].
Available layers for model RESNET50 are ['layer1', 'layer2', 'layer3', 'layer4'].
Traceback (most recent call last):
File "/home/reilly/Documents/Github/pytorch-deepdream/deepdream.py", line 236, in
dump_path = utils.save_and_maybe_display_image(config, img)
File "/home/reilly/Documents/Github/pytorch-deepdream/utils/utils.py", line 87, in save_and_maybe_display_image
assert isinstance(dump_img, np.ndarray), f'Expected numpy array got {type(dump_img)}.'
AssertionError: Expected numpy array got <class 'NoneType'>.

Again, any insight into how to resolve this would be greatly appreciated, thank you so much!

Error with resnet in jupyter notebook

Hi, when I try to run section 21 of the jupyter notebook I am returned the follow error:
Downloading resnet50_places365.pth.tar from http://places2.csail.mit.edu/models_places365/resnet50_places365.pth.tar it may take some time.


NameError Traceback (most recent call last)
/tmp/ipykernel_212303/229011906.py in
10 config['spatial_shift_size'] = 40
11
---> 12 img = deep_dream_static_image(config)
13 dump_path = save_and_maybe_display_image(config, img)
14 print(f'Saved DeepDream static image to: {os.path.relpath(dump_path)}\n')

/tmp/ipykernel_212303/1103483755.py in deep_dream_static_image(config, img)
1 def deep_dream_static_image(config, img=None):
----> 2 model = fetch_and_prepare_model(config['model_name'], config['pretrained_weights'])
3
4 try:
5 layer_ids_to_use = [model.layer_names.index(layer_name) for layer_name in config['layers_to_use']]

/tmp/ipykernel_212303/3540351205.py in fetch_and_prepare_model(model_type, pretrained_weights)
128 elif model_type == SupportedModels.RESNET50.name:
129 # We'll define the ResNet50 later
--> 130 model = ResNet50(pretrained_weights, requires_grad=False, show_progress=True).to(DEVICE)
131 else:
132 raise Exception('Model not yet supported.')

/tmp/ipykernel_212303/2427502766.py in init(self, pretrained_weights, requires_grad, show_progress)
17 binary_url = r'http://places2.csail.mit.edu/models_places365/resnet50_places365.pth.tar'
18 print(f'Downloading {binary_name} from {binary_url} it may take some time.')
---> 19 download_url_to_file(binary_url, resnet50_places365_binary_path)
20 print('Done downloading.')
21 state_dict = torch.load(resnet50_places365_binary_path)['state_dict']

NameError: name 'download_url_to_file' is not defined

Any idea how to fix this? Thanks!

Recommend Projects

  • React photo React

    A declarative, efficient, and flexible JavaScript library for building user interfaces.

  • Vue.js photo Vue.js

    🖖 Vue.js is a progressive, incrementally-adoptable JavaScript framework for building UI on the web.

  • Typescript photo Typescript

    TypeScript is a superset of JavaScript that compiles to clean JavaScript output.

  • TensorFlow photo TensorFlow

    An Open Source Machine Learning Framework for Everyone

  • Django photo Django

    The Web framework for perfectionists with deadlines.

  • D3 photo D3

    Bring data to life with SVG, Canvas and HTML. 📊📈🎉

Recommend Topics

  • javascript

    JavaScript (JS) is a lightweight interpreted programming language with first-class functions.

  • web

    Some thing interesting about web. New door for the world.

  • server

    A server is a program made to process requests and deliver data to clients.

  • Machine learning

    Machine learning is a way of modeling and interpreting data that allows a piece of software to respond intelligently.

  • Game

    Some thing interesting about game, make everyone happy.

Recommend Org

  • Facebook photo Facebook

    We are working to build community through open source technology. NB: members must have two-factor auth.

  • Microsoft photo Microsoft

    Open source projects and samples from Microsoft.

  • Google photo Google

    Google ❤️ Open Source for everyone.

  • D3 photo D3

    Data-Driven Documents codes.