![]()

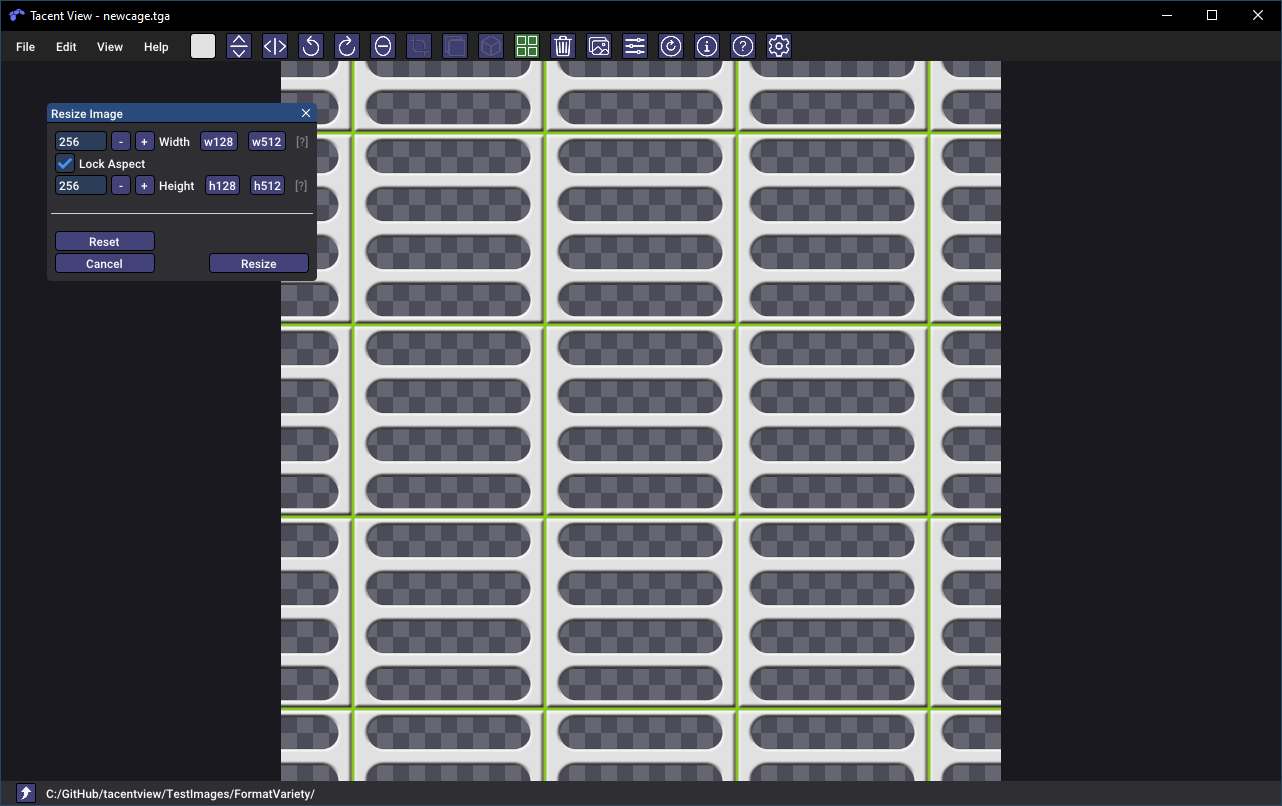
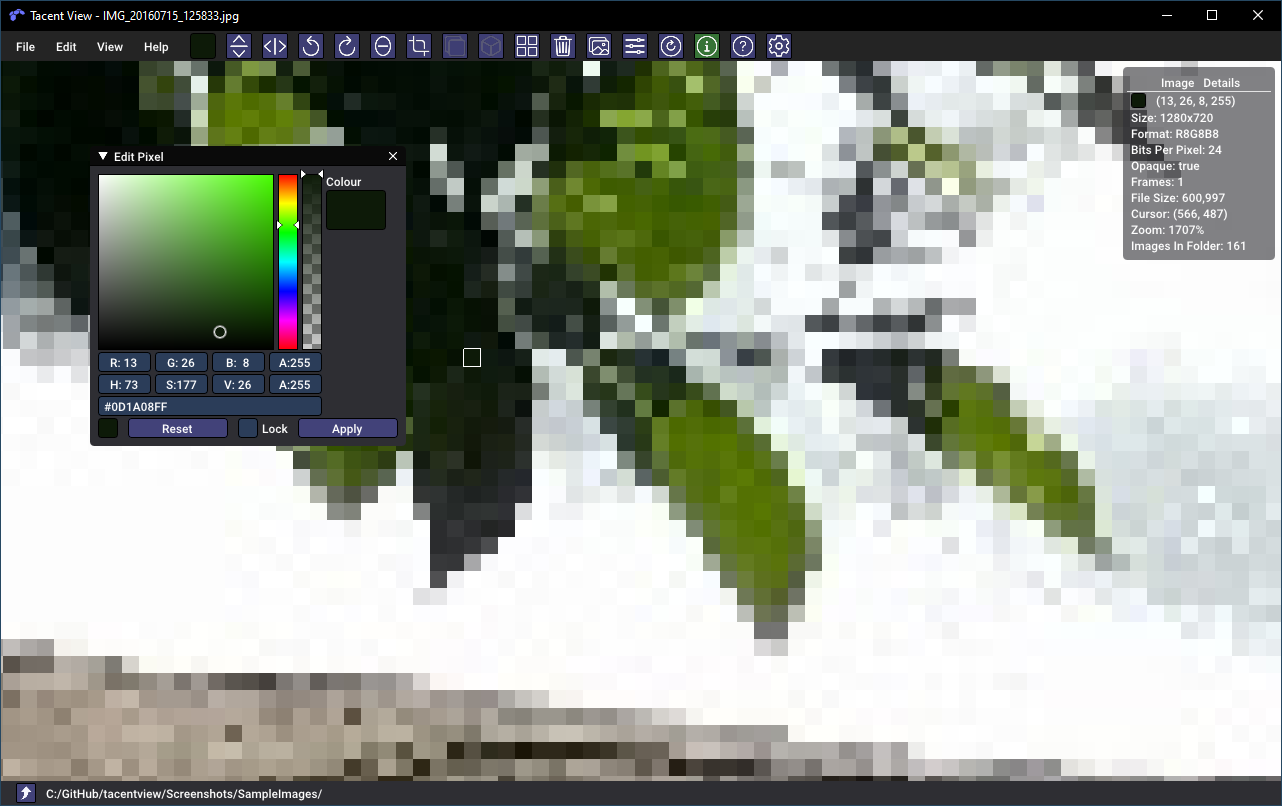
An image and texture viewer for tga, png, apng, exr, dds, gif, hdr, jpg, tif, ico, webp, and bmp files. Uses Dear ImGui and the Tacent library. This viewer is targeted to game devs -- It displays alpha channels correctly and can inspect the colour of individual pixels. There is basic editing functionality, batch resizing, and the ability to generate contact sheets for FX etc.
Tacent View runs on Windows 10 and Ubuntu Linux. Browse the releases to grab a zip (Windows) or deb (Linux) package -- or install from the snap store.
Left/right direction keys show previous and next images, semi-transparent images are displayed with an optional checkerboard background, and images may be converted to different formats easily.
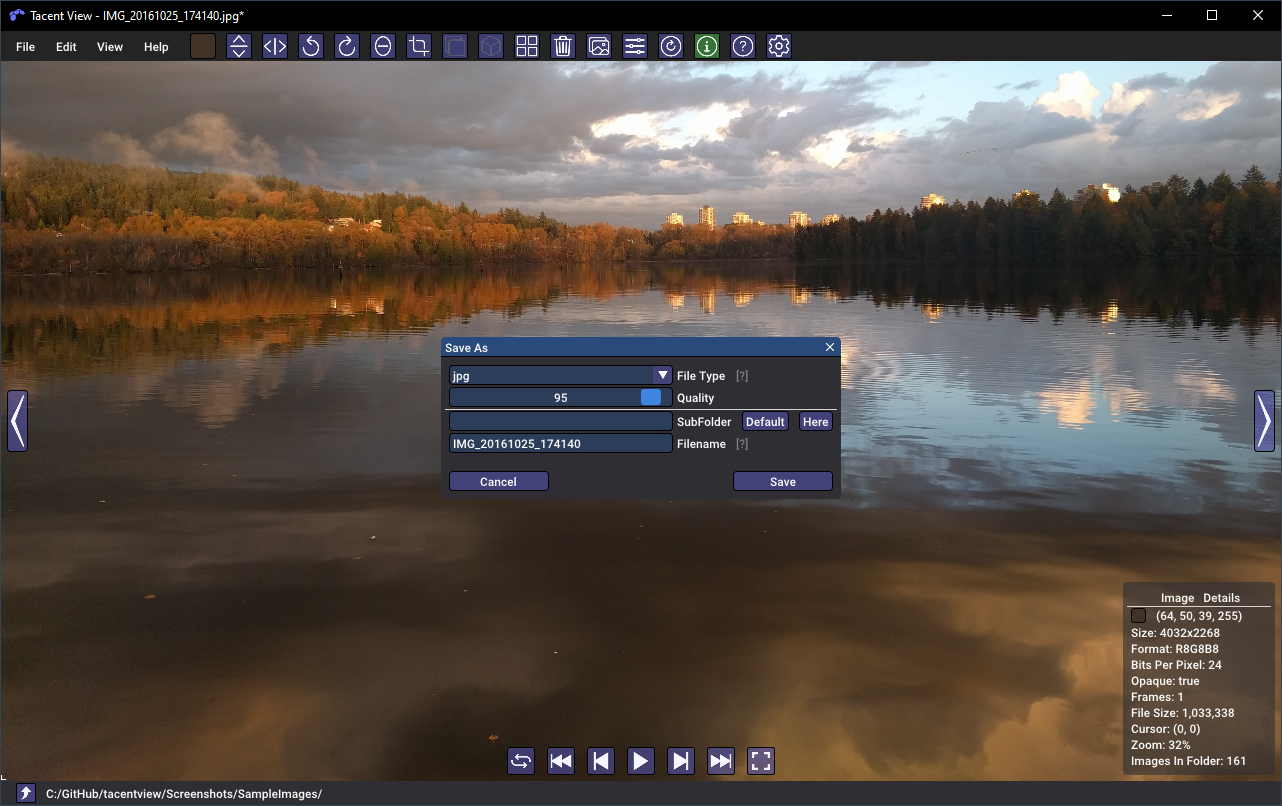
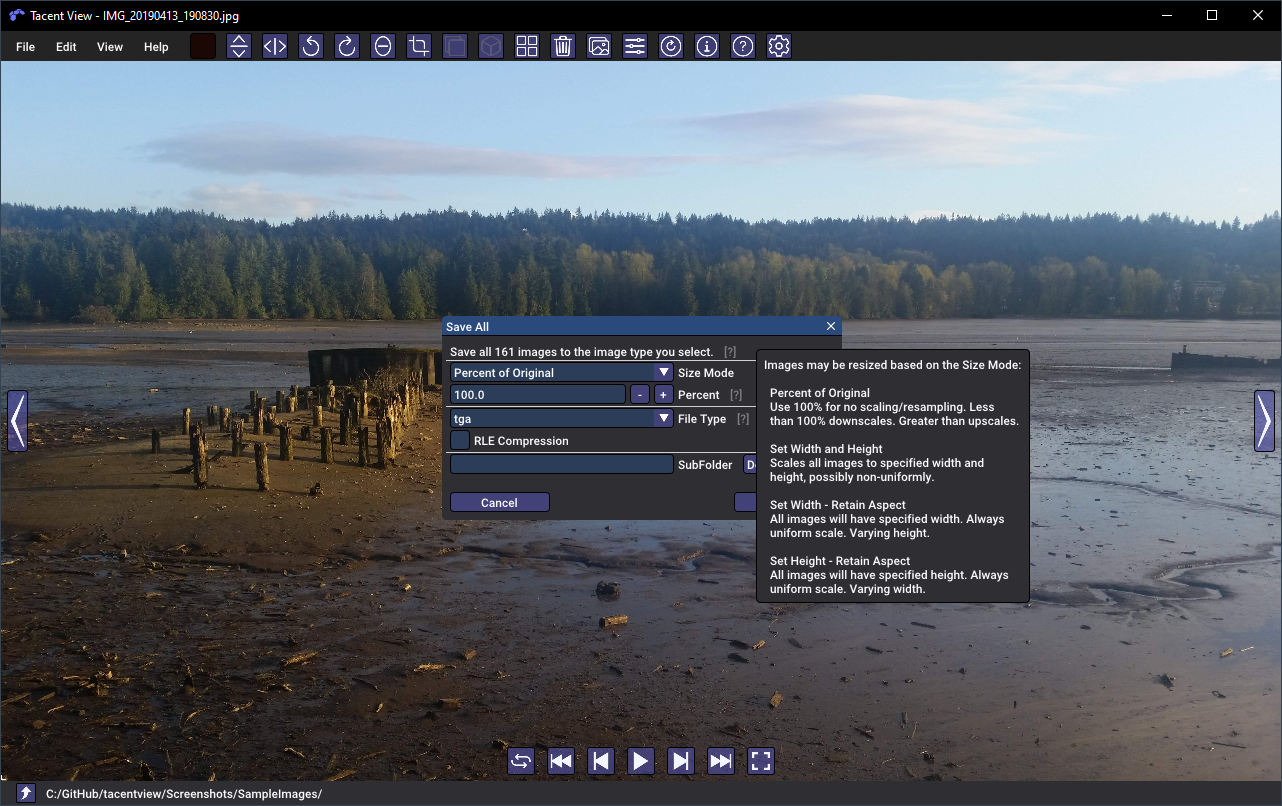
Use 'Save All As..." to batch convert all the images in a folder.
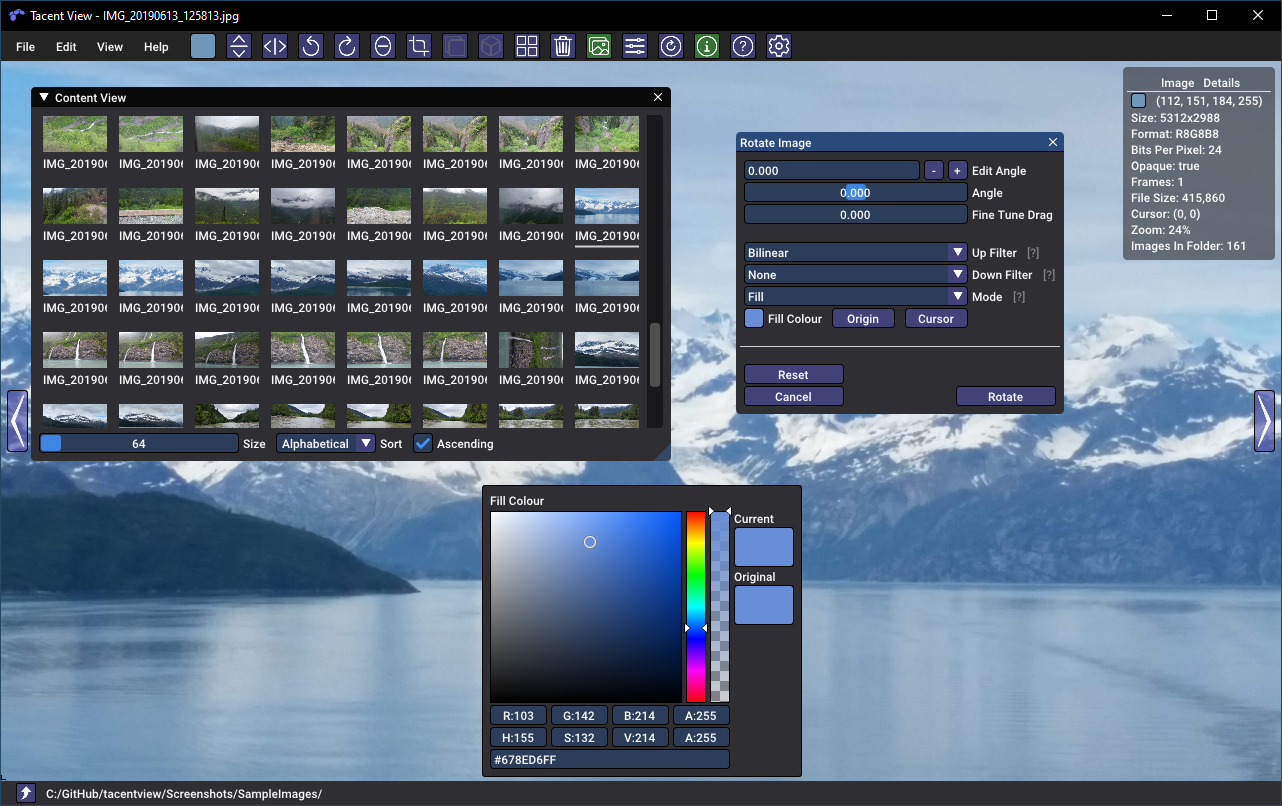
Viewing as thumbnails is supported by the 'Content View' window. Thumbnail generation and cache retrieval are extremely fast. Tacent View can easily handle thousands of photos in a single folder.
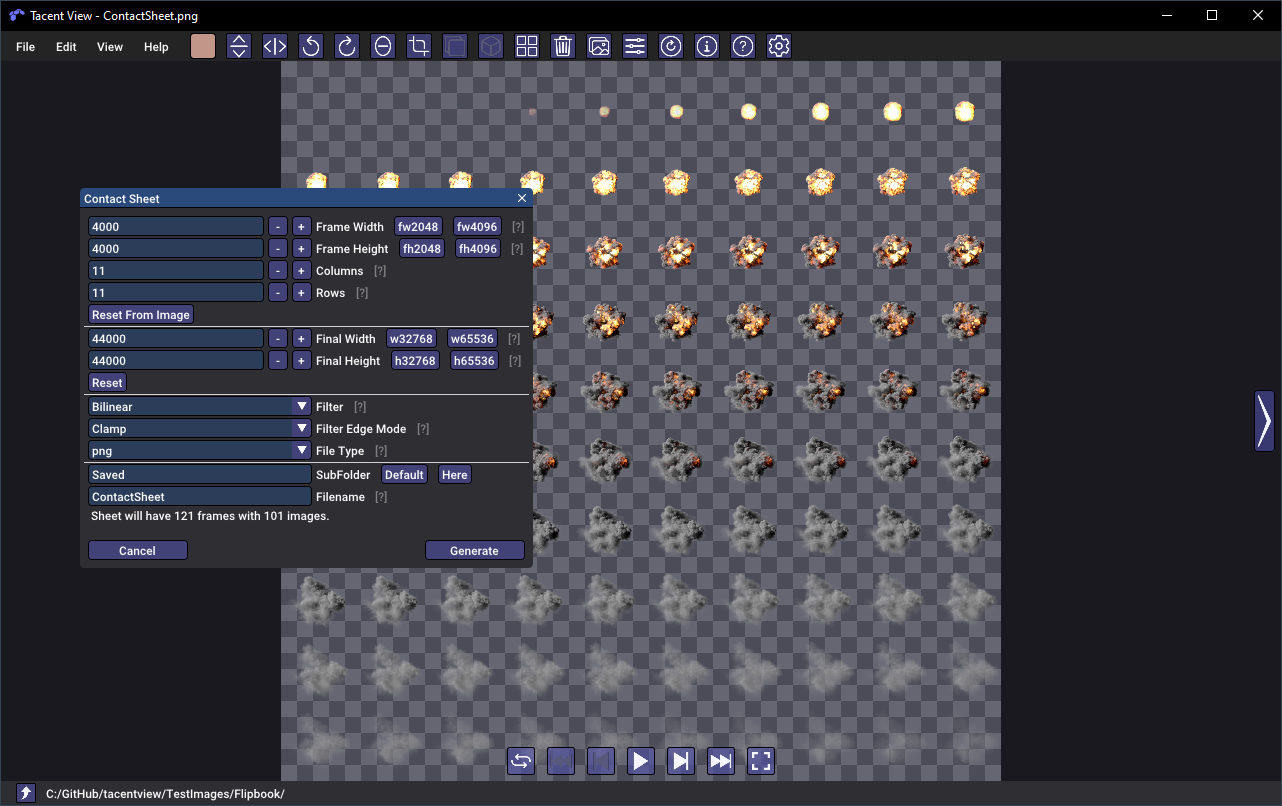
Contact sheet (AKA flipbook) textures may be generated. Images may be 'played' in succession to see what they look like animated. The alpha-channel is interpreted as opacity and is properly processed if the source images have semi-transparency.
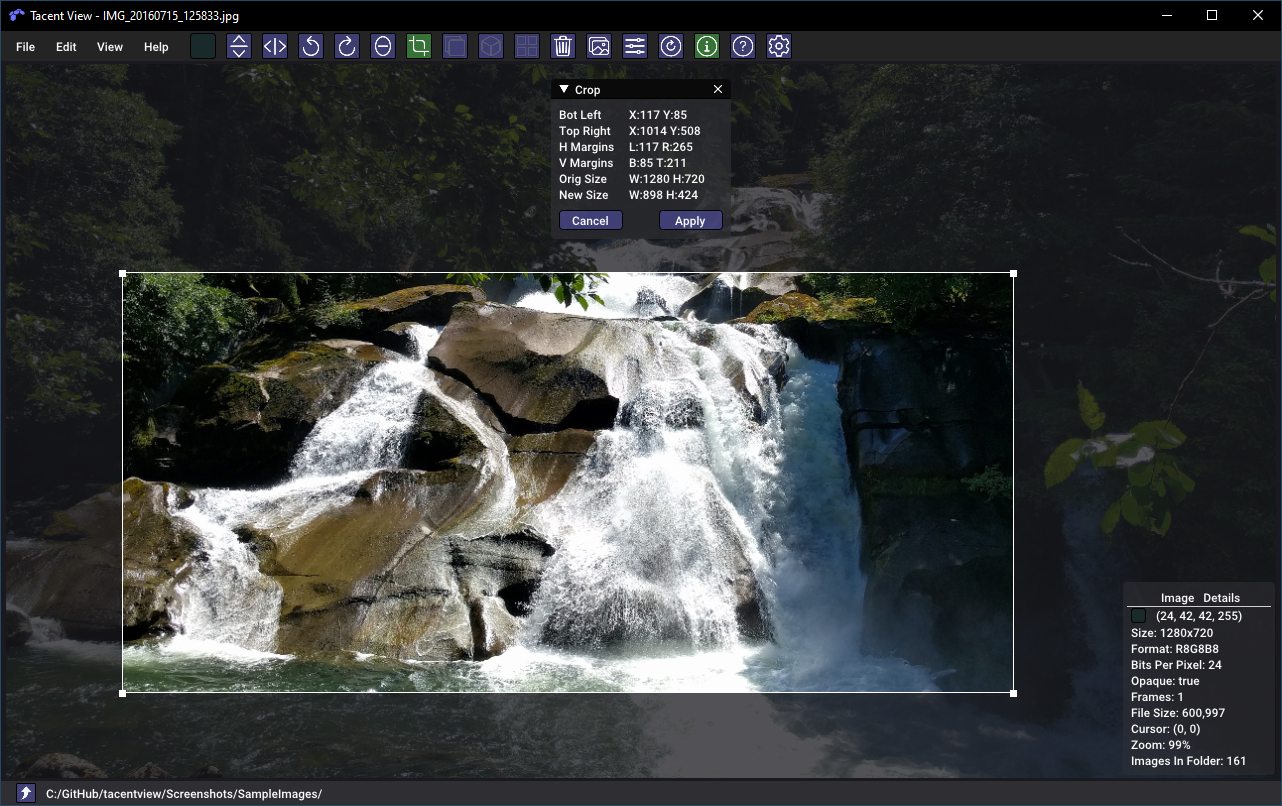
Flip, rotate-by-90-degrees, cropping and viewing textures in tiled mode is supported.
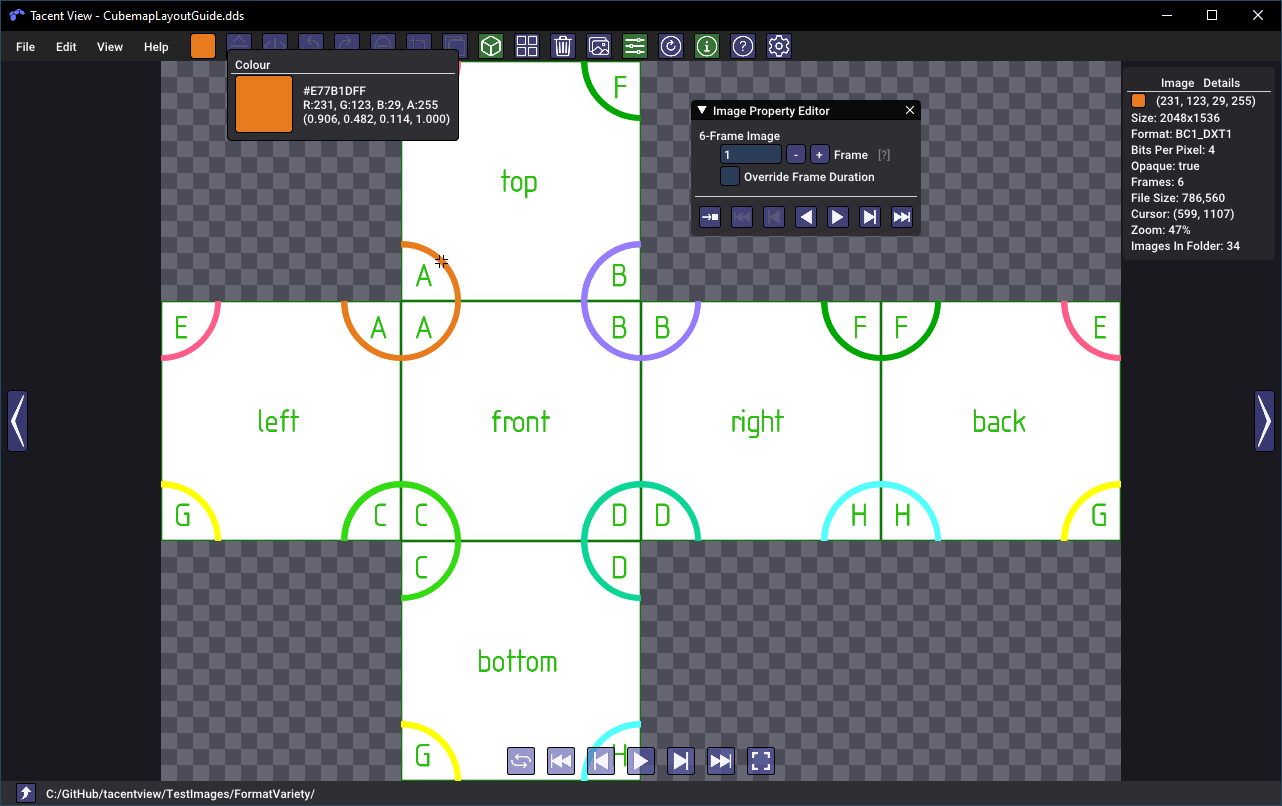
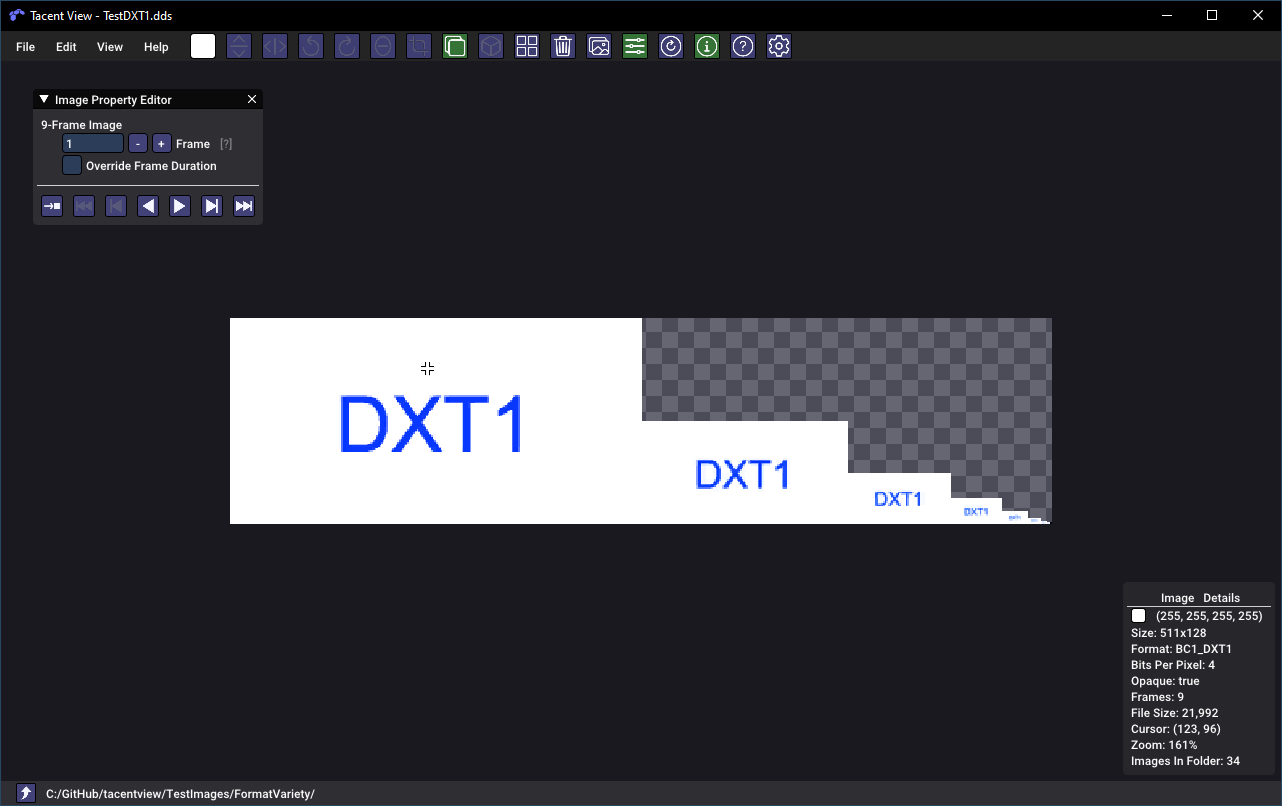
When viewing dds (direct draw surface) files, you can view any present mipmaps and see cubemaps in a 'T' layout.
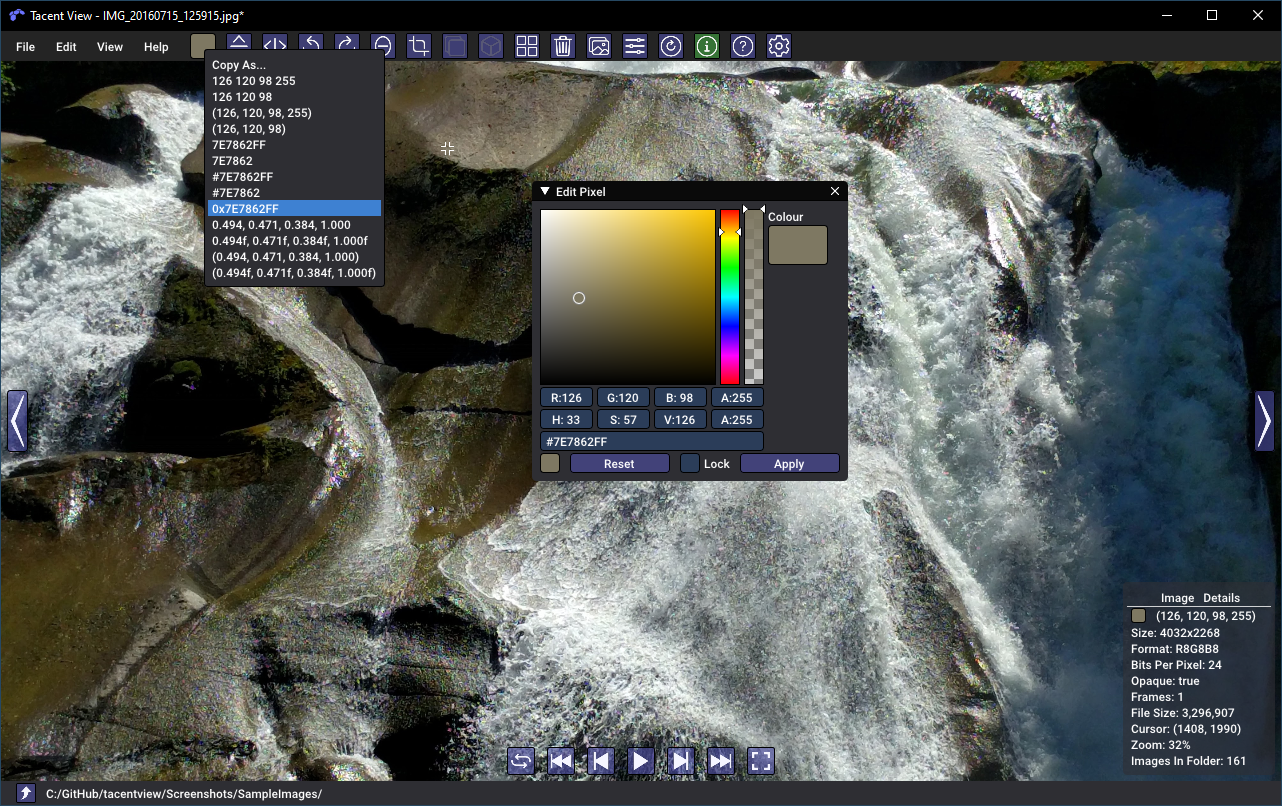
Users may zoom using Ctrl+/- and pan using the right mouse button. Several zoom modes are availabe in the view-menu including Fit, Downscale, and One-to-One pixel mapping. On extreme zooms the selected pixel is drawn with an outline.
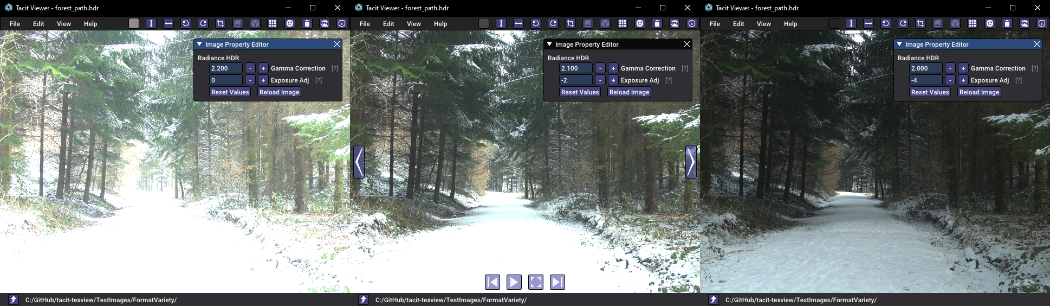
High Definition Image loading is supported for exr and hdr files. For hdr files the loading code is based on, and is functionally equivalent to, the reference code from the Radiance imaging toolset. Adjustments to gamma correction and exposure are supported when loading radiance hdr files. The images below (Copyright Rafal Mantiuk under Creative Commons 3.0) show an hdr image that loads over-exposed and is subsequentially adjusted to yield a more balanced result.
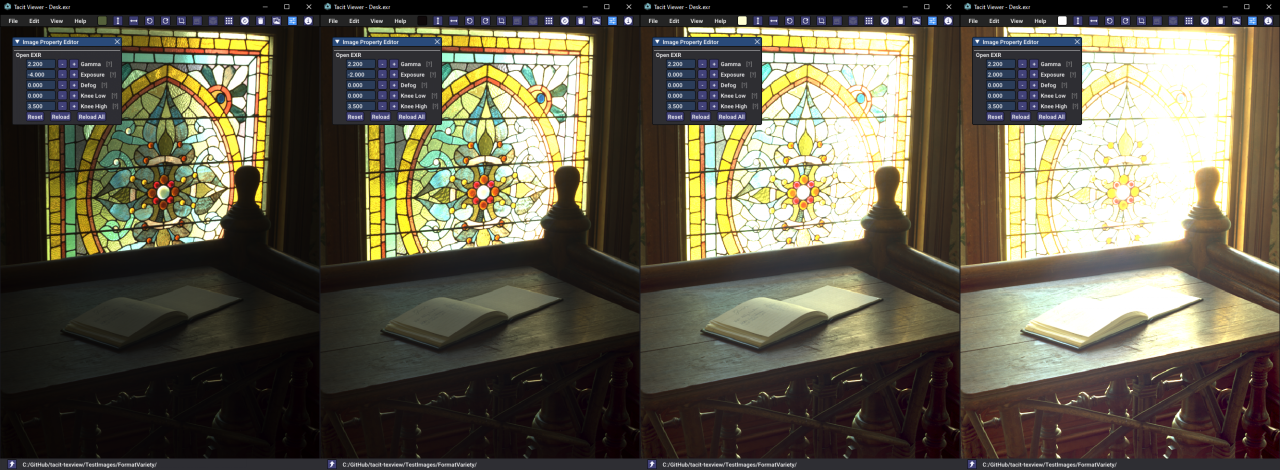
EXR support also uses reference code from OpenEXR and should be able to load most exr files, including multi-part files. There is more control for exr parameters including the ability to de-fog. The screenshot below ('desk' image courtesy OpenEXR and under their licence) shows similar successive exposure adjustments.
Some formats store multiple images inside a single file. A dds for example may be a cubemap with 6 sides or a BC compressed image with mipmaps. The property-editor window allows you to display which image/part you see. The hypercube below (courtesy Jason Hise under CC0) shows the options and play controls for a multi-part animated gif.

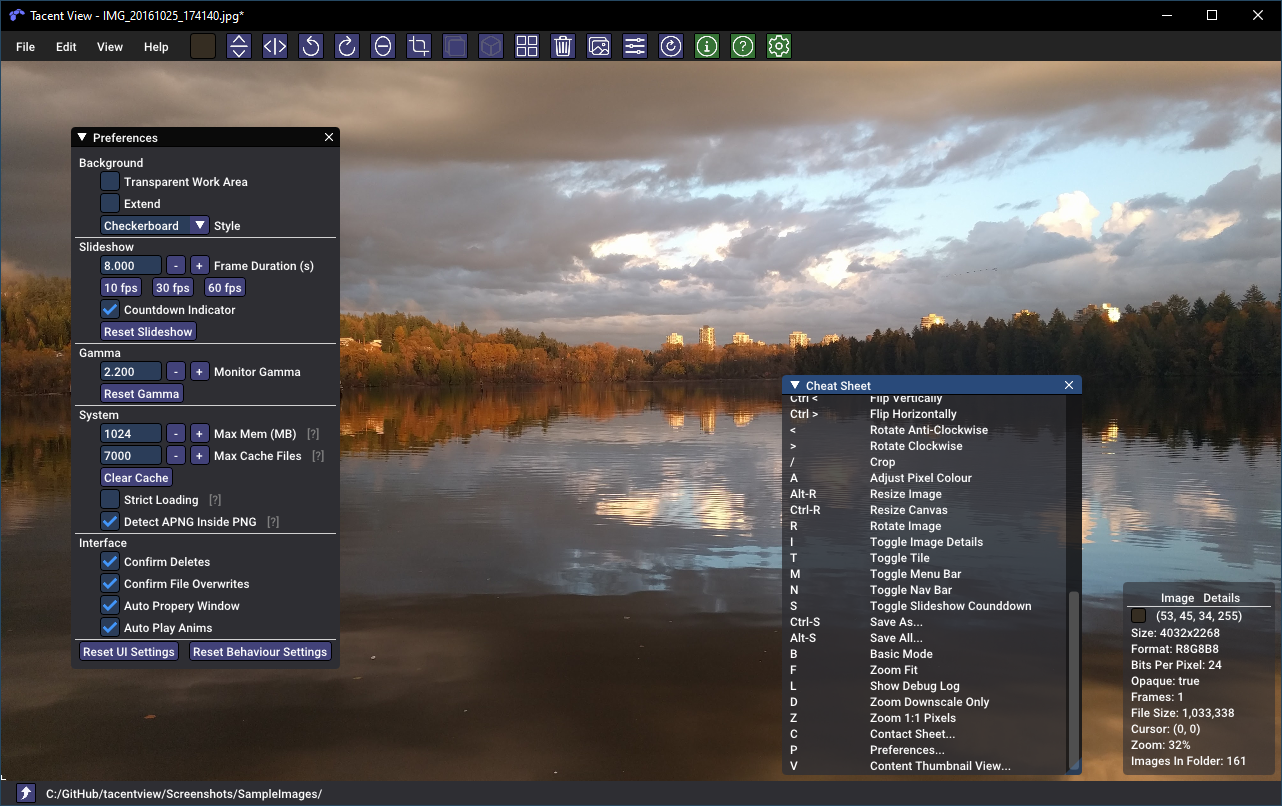
Alt-Enter toggles fullscreen mode. In this mode the bottom navigation bar and top menu are invisible. If at any point you want to reset the UI or other settings like the default resample algorithm or preferred file save format, you may do so from the preferences dialog.
For convenience pre-built binaries are available for Windows and Ubuntu/Debian in the Releases section. Follow the instructions below to build from source.
Building on Windows is tested with the Visual Studio 2019 MSVC compiler (choose the C++ workflow when installing). You will need to install git. Optionally you may want to use VSCode with the CMake Tools extension to build. To build from the Visual Studio x64 Command Prompt:
mkdir build
cd build
cmake .. -G"Visual Studio 16 2019" -Ax64
cmake --build . --config Release --target install
The install target will also package a zip file with all required content. This is done by an install step using a powershell script.
Building for Ubuntu is tested with Clang (9 or 10) and GCC 9.3. CMake and Git are required. Ninja is suggested but optional. The 'Software and Updates' app allows you to manage (add and remove) repositories or use the command line:
sudo apt-get install gdebi               # Installs gdebi to allow command-line deb file installation. Optional.
sudo apt-get install git                 # Install git or download the source as a zip.
sudo gdebi Downloads/smartgit-19_1_7.deb # Install smartgit or some other git frontend. Optional.
sudo apt-get install llvm                # The compiler. Optional if not using GCC.
sudo apt-get install clang               # The compiler. Optional if not using GCC.
sudo apt-get install lldb                # The debugger. Optional if not using GCC.
sudo apt-get install cmake               # CMake.
sudo apt-get install ninja-build         # Ninja build system.
sudo update-alternatives --config c++    # Choose clang. Optional if not using GCC.
sudo update-alternatives --config cc     # Choose clang. Optional if not using GCC.
I usually use VSCode with the CMake Tools to build. Alternatively from the command line:
mkdir ninjabuild
cd ninjabuild
cmake .. -GNinja
ninja install
You can pass -DCMAKE_BUILD_TYPE=Debug (or Release) to cmake if so desired. The install target places the viewer into a ViewerInstall directory along with any data resources it needs. Install is also leveraged to build packages. If you configure and build with:
cmake .. -GNinja -DPACKAGE_DEB=True
ninja install
Then a deb file with all required content will be generated.
This project relies on myriad 3rd-party libraries. In the Data folder you will find their licences. Some of the more notable dependencies are listed here:
- Dear ImGui
- Gif Load
- Ico Load
- Ion Icons
- LibJPeg-Turbo
- OpenEXR
- Roboto Font
- WebP Reference Library
- ZLib
- This software is based in part on the work of the Independent JPEG Group.
- This software includes Radiance software developed by the Lawrence Berkeley National Laboratory.
Various development tools available for open source projects bear mentioning:
- CMake
- Ubuntu
- VS Code Editor
- Visual Studio Community
- GCC, Clang, and the MSVC Compiler
- Github
- Git and the SmartGit Client
- OpenGL, GLAD, and GLFW

