ferstar / blog Goto Github PK
View Code? Open in Web Editor NEWHome Page: https://blog.ferstar.org
Home Page: https://blog.ferstar.org


可以选择直接卸载
apport这个软件包, 但最好还是改配置
# 看说明
sudo vi /etc/default/apport
贴个图

先抛成果:
重构前 重构后 Python版本 3.6.x 3.8.x Tornado版本 4.5.3 6.1(latest) DB driver momoko gino(latest) Code style check pylint only multi pre-commit hooks 单元测试 无 有(基本覆盖基础业务API&主要数据处理流程) 热重载 不支持 支持(gunicorn) 项目冷启动速度 8~10秒 <2秒 类型注释 无 有(持续完善中)
一般来说,作为业务CRUD仔,其实没有太大的动力对项目进行重构,能跑就对了,要啥自行车,对吧?但是实际上我就是看不惯再加上若干次组员很**的低级错误引发的线上扑街问题以后,重构就变成了一件很必要的事。
下定决心重构以后,接下来的事情就是琢磨下怎么做。时间上,肯定是优先响应bug以及新需求,其次抠出点时间来做重构;顺序方面,因为涉及到多人合作,实在不想老在codereview时就一些基本语法、样式之类的臭裹脚布问题扯皮,所以首先从引入pre-commit hooks强制规范代码风格做起。
这个还是直接贴配置说的清楚些
default_stages: [commit]
fail_fast: true

repos:
  - repo: https://github.com/ambv/black  # 自动格式化
    rev: 21.5b2
    hooks:
      - id: black

  - repo: https://github.com/pre-commit/pre-commit-hooks
    rev: v4.0.1
    hooks:
      - id: check-added-large-files  # 大的二进制文件提交检查,主要是模型有时候会被别组的同事误提交,导致.git很膨胀
      - id: trailing-whitespace
        stages: [commit]
      - id: end-of-file-fixer
        stages: [commit]
      - id: debug-statements

  - repo: https://github.com/commitizen-tools/commitizen
    rev: v2.17.9
    hooks:
      - id: commitizen  # commit msg规范检查

  - repo: local
    hooks:
      - id: pylint  # 代码静态检查
        name: pylint
        entry: pylint
        language: system
        types: [python]
这个没说的,欠的坑要填上,不然不管是新需求还是重构旧代码心里都没谱
这部分其实挺糟心的, 莽荒时期的项目, 既然无单元测试, 那必然写的是非常放飞自我, 业务代码/基础逻辑基本一锅粥, 要想舒服顺利地搞单元测试, 服务分层势在必行, 基本上开始大概就分了四层: 核心逻辑/业务逻辑/接口/数据库
这个优先级比较低这个巨坑爹,光是把成吨的
yield from换成async/await都够喝一壶
gino一个悲伤的事情, 好不容易完成替换半年多以后, SQLAlchemy 这个渣男官宣支持异步了...
momoko替换momoko切换 DB driver 的过程中就发现很多方法,特别是一些又臭又长的拼裸 SQL 方法,不头铁挨个找线上环境真实环境测试,你根本不知道自己要改的是啥玩意。
祖师爷都亲自放话未来Python的重心之一是大幅提升性能,我们又有什么理由不跟一下呢?实际上同等条件,仅升级 Python 到
3.8.x的性能提升贡献就超过了百分之五十多。
通过健全代码风格检查规则以及单元测试的保驾护航,我们对项目的架构做了相对更科学的分层处理,优化了超长代码的模块,使得启动时间由
8~10秒缩短至现在的不到2秒
这是运维同事提的需求,对于一个活跃开发的分支环境,
CI的频繁启停,导致服务不可用的情况时有发生,对业务组的同事非常不友好。关于这部分的折腾,可以看我这里的说明:https://github.com/ferstar/blog/issues/39 其实就是借助gunicorn实现了HUP signal的支持。
项目运行得更快更稳定,节省大把时间,用来思考人生或者摸鱼?
最大的坑点就是换 ORM 么有做好技术选型, 匆匆选择了 gino, 当时哪怕换个 peewee-async 也比 gino 香啊, 何况 SQLAlchemy 这个渣男人家 blog 上早就把异步支持写进了 roadmap, 当然了, 也没有说 gino 就垃圾, 只是我们用的不爽而已, 比如: xxx.gino.xxx() 这种强烈的个人主义设定, 以及屎一样的 join 支持......
下一次重构: 干掉 gino 换 SQLAlchemy!
经常用
lru_cache来加速一些重复耗时的func, 今天栽了个坑:func的缓存在服务热重载后并没有被释放掉, 导致重跑这个方法的时候总是返回旧的数据, 放代码解释:
@lru_cache()
def parse_file(path):
passparse_file接收一个文件路径, 对给定文件做了若干处理, 正常情况是没有问题的, 但是如果文件内容发生了变化, 本例实际上是因为要重跑某些process, 连带着这个文件内容是有更新的, 但是path不变, 在热重载的时候, 全局缓存并没有清掉, 导致每次调用方法返回的还是旧缓存数据
关于 Tornado 的热重载, 我在这里有过介绍: init_process
问题搞清楚, 解决起来就很简单, 重载的时候清一波就完事
def clear_caches():
    # All objects cleared
    for obj in (i for i in gc.get_objects() if isinstance(i, functools._lru_cache_wrapper)):
        obj.cache_clear()
gc.collect()class TornadoWorker(Worker):
......
def init_process(self):
# IOLoop cannot survive a fork or be shared across processes
# in any way. When multiple processes are being used, each process
# should create its own IOLoop. We should clear current IOLoop
# if exists before os.fork.
IOLoop.clear_current()
clear_caches()
# You can do something like release db conn/clean fp or else.
super().init_process()然后, 整个世界清净了~
还是老老实实用现成的轮子吧
from pdfminer.pdfdocument import PDFDocument
from pdfminer.pdfparser import PDFParser
from pdfminer.pdftypes import resolve1


def count_pdf_pages(data: bytes) -> int:
    """
    :param data: pdf data
    :return: page count
    """
    parser = PDFParser(BytesIO(data))
    doc = PDFDocument(parser)
    parser.set_document(doc)
    pages = resolve1(doc.catalog['Pages'])
    return pages.get('Count', 0)
翻车了, 下面的代码仅适用于 PDF1.4 及以下版本
import re


def count_pages(path):
    count_pages_p = re.compile(rb"/Type\s*/Page([^s]|$)", re.MULTILINE | re.DOTALL)
    with open(path, 'rb') as fp:
return len(count_pages_p.findall(fp.read()))不小心把不该提交的东西提交了, 可以用这招救命, 团队协作慎用
git reset --hard <需要回退到的commit tag>
git push --force2022年04月28日更新:垃圾甲骨文,又莫须有删我实例,告辞。
后知后觉入了甲骨文坡县的账号, 发现正经建免费 ARM 实例几乎不可能, 于是就随便找了篇抢购教程, 具体过程不细表, 只说几个关键的点:
贡献一个自用的脚本(依赖at程序做定时运行)
#!/bin/bash

oci compute instance launch --availability-domain LyQn:AP-SINGAPORE-1-AD-1 \
    --image-id ocid1.image.oc1.ap-singapore-1.xxx \
    --subnet-id ocid1.subnet.oc1.ap-singapore-1.ooo \
    --shape VM.Standard.A1.Flex \
    --assign-public-ip false \
    --metadata '{"ssh_authorized_keys": "ssh-rsa xxx+yyy+hHrDIzDuudkARI7/zzz/WbQYN+0sGVt096LnU8gf2VE+kPIf6hbeTcQYcZC89l4Nn0z+G5VlF1J1H15MZrVzl2XIdv2egqQXEclYtgnUT5WkDumW6A7NCWXM/9y+qqq ssh-key-2022-02-07"}' \
    --compartment-id ocid1.tenancy.oc1..zzzz \
    --shape-config '{"ocpus": 2, "memory_in_gbs": 12, "boot_volume_size_in_gbs": 50}'
# 我这用的是中配

# 执行完两分钟以后继续运行
at $(date -d "$(date) + 2 minutes" +"%H:%M %Y-%m-%d") < ~/oracle.cron.sh
我是挂了大概 12 小时左右就抢到两台(超免费账户限额后就不能创建新的, 所以不用担心脚本会重建一堆实例然后甲骨文把你扣到底裤不剩), 然后删掉一台, 再对剩下的一台做扩容操作(CPU/RAM/DISK 都拉满), 再上公网 IP, 再上 ipv6
PS: 注意甲骨文的 OS 比较恶心的一点是预置了一堆 iptables 规则, 最好提前干掉(我换了ufw来管理, 有效降低了心智负担)
# 开放所有
iptables -P INPUT ACCEPT
iptables -P FORWARD ACCEPT
iptables -P OUTPUT ACCEPT
iptables -F
# 持久化
iptables-save > /etc/iptables/rules.v4
默认 Ubuntu 系统内核版本已经很高了, 早就内置了bbr拥塞协议, 所以简单配置一下就能开启
# /etc/sysctl.conf 增加一行
net.ipv4.tcp_congestion_control=bbr
# 应用即可, 无需重启
# sysctl -p列一下还算有效的喷剂
实在堵的受不了可以用上述任何一个喷剂都能有效缓解
减少过敏反应的药物
因为鼻子实在太脆弱,清洗必不可少,可选的有
迫于日益厚重的雾霾&预防新冠,口罩也是必不可少,毕竟鼻子实在太脆
Over the past few years I've written a few little tools in Python to improve productivity, and when I shared them with colleagues, it was a pain to package them until I met fbs
In this post I will show you a demo which can do build things automatically with the github actions service.
mkdir fbs_demo
cd fbs_demo
python3 -m venv fbs
source fbs/bin/activate
pip3 install pip -U
pip3 install fbs
pip3 install PyQt5==5.9.2fbs startprojectfbs runSee my workflow file for different platforms(Ubuntu, macOS and Windows)
Thanks to the github actions, the only thing you need to care is about the code, not the build environment.
这玩意属于粗暴玩法,要确定日志没用才能搞
truncate -s 0 /var/lib/docker/containers/*/*-json.log
2020年了,在这里记录下关于宝宝的日常,希望她健康成长
大概JB也知道自家runtime坑了,所以不知从哪个版本开始支持更换自定义的runtime,所以事情就变得更简单了: 下载合适的runtime换一下就行OK
注意:如果你最近更新了PyCharm,然后发现频繁闪退,那就得先把runtime切换为IDE默认,然后再更新一下自定义runtime即可
https://github.com/ayanamist/JetBrainsRuntime-for-fcitx
fcitx version: 4.2.9.7
OS: Ubuntu 20.04.1 LTS x86_64
Host: 82DM Lenovo XiaoXinPro-13ARE 2020
Kernel: 5.6.0-1038-oem
Uptime: 3 days, 15 hours, 10 mins
Packages: 2526 (dpkg), 17 (snap)
Shell: zsh 5.8
Resolution: 1680x1050, 1920x1080
DE: GNOME
WM: Mutter
WM Theme: Yaru-dark
Theme: Yaru [GTK2/3]
Icons: Yaru [GTK2/3]
Terminal: x-terminal-emul
CPU: AMD Ryzen 7 4800U with Radeon Graphics (16)
GPU: AMD ATI 03:00.0 Renoir
Memory: 5793MiB / 15432MiB PyCharm版本:2020.3.1 Professional Edition from SnapStore
解决办法:
下载解压 这个runtime
假设你解压的路径在~/myprojects/jbr
sudo mount -o bind ~/myprojects/jbr /snap/pycharm-professional/current/jbr
效果图:


对我基本无用,snap商店里的pycharm没有idea.sh这个启动脚本Stream 模块真是牛的不行, 直接放配置
stream {
    map $ssl_preread_server_name $name {
        mydomain                xtls;
        www.mydomain            http;
        default    ssh;
    }
    # upstream pool
    upstream xtls {
        server localhost:8081;
    }
    upstream http {
        server localhost:8080;
    }
    upstream ssh {
        # 默认 ssh 连接会回落到 default , 然后到本机 22 端口
        server localhost:22;
        # 你甚至可以在这里挂个 openvpn ...
    }
    server {
        listen 443 reuseport;
        listen [::]443 reuseport;
        proxy_pass $name;
        # 这个开不开在你, 我反正没开, 因为就一个静态博客加微信公众号后台, 并不关心客户端 IP 的问题
        proxy_protocol on;
        ssl_preread on;
    }
}
这样做的好处显而易见: ssh 可以经过 443 端口接入, 所以防火墙可以直接屏蔽掉22端口, VPS 安全性又能上个台阶, 虽然有fail2ban护体但每天 auth.log 里一堆垃圾试探看着也是神烦
当然 由于工作在四层, 你可以有更多的玩法, 比如搭把梯子
这货socket模块没有
SO_REUSEPORT,着实坑我不少,还是用官方源码编译靠谱,鬼知道类似这种魔改选手又在哪里缺金少两。
有个tornado项目起手式是这样的
app = TornadoApplication()
server = tornado.httpserver.HTTPServer(app)
server.bind(8888, reuse_port=True)
server.start()
tornado.ioloop.IOLoop.current().start()
然后赤裸裸报错:
the platform doesn't support SO_REUSEPORT
找到出错的源码位置
    if reuse_port and not hasattr(socket, "SO_REUSEPORT"):
raise ValueError("the platform doesn't support SO_REUSEPORT")好吧居然没有SO_REUSEPORT属性,我一度以为是自己系统问题,然而并不是,问题出在miniconda的Python包上,换系统内置Python或者官方源码编译的就没有问题。
准备给Conda官方提个issue,发现早有人遇到了这个问题
只不过一直没人理会的感觉,瞟一眼1.7k+的issues,我还是跟conda拜拜吧,毕竟又不炼丹。
SELECT
  sum(reltuples)
FROM pg_class C
LEFT JOIN pg_namespace N ON (N.oid = C.relnamespace)
WHERE
  nspname NOT IN ('pg_catalog', 'information_schema') AND
relkind='r';SELECT
nspname AS schemaname,relname,reltuples
FROM pg_class C
LEFT JOIN pg_namespace N ON (N.oid = C.relnamespace)
WHERE
nspname NOT IN ('pg_catalog', 'information_schema') AND
relkind='r'
ORDER BY reltuples DESC;So I could not find any examples in the SQLAlchemy documentation, but I found these functions:
And I managed to combine them to produce exactly the result I was looking for:
from sqlalchemy import func
query = session.query(Guest, func.count(Guest.id).over().label('total'))
query = query.filter(Guest.deleted == None)
query = query.order_by(Guest.id.asc())
query = query.offset(0)
query = query.limit(50)
result = query.all()
Cheers!
P.S. I also found this question on Stack Overflow, which was unanswered.
tkinter module enabledbrew install zlib bzip2 tcl-tk openssl
py_version="3.6.11"
CFLAGS="-I$(brew --prefix openssl)/include -I$(brew --prefix bzip2)/include -I$(brew --prefix readline)/include -I$(xcrun --show-sdk-path)/usr/include -I$(brew --prefix tcl-tk)/include" \
LDFLAGS="-L$(brew --prefix openssl)/lib -L$(brew --prefix readline)/lib -L$(brew --prefix zlib)/lib -L$(brew --prefix bzip2)/lib -L$(brew --prefix tcl-tk)/lib" \
PYTHON_CONFIGURE_OPTS="--with-tcltk-includes='-I/usr/local/opt/tcl-tk/include' --with-tcltk-libs='-L/usr/local/opt/tcl-tk/lib -ltcl8.6 -ltk8.6' --enable-framework" \
pyenv install --patch $py_version < <(curl -sSL https://github.com/python/cpython/commit/8ea6353.patch\?full_index\=1)output:
pyenv install --patch 3.6.11 < <(curl -sSL https://github.com/python/cpython/commit/8ea6353.patch\?full_index\=1)
python-build: use [email protected] from homebrew
python-build: use readline from homebrew
Downloading Python-3.6.11.tar.xz...
-> https://www.python.org/ftp/python/3.6.11/Python-3.6.11.tar.xz
Installing Python-3.6.11...
patching file Misc/NEWS.d/next/macOS/2020-06-24-13-51-57.bpo-41100.mcHdc5.rst
patching file configure
Hunk #1 succeeded at 3375 (offset -51 lines).
patching file configure.ac
Hunk #1 succeeded at 495 (offset -15 lines).
python-build: use readline from homebrew
python-build: use zlib from xcode sdk
Installed Python-3.6.11 to /Users/ferstar/.pyenv/versions/3.6.11
test tkinter module
python -m tkinter -c 'tkinter._test()'

references
When I use cython compile my *.py files to *.so, it looks good and no error occurred. But when I run my project it throw out such error exception: RuntimeError: super(): __class__ cell not found(I'm sure I can run the project from the source code without any problems)
...debuging...
After debugging for a few minutes, I found this ancient issue: cython/cython#1127
My goodness, this bug has not been resolved for more than ten years......
Fortunately, I got a simple solution: roll back the legacy python2 super style
And here comes the problems:
...coding...
And here comes the solution:
"""Change py3 super style to py2's"""
import re
from pathlib import Path

class_p = re.compile(r'class (?P<class_name>\w+)[\(:]')


def replace(path):
    with open(path, 'r') as read_file:
        reversed_lines = read_file.readlines()[::-1]
    for idx, line in enumerate(reversed_lines[:]):
        if 'super().' in line:
            print(f'{path}:{len(reversed_lines) - idx}')
            cls_str = 'cls' if '__new__' in line else 'self'
            for above_line in reversed_lines[idx:]:
                if '@classmethod' in line:
                    cls_str = 'cls'
                    continue
                match = class_p.search(above_line)
                if match:
                    reversed_lines[idx] = line.replace('super().', f'super({match.group("class_name")}, {cls_str}).')
                    break
    with open(path, 'w') as write_file:
        write_file.writelines(reversed_lines[::-1])


if __name__ == '__main__':
    for file in Path('.').glob('**/*.py'):
        if __file__ != file.as_posix():
replace(file)"""file: py3_style_checker.py"""
import astroid
from pylint import checkers, interfaces
from pylint.checkers import utils
class PY3StyleSupperChecker(checkers.BaseChecker):
__implements__ = (interfaces.IAstroidChecker,)
name = "py3-style-super"
msgs = {
"R0711": (
"Consider using Python 2 style super() within arguments",
"super-without-arguments",
"Emitted when calling the super() builtin with the current class "
"and instance. We need to keep the legacy Python 2 style super to "
"make the Cython compile correct.",
),
}
options = ()
priority = -1
@utils.check_messages(
"super-without-arguments",
)
def visit_call(self, node):
self._check_super_without_arguments(node)
def _check_super_without_arguments(self, node):
if not isinstance(node.func, astroid.Name) or node.func.name != "super":
return
if len(node.args) != 0:
return
self.add_message("super-without-arguments", node=node)
def register(linter):
linter.register_checker(PY3StyleSupperChecker(linter))We need to add the checker's parent directory into current PYTHONPATH, and run pylint like this:
$ pylint --load-plugins=py3_style_checker --disable=all --enable=super-without-arguments <path_to_your_py_file>done!
Ref
装黑苹果了,香。。。
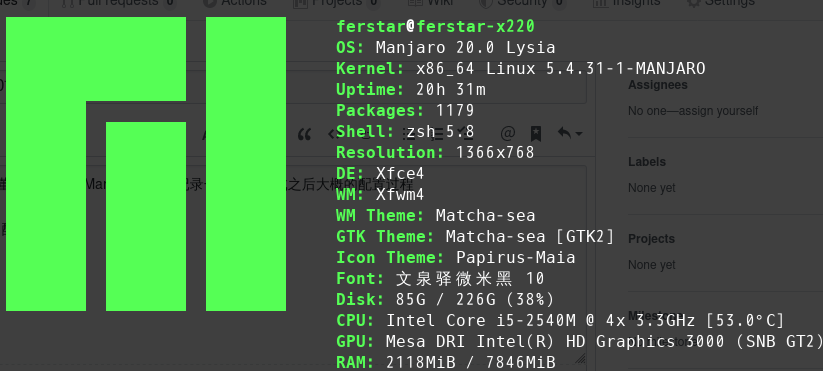
给老古董x220装了个Manjaro,顺路记录一下安装完成之后大概的配置过程
# 选择一个快的, 我选了中科大和清华的
sudo pacman-mirrors -i -c China -m ranksudo vi /etc/pacman.conf
# 在文件的末尾添加
[archlinuxcn]
SigLevel = Optional TrustedOnly
Server = https://mirrors.tuna.tsinghua.edu.cn/archlinuxcn//$arch
# 更新源和密钥环
sudo pacman -Syy
sudo pacman -S archlinux-keyring archlinuxcn-keyringsudo pacman -S yay
yay --aururl "https://aur.tuna.tsinghua.edu.cn" --save# 如果之前安装了 fcitx-im 或者相关的包,直接删除。
sudo pacman -Rsn fcitx-im fcitx-configtool
# 然后从 ArchLinuxCN 中文源里安装 fcitx-lilydjwg-git 和搜狗输入法的包, fcitx-lilydjwg-git 这个包里默认是包含 fcitx-qt4 的。
sudo pacman -S fcitx-lilydjwg-git fcitx-sogoupinyin fcitx-qt5 fcitx-configtool
# 这里需要安装 fcitx-qt5 的原因是 fcitx-configtool 这个包依赖于 QT5。
# 安装完成后手动添加用户变量,编辑 ~/.pam_environment 这个文件,如果没有就手动创建
vi ~/.pam_environment
GTK_IM_MODULE=fcitx
QT_IM_MODULE=fcitx
XMODIFIERS=@im=fcitx比如火焰截图-flameshot,超级好用的截图工具,当然深度截图工具也不错
又比如Google Chrome,vscode,qv2ray,WPS for Linux之类
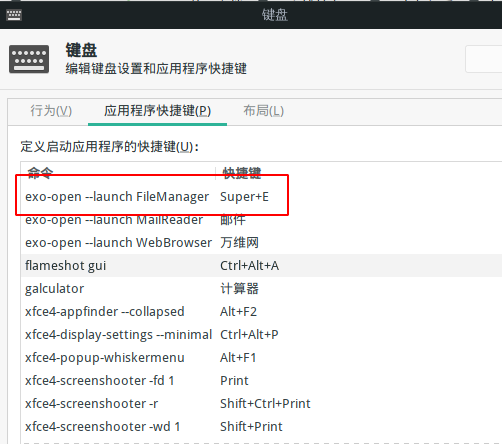
xfce4有两处可以调快捷键的地方,如图,比较割裂,我只是小改一下以适应Windows的风格。

filter.d中应该怎么写呀
好了,我宣布WSLg就是个锤锤,投奔Linux怀抱
开个坑, 慢慢填
这里喷IO慢的仔细一看基本都是项目在Windows里, 然后 runtime 在 WSL, 这他喵跨着9p不卡才怪
解决方法也很简单, runtime IDE什么的一股脑统统丢 WSL 里不就完了, 啥? 嫌空间不够用? WSL挂载磁盘了解下? 直接就是原生磁盘IO的性能
此坑已填: https://youtrack.jetbrains.com/issue/IDEA-265390这个issue里找到了神仙解法: 狂按快捷键, 直到全局搜索框出来为止, 然后 pin 住, 就欧了...
方法是从CSDN淘的 , 装好fcitx后, 这段丢到bashrc 或 zshrc 或 profile 里, 然后启动GUI前运行fcitx-autostart即可, 只需要运行一次
export LANG=zh_CN.UTF-8
export INPUT_METHOD=fcitx # wayland输入法
export XMODIFIERS=@im=fcitx # x11输入法
export GTK_IM_MODULE=fcitx # gtk输入法
export QT_IM_MODULE=fcitx # qt输入法老老实实按官方说明去装一下支持wslg的显卡驱动即可, 直观的感受是拖拽WSL的GUI应用窗口不会撕裂, 也明显不卡顿了, 纵享丝滑
后续的Windows更新可能会把装好的vGPU驱动替换成正常驱动, 从而导致WSLg GUI 应用丢掉 OpenGL 加速支持, 会显得比较卡, 暂时的解决办法是从组策略禁用Windows更新驱动程序
Win + R -> gpedit.msc -> 计算机配置 -> 管理模板 -> Windows组件 -> Windows更新 -> 管理从Windows更新提供的更新 -> Windows更新不包括驱动程序 -> 启用 -> 应用
这个也就是一个小脚本解决的事情, 以我常用的 proxychains(wsl中使用host代理) 为例
new_host=$(grep 'nameserver' /etc/resolv.conf | head -n 1 | awk '{print $2}')
old_host=$(grep -E '^socks5' /etc/proxychains4.conf | awk '{print $2}')
sudo sed -i "s/$old_host/$new_host/g" /etc/proxychains4.conf~设置 -> Ubuntu -> 常规 -> 命令行 -> wsl.exe -d Ubuntu-20.04 --cd ~

我现在换新机直接用这招:先清一波垃圾文件如缓存日志等,然后把旧机硬盘拆出来放移动硬盘盒里,挂到新机器启动,再用btrfs send&receive转移子卷数据,转完以后把新盘uuid写入/etc/fstab和/boot/grub/grub.cfg即可,方便快捷
sudo btrfs send root | sudo btrfs receive /tmp/rootfs
这个其实最方便最无感,有个软件很犀利:timeshift,核心就是利用btrfs文件系统的快照能力,但是成也快照败也快照,只能放在同盘分区下,如果单盘扑街,资料就跪了。

以Ubuntu为例, 参考BackuoYourSystem,适用于任意文件系统备份
以zstd压缩方式打包/目录(除/proc /sys /mnt /media /home外),并切分为最大3900MB的分片文件(backup_xxx)
sudo tar -I zstd -cpf - --exclude=/home --exclude=/proc --exclude=/tmp --exclude=/mnt --exclude=/dev --exclude=/sys --exclude=/run --exclude=/media --exclude=/var/log --exclude=/var/cache/apt/archives --one-file-system / | pv -s $(du -sb . | awk '{print $1}') | split -b 3900m - -d -a 3 backup_附上备份输出,可以看出pv给的进度其实不准,看看而已
tar: Removing leading `/' from member names
tar: Removing leading `/' from hard link targets               ] 17% ETA 0:01:05
tar: /root/.cache/keyring-87BMU0/control: socket ignored       ] 19% ETA 0:01:10
tar: /var/snap/canonical-livepatch/95/livepatchd-priv.sock: socket ignored:00:05
tar: /var/snap/canonical-livepatch/95/livepatchd.sock: socket ignored
tar: /var/xdroid/common/data/system/ndebugsocket: socket ignored108% ETA 0:00:00
tar: /var/xdroid/common/runtime/xdroid/sockets/0/qemu_pipe: socket ignored:00:00
tar: /var/xdroid/common/runtime/xdroid/sockets/0/xdroid_bridge: socket ignored
tar: /var/xdroid/common/runtime/xdroid/input/0/event0: socket ignored
tar: /var/xdroid/common/runtime/xdroid/input/0/event1: socket ignored
tar: /var/xdroid/common/runtime/xdroid/input/0/event2: socket ignored
tar: /var/xdroid/common/sockets/xdroid-container.socket: socket ignored
10.1GiB 0:01:49 [94.8MiB/s] [=================================] 116%进入recovery模式或者liveCD模式,恢复备份
cat backup_* | pv - | sudo tar -I zstd -xpf - -C /media/path_to_rec --numeric-owner
# 补足缺失的目录
mkdir /proc /sys /mnt /media /dev /tmpsudo -s
for f in dev dev/pts proc ; do mount --bind /$f /media/whatever/$f ; done
chroot /media/whatever
dpkg-reconfigure grub-pc主要用这个工具fstransform
先记录一下运行日志:
tianbot@ros2go:~$ sudo fstransform /dev/nvme0n1p4 btrfs --force-untested-file-systems
fstransform: starting version 0.9.3, checking environment
fstransform: checking for which... 	'/usr/bin/which'
fstransform: checking for expr... 	'/usr/bin/expr'
fstransform: checking for id... 	'/usr/bin/id'
fstransform: parsing command line arguments
fstransform: forcing trasformation of untested file systems (DANGEROUS). '--force-untested-file-systems' bytes specified on command line
fstransform: checking for stat... 	'/usr/bin/stat'
fstransform: checking for mkfifo... 	'/usr/bin/mkfifo'
fstransform: checking for blockdev... 	'/sbin/blockdev'
fstransform: checking for losetup... 	'/sbin/losetup'
fstransform: checking for fsck... 	'/sbin/fsck'
fstransform: checking for mkfs... 	'/sbin/mkfs'
fstransform: checking for mount... 	'/bin/mount'
fstransform: checking for umount... 	'/bin/umount'
fstransform: checking for mkdir... 	'/bin/mkdir'
fstransform: checking for rmdir... 	'/bin/rmdir'
fstransform: checking for rm... 	'/bin/rm'
fstransform: checking for dd... 	'/bin/dd'
fstransform: checking for sync... 	'/bin/sync'
fstransform: checking for fsmove... 	'/usr/sbin/fsmove'
fstransform: checking for fsremap... 	'/usr/sbin/fsremap'
fstransform: checking for fsck(source file-system)...	'/sbin/fsck'
fstransform: checking for fsck(target file-system)...	'/sbin/fsck'
fstransform: looking for optional commands
fstransform: checking for sleep... 	'/bin/sleep'
fstransform: checking for date... 	'/bin/date'
15:24:46 fstransform: environment check passed.
15:24:46 fstransform: saving output of this execution into /var/tmp/fstransform/fstransform.log.5394
15:24:46 fstransform: preparing to transform device '/dev/nvme0n1p4' to file-system type 'btrfs'
15:24:46 fstransform: device '/dev/nvme0n1p4' not found in the output of command /bin/mount, assuming it is not mounted
15:24:46 fstransform: device is now mounted at '/tmp/fstransform.mount.5394' with file-system type 'ext4'

15:24:46 fstransform: WARNING: this program is UNTESTED on target file system 'btrfs' !

15:24:46 fstransform: WARNING: this program is tested ONLY on file systems: minix ext2 ext3 ext4 reiserfs jfs xfs

15:24:46 fstransform: WARNING: continuing anyway due to option '--force-untested-file-systems' (DANGEROUS)
15:24:46 fstransform: device raw size = 348535128064 bytes
15:24:46 fstransform: creating sparse loop file '/tmp/fstransform.mount.5394/.fstransform.loop.5394' inside device '/dev/nvme0n1p4'...
15:24:46 dd: 1+0 records in
15:24:46 dd: 1+0 records out
15:24:46 dd: 1 byte copied, 0.000131407 s, 7.6 kB/s
15:24:46 fstransform: device file-system block size = 4096 bytes
15:24:46 fstransform: device usable size = 348535128064 bytes
15:24:46 dd: 1+0 records in
15:24:46 dd: 1+0 records out
15:24:46 dd: 1 byte copied, 0.000102059 s, 9.8 kB/s
15:24:46 fstransform: connected loop device '/dev/loop11' to file '/tmp/fstransform.mount.5394/.fstransform.loop.5394'
15:24:46 fstransform: formatting loop device '/dev/loop11' with file-system type 'btrfs'...
15:24:46 fstransform: mounting loop device '/dev/loop11' on '/tmp/fstransform.loop.5394' ...
15:24:46 fstransform: loop device '/dev/loop11' mounted successfully.
15:24:46 fstransform: preliminary steps completed, now comes the delicate part:
15:24:46 fstransform: fstransform will move '/dev/nvme0n1p4' contents into the loop file.

15:24:46 fstransform: WARNING: THIS IS IMPORTANT! if either the original device '/dev/nvme0n1p4'
                      or the loop device '/dev/loop11' become FULL,

                       YOU  WILL  LOSE  YOUR  DATA !

                      fstransform checks for enough available space,
                      in any case it is recommended to open another terminal, type
                        watch df /dev/nvme0n1p4 /dev/loop11
                      and check that both the original device '/dev/nvme0n1p4'
                      and the loop device '/dev/loop11' are NOT becoming full.
                      if one of them is becoming full (or both),
                      you MUST stop fstransform with CTRL+C or equivalent.

                      this is your chance to quit.
                      press ENTER to continue, or CTRL+C to quit:
15:25:24 fstransform: moving '/dev/nvme0n1p4' contents into the loop file.
15:25:24 fstransform: this may take a long time, please be patient...
15:25:24 fsmove: move() skipped `/tmp/fstransform.mount.5394/.fstransform.loop.5394', matches exclude list
15:25:45 fsmove: progress: 1.5% done, 180.7 gigabytes still to move
15:25:54 fsmove: progress: 2.9% done, 178.0 gigabytes still to move, estimated 15 minutes left
15:26:07 fsmove: progress: 4.4% done, 175.3 gigabytes still to move, estimated 15 minutes left
15:26:16 fsmove: progress: 5.9% done, 172.6 gigabytes still to move, estimated 15 minutes left
15:26:21 fsmove: progress: 7.4% done, 169.9 gigabytes still to move, estimated 15 minutes left
15:26:27 fsmove: progress: 8.8% done, 167.2 gigabytes still to move, estimated 15 minutes left
15:26:33 fsmove: progress: 10.3% done, 164.5 gigabytes still to move, estimated 10 minutes left
15:26:38 fsmove: progress: 11.8% done, 161.8 gigabytes still to move, estimated 10 minutes left
15:26:46 fsmove: progress: 13.3% done, 159.1 gigabytes still to move, estimated 10 minutes left
15:26:51 fsmove: progress: 14.7% done, 156.4 gigabytes still to move, estimated 10 minutes left
15:26:56 fsmove: progress: 16.2% done, 153.7 gigabytes still to move, estimated 10 minutes left
15:27:05 fsmove: progress: 17.7% done, 151.0 gigabytes still to move, estimated  8 minutes left
15:27:10 fsmove: progress: 19.2% done, 148.3 gigabytes still to move, estimated  8 minutes left
15:27:15 fsmove: progress: 20.6% done, 145.6 gigabytes still to move, estimated  6 minutes left
15:27:30 fsmove: progress: 22.1% done, 142.9 gigabytes still to move, estimated  5 minutes left
15:27:39 fsmove: progress: 23.6% done, 140.1 gigabytes still to move, estimated  5 minutes left
15:27:44 fsmove: progress: 25.1% done, 137.4 gigabytes still to move, estimated  5 minutes left
15:27:50 fsmove: progress: 26.5% done, 134.7 gigabytes still to move, estimated  6 minutes left
15:28:00 fsmove: progress: 28.0% done, 132.0 gigabytes still to move, estimated  6 minutes left
15:28:21 fsmove: progress: 29.5% done, 129.3 gigabytes still to move, estimated  5 minutes left
15:28:26 fsmove: progress: 31.0% done, 126.6 gigabytes still to move, estimated  6 minutes left
15:28:35 fsmove: progress: 32.4% done, 123.9 gigabytes still to move, estimated  6 minutes left
15:28:49 fsmove: progress: 33.9% done, 121.2 gigabytes still to move, estimated  5 minutes left
15:28:52 fsmove: progress: 35.4% done, 118.5 gigabytes still to move, estimated  8 minutes left
15:28:58 fsmove: progress: 36.9% done, 115.8 gigabytes still to move, estimated  8 minutes left
15:29:04 fsmove: progress: 38.3% done, 113.1 gigabytes still to move, estimated  6 minutes left
15:29:09 fsmove: progress: 39.8% done, 110.4 gigabytes still to move, estimated  5 minutes left
15:29:26 fsmove: progress: 41.3% done, 107.7 gigabytes still to move, estimated  6 minutes left
15:29:44 fsmove: progress: 42.8% done, 105.0 gigabytes still to move, estimated  8 minutes left
15:29:54 fsmove: progress: 44.2% done, 102.3 gigabytes still to move, estimated  7 minutes left
15:30:02 fsmove: progress: 45.7% done,  99.6 gigabytes still to move, estimated  5 minutes left
15:30:13 fsmove: progress: 47.2% done,  96.9 gigabytes still to move, estimated  6 minutes left
15:30:22 fsmove: progress: 48.7% done,  94.2 gigabytes still to move, estimated  6 minutes left
15:30:31 fsmove: progress: 50.1% done,  91.4 gigabytes still to move, estimated  4 minutes left
15:30:42 fsmove: progress: 51.6% done,  88.7 gigabytes still to move, estimated  4 minutes left
15:30:52 fsmove: progress: 53.1% done,  86.0 gigabytes still to move, estimated  4 minutes left
15:31:06 fsmove: progress: 54.6% done,  83.3 gigabytes still to move, estimated  6 minutes left
15:31:14 fsmove: progress: 56.0% done,  80.6 gigabytes still to move, estimated  7 minutes left
15:31:19 fsmove: progress: 57.5% done,  77.9 gigabytes still to move, estimated  6 minutes left
15:31:27 fsmove: progress: 59.0% done,  75.2 gigabytes still to move, estimated  4 minutes left
15:31:32 fsmove: progress: 60.5% done,  72.5 gigabytes still to move, estimated  4 minutes left
15:31:38 fsmove: progress: 61.9% done,  69.8 gigabytes still to move, estimated  4 minutes left
15:31:45 fsmove: progress: 63.4% done,  67.1 gigabytes still to move, estimated  4 minutes left
15:31:53 fsmove: progress: 64.9% done,  64.4 gigabytes still to move, estimated  4 minutes left
15:31:58 fsmove: progress: 66.4% done,  61.7 gigabytes still to move, estimated  3 minutes left
15:32:04 fsmove: progress: 67.8% done,  59.0 gigabytes still to move, estimated  3 minutes left
15:32:12 fsmove: progress: 69.3% done,  56.3 gigabytes still to move, estimated  3 minutes left
15:32:27 fsmove: progress: 70.8% done,  53.6 gigabytes still to move, estimated  2 minutes left
15:32:33 fsmove: progress: 72.3% done,  50.9 gigabytes still to move, estimated  2 minutes left
15:32:36 fsmove: job completed.
15:32:36 fstransform: unmounting and running '/sbin/fsck' (disk check) on loop file '/tmp/fstransform.mount.5394/.fstransform.loop.5394'
15:32:39 fsck: fsck from util-linux 2.31.1
15:32:39 fstransform: disconnected loop device '/dev/loop11' from file '/tmp/fstransform.mount.5394/.fstransform.loop.5394'
15:32:39 fstransform: unmounting device '/dev/nvme0n1p4' before disk check
15:32:42 fstransform: running '/sbin/fsck' (disk check) on device '/dev/nvme0n1p4'
15:32:42 fsck: fsck from util-linux 2.31.1
15:32:42 fsck: home: Inode 3336 extent tree (at level 2) could be narrower.  IGNORED.
15:32:43 fsck: home: 12/21274624 files (0.0% non-contiguous), 36800594/85091584 blocks
15:32:43 fstransform: mounting again device '/dev/nvme0n1p4' read-only
15:32:43 fstransform: launching '/usr/sbin/fsremap' in simulated mode
15:32:43 fsremap: starting job 1, persistence data and logs are in '/var/tmp/fstransform/fsremap.job.1'
15:32:43 fsremap: if this job is interrupted, for example by a power failure,
15:32:43 fsremap: you CAN RESUME it with: /usr/sbin/fsremap -n -q --resume-job=1 -- /dev/nvme0n1p4
15:32:43 fsremap: analysis completed: 135.22 gigabytes must be relocated
15:32:45 fsremap: allocated 3.50 gigabytes RAM as memory buffer
15:32:45 fsremap: primary-storage is 7.01 gigabytes, initialized and mmapped() to contiguous RAM
15:32:45 fsremap: (simulated) starting in-place remapping. this may take a LONG time ...
15:32:45 fsremap: (simulated) progress:  2.6% done, 135.2 gigabytes still to relocate
15:32:45 fsremap: (simulated) progress: 69.0% done,  45.4 gigabytes still to relocate
15:32:45 fsremap: (simulated) clearing 1.38 gigabytes free-space from device ...
15:32:45 fsremap: (simulated) job completed.
15:32:45 fstransform: launching '/usr/sbin/fsremap' in REAL mode to perform in-place remapping.
15:32:45 fsremap: starting job 2, persistence data and logs are in '/var/tmp/fstransform/fsremap.job.2'
15:32:45 fsremap: if this job is interrupted, for example by a power failure,
15:32:45 fsremap: you CAN RESUME it with: /usr/sbin/fsremap -q --resume-job=2 -- /dev/nvme0n1p4
15:32:45 fsremap: analysis completed: 135.22 gigabytes must be relocated
15:32:46 fsremap: allocated 3.50 gigabytes RAM as memory buffer
15:32:49 fsremap: primary-storage is 7.01 gigabytes, initialized and mmapped() to contiguous RAM
15:32:49 fsremap: successfully unmounted device '/dev/nvme0n1p4'
15:32:49 fsremap: everything ready for in-place remapping, this is your LAST chance to quit.
15:32:49 fsremap: WARN: press ENTER to proceed, or CTRL+C to quit

15:33:32 fsremap: starting in-place remapping. this may take a LONG time ...
15:33:43 fsremap: progress: 2.6% done, 135.2 gigabytes still to relocate
15:36:29 fsremap: progress: 69.0% done,  45.4 gigabytes still to relocate, estimated  1 minute and 20 seconds left
15:37:43 fsremap: clearing 1.38 gigabytes free-space from device ...
15:41:25 fsremap: job completed.
15:41:28 fstransform: running again '/sbin/fsck' (disk check) on device '/dev/nvme0n1p4'
15:41:28 fsck: fsck from util-linux 2.31.1
15:41:28 fstransform: completed successfully. device '/dev/nvme0n1p4' now contains 'btrfs' file-system
转换完毕后挂载随便看几个文件看是不是正常,一般是OK的,然后改一下挂载参数
/etc/fstab
UUID=361c83ca-fa86-417a-96ce-29569c9bc98e /home   btrfs ssd,noatime,subvol=/   0
   0
下一步再搞一下透明压缩(用lzo算法):
btrfs filesystem defragment -v -clzo /mountpoint
注意这是压缩已有文件。如果要真正的“实时透明压缩”请在挂载参数上加compress-force=lzo,这样存进去的文件都会被压缩了。
import ast
import operator

valid_ops = {
    ast.Add: operator.add,
    ast.Sub: operator.sub,
    ast.Mult: operator.mul,
    ast.Div: operator.truediv,
    ast.USub: operator.neg,  # negative number
}

def safe_eval(expr):
    """Use `ast.literal_eval` instead of `eval`
    via: https://stackoverflow.com/a/20748308
    """

    def _eval(node):
        if isinstance(node, ast.Expression):
            return _eval(node.body)
        if isinstance(node, ast.Str):
            return node.s
        if isinstance(node, ast.Num):
            return node.n
        if isinstance(node, ast.UnaryOp):
            return valid_ops[type(node.op)](node.operand.n)
        if isinstance(node, ast.BinOp):
            return valid_ops[type(node.op)](_eval(node.left), _eval(node.right))
        raise TypeError('Unsupported type {}'.format(node))

return _eval(ast.parse(expr, mode='eval').body)safe_eval('1 + 2 / 3')
Out[3]: 1.6666666666666665
safe_eval('(1 + 2) / 3')
Out[4]: 1.0
safe_eval('-1')
Out[5]: -1http://mirrors.ustc.edu.cn/qtproject/archive/qt/5.9/5.9.0/qt-opensource-linux-x64-5.9.0.run
sudo apt-get install git build-essential cmake zlib1g-dev extra-cmake-modules fcitx-libs-dev mesa-common-dev libjasper-dev libxkbcommon-devcd ~
mkdir WizTeam
cd WizTeam
git clone https://github.com/ferstar/WizQTClient.git
cd WizQTClient
git checkout 2.8.2git clone https://github.com/fcitx/fcitx-qt5.git
cd fcitx-qt5
cmake .
make
sudo make install
# 拷贝platforminputcontext/libfcitxplatforminputcontextplugin.so到Qt安装目录的Tools/QtCreator/lib/Qt/plugins/platforminputcontexts目录内chmod a+x linuxdeployqt
export PATH="$HOME/Qt5.9.0/5.9/gcc_64/bin":$PATH
./linux-package.sh以上步骤成功完成后会生成一个AppImage文件,双击即可运行,但登录会报错Failed to exec json request, network error=99, message=
Google一番发现是openssl库的问题导致其联网同步时安全验证失败,官网上提供了解决方案
sudo apt-get install aptitude
# 安装aptitude
sudo aptitude install libssl1.0-dev
# aptitude会自动解决依赖,这里我们需要降级系统默认的ssl包,选择接受即可
重新打开为知笔记即可正常登录
预编译版本见:https://github.com/ferstar/WizQTClient/releases/tag/v2.8.2
各处拖的驱动集合了一下,硬件基本完美驱动。
不工作的:读卡器、PCI express,当然还有无线网卡,自带的无线网卡是无解的,淘宝十八块换了乞丐版BCM4322 DW1510网卡,10.15以下免驱。
蓝牙:BCM20702A0,也OK,不过平时又几乎不用
打了这么些驱动:

关于Intel HD3000集显冻屏的问题,需要选择适合的旧版驱动才行,这个可以在http://dosdude1.com/mojave/ 拿到,安装后从未碰到冻屏死机问题,就是偶尔屏幕有细横线,基本不影响码字,话说这本子键盘手感真好!

因为用到的Shades调光软件是32位的,x220这块垃圾TN屏PWM调光,低亮度下闪瞎眼,只有靠这个软件才能活的样子,所以停留在Mojave养老了。
升级路径:10.13.6 -> Mojave Patcher -> 10.14.6
最早用微林的服务是他家的http://tmp.link/, 前阵子在他家推上看到
vxTrans服务, 立马充值(丐中丐套餐)体验了一波, 真香
这里是关于vxTrans服务的介绍: https://www.vx.link/?tmpui_page=/help/vxtrans.html
官方讲的其实很克制, 就说了个加速 ssh, 这时候你可以认为他就是个 ssh 跳板, 但稍微往深挖一挖, 这玩意能玩的东西很多, 嗯, 就包括科学上网, 没错我又要利用他来拯救我的垃圾美西🐔了...
简单说个用法: 用 vxTrans 来对接你的弱鸡, 然后原来科学上网的客户端配置里把 server/port 换成你 vxTrans 里的配置, 芜湖起飞!
彩蛋: 关注他家 telegram 机器人@system_vx_bot, 发送getGift有惊喜
主要照抄这个gist https://gist.github.com/brock/7a7a70300096632cec30
以往小数据直接scp大法走起就可以,但是这次比较大,裸SQL大概有30GB,gzip压完都有3.6GB,现有网络环境下,scp传不了多少就异常关闭,就算不关闭,因为是跨区域机房迁移,速度也是非常龟速,所以选择了一个有cdn加持的临时文件中转服务来迁移,实际效果也是非常棒,Local 机器上传基本跑满带宽,Remote 机器下载能稳定维持在5MB/s,一次成功,共耗时半小时左右。
Local 导出直接压成gzip,能节省巨量的存储空间
pg_dump -d <db_name> -p <port> -U <db_user> -Z9 -f <dump_file.sql.gz>
加密因为要通过中转服务传输
zip -e -1 <dump_file.sql.gz.zip> <dump_file.sql.gz>
md5sum
md5sum <dump_file.sql.gz.zip> > <dump_file.sql.gz.zip.md5sum>
上传至中转服务器tmp.link
curl -k -F "file=@<dump_file.sql.gz.zip>" -F "token=kzzzzaypns" -F "model=0" -F "utoken=sCH066OaaaC" -X POST "https://connect.tmp.link/api_v2/cli_uploader2"
从中转服务器下载先在浏览器打开临时链接,拿到真实下载地址,去 Remote 服务器下载
wget <tmp_down_link>
Remote 解压&恢复数据库
unzip <dump_file.sql.gz.zip>
dropdb <database> && createdb <database>
gunzip <dump_file.sql.gz> | psql -d <db_name> -p <port> -U <db_user>怒装黑苹果了,香~
本子升到20.04, 顺路换成了KDE, 不过一直有个问题就是: 每次从休眠唤醒一段时间后, 桌面会变的异常卡, htop一发发现plasmashell占了近100%, 这明显不科学, google一发发现似乎是kde的陈年烂事, 没办法, 大力出奇迹~
killall plasmashell; kstart5 plasmashell; exit后来发现把独显屏蔽似乎就没这个问题了, 看来还是NV显卡驱动的锅

最近对项目做了一个比较大的架构调整, 某个dev分支的一个单元测试数据乱入到stable分支, 导致单元测试失败, 所以需要把stable分支的测试样例bin回退到以前旧的版本
我们二进制数据是用lfs管理的, 所以并不能通过简单的git revert处理, 最终Google一通解决, 简单记录下.
假定这个文件叫data/tests/test.bin, 需要回退的commit id是074bf35a, 那么首先需要获取他的lfs oid
git cat-file -p '074bf35a:data/tests/test.bin输出如下:
version https://git-lfs.github.com/spec/v1
oid sha256:ed60a8c13728a47db0e8789ce9b20dc212a92fd0d0fb306fd4007b9aa6dd6b57
size 32731432
拿到oid以后, 从lfs缓存中把旧数据拷贝出来
cp .git/lfs/objects/ed/60/ed60a8c13728a47db0e8789ce9b20dc212a92fd0d0fb306fd4007b9aa6dd6b57 data/tests/test.bin
然后把这个旧数据重新push到repo即可
可能的问题:
git lfs fetch --include=data/tests/test.bingit lfs push origin --object-id ed60a8c13728a47db0e8789ce9b20dc212a92fd0d0fb306fd4007b9aa6dd6b57有一段损失了定位信息的文字: plain_text = '我爱北京***, ***上放鞭炮', 要求还原这段文字在给定段落中尽可能相近的位置
这个段落数据结构大概长这样: paragraph = {'text': '佛曰 我爱北京***, ***上太阳升...', chars': [{'text': '佛', 'box': [1, 2, 3, 4]}, {'text': '曰', 'box': [1, 2, 3, 4]}, ..., {'text': '我', 'box': [1, 2, 3, 4]}, ..., {'text': '门', 'box': [1, 2, 3, 4]}, ]}
其实这就是一个求最长公共子串的问题, 先简单粗暴实现了一发:
def find_longest_sub_str(string1, string2):
    answer = ''
    len1, len2 = len(string1), len(string2)
    for i in range(len1):
        for j in range(len2):
            lcs_temp = 0
            match = ''
            while (i + lcs_temp < len1) and (j + lcs_temp < len2) and string1[i + lcs_temp] == string2[j + lcs_temp]:
                match += string2[j + lcs_temp]
                lcs_temp += 1
            if len(match) > len(answer):
                answer = match
    return answer


if __name__ == '__main__':
    str_a = '我爱北京***, ***上放鞭炮'
    str_b = '佛曰 我爱北京***, ***上太阳升...'
print(find_longest_sub_str(str_a, str_b))def find_longest_sub_str(string1, string2):
answer = []
len1, len2 = len(string1), len(string2)
for i in range(len1):
for j in range(len2):
lcs_temp = 0
match = []
while (i + lcs_temp < len1) and (j + lcs_temp < len2) and string1[i + lcs_temp] == string2[j + lcs_temp]:
match.append(j + lcs_temp)
lcs_temp += 1
if len(match) > len(answer):
answer = match[:]
return answer
if __name__ == '__main__':
str_a = '我爱北京***, ***上放鞭炮'
str_b = '佛曰 我爱北京***, ***上太阳升...'
indexes = find_longest_sub_str(str_a, str_b)
# 这里拦头去尾就可以从段落中拿到对应字的位置信息了粗看起来貌似能交差, 但实际上很坑, 这玩意是O(N^2), 段落文字如果略长的话, 会慢到怀疑人生, 所以必须优化之, 放狗一搜, 发现标准库就有对应实现, 果断抄之
def find_longest_sub_str1(str_a, str_b):
    return SequenceMatcher(None, str_a, str_b).find_longest_match(0, len(str_a), 0, len(str_b))
跑了个分, 当字符串长度过长时, 人比人得死了...

18.04.4有效,有的帖子说禁用
udisks2.service服务这招并不靠谱
sudo apt install dconf-editor配置如图:

如题,有好的想法随时开issue写一发,然后借助CI自动把同一issue下的comments都拼接到一起,生成post。
每次想到什么写什么,不论多少,没有一定要写完的压力,日积月累,应该会能形成一些起码篇幅不小的博文,想想都好激动的说。
由于是在已有的项目上添加一点新的功能,比如需要支持模糊搜索,但不凑巧的是有几个key是存在一个jsonb col里的,like无法命中缓存,所以查询速度略慢。
一番搜索发现pg_trgm模块提供函数和操作符测定字母,数字,文本基于三元模型匹配的相似性, 还有支持快速搜索相似字符串的索引操作符类,于是实测了下,确实可以命中缓存。

记录下启用gin index的SQL:
create extension if not exists pg_trgm;
create extension if not exists btree_gin;
create index idx_file_meta on file using gin ((meta ->> 'name'), (meta ->> 'alias') gin_trgm_ops);
ORM查询
key = 'name'
value = 'sample'
cond = File.meta[key].astext.like(f'%{value.replace("%", "")}%')
...
# 转成实际的SQL语句就是
meta ->> 'name' like '%sample%'抄这里的实现,主要应用场景就是某个接口要提供导出某某静态文件啊什么的,直接把文件绝对路径传给
export方法即可。
https://github.com/kzahel/tornado_gen/blob/master/tornado/web.py#L1414
# 你肯定得有个类似`BaseHandler`的类
class BaseHandler(tornado.web.RequestHandler):
    def __init__(self, *args, **kwargs):
        """此处省略若干自定义初始化过程"""
        pass
    def export(self, abs_path, file_name=None, content_type=None):
        def set_content_length(this, path, req_range):
            size = os.path.getsize(path)
            if req_range:
                start, end = req_range
                if (start is not None and start >= size) or end == 0:
                    # As per RFC 2616 14.35.1, a range is not satisfiable only: if
                    # the first requested byte is equal to or greater than the
                    # content, or when a suffix with length 0 is specified
                    this.set_status(416)  # Range Not Satisfiable
                    this.set_header("Content-Type", "text/plain")
                    this.set_header("Content-Range", "bytes */%s" % (size,))
                    return start, end
                if start is not None and start < 0:
                    start += size
                if end is not None and end > size:
                    # Clients sometimes blindly use a large range to limit their
                    # download size; cap the endpoint at the actual file size.
                    end = size
                # Note: only return HTTP 206 if less than the entire range has been
                # requested. Not only is this semantically correct, but Chrome
                # refuses to play audio if it gets an HTTP 206 in response to
                # ``Range: bytes=0-``.
                if size != (end or size) - (start or 0):
                    this.set_status(206)  # Partial Content
                    # pylint: disable=protected-access
                    this.set_header("Content-Range", httputil._get_content_range(start, end, size))
            else:
                start = end = None

            if start is not None and end is not None:
                length = end - start
            elif end is not None:
                length = end
            elif start is not None:
                length = size - start
            else:
                length = size
            this.set_header("Content-Length", length)
            return start, end

        def get_content_type(path):
            mime_type, encoding = mimetypes.guess_type(path)
            # per RFC 6713, use the appropriate type for a gzip compressed file
            if encoding == "gzip":
                return "application/gzip"
            # As of 2015-07-21 there is no bzip2 encoding defined at
            # http://www.iana.org/assignments/media-types/media-types.xhtml
            # So for that (and any other encoding), use octet-stream.
            elif encoding is not None:
                return "application/octet-stream"
            elif mime_type is not None:
                return mime_type
            # if mime_type not detected, use application/octet-stream
            else:
                return "application/octet-stream"

        def get_content(abspath, start=None, end=None):
            with open(abspath, "rb") as file:
                if start is not None:
                    file.seek(start)
                if end is not None:
                    remaining = end - (start or 0)
                else:
                    remaining = None
                while True:
                    chunk_size = 64 * 1024
                    if remaining is not None and remaining < chunk_size:
                        chunk_size = remaining
                    chunk = file.read(chunk_size)
                    if chunk:
                        if remaining is not None:
                            remaining -= len(chunk)
                        yield chunk
                    else:
                        if remaining is not None:
                            assert remaining == 0
                        return

        if isinstance(abs_path, bytes):
            self.set_header('Content-Type', f'application/{content_type}')
            if file_name:
                file_name = urllib.parse.quote(file_name)
                self.set_header('Content-Disposition', f'attachment; filename={file_name}')
            self.finish(abs_path)

        if not os.path.exists(abs_path):
            raise CustomError(_("File not found"))
        if not file_name:
            file_name = os.path.basename(abs_path)
        file_name = urllib.parse.quote(file_name)
        self.set_header('Content-Disposition', f'attachment; filename={file_name}')
        if not content_type:
            content_type = get_content_type(abs_path)
        self.set_header("Content-Type", content_type)

        self.set_header("Accept-Ranges", "bytes")
        self.set_header("Last-Modified", datetime.datetime.utcfromtimestamp(os.path.getmtime(abs_path)))

        request_range = None
        range_header = self.request.headers.get("Range")
        if range_header:
            # As per RFC 2616 14.16, if an invalid Range header is specified,
            # the request will be treated as if the header didn't exist.
            request_range = httputil._parse_request_range(range_header)  # pylint: disable=protected-access
        start, end = set_content_length(self, abs_path, request_range)

        if self.request.method == 'GET':
            content = get_content(abs_path, start, end)
            if isinstance(content, bytes):
                content = [content]
            for chunk in content:
                try:
                    self.write(chunk)
                except iostream.StreamClosedError:
                    return
        else:
assert self.request.method == "HEAD"invoke version: >= 1.1
# filename=tasks.py
import asyncio
from inspect import isgeneratorfunction, iscoroutinefunction

from invoke import Task
from invoke.tasks import task


class InvokeWrapper(Task):
    def __call__(self, *args, **kwargs):
        io_loop = asyncio.get_event_loop()
        if isgeneratorfunction(self.body):
            result = io_loop.run_until_complete(
                asyncio.coroutine(self.body)(*args, **kwargs)
            )
        elif iscoroutinefunction(self.body):
            result = io_loop.run_until_complete(self.body(*args, **kwargs))
        else:
            result = self.body(*args, **kwargs)
        self.times_called += 1
        return result


@task(klass=InvokeWrapper)
def foo(ctx):
    """sync task"""
    print("foo")


@task(klass=InvokeWrapper)
async def bar(ctx):
    """async/await style async task"""
    await asyncio.sleep(0.1)
    print("bar")


@task(klass=InvokeWrapper)
def baz(ctx):
    """yield from(< py3.6) style async task"""
    yield from asyncio.sleep(0.1)
print("baz")~ inv -l
Available tasks:
bar async/await style async task
baz yield from(< py3.6) style async task
foo sync task
~ inv bar|foo|baz
bar
baz
foo下班到家想强啵一发闺女,小家伙双手环抱,一本正经的对我说:「爸爸你走开,我在看电视不要打扰我!」
老父亲的心💔💔💔
先把用到的东西摆出来:
用Cloudflare Argo Tunnels(以下简称cft)的目的主要是薅Cloudflare的CDN网络为自己的垃圾VPS加速
食用方法:
cloudflared tunnel run --url http://localhost:8888 hellobrook wsserver --listen 127.0.0.1:8888 --password auok优点:
cft也能帮你突破VPS所在域的网络限制缺点:
cft当前免费有 1TB/month 的流量, 但不确定未来收费水平我用的是PyCharm,也遇到这个问题,后来在官方论坛找到了解决方法:
https://intellij-support.jetbrains.com/hc/en-us/community/posts/360006740379/comments/360001272440
Hello everyone!
Please use the following VM option -Dauto.disable.input.methods=false to resolve the problem.
我的pycharm64.vmoptions文件内容如下:
-Xms1024m
-Xmx4096m
-XX:ReservedCodeCacheSize=1024m
-XX:+UseCompressedOops
-XX:+UseConcMarkSweepGC
-XX:SoftRefLRUPolicyMSPerMB=50
-ea
-XX:CICompilerCount=2
-Dsun.io.useCanonPrefixCache=false
-Djava.net.preferIPv4Stack=true
-Djdk.http.auth.tunneling.disabledSchemes=""
-XX:+HeapDumpOnOutOfMemoryError
-XX:-OmitStackTraceInFastThrow
-Djdk.attach.allowAttachSelf
-Dkotlinx.coroutines.debug=off
-Djdk.module.illegalAccess.silent=true
-Dawt.useSystemAAFontSettings=lcd
-Dsun.java2d.renderer=sun.java2d.marlin.MarlinRenderingEngine
-Dsun.tools.attach.tmp.only=true
-Dauto.disable.input.methods=false#!/usr/bin/env python3
import subprocess
import logging
import re
import sys
from collections import defaultdict
kernel_version_p = re.compile(r"[\d\-\.]{8,}")
def run_command(command, ignore_exception=False, timeout=60 * 60 * 24, no_out=False):
logging.debug('exec command :"%s"', command)
if no_out:
return subprocess.Popen(command, shell=True)
proc = subprocess.Popen(
command, stdout=subprocess.PIPE, stderr=subprocess.PIPE, shell=True
)
try:
outs, errs = [o.decode() for o in proc.communicate(timeout=timeout)]
except subprocess.SubprocessError as exp:
outs, errs = "", str(exp)
if ignore_exception:
logging.warning(errs)
else:
raise exp
finally:
proc.kill()
return outs, errs
def parse(kernels):
generic_kernels = defaultdict(set)
oem_kernels = defaultdict(set)
for k in kernels:
match = kernel_version_p.search(k)
if not match:
logging.warning(f"wrong: {k}")
continue
num_k = int(match[0].replace("-", ".").replace(".", ""))
if "edge" in k:
oem_kernels[num_k].add(k)
else:
generic_kernels[num_k].add(k)
for k in kernels:
match = kernel_version_p.search(k)
if not match:
logging.warning(f"wrong: {k}")
continue
num_k = int(match[0].replace("-", ".").replace(".", ""))
for d in [generic_kernels, oem_kernels]:
if num_k in d:
d[num_k].add(k)
return generic_kernels, oem_kernels
if __name__ == "__main__":
cli = "dpkg --get-selections | egrep -i 'linux-[himo]' | awk '{print $1}' | grep -v $(egrep -i '^DISTRIB_RELEASE=' /etc/lsb-release | awk -F '=' '{print $NF}')"
outs, errors = run_command(cli)
print(outs)
if errors:
sys.exit(errors)
kernels = [
i for i in outs.split("\n") if i and not re.search(r"[a-z]+\-generic$", i)
]
for d in parse(kernels):
for _, k in sorted(d.items(), key=lambda x: x[0], reverse=True):
cmd = f"apt purge {' '.join(k)} -y"
op = input(cmd).strip()
if op.lower() == 'y':
run_command(cmd)I used to write some Python scripts, and some of them crashed when run on earlier version of macOS(<10.15.x).
A typical exception may like this:
urllib3.exceptions.MaxRetryError: HTTPSConnectionPool(
host='xxx.com', port=443): Max retries exceeded with url: /
(Caused by SSLError(SSLError(1, '[SSL: TLSV1_ALERT_PROTOCOL_VERSION]
tlsv1 alert protocol version (_ssl.c:720)'),))
This was caused by macOS using an outdated OpenSSL version.
I found this page on Google and follow these steps to solve the problem:
brew update
brew install openssl
# brew install pyenv  # I skipped this line because I used pyenv too
PYTHON_CONFIGURE_OPTS="--enable-shared" CFLAGS="-I$(brew --prefix openssl)/include" LDFLAGS="-L$(brew --prefix openssl)/lib" pyenv install 3.6.9
After using this newly compiled Python interpreter, the problem disappeared
转眼主力参与项目已经三年整,统计了下,发现自己代码总量是-10万+,没错,是负的,要按代码量算工钱我得倒贴,遥谢老板不开之恩。

起pg的时候报了这么个错
pg_ctl: another server might be running; trying to start server anyway
dyld: Library not loaded: /usr/local/opt/icu4c/lib/libicui18n.67.dylib
  Referenced from: /usr/local/Cellar/postgresql/13.1/bin/postgres
  Reason: image not found
no data was returned by command ""/usr/local/Cellar/postgresql/13.1/bin/postgres" -V"
The program "postgres" is needed by pg_ctl but was not found in the
same directory as "/usr/local/Cellar/postgresql/13.1/bin/pg_ctl".
Check your installation.看样子是brew更新把icu4c这个包搞挂了, 所以解决也很简单, 卸了重装即可
brew uninstall --ignore-dependencies icu4c postgresql
brew install postgresql最近在使用
openpyxl时踩了个小坑: 遍历 Excel 时openpyxl可能会由于对行数的误判而提前终止
测试 Excel: sample.xlsx 这个 Excel 实际只有 10 行
代码(分别使用了openpyxl/pylightxl/xlrd来计算示例文件的行数):
import openpyxl
import pylightxl
import xlrd


def openpyxl_count(path):
    """
    Counts the number of rows in an Excel file with openpyxl.
    """
    wb = openpyxl.load_workbook(path)
    sheet = wb.active
    return sheet.max_row


def pylightxl_count(path):
    """
    Counts the number of rows in an Excel file with pylightxl.
    """
    db = pylightxl.readxl(path)
    ws = db.ws(db.ws_names[0])
    return ws.maxrow


def xlrd_count(path):
    """
    Counts the number of rows in an Excel file with xlrd.
    """
    wb = xlrd.open_workbook(path)
    sheet = wb.sheet_by_index(0)
    return sheet.nrows


if __name__ == '__main__':
    excel_path = 'sample.xlsx'
    print(openpyxl_count(excel_path))
    print(pylightxl_count(excel_path))
    print(xlrd_count(excel_path))
结果很奇怪, openpyxl得出14行的结论, 其他两个工具结论正确10, 实际上使用 MS office 打开也确实显示只有10行
哪里出问题了呢? 我拆开这个文档, 查了下xml文件, 发现后四行确实是存在的, 只不过没有内容
也就是说从视觉上看openpyxl是错的, 但从真实数据上看他又是对的
甲方客户可不管真实底层数据的情况, 他只关心他给你了 N 行数据, 结果你给人整了 M 行, 此为坑也
排坑无非两个方案: 要么换库, 要么把源文件改造一下
我选改造源文件, 即遍历 Excel 前先把xml中隐藏的空值行全干掉, 这样就欧了, 同时也提了个 issue 给openpyxl项目: https://foss.heptapod.net/openpyxl/openpyxl/-/issues/1806
但官方不认为这是个 bug, 因为 xml 文件确实是有内容的, 只不过是几个空行, 尴尬
| 规格 | 详细信息 |
|---|---|
| 电脑型号 | 联想小新pro13 2019笔记本电脑 |
| 操作系统 | 11.2 (20D64) |
| 处理器 | 英特尔 酷睿 i7-10710U |
| 内存 | 16GB板载无法更换 |
| 硬盘 | |
| 显卡 | Intel HD Graphics CFL CRB(UHD620) |
| 显示器 | 13.3 英寸 IPS 2560x1600 华星光电 |
| 声卡 | Realtek ALC257 |
| 网卡 | |
| SMBIOS | MacBookPro16,2 |
OpenCore Configurator来修改config.plist OpenCore Configurator更新缓慢与OpenCore版本不匹配,推荐使用ProperTree
config.plist请下载群文件ProperTree中文版-WIN来修改config.plist终端输入sudo kextcache -i /清理缓存并重启,触控板才能正常使用需要更新BIOS【重要】
BIOS下载 密码: dpoe解锁 DVMT 、 CFG 【或参考@donald 《修改DVMT Pre-Allocated数值方法》】
DVMT =64M;位置:Advanced -> System Agent -> Graphics Configura -> DVMT Pre- Allocated 【重要】CFG =disable;位置:Advanced -> Power Performanc -> CPU Power Manage -> CPU Lock Configura【重要】Security 【重要】
Intel Platform Trust Technology = DisableIntel SGX Control = Disable 【建议】Secure Boot =DisableMacBookPro16,2
SMBIOS时请修改USBPorts.kext-Contents-Info.plist
OC 下唤醒方法是:电源键唤醒)暂时解决方法:启动台-声音-输入:手动切换到“外接可用麦克风设备”)D0 就是正常工作状态,S0 是 D0 的电源管理,S0睡眠应该是不存在的,说 S0 睡眠,本质就是 D0 状态下进入了空闲,所以有了空闲状态下的电源管理,这个机器没有 S3睡眠,没有设计相关硬件
但因 ACPI 有了 S3才导致苹果试图进入睡眠,但因缺少必须的硬件最终失败,对于 Windows 不妨碍
更详细的说明移步OC-little实测选择省电的SSD可有效延长待机时间。如:三星PM961+BCM94360CS2并使用SleepWithoutBluetoothAndWifi盒盖一小时耗电仅需0.86%,而西数SN750+BCM94360CS2并使用SleepWithoutBluetoothAndWif则需要3%每小时
可能会出现花屏现象| AAPL,ig-platform-id | device-id | 备注 |
|---|---|---|
| 0500A53E | A53E0000 | 解决i7-10710u花屏/闪屏 |
| 0400A53E | A53E0004 | 解决i7-10710u花屏/闪屏 |
| 0500A63E | A63E0000 | 通用 |
本EFI所使用的ACPI均来自 @宪武 大佬
daliansky黑果小兵
感谢PS@Donald提供的解锁DVMT CFG lock工具
感谢群友QQ876310253提供的解锁dvmt及cfglock.docx教程
感谢群友Dreamn提供的SleepWithoutBluetoothAndWifi工具
......
MacBookPro16,2CPUFriend以改善变频效果实测10710U单核可跑到4.7GHz - 附GeekBench5跑分Scan Policy配置为524547仅扫描并引导macOSShow Picker=False, 跳过OC引导菜单直接进入系统#23 之前这里用的
Alertover服务最近正式扑街没法用, 只好再挪个别的法子
用到的推送工具: PushDeer
脚本运行环境: 腾讯云函数
代码基本还是原来的, 只不过通过Alertover服务推送消息变成了使用PushDeer, 对应的方法改造也很简单, 就不放码了: 发送示例
至于云函数, 网上一堆教程, 这也不啰嗦, 我配置了每五分钟运行一次, 主动调低了实例内存要求至64MB
当然节假日最好是不要推送的, 这就需要另一个 API 服务: http://tool.bitefu.net/jiari/ 检测消息前判断一下是否工作日, 是工作日才检查&发通知, 完美!
MatterMost是一款非常好用的团队沟通工具,但是这货的安卓客户端推送服务非常的垃圾,夸张到昨天的消息今天才可能收到,就算挂梯子也不行。有时候团队有啥要紧事的时候就很蛋疼,只能在微信群里at某某某,体验很不好。所幸他的API非常详细,通过一番组合加上GitHub Actions服务完全可以拯救糟糕的消息推送。
就是遍历所有频道,拿到未读消息计数,利用AlertOver进行推送
/api/v4/users/me/teams/unread/api/v4/users/me/teams/<channel_id>/channels/api/v4/users/me/channels/<channel_id>/unreadhttps://api.alertover.com/v1/alert这个没啥好说的,注册账号,下载安装客户端,比较开心的是,客户端支持 MIPush,不用单独给他留后台服务。然后再新建一个组织,如图

一番折腾后,手机上可以比较及时的收到MatterMost中的未读消息提示,飒!

用gunicorn启动一个tornado服务时报了个错:
[ERROR] [MainThread] (http1connection:67) Uncaught exception
Traceback (most recent call last):
  File "/Users/ferstar/.pyenv/versions/scriber/lib/python3.6/site-packages/tornado/http1connection.py", line 273, in _read_message
    delegate.finish()
  File "/Users/ferstar/.pyenv/versions/scriber/lib/python3.6/site-packages/tornado/httpserver.py", line 280, in finish
    self.request_callback(self.request)
  File "/Users/ferstar/.pyenv/versions/scriber/lib/python3.6/site-packages/tornado/wsgi.py", line 114, in __call__
    WSGIContainer.environ(request), start_response
TypeError: __call__() takes 2 positional arguments but 3 were given调试发现是这行代码的问题:
        # Assume the app is a WSGI callable if its not an
        # instance of tornado.web.Application or is an
        # instance of tornado.wsgi.WSGIApplication
        app = self.wsgi
        if tornado.version_info[0] < 6:
            if not isinstance(app, tornado.web.Application) or \
            isinstance(app, tornado.wsgi.WSGIApplication):
                app = WSGIContainer(app)
        elif not isinstance(app, WSGIContainer):
            app = WSGIContainer(app)
我用的 tornado 版本是6.1, 可以看到, web.Application被WSGIContainer包了一层, 实际上tornado自6.0以后的版本中有意在剥离WSGI的支持, 所以比较苟的一个解决方法是退回到6.0之前的版本, 比如5.1.1, 即可正常; 然而作为一个有追求的攻城狮, 怎么能够因为一个小小的兼容问题就退版本号呢, 我选择硬肛, 既然gunicorn自己的tornado worker不能用, 那就照抄另写一个:
# This file is part of gunicorn released under the MIT license.
# See the NOTICE for more information.
# filename: gtornado.py

import copy
import gettext
import logging.config
import os
import sys

from gunicorn.workers.base import Worker
import tornado
import tornado.httpserver
import tornado.web
from tornado.ioloop import IOLoop, PeriodicCallback

class TornadoWorker(Worker):
    def handle_exit(self, sig, frame):
        if self.alive:
            super().handle_exit(sig, frame)

    def handle_request(self):
        self.nr += 1
        if self.alive and self.nr >= self.max_requests:
            self.log.info("Autorestarting worker after current request.")
            self.alive = False

    def watchdog(self):
        if self.alive:
            self.notify()

        if self.ppid != os.getppid():
            self.log.info("Parent changed, shutting down: %s", self)
            self.alive = False

    def heartbeat(self):
        if not self.alive:
            if self.server_alive:
                if hasattr(self, 'server'):
                    try:
                        self.server.stop()
                    except Exception:  # pylint: disable=broad-except
                        pass
                self.server_alive = False
            else:
                for callback in self.callbacks:
                    callback.stop()
                self.ioloop.stop()

    def init_process(self):
        # IOLoop cannot survive a fork or be shared across processes
        # in any way. When multiple processes are being used, each process
        # should create its own IOLoop. We should clear current IOLoop
        # if exists before os.fork.
        IOLoop.clear_current()
        super().init_process()

    def run(self):
        self.ioloop = IOLoop.current()
        self.alive = True
        self.server_alive = False

        self.callbacks = []
        self.callbacks.append(PeriodicCallback(self.watchdog, 1000))
        self.callbacks.append(PeriodicCallback(self.heartbeat, 1000))
        for callback in self.callbacks:
            callback.start()

        # Assume the app is a WSGI callable if its not an
        # instance of tornado.web.Application or is an
        # instance of tornado.wsgi.WSGIApplication
        app = self.wsgi

        # Monkey-patching HTTPConnection.finish to count the
        # number of requests being handled by Tornado. This
        # will help gunicorn shutdown the worker if max_requests
        # is exceeded.
        httpserver = sys.modules["tornado.httpserver"]
        if hasattr(httpserver, 'HTTPConnection'):
            old_connection_finish = httpserver.HTTPConnection.finish

            def finish(other):
                self.handle_request()
                old_connection_finish(other)

            httpserver.HTTPConnection.finish = finish
            sys.modules["tornado.httpserver"] = httpserver

            server_class = tornado.httpserver.HTTPServer
        else:

            class _HTTPServer(tornado.httpserver.HTTPServer):
                def on_close(instance, server_conn):  # pylint: disable=no-self-argument
                    self.handle_request()
                    super(_HTTPServer, instance).on_close(server_conn)

            server_class = _HTTPServer

        app_params = {
            "max_buffer_size": 200 * 1024 * 1024,  # 200MB
            "decompress_request": True,
        }
        if self.cfg.is_ssl:
            _ssl_opt = copy.deepcopy(self.cfg.ssl_options)
            # tornado refuses initialization if ssl_options contains following
            # options
            del _ssl_opt["do_handshake_on_connect"]
            del _ssl_opt["suppress_ragged_eofs"]
            app_params["ssl_options"] = _ssl_opt
        server = server_class(app, **app_params)

        self.server = server
        self.server_alive = True

        for socket in self.sockets:
            socket.setblocking(0)
            server.add_socket(socket)

        server.no_keep_alive = self.cfg.keepalive <= 0
        server.start(num_processes=1)

self.ioloop.start()主要就是直接丢掉WSGIContainer, 使用tornado.web.Application, 然后运行:
gunicorn -k gtornado.TornadoWorker main:app -b 0.0.0.0:8080 --graceful-timeout 120 --timeout 600发送个HUP信号看看反应, 嗯, 顺利重载
[INFO] Starting gunicorn 20.1.0
[INFO] Listening at: http://0.0.0.0:8080 (51702)
[INFO] Using worker: gtornado.TornadoWorker
[INFO] Booting worker with pid: 51756
[INFO] Handling signal: hup  # 收到信号
[INFO] Hang up: Master
[INFO] Booting worker with pid: 52640  # 顺利重载
[INFO] Worker exiting (pid: 51756)
附上测试代码:
# filename: main.py
import asyncio
from tornado.web import Application, RequestHandler


class MainHandler(RequestHandler):
    def get(self):
        self.write("Hello, world")


class LongPollHandler(RequestHandler):
    async def get(self):
        lines = ['line 1\n', 'line 2\n']

        for line in lines:
            self.write(line)
            await self.flush()
            await asyncio.sleep(0.5)
        await self.finish()


app = Application([
    (r"/", MainHandler),
    (r"/longpoll", LongPollHandler)
])养老养老了,MIUI11 9.9.27,只装个面具root,其他模块调度全扔
一路官方 OTA 上到 MIUI12, 感觉手上的米 8 已经战不动了, 正好官方最后的开发版定格在 MIUI12 20.9.4, 所以是时候再搞一波机, 养个老
因为 NFC 公交卡是刚需, 类原生就不能考虑, 官改感觉改的乱七八糟, 所以只能自己整整官方包了
这个当然是 f2fs yes(4k随机写性能大概能比 ext4 高 25% 左右) 其实从 MIUI10 起官方内核也是支持 f2fs 的, 只不过 ROM 默认还是用的是 ext4, 附一个补丁
Patch-wayne-f2fs-any-rom.zip 其实很简单, 就是修改了系统/data及/cache的挂载参数, 另外最好再加刷一个 f2fs 优化补丁
f2fs-optimize.zip
改 f2fs 步骤大概说一下: REC 里把/data, /cache 格式化为 f2fs -> 重启至REC -> 刷补丁 -> 重启手机即可
UPDATE: 弃坑,还是官核稳。
第三方内核的优点是自定义了一坨东西, 代码上较官方内核新一些, 我主要看重快充, 以及支持 MIUI DC 调光, 所以这方面选择就比较窄, 因为没几个三方内核支持 DC 调光的, 目前试用下来有两个内核支持, 一个是巫女内核, 我只用过 7.1 这个是支持 DC 调光的, 另外还有个Tsing Kernel这个也是支持 DC 调光, 安卓 9 以下的三方内核没有一个支持 DC 调光, 所以直接 pass
刷三方内核的步骤: 刷回原生 ROM 内核 -> 刷 magisk -> 刷三方内核 -> 刷 magisk -> 双清cache(不需要清数据)
神他么的 yc 调度, 你值得拥有: https://github.com/yc9559/uperf
这个自己去酷安捞, 我主要用了杜比&蝰蛇音效的模块以及 Riru core & EdXposed & Busybox & SQLite 加上上面提到的 yc调度
ChiMi & 微X模块 & 腾爱优芒豆去广告 & 知了 & AD 快消
酷安 & Scene & MT 管理器 & 钛备份 & AccuBattery & STM工具箱 & 搞机助手 & EX kernel manager
8. To be continue...
作为CRUD仔,经常这样的套路用ORM,想加个to_dict的方法来把ORM对象转换成json给前端返回,但已有的项目都是在各自的子类里写个to_dict的方法,太累了,放到基类可好?是可以的。
from sqlalchemy import Column, String, create_engine
from sqlalchemy.orm import sessionmaker
from sqlalchemy.ext.declarative import declarative_base

Base = declarative_base()

class User(Base):
    __tablename__ = 'user'

    id = Column(String(20), primary_key=True)
    name = Column(String(20))

    def to_dict(self):
        ...

class School(Base):
    __tablename__ = 'school'
    id = ...
    name = ...

    def to_dict(self):
        ...
...

engine = create_engine('mysql+mysqlconnector://root:password@localhost:3306/test')
DBSession = sessionmaker(bind=engine)看declarative_base源码发现可以给塞个自定义的class进去作为基类,所以以上代码可以这样改进
from sqlalchemy import inspect
from sqlalchemy.ext.declarative import declarative_base

class _Base:
    __banned_cols__: List[str] = ['deleted_utc']
    __extra_cols__: List[str] = []

    def to_dict(self, **kwargs):
        cols = self.__extra_cols__ + [c.name for c in inspect(self.__class__).c]
        ret_dict = {col: getattr(self, col) for col in cols if hasattr(self, col) and col not in self.__banned_cols__}
        for func in self.custom_funcs():
            if callable(func):
                ret_dict.update(func(ret_dict, **kwargs))
        return ret_dict

    def custom_funcs(self) -> List[FunctionType]:
        return []

Base = declarative_base(cls=_Base)
...
这样子类model class就没必要去再写一遍to_dict方法了
我digital ocean的5刀丐版vps上面放了个人公众号的服务,就是些许python脚本拼凑起来的,还是科研狗的时候偷懒搞的东西,不小心维护到现在。
前几日因为数据源站更新,需要更新爬虫策略,开vscode登上去改代码,不小心手贱删掉了工作目录,蛋疼啊,火急火燎关掉vps,
刚关完就有粉丝反馈公众号故障,所以临时挂了个维护的通知,开始苦逼恢复数据。
git、备份恢复 - 扑街,因为很多功能调整都是断断续续加的,没有及时的备份,拿到的旧代码相当于没用
extundelete大法
这个网上一堆教程,比较有用的一个参数是after,因为我知道确切的删文档时间点,那么只需要恢复删档时间以后的资料就可以
mount -o remount,ro /dev/sdX1
# 举个栗子,恢复一小时内删除的资料
extundelete --restore-all --after $(date -d "-1 hours" +%s) /dev/sdX1
find RECOVERED_FILES/extundelete恢复后,悲剧的发现py代码几乎全丢了,但神奇的是__pycache__居然完整恢复,于是赶紧用uncompyle6反编译pyc试试
for i in $(ls | awk -F . '{print $1}'); do uncompyle6 $i.cpython-36.pyc > ../$i.py; done跑完效果好的出奇,基本上完美还原
重启&恢复服务 - 一切正常
复盘 - crontab rsync + git code 走起来,可保江山永固
从手欠删工作目录到恢复完成耗时1.5h,能完美恢复的关键是发现问题需要立即把盘离线(避免覆写,神仙难救)
大概就是损失了午休的时间,于是公众号卖惨求红包,果然收到几个热心粉丝老板的红包打赏,开心。。。
A declarative, efficient, and flexible JavaScript library for building user interfaces.
🖖 Vue.js is a progressive, incrementally-adoptable JavaScript framework for building UI on the web.
TypeScript is a superset of JavaScript that compiles to clean JavaScript output.
An Open Source Machine Learning Framework for Everyone
The Web framework for perfectionists with deadlines.
A PHP framework for web artisans
Bring data to life with SVG, Canvas and HTML. 📊📈🎉
JavaScript (JS) is a lightweight interpreted programming language with first-class functions.
Some thing interesting about web. New door for the world.
A server is a program made to process requests and deliver data to clients.
Machine learning is a way of modeling and interpreting data that allows a piece of software to respond intelligently.
Some thing interesting about visualization, use data art
Some thing interesting about game, make everyone happy.
We are working to build community through open source technology. NB: members must have two-factor auth.
Open source projects and samples from Microsoft.
Google ❤️ Open Source for everyone.
Alibaba Open Source for everyone
Data-Driven Documents codes.
China tencent open source team.
