문자가 인코딩되는 방식을 설정합니다.
<meta charset="UTF-8"/>UTF-8: 초성, 중성, 종성으로 구분하여 문자를 작성(권장)EUC-KR: 하나의 완성된 글자를 인식
웹페이지가 화면(Viewport)에 표현되는 방식을 설정합니다.
모바일 환경에서 적용됩니다.
<meta name="viewport" content="width=device-width, initial-scale=1.0" />width=device-width: 화면의 가로 너비를 각 디바이스(Device)의 가로 너비와 동일하게 적용initial-scale=1.0: 화면의 초기 화면 배율(확대 정도)을 설정user-scalable=no: 사용자가 디바이스 화면을 확대(yes)/축소(no)할 수 있는지 설정maximum-scale=1: 사용자가 화면을 확대할 수 있는 최댓값minimum-scale=1: 사용자가 화면을 축소할 수 있는 최솟값
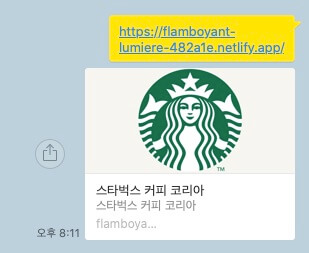
웹페이지가 소셜 미디어(페이스북 등)로 공유될 때 우선적으로 활용되는 정보를 지정합니다.
Slack -

KakaoTalk -
<meta property="og:type" content="website" />
<meta property="og:site_name" content="Starbucks" />
<meta property="og:title" content="Starbucks Coffee Korea" />
<meta property="og:description" content="스타벅스는 세계에서 가장 큰 다국적 커피 전문점으로, 64개국에서 총 23,187개의 매점을 운영하고 있습니다." />
<meta property="og:image" content="./images/starbucks_seo.jpg" />
<meta property="og:url" content="https://starbucks.co.kr" />og:type: 페이지의 유형(E.g,website,video.movie)og:site_name: 속한 사이트의 이름og:title: 페이지의 이름(제목)og:description: 페이지의 간단한 설명og:image: 페이지의 대표 이미지 주소(URL)og:url: 페이지 주소(URL)
웹페이지가 소셜 미디어(트위터)로 공유될 때 우선적으로 활용되는 정보를 지정합니다.
<meta property="twitter:card" content="summary" />
<meta property="twitter:site" content="Starbucks" />
<meta property="twitter:title" content="Starbucks Coffee Korea" />
<meta property="twitter:description" content="스타벅스는 세계에서 가장 큰 다국적 커피 전문점으로, 64개국에서 총 23,187개의 매점을 운영하고 있습니다." />
<meta property="twitter:image" content="./images/starbucks_seo.jpg" />
<meta property="twitter:url" content="https://starbucks.co.kr" />twitter:card: 페이지(카드)의 유형(E.g.summary,player)twitter:site: 속한 사이트의 이름twitter:title: 페이지의 이름(제목)twitter:description: 페이지의 간단한 설명twitter:image: 페이지의 대표 이미지 주소(URL)twitter:url: 페이지 주소(URL)
웹페이지를 나타내는 아이콘, 웹페이지의 로고를 설정합니다.
대부분의 경우 루트 경로에 favicon.ico 파일을 위치하면 자동으로 로딩하기 때문에 <link /> 를 작성할 필요가 없습니다.
favicon.png 파일을 사용하려면 다음과 같이 <link />를 작성하세요.
파비콘 이미지는 루트 경로에 있어야 합니다!
<!--<link rel="shortcut icon" href="favicon.ico" />-->
<link rel="icon" href="./favicon.png" />favicon.ico64 x 64 (px) 또는 32 x 32 또는 16 x 16favicon.png500 x 500 (px)
![]()

이미지를 업로드하면 손쉽게 .ico 파일을 제작할 수 있습니다.
각 브라우저의 기본 스타일을 초기화합니다. 이외에 reset.css파일을 css 폴더에 직접 추가하는 방법이 있습니다.
<link rel="stylesheet" href="https://cdn.jsdelivr.net/npm/[email protected]/reset.min.css" />페이지에서 사용할 '나눔고딕' 폰트를 지정합니다.
폰트 라이선스를 꼭 확인해야 합니다!
Google Fonts에서 고른 폰트 파일을 가져옵니다.
<link rel="preconnect" href="https://fonts.gstatic.com" />
<link href="https://fonts.googleapis.com/css2?family=Nanum+Gothic:wght@400;700&display=swap" rel="stylesheet" />
페이지에 폰트를 적용(CSS 상속)합니다.
body {
    font-family: 'Nanum Gothic', sans-serif;
}구글에서 제공하는 머터리얼 아이콘을 무료로 사용할 수 있습니다.
<link rel="stylesheet" href="https://fonts.googleapis.com/icon?family=Material+Icons" />다음과 같이 사용할 수 있습니다.
<div class="material-icons">upload</div>Swiper는 하드웨어 가속 전환과 여러 기본 동작을 갖춘 현대적인 슬라이드 라이브러리입니다.
Swiper 6버전을 사용합니다.
7/8버전의 사용법이 다르기 때문에 6버전을 유지합니다.
<!-- in HEAD -->
<link rel="stylesheet" href="https://unpkg.com/[email protected]/swiper-bundle.min.css" />
<script src="https://unpkg.com/[email protected]/swiper-bundle.min.js"></script>

<!-- in BODY -->
<div class="swiper-container">
  <div class="swiper-wrapper">
    <div class="swiper-slide">1</div>
    <div class="swiper-slide">2</div>
    <div class="swiper-slide">3</div>
  </div>
</div>
Swiper API(옵션)을 확인하세요!
new Swiper(요소, 옵션);new Swiper('.swiper-container', {
direction: 'vertical', // 수직 슬라이드
autoplay: true, // 자동 재생 여부
loop: true // 반복 재생 여부
});Lodash는 다양한 유틸리티 기능을 제공하는 자바스크립트 라이브러리입니다.
<script src="https://cdnjs.cloudflare.com/ajax/libs/lodash.js/4.17.20/lodash.min.js" integrity="sha512-90vH1Z83AJY9DmlWa8WkjkV79yfS2n2Oxhsi2dZbIv0nC4E6m5AbH8Nh156kkM7JePmqD6tcZsfad1ueoaovww==" crossorigin="anonymous"></script> scroll event에 .throttle()로 스크롤이 지나치게 자주 발생하는 것을 조절(고의적으로 부하 제공)
fixed되는 starbuck-menu(in Header)라서
위치를 적절한 곳에 배치시키고 다시 추가
상대적 배치를 이용해, 좌측 수직 중앙 배치
header .logo {
  height: 75px;
  position: absolute;
  top: 0;
  bottom: 0;
  left: 0;
  margin: auto;
}flex 정렬을 통해 li를 수평으로 정렬
header .sub-menu {
  position: absolute;
  top: 10px;
  right: 0;
  display: flex;
}
header .sub-menu ul.menu {
  font-family: Arial, sans-serif;
  display: flex;
}
// 검색창 요소 내부 실제 input 요소에 포커스 될때
// 검색창 요소 내부 실제 input 요소에서 포커스가 해제(블러)될때

각각 add()와 remove()를 통해 해당 .focused 클래스 선택자 선택 및 해제!
// 검색창 요소를 클릭하면 실행.
searchEl.addEventListener('click', function () {
  searchInputEl.focus()
})
// 검색창 요소 내부 실제 input 요소에 포커스되면 실행.
searchInputEl.addEventListener('focus', function () {
  searchEl.classList.add('focused')
  searchInputEl.setAttribute('placeholder', '통합검색')
})
// 검색창 요소 내부 실제 input 요소에서 포커스가 해제(블러)되면 실행.
searchInputEl.addEventListener('blur', function () {
  searchEl.classList.remove('focused')
  searchInputEl.setAttribute('placeholder', '')
})drop-down menu로 hover로 구현
sub-menu와 동일하게 flex 정렬을 통해 li를 수평으로 정렬
header .main-menu {
  position: absolute;
  bottom: 0;
  right: 0;
  z-index: 1;
  display: flex;
}

header .main-menu .item .item__contents .contents__menu > ul {
  padding: 20px 0;
  display: flex;
}<div class="fade-in"></div>의 구성
.fade-in에 gsap.to()로 순차적(fade-in) 등장 모션 추가
<!--<div class="fade-in"></div>의 구성-->
    <div class="inner">

      <div class="title fade-in">
        <img />
        <a href="javascript:void(0)" class="btn btn--brown">자세히 보기</a>
      </div>
      <div class="fade-in">
        <img class="cup1 image" />
        <img class="cup1 text" />
      </div>
      <div class="fade-in">
        <img class="cup2 image" />
        <img class="cup2 text" />
      </div>
      <div class="fade-in">
        <img class="spoon" />
      </div>

    </div>
/*default: opacity: 0*/
.visual .fade-in {
opacity: 0;
}
/*순차적으로 등장하여, gsap.to*()를 적용하며, 옵션 내, opacity: 1을 실행!*/
/*아래 js 코드를 참고*/// 각 htmlelements list에 반복적으로 gsap.to()로 등장 모션을 정하고, 구체적 옵션을 안에 추가해, 각 htmlelement에 부착
fadeEls.forEach(function (fadeEl, index) {
// 각 요소들을 순서대로(delay) 보여지게 함!
gsap.to(fadeEl, 1, {
delay: (index + 1) * .7,
opacity: 1
})
})swiper-wrapper안에 swiper-slide들로 구성
// swiperjs docs
const swiper = new Swiper('.swiper', {
  // Optional parameters
  direction: 'vertical',
  loop: true,

  // If we need pagination
  pagination: {
    el: '.swiper-pagination',
  },

  // Navigation arrows
  navigation: {
    nextEl: '.swiper-button-next',
    prevEl: '.swiper-button-prev',
  },

  // And if we need scrollbar
  scrollbar: {
    el: '.swiper-scrollbar',
  },
});
<!-- in BODY -->
<div class="swiper-container">
<div class="swiper-wrapper">
<div class="swiper-slide">1</div>
<div class="swiper-slide">2</div>
<div class="swiper-slide">3</div>
</div>
</div> /*정렬 수행*/
.notice .notice-line .inner__left .swiper-slide {
height: 62px;
display: flex;
align-items: center;
}
.notice .notice-line .inner__left .swiper-slide a {
color: #fff;
}
.notice .notice-line .inner__left .notice-line__more {
width: 62px;
height: 62px;
display: flex;
justify-content: center;
align-items: center;
} new Swiper('.swiper-container', {
direction: 'vertical', // 수직 슬라이드
autoplay: true, // 자동 재생 여부
loop: true // 반복 재생 여부
});swiper-wrapper안에 swiper-slide들로 구성
버튼 배치 및 메인 slide 외 양쪽 나머지 슬라이드 opacity: 0.5로 조절
// swiperjs docs
const swiper = new Swiper('.swiper', {
  // Optional parameters
  direction: 'vertical',
  loop: true,

  // If we need pagination
  pagination: {
    el: '.swiper-pagination',
  },

  // Navigation arrows
  navigation: {
    nextEl: '.swiper-button-next',
    prevEl: '.swiper-button-prev',
  },

  // And if we need scrollbar
  scrollbar: {
    el: '.swiper-scrollbar',
  },
});
<!-- in BODY -->
<div class="swiper-container">
<div class="swiper-wrapper">
<div class="swiper-slide">1</div>
<div class="swiper-slide">2</div>
<div class="swiper-slide">3</div>
</div>
</div>.notice .promotion {
/*width: auto;*/
height: 693px;
background-color: #f6f5ef;
position: relative;
overflow: hidden;
transition: height .4s;
}
.notice .promotion .swiper-container {
/* 819px 슬라이드 3개와 그 사이 여백 10px씩 = 2477px */
width: calc(819px * 3 + 20px);
height: 553px;
position: absolute;
top: 40px;
left: 50%;
margin-left: calc((819px * 3 + 20px) / -2);
}
.notice .promotion .swiper-slide {
position: relative;
opacity: .5;
transition: opacity 1s;
}
.notice .promotion .swiper-slide .btn {
/*width: 130px;*/
position: absolute;
bottom: 0;
left: 0;
right: 0;
margin: auto;
}new Swiper('.promotion .swiper-container', {
// direction: 'horizontal', // 수평 슬라이드
autoplay: { // 자동 재생 여부
delay: 5000 // 5초마다 슬라이드 바뀜
},
loop: true, // 반복 재생 여부
slidesPerView: 3, // 한 번에 보여줄 슬라이드 개수
spaceBetween: 10, // 슬라이드 사이 여백
centeredSlides: true, // 1번 슬라이드가 가운데 보이기
pagination: { // 페이지 번호 사용 여부
el: '.promotion .swiper-pagination', // 페이지 번호 요소 선택자
clickable: true // 사용자의 페이지 번호 요소 제어 가능 여부
},
navigation: { // 슬라이드 이전/다음 버튼 사용 여부
prevEl: '.promotion .swiper-prev', // 이전 버튼 선택자
nextEl: '.promotion .swiper-next' // 다음 버튼 선택자
}
});// 네비게이션 옵션 추가
// css로 네비게이션 배치
new Swiper('.awards .swiper-container', {
    // direction: 'horizontal', // 수평 슬라이드
    autoplay: true, // 자동 재생 여부
    loop: true, // 반복 재생 여부
    spaceBetween: 30, // 슬라이드 사이 여백
    slidesPerView: 5, // 한 번에 보여줄 슬라이드 개수
    // slidesPerGroup: 5, // 한 번에 슬라이드 할 개수(전체 개수로 나뉘어야 함)
    navigation: { // 슬라이드 이전/다음 버튼 사용 여부
      prevEl: '.awards .swiper-prev', // 이전 버튼 선택자
      nextEl: '.awards .swiper-next' // 다음 버튼 선택자
    }
});
<!--promotion과 동일-->.awards .swiper-prev,
.awards .swiper-next {
width: 42px;
height: 42px;
outline: none;
border: 2px solid #fff;
border-radius: 50%;
color: #fff;
position: absolute;
top: 0;
bottom: 0;
margin: auto;
opacity: .3;
cursor: pointer;
display: flex;
justify-content: center;
align-items: center;
transition: .4s;
}
.awards .swiper-prev {
left: -100px;
}
.awards .swiper-next {
right: -100px;
}// flex로 수평 정렬
// 이는 메뉴바 구성원리와도 동일
// btn-group과 menu가 핵심
footer .menu {
  display: flex;
  justify-content: center;
}

footer .btn-group {
  margin-top: 20px;
  display: flex;
  justify-content: center;
}// 화면을 기준으로 고정시키며, 배치(postion:fixed;)
// gsap.to()로, window객체를 이용해, scroll 위치 0으로 이동(scrollTo: 0)
#to-top {
  position: fixed;
  bottom: 30px;
  right: 30px;

  width: 42px;
  height: 42px;

  display: flex;
  justify-content: center;
  align-items: center;
}
// 상단으로 스크롤 버튼을 클릭하면,
toTopEl.addEventListener('click', function () {
// 페이지 위치를 최상단으로 부드럽게(0.7초 동안) 이동.
gsap.to(window, .7, {
scrollTo: 0
})
})// header 기준으로 배치
// scroll 특정 위치를 넘어가면, 사라지고,
// 넘어가지않으면, 존재
header .badges {
  position: absolute;
  top: 132px;
  right: 12px;
}
// 페이지 스크롤 위치가 500px이 넘으면.
if (window.scrollY > 500) {
// Badge 요소 숨기기!
gsap.to(badgeEl, .6, {
opacity: 0,
display: 'none'
})
// 상단으로 스크롤 버튼 보이기!
gsap.to(toTopEl, .2, {
x: 0
})
// 페이지 스크롤 위치가 500px이 넘지 않으면.
} else {
// Badge 요소 보이기!
gsap.to(badgeEl, .6, {
opacity: 1,
display: 'block'
})
// 상단으로 스크롤 버튼 숨기기!
gsap.to(toTopEl, .2, {
x: 100
})
}