![]()


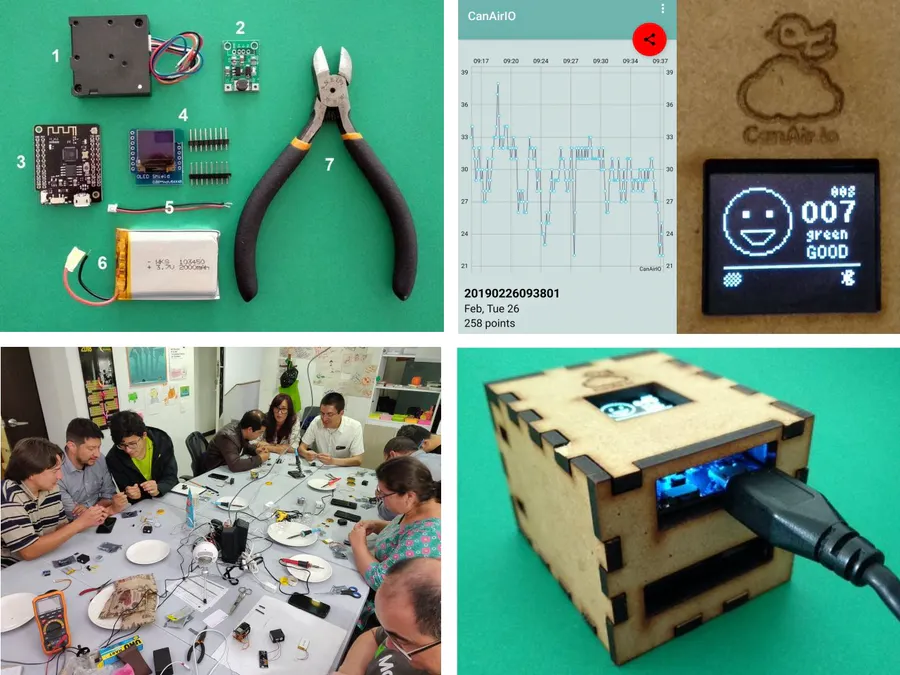
Citizen science project with mobile and fixed sensors for measuring air quality (PM 2.5) using low-cost sensors and smartphones. Built with a ESP32 module board and a dust sensor, interfaced with an CanAirIO Android client app. The current firmware supports multiple boards and sensors, please review the DIY guides in our wiki
You can download the last firmware version in releases section. Download the last release from assets section in releases and please uncompress zip file.
Connect your CanAirIO device to your USB and execute the next command for your model board*, like this:
unzip canairio_rev414_20190829.zip
cd canairio_installer
./install.sh canairio_TTGO_T7_rev605_20200925.bin
For more options run ./canairio_installer help.
Note: you need python2 or python3 with pyserial in your system.
TTGO_T7 Please see the CanAirIO v2.1 guide.
TTGO_TQ firmware for TTGO_TQ board
WEMOSOLED firmware for ESP32 OLED board
Is possible that the current firmware supports more boards and sensors. Also you can choose the sensor brand or type on the CanAirIO Android app.
After that you will able to send OTA updates to any board supported, like this:
./install.sh ota canairio_d1mini_rev414_20190829.binAlso you can specify the IP address:
./install.sh ota canairio_xxx.bin 192.168.1.10Please read procedure on firmware section on HacksterIO Guide for details for load firmware via oficial Espressif Download Tool in Windows
Please install first PlatformIO open source ecosystem for IoT development compatible with Arduino IDE and its command line tools (Windows, MacOs and Linux). Also, you may need to install git in your system.
For default board TTGO_T7, clone and upload firmware via USB cable:
git clone https://github.com/kike-canaries/esp32-hpma115s0.git
cd esp32-hpma115s0
pio run -e TTGO_T7 --target upload
After that, it able for sending updates via OTA protocol using Wifi in your LAN, is more fastest than USB and you can disconnect your board, but you need first save Wifi credentials via Android CanAirIO app see below.
For OTA updates you only run
pio run -e TTGO_T7_OTA --target uploadAlso you can specify the IP address on platformio.ini config file
Optional for other board, please select the right environment for example for wemos board:
pio run -e WEMOSOLED --target uploadAlso you can change in platformio.ini the next parameters:
-D CORE_DEBUG_LEVEL=0, set to 3 for get more verbose log.
-D EMOTICONS, comment or uncomment for enable emoticons.
upload_port, in OTA section is for set to CanAirIO device IP address.
You can build CanAirIO Installer zip package with all binaries of all board flavors running the next command:
./build all && ./build installerThe directory output is in: releases/installer
Also the binaries flavors directory: releases/binaries/
If you have some issues with Bluetooth library internals, or libraries issues, please upgrade all frameworks and tools on PlatformIO:
pio update
sudo pio upgrade
pio run -t clean
rm -rf .pio
pio lib update
pio run --target upload
If you want clear all ESP32 preferences and flash variables, please execute before:
./esptool.py --port /dev/ttyUSB0 erase_flashFor now you need any Android device with Bluetooth 4 or above. You can download the CanAirIO app from GooglePlay, keep in mind that it is in continuos development then please any feedback, report errors, or any thing please let us knowed it via our contact form or on our Telegram chat
You have two configuration options or modes of your CanAirIO device from the app:
For record tracks on your device (Sdcard) or publish it to the cloud (share), please follow the next steps:


NOTE: Also all recorded tracks will be saved in the /sdcard/canairio/ directory on json format.

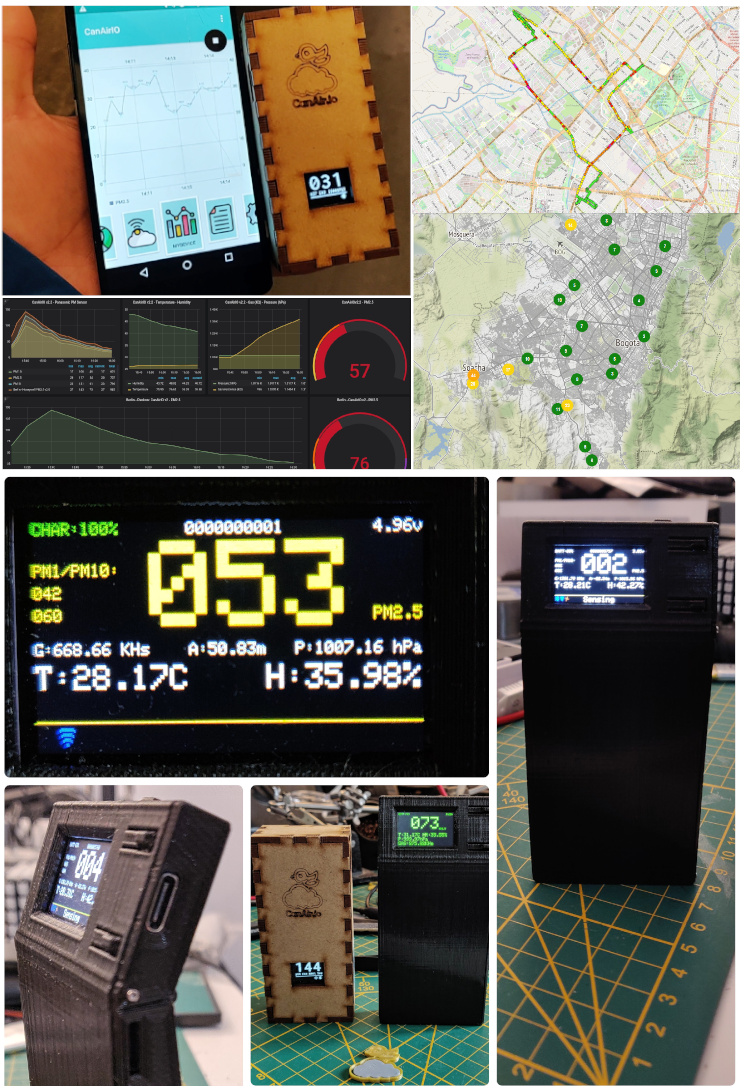
Also, you can connect your CanAirIO device to the WiFi and leave this like a fixed station. In this mode you only need the Android app only for initial settings, after that the device could be publish data without the phone. For this you need configure it in settings section:

- Station Name: for example:
PM25_Berlin_Pankow - Wifi Name and Password:
- Your Wifi network credentials.
- Save the credentials with the switch.
- InfluxDB Cloud: add the next values,
- Database name:
canairio - Hostname:
influxdb.canair.io - Save the settings with the switch.
- Database name:
The data will be configured and showed in CanAirIO Grafana Server.
- Reboot device: Only for restart your CanAirIO device
- Factory Reset: For set all settings to default on your CanAirIO device
- Enable/Disable APIs from App (on testing)
- Locatitation settings via Bluetooth (on testing)
- OTA updates ready (LAN)
- Sensors manager is now a library (canairio_sensorlib)
- Auto detection of PM sensors (see sensorlib doc)
- Anonymous authentication
- OTA updates (WAN)
- Migrate
loopto multithread RTOS implementation - Dinamic Humidity and Temperature visualization on Display
You can build a device to measure air quality by using a PM2.5 or similar sensor, for then publish it to CanAirio cloud or a personal server using CanAirIO App, more info here: