Visit the live site here.
The sole purpose for this python project was following a brief layout for my third milestone project, building a battleship game using python was suggested as an idea within the brief therefore I decided to give it a go.
Using a game, I feel is a fun and interactive way to display my knowledge in python.
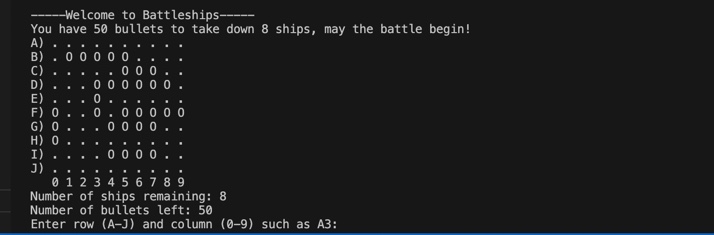
My battleship game, will be displayed in a 10x10 grid. It is a one player game. There will be 8 ships of variable lengths, randomly placed around the grid by the computer. The user will start with 50 bullets to take down the ships. The user must choose a row and column of where they would like to shot, the row must be picked by a letter from the range A-J and the column is picked using a number from the range 0-9, they must be typed into the terminal together such as A3. This will indicate exactly where the user would like to shot on the grid.
For every shot that shots or misses, it will be shown on the grid using a symbol from a legend explained below and outlined in a comment in the code for this game.
A ship cannot be placed diagonally in this battleships game. Therefore when a shot hits, the rest of that ship can only be in one of four directions, left, right, up, or down.
To win this battleship game, all 8 ships must be fully unearthed before running out of bullets. If you have used all 50 bullets and have not found all eight ships, you lose.
The legend in this game is as follows:
"." = empty space
"O" = part of the ship (unhit)
"X" = part of the ship hit with a bullet
"#" = empty space hit with a bullet (a miss because it hit no ship)
- Python was the main language used in this battleships game. An extension of python had to be installed for it to be used correctly.
- I used GitHub to store my code.
- I used GitPod to write my code.
- I used Heroku to deploy my python project.
- I used PEP8 to test my code. To fix and error or warnings.
To test that this python battleships game was working correctly, I first added a function to my code called debug_mode. This debug_mode is equal to false when the game is being played but to test that all functions in my code were working correctly I set this equal to true (debug_mode = True). What this did is aloud me to see where the computer had placed the ships using the symbol from the above legend of "O", when these symbol were visible I could hit and miss while playing the game to ensure the correct message was being displayed in these situations.
I used the above function to test that the battleship game was working as expected. If the length of the input by the player is less then or equal to 0 or greater than 2, an error message is outputted. If the row input is not a letter or the column input is not a number, an error message is outputted. If the inputted row is off the grid, an error message is outputted. If the inputted column is off the grid, an error message is outputted. All the above display the same error message which is "Error: Please enter letter (A-J) for row and (0-9) for column"
If the shot hits a "#" (empty space that was shot with a bullet) or "X" (part of the ship that was hit with a bullet), an error message of "You have already shot a bullet here, pick somewhere else."
Otherwise hitting a "." or "O" is fine and no error message will appear.
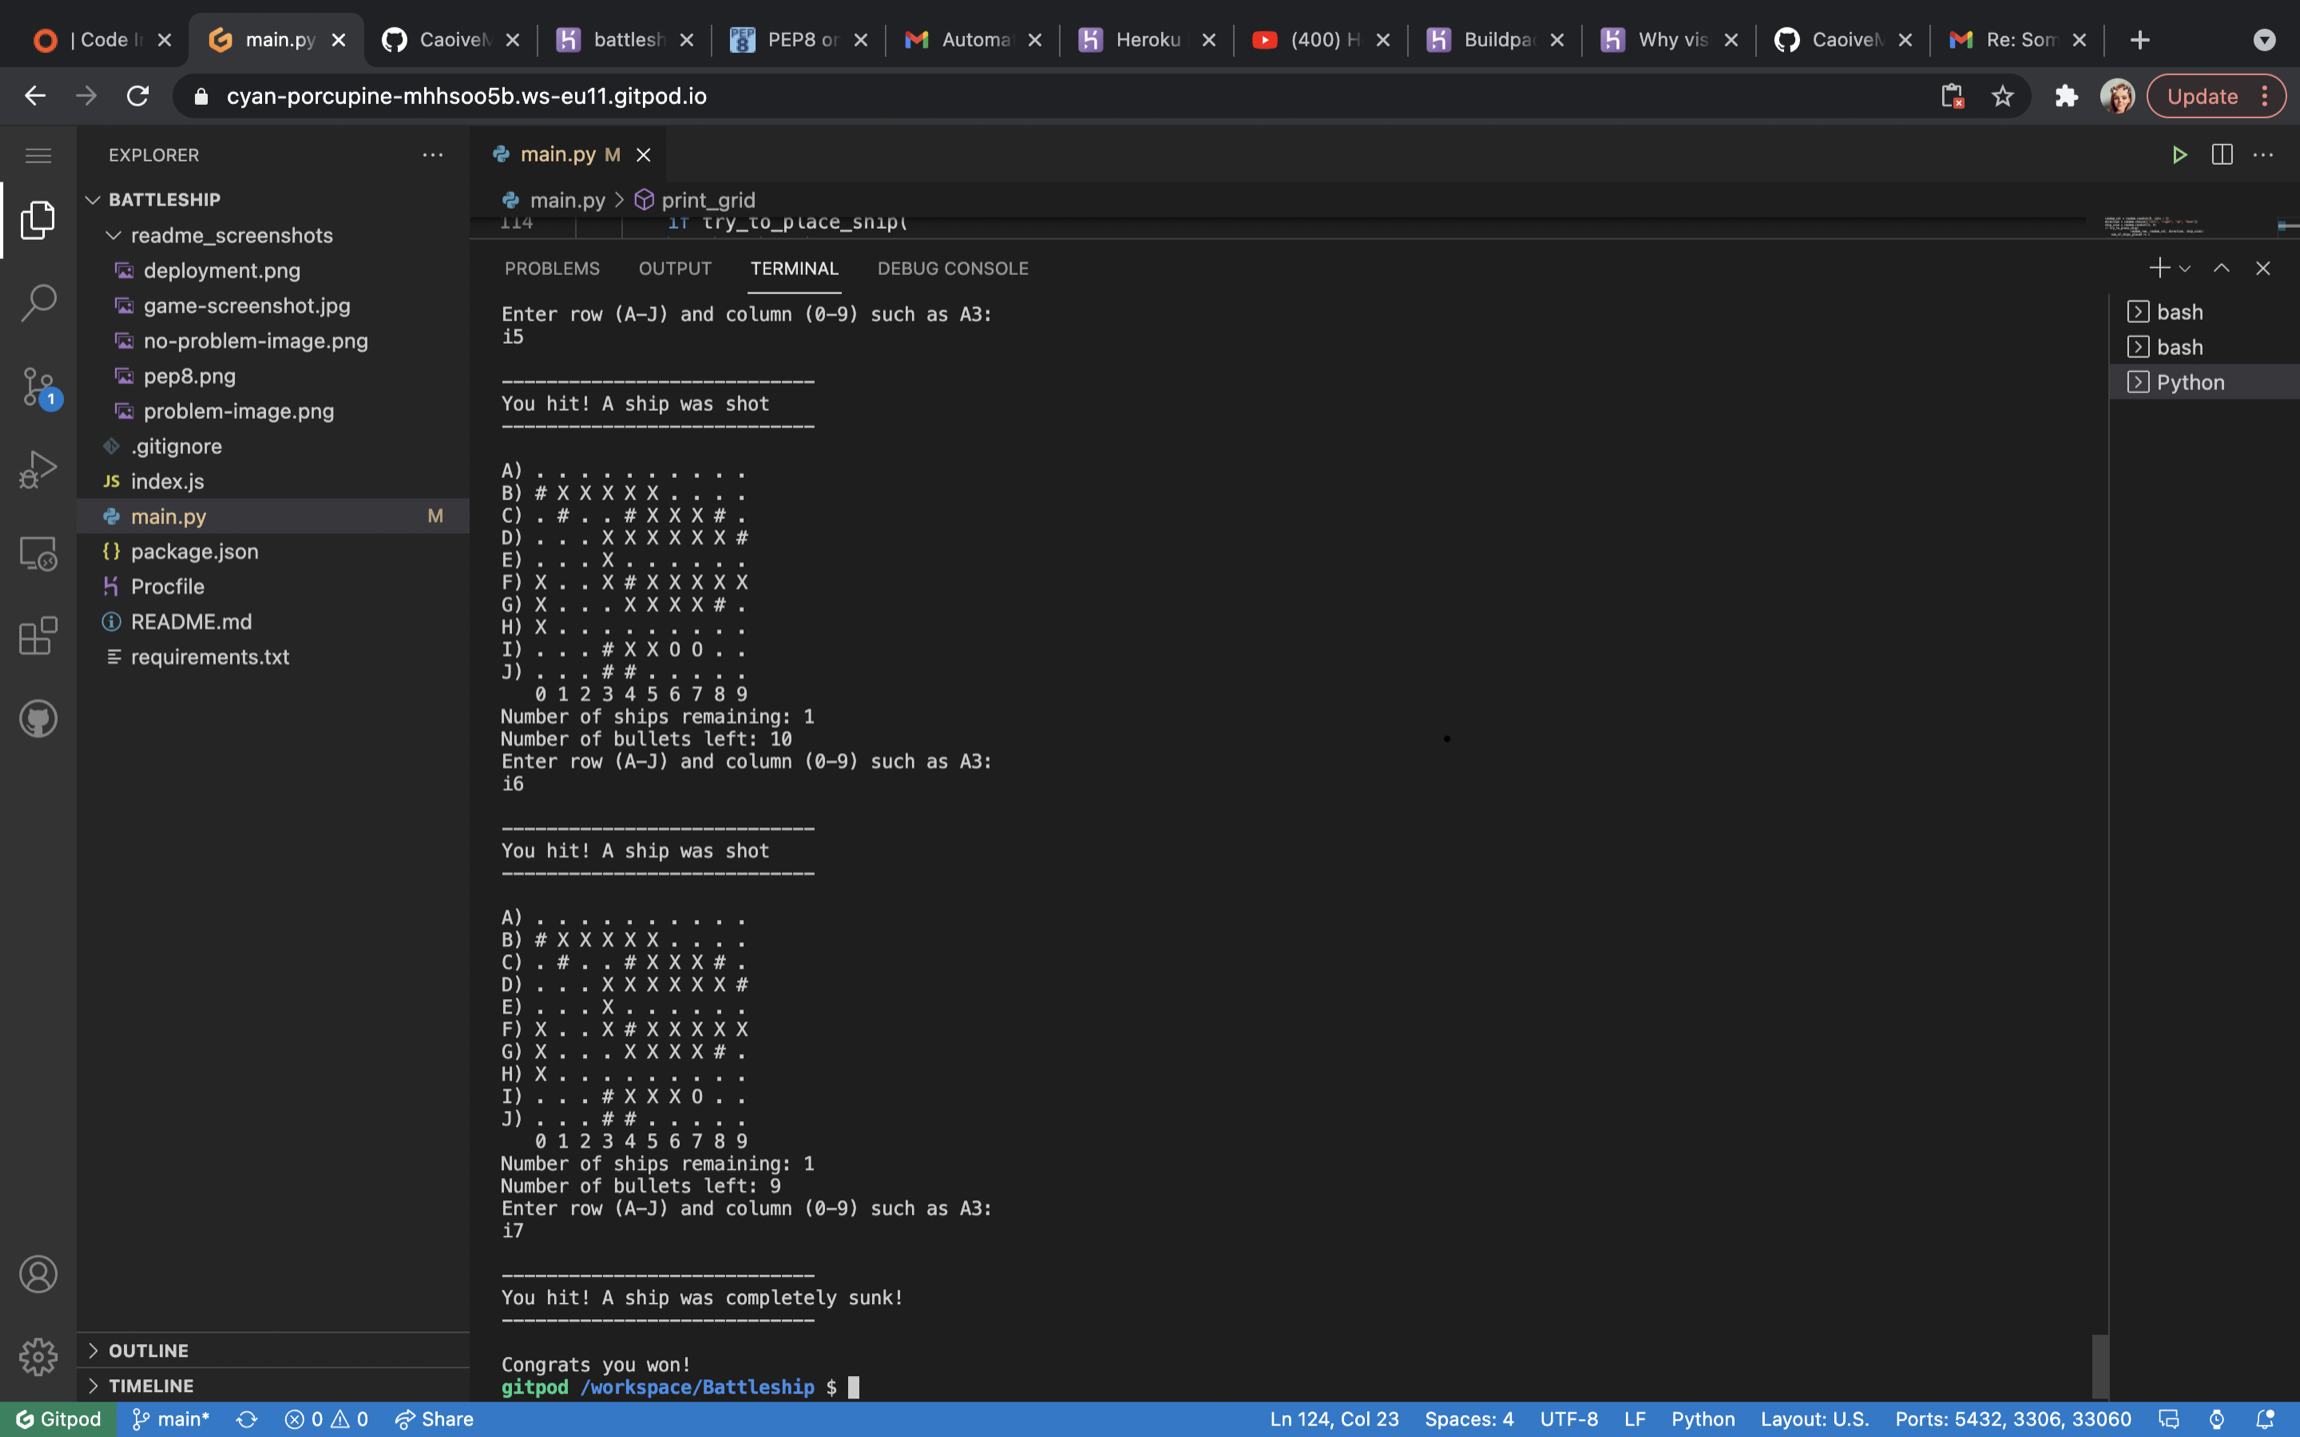
Using the debug mode, I tested all these functions were working correctly and to my delighted they did.
I had a number of problems when writing my code these were mostly down to syntax errors. I fixed them by breaking up lines of code that had too many characters in them. Another big problem was white spacing, to fix these problems I either had to add or remove white space where indicated.I have included two screenshot below, of before and after these problems.
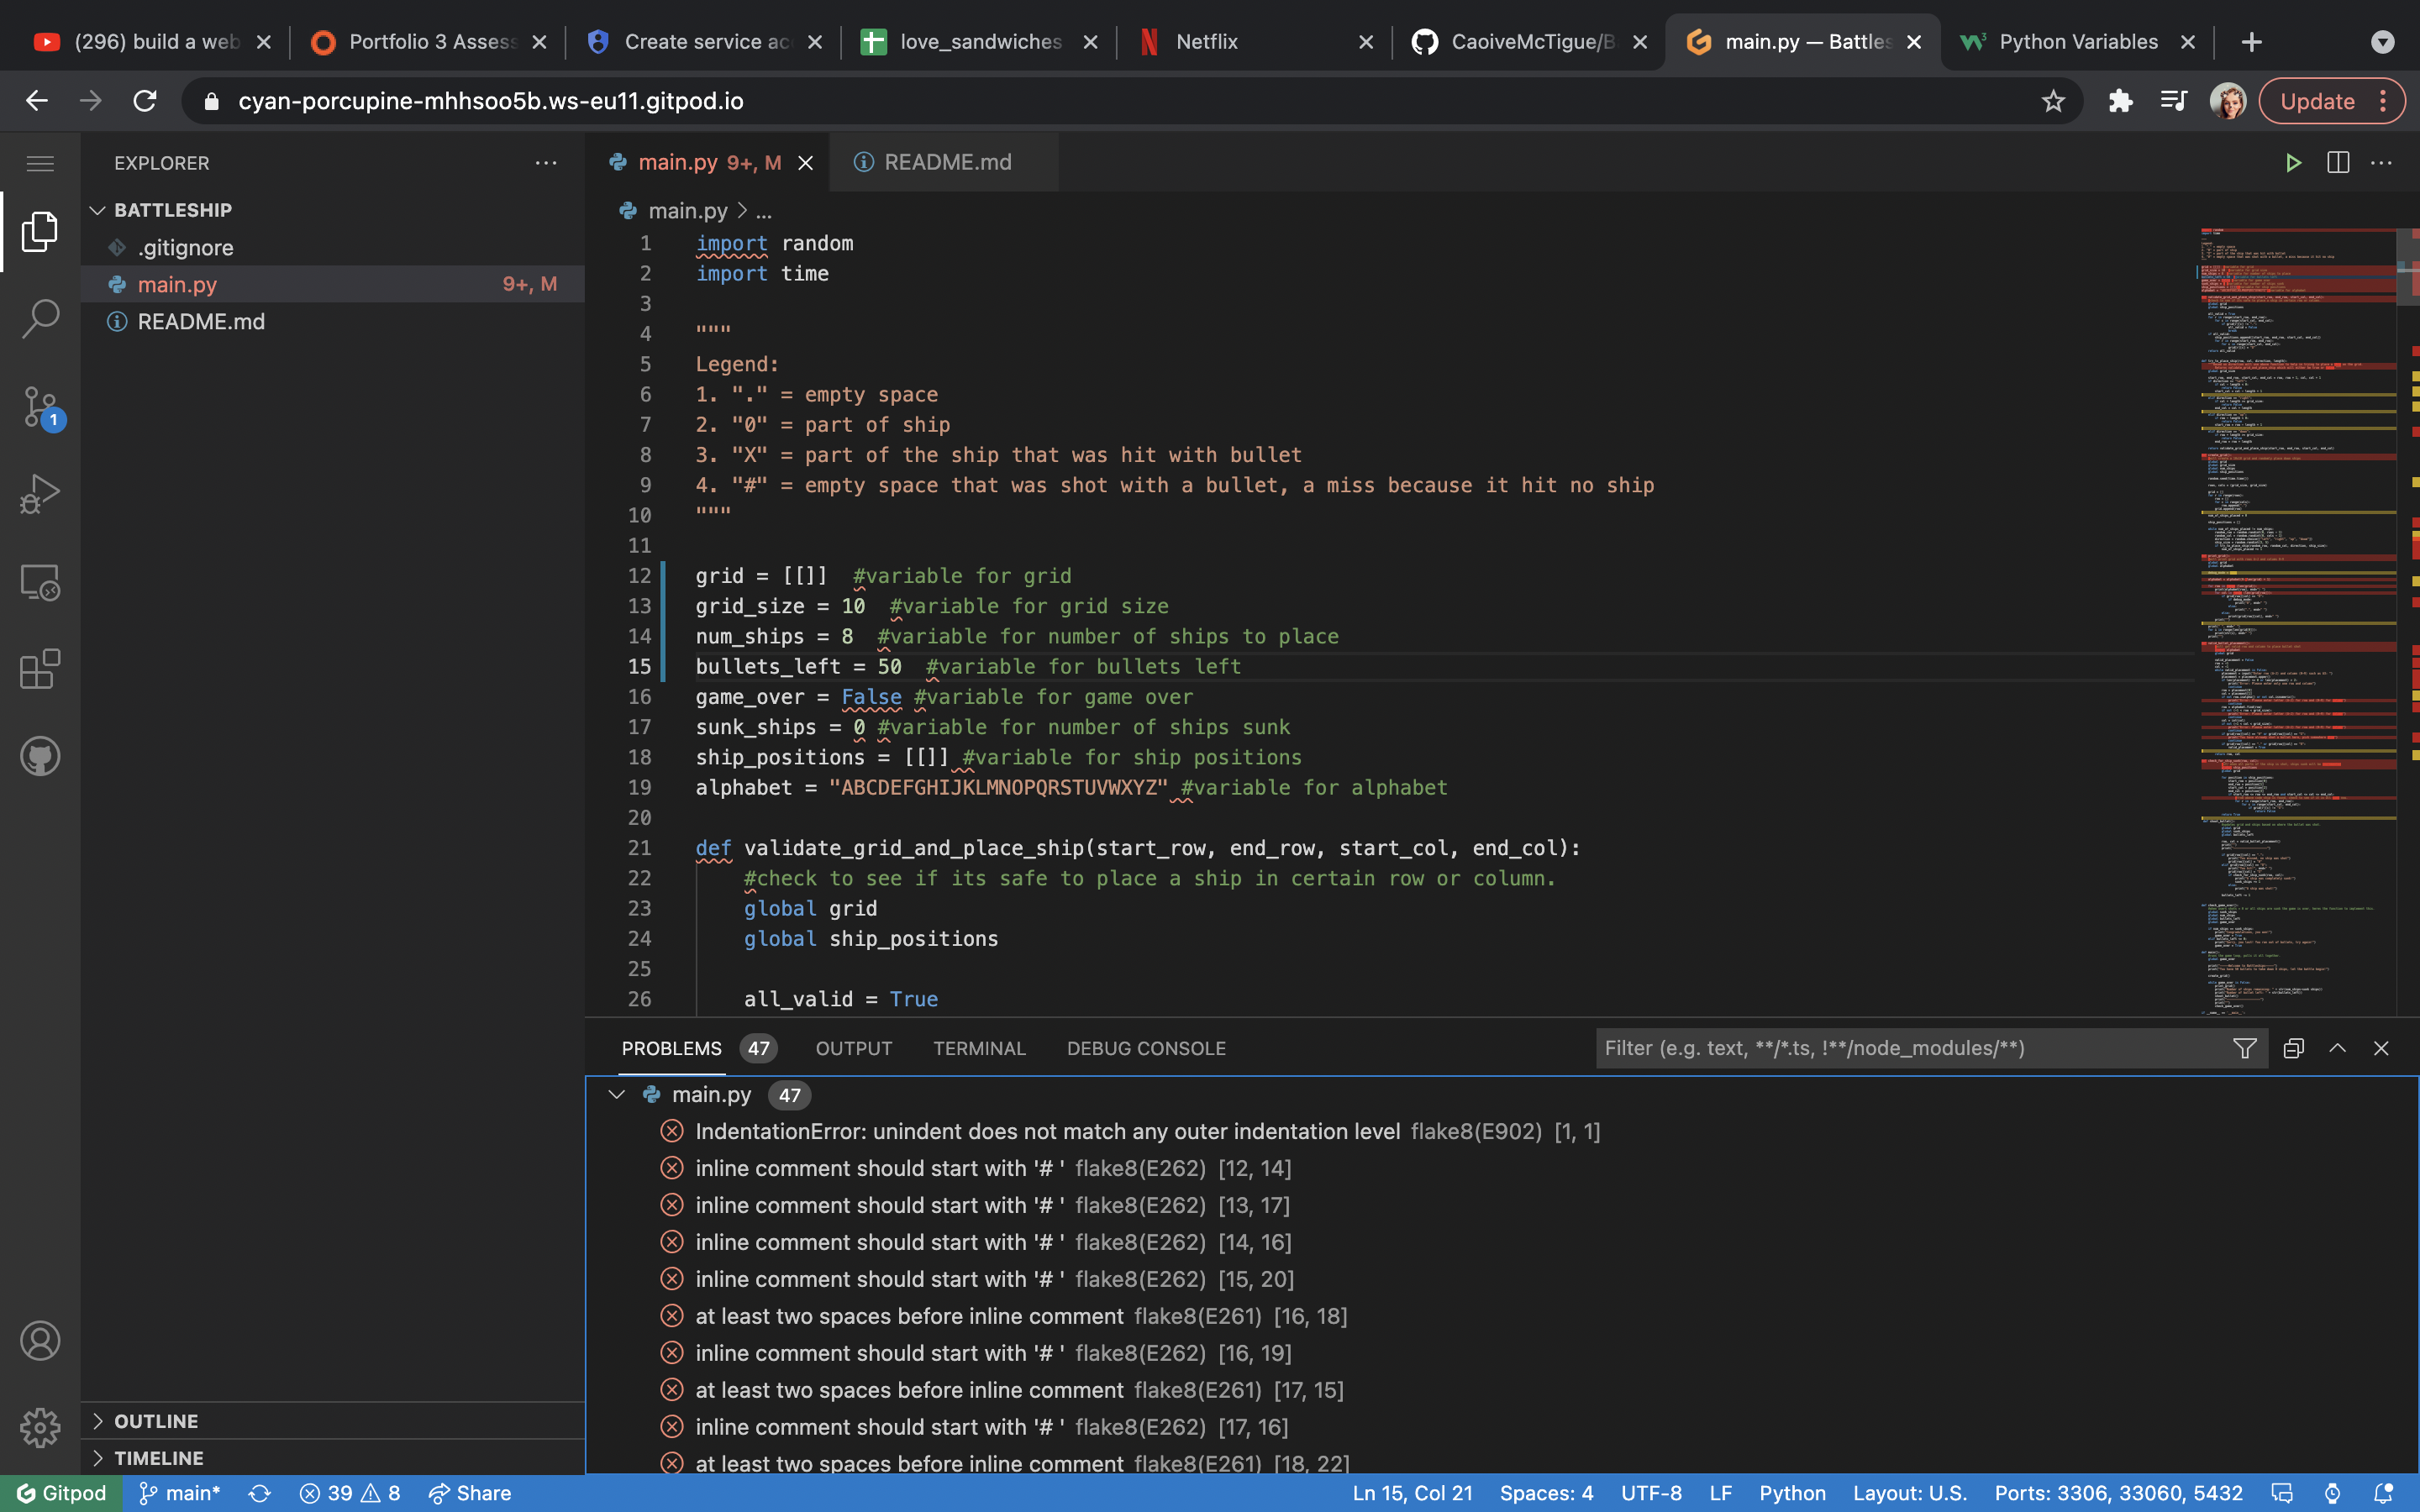
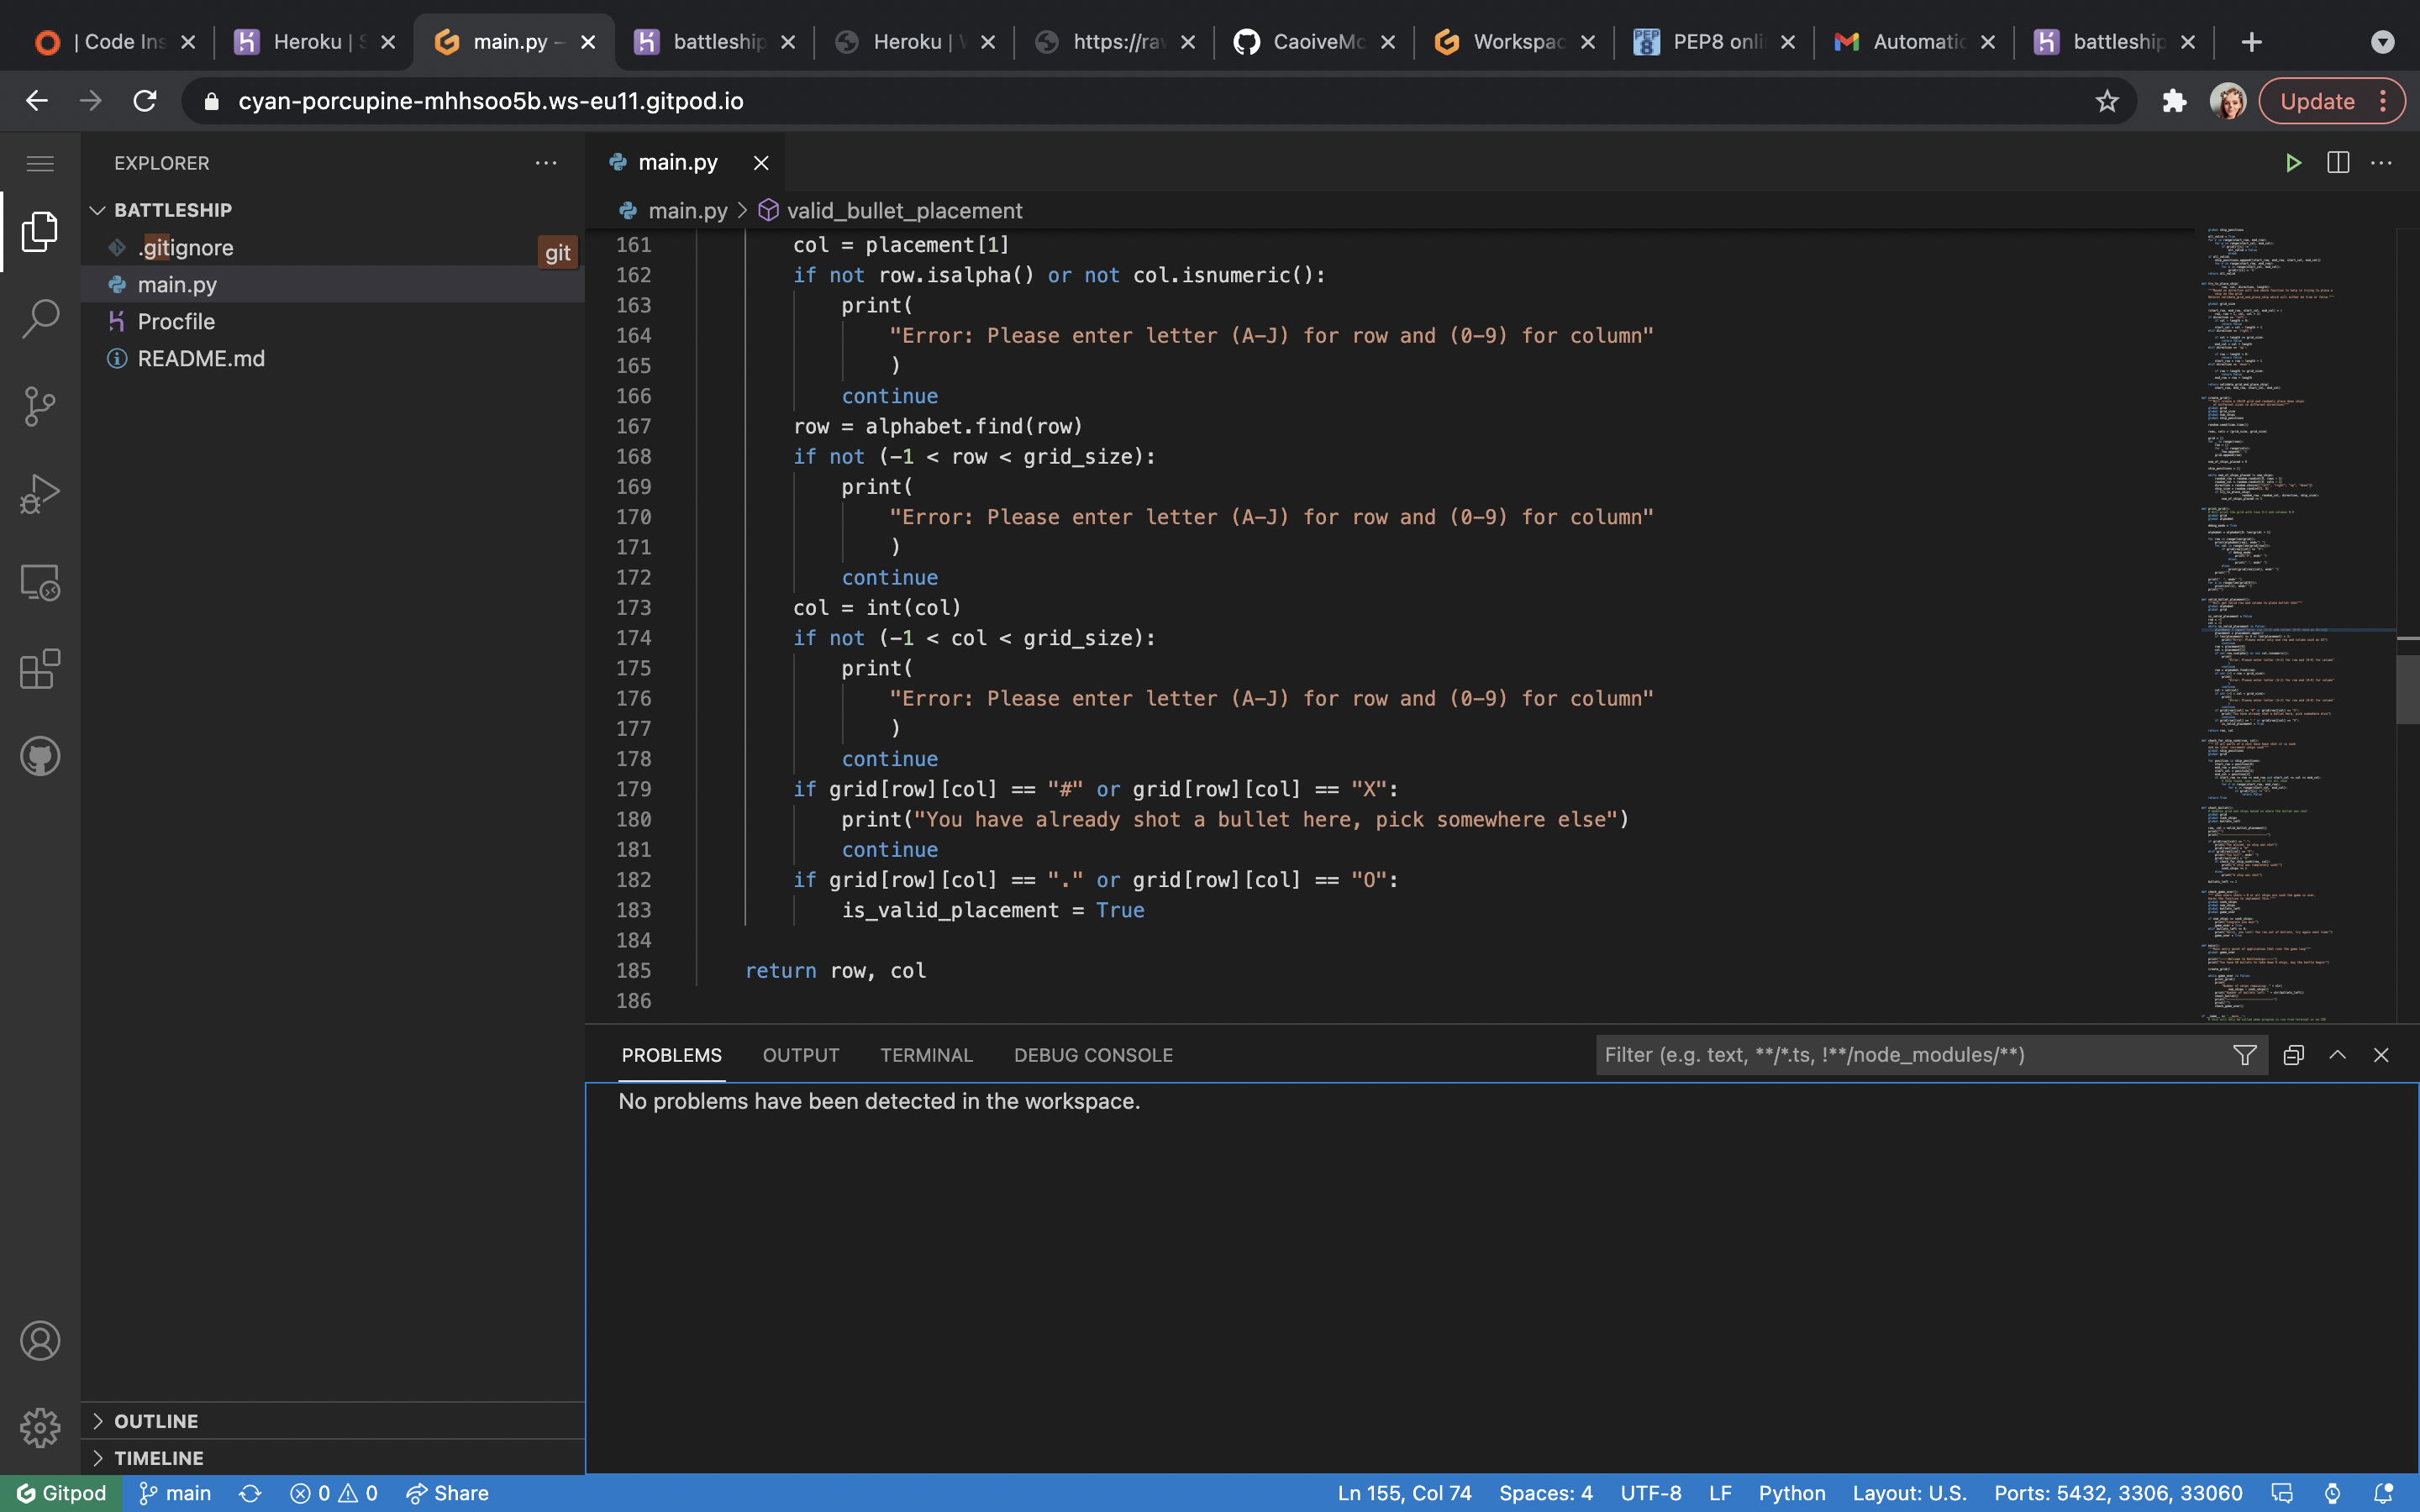
I also tested the python using PEP8. Which I have also included a screenshot of below.

I used heroku to deploy my python project. There was a number of steps to follow in order for the project to deploy correctly these included:
- The first set is to edit the gitpod code a little. Anywhere that includes an input field you must add an "\n" after the input field instead of a space.
For example: ("Enter your name:\n") - As this is my very first time to use Heroku, I had to create an account. This was very straightforward and easy to follow. I filled out the required fields within the form, some fields that were a little trickier to understand included the "Role" field which I selected "student" and "Primary development language" for which I selected "python".
- Now that my Heroku account is set up correctly. The next step is to create the app, you can do this clicking the create new app button. Then name your app. With Heroku you can only use a name once as Battleship was already taken, I named my app battleship1. Underneath the naming field, you must then select a region, here I selected europe as my region. Then click the "create app" button.
- Now select the setting tabs from the several tabs located at the top of the page. Here I added some buildpacks. Buildpacks install dependencies that we need to build the app. To do this I simply clicked the "add buildpack" button. This displays a pop up box. Add the python buildpack and click the "save changes" button. Repeat this if you need to add more buildpacks to your app but remember to save changes after each buildpack you select. I repeated the steps to add node.js buildpack with this.
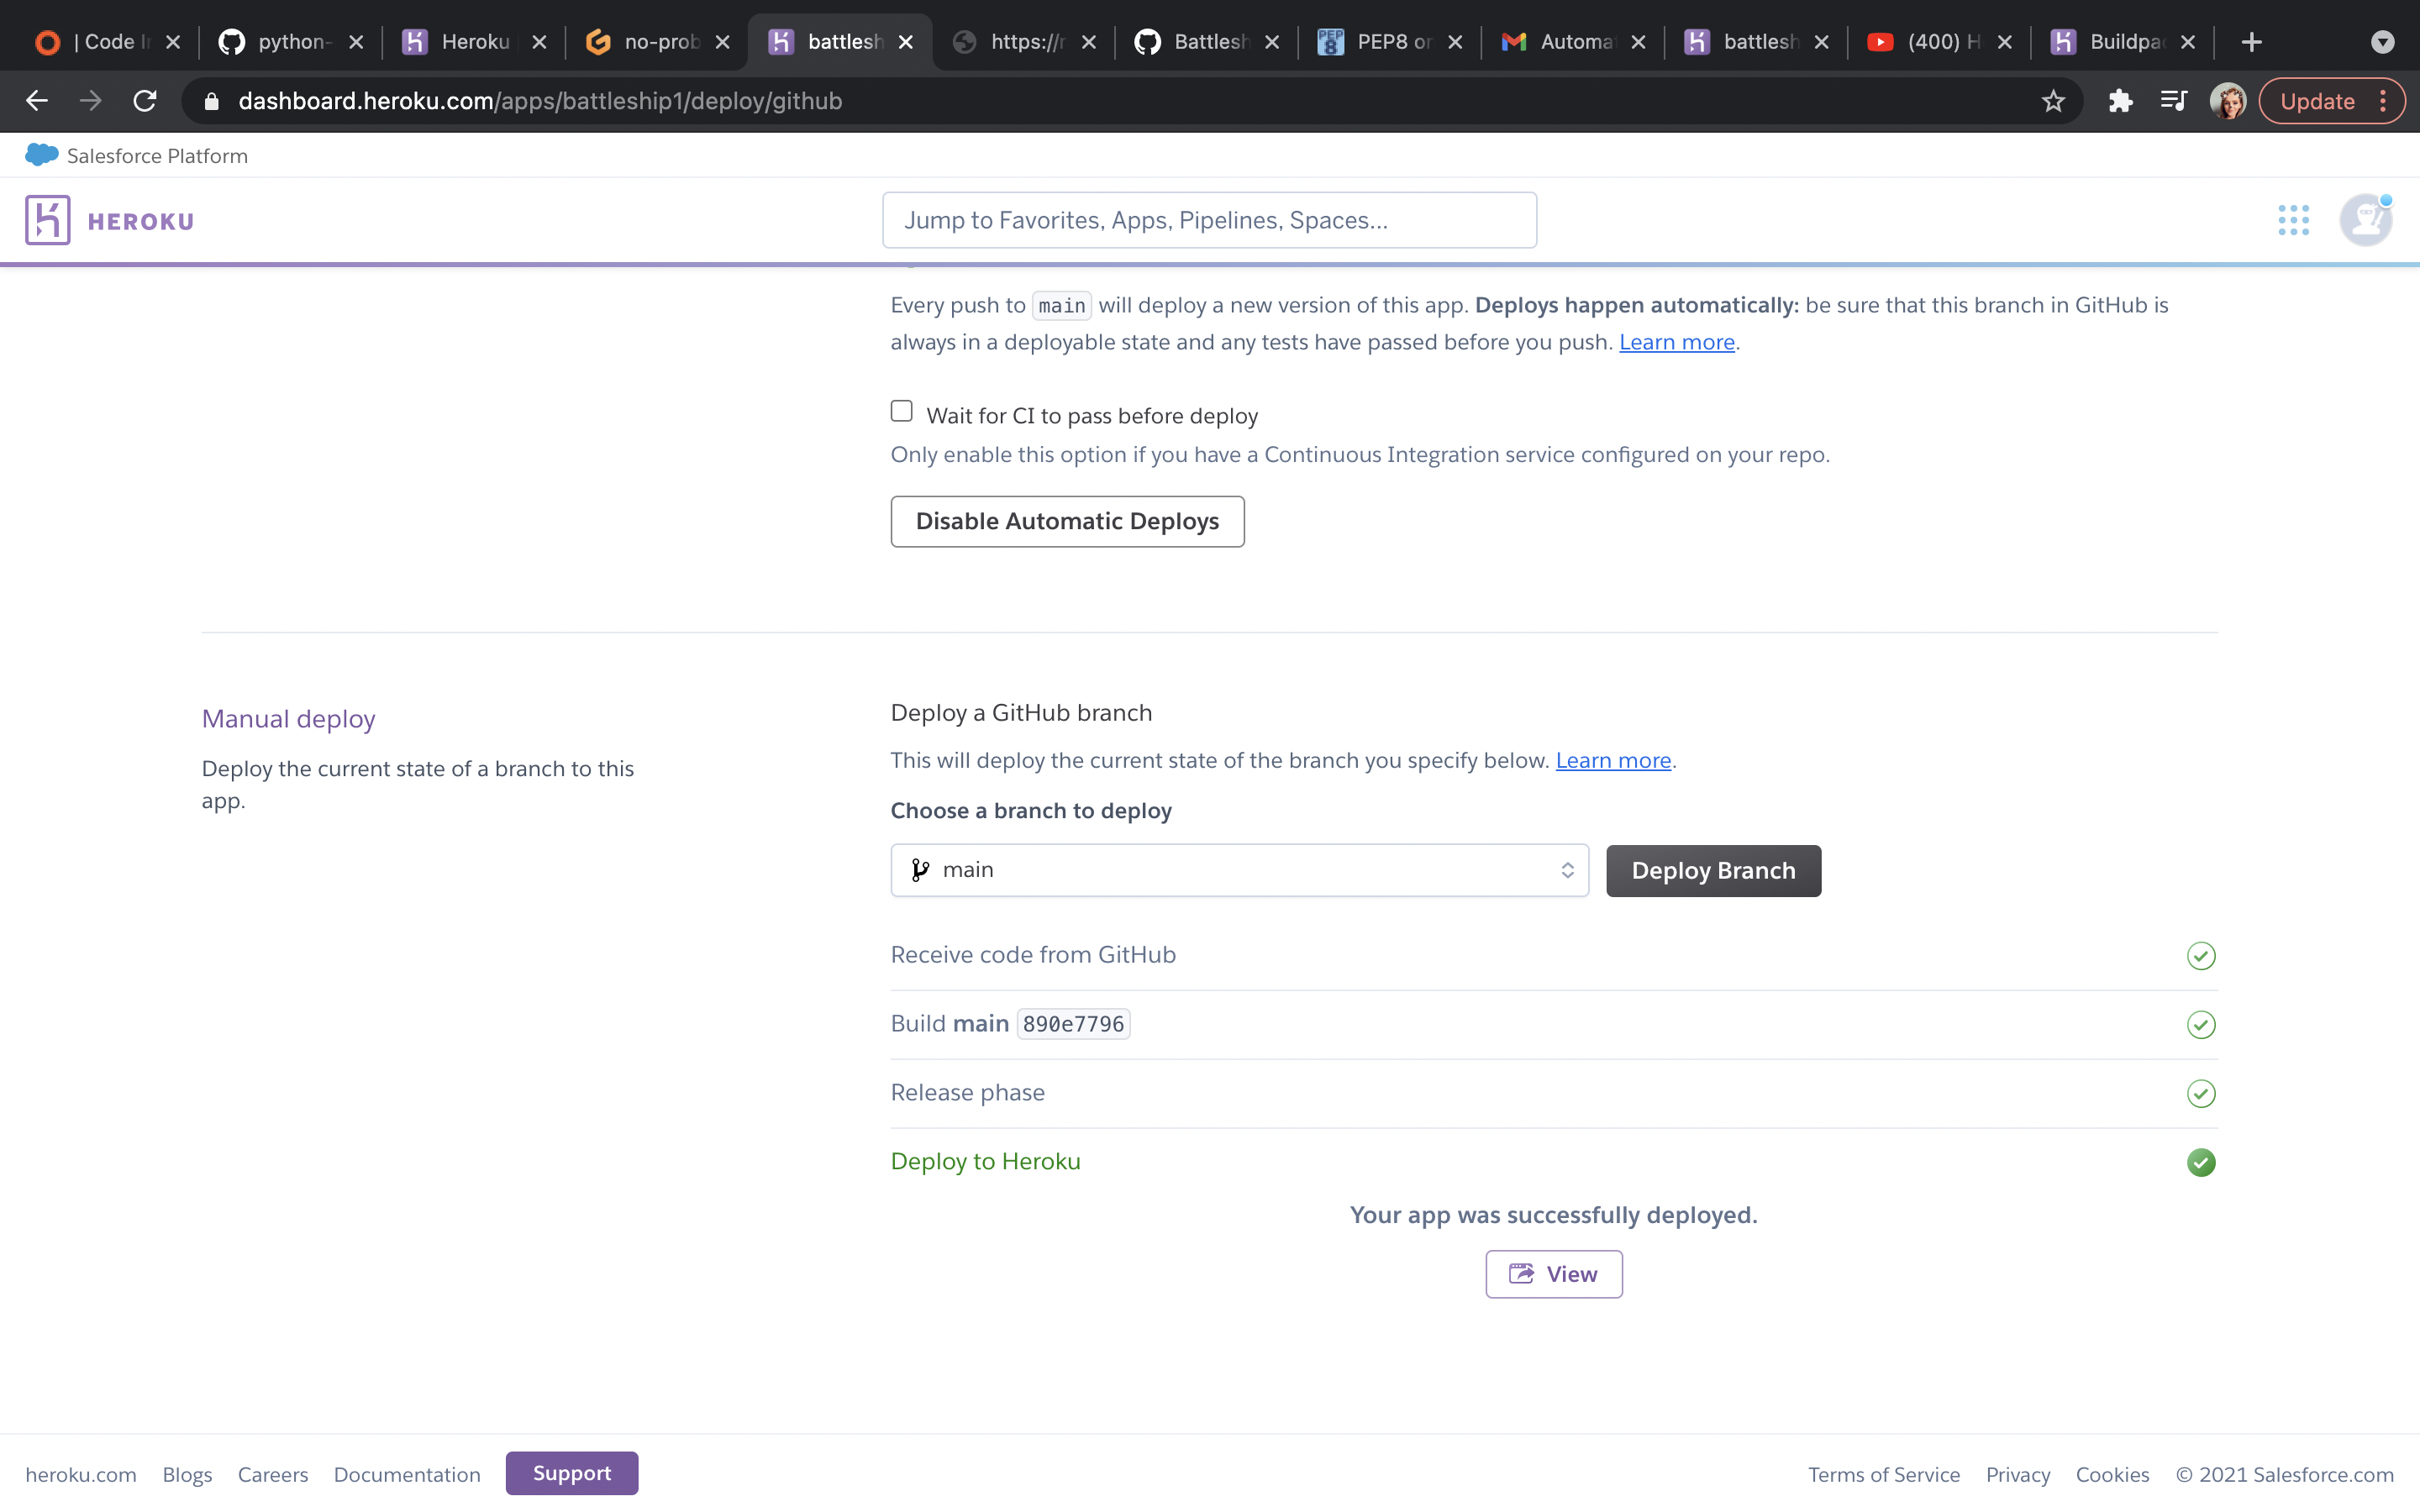
- Next I went back up to the tabs section and clicked the deploy tab. Within the deployment method section, I selected github and clicked the "connect to github" button, this took me to a new webpage where I had to put in my github password to connect. Once this had connected I then searched for the github repository name "Battleship" and then click connect again to link the Heroku app and the github repository code.
- After this, you have two options.
A) You can set up automatic deploy, this enables Heroku to rebuild your app automatically everytime you push a new change to github.
B) You can choose to manually deploy your app, using a deploy branch option.
I used the automatic deploy option, as i felt it would be much easier to have the code deployed everytime it was pushed to [github](https://github.com/CaoiveMcTigue). Once you select your option, you can see the different packages and code running to build your app. 7. Finally you will see "app was successfully deployed" message and a button to take you to the deployed link. 8. The program will run automatically from this link and any time you want to restart it, click the "run program" button at the top of the page.
Visit the deployed site here.
-----> Building on the Heroku-20 stack -----> Using buildpack: heroku/nodejs -----> Node.js app detected
-----> Creating runtime environment
   NPM_CONFIG_LOGLEVEL=error
   NODE_VERBOSE=false
   NODE_ENV=production
   NODE_MODULES_CACHE=true
-----> Installing binaries engines.node (package.json): unspecified engines.npm (package.json): unspecified (use default)
   Resolving node version 14.x...
   Downloading and installing node 14.17.3...
   Using default npm version: 6.14.13
-----> Restoring cache - node_modules
-----> Installing dependencies
Installing node modules (package.json)
audited 33 packages in 0.529s
found 4 vulnerabilities (3 low, 1 high)
run npm audit fix to fix them, or npm audit for details
-----> Build
-----> Caching build - node_modules
-----> Pruning devDependencies
audited 33 packages in 0.545s
found 4 vulnerabilities (3 low, 1 high)
run npm audit fix to fix them, or npm audit for details
-----> Build succeeded! -----> Discovering process types Procfile declares types -> web -----> Compressing... Done: 97.9M -----> Launching... Released v13 https://battleship1.herokuapp.com/ deployed to Heroku
As always I relied heavily on my code institute course notes.
I also used a number of websites and Youtube videos when building this battleships game in python these include:
