
This exercise allows you to practice and apply the concepts and techniques taught in class.
Upon completion of this exercise, you will be able to:
- Install and set up React Router in a React application.
- Create a React application that contains multiple pages using React Router.
- Use React Router
Linkto navigate between pages. - Use React Router hook
useParamsto access URL parameters. - Create page components that dynamically render content based on URL parameter values.
In this exercise, you will practice using React Router to create a multi-page React application. The application that you will be working on today is called Cohort Tools. It is a simple application that allows a teacher to manage students in a cohort of a coding bootcamp.
- Fork this repo
- Clone this repo
cd lab-react-cohort-tools
npm install
npm run dev-
Upon completion, run the following commands:
git add . git commit -m "done" git push origin master -
Create a Pull Request and submit your assignment.
To help you get started quickly and let you focus only on practicing React Router without any distractions, we have provided you with the starter code and all the required page components. This means there's no need for you to create any new components. Instead, your task is to set up React Router and use it to display the provided pages.
Once you are done setting up the React Router and the navigation between pages, you will need to use React Router to access URL parameters and create a dynamic page that renders content based on the URL parameter values. Let's get started!
Set up React Router in your src/main.jsx file following the below example:
Example
// src/main.jsx
import ReactDOM from "react-dom/client";
import "./index.css";
import App from "./App";
import { BrowserRouter as Router } from "react-router-dom";

const root = ReactDOM.createRoot(document.getElementById("root"));

root.render(
  <React.StrictMode>
    <Router>
      <App />
    </Router>
  </React.StrictMode>
);In the App.jsx, you will find the following page components:
<HomePage /><StudentDetailsPage /><UserProfilePage />
These components are currently being rendered one below the other. Each component has a border around it to distinguish between each page component more easily. Your task is to set up React Router routes and show them on specified routes.
In your App.jsx set up three routes that render the page components as follows:
- Route
/for theHomePage. - Route
/students/:studentIdfor theStudentDetailsPage. - Route
/profilefor theUserProfilePage.
See Expected Result
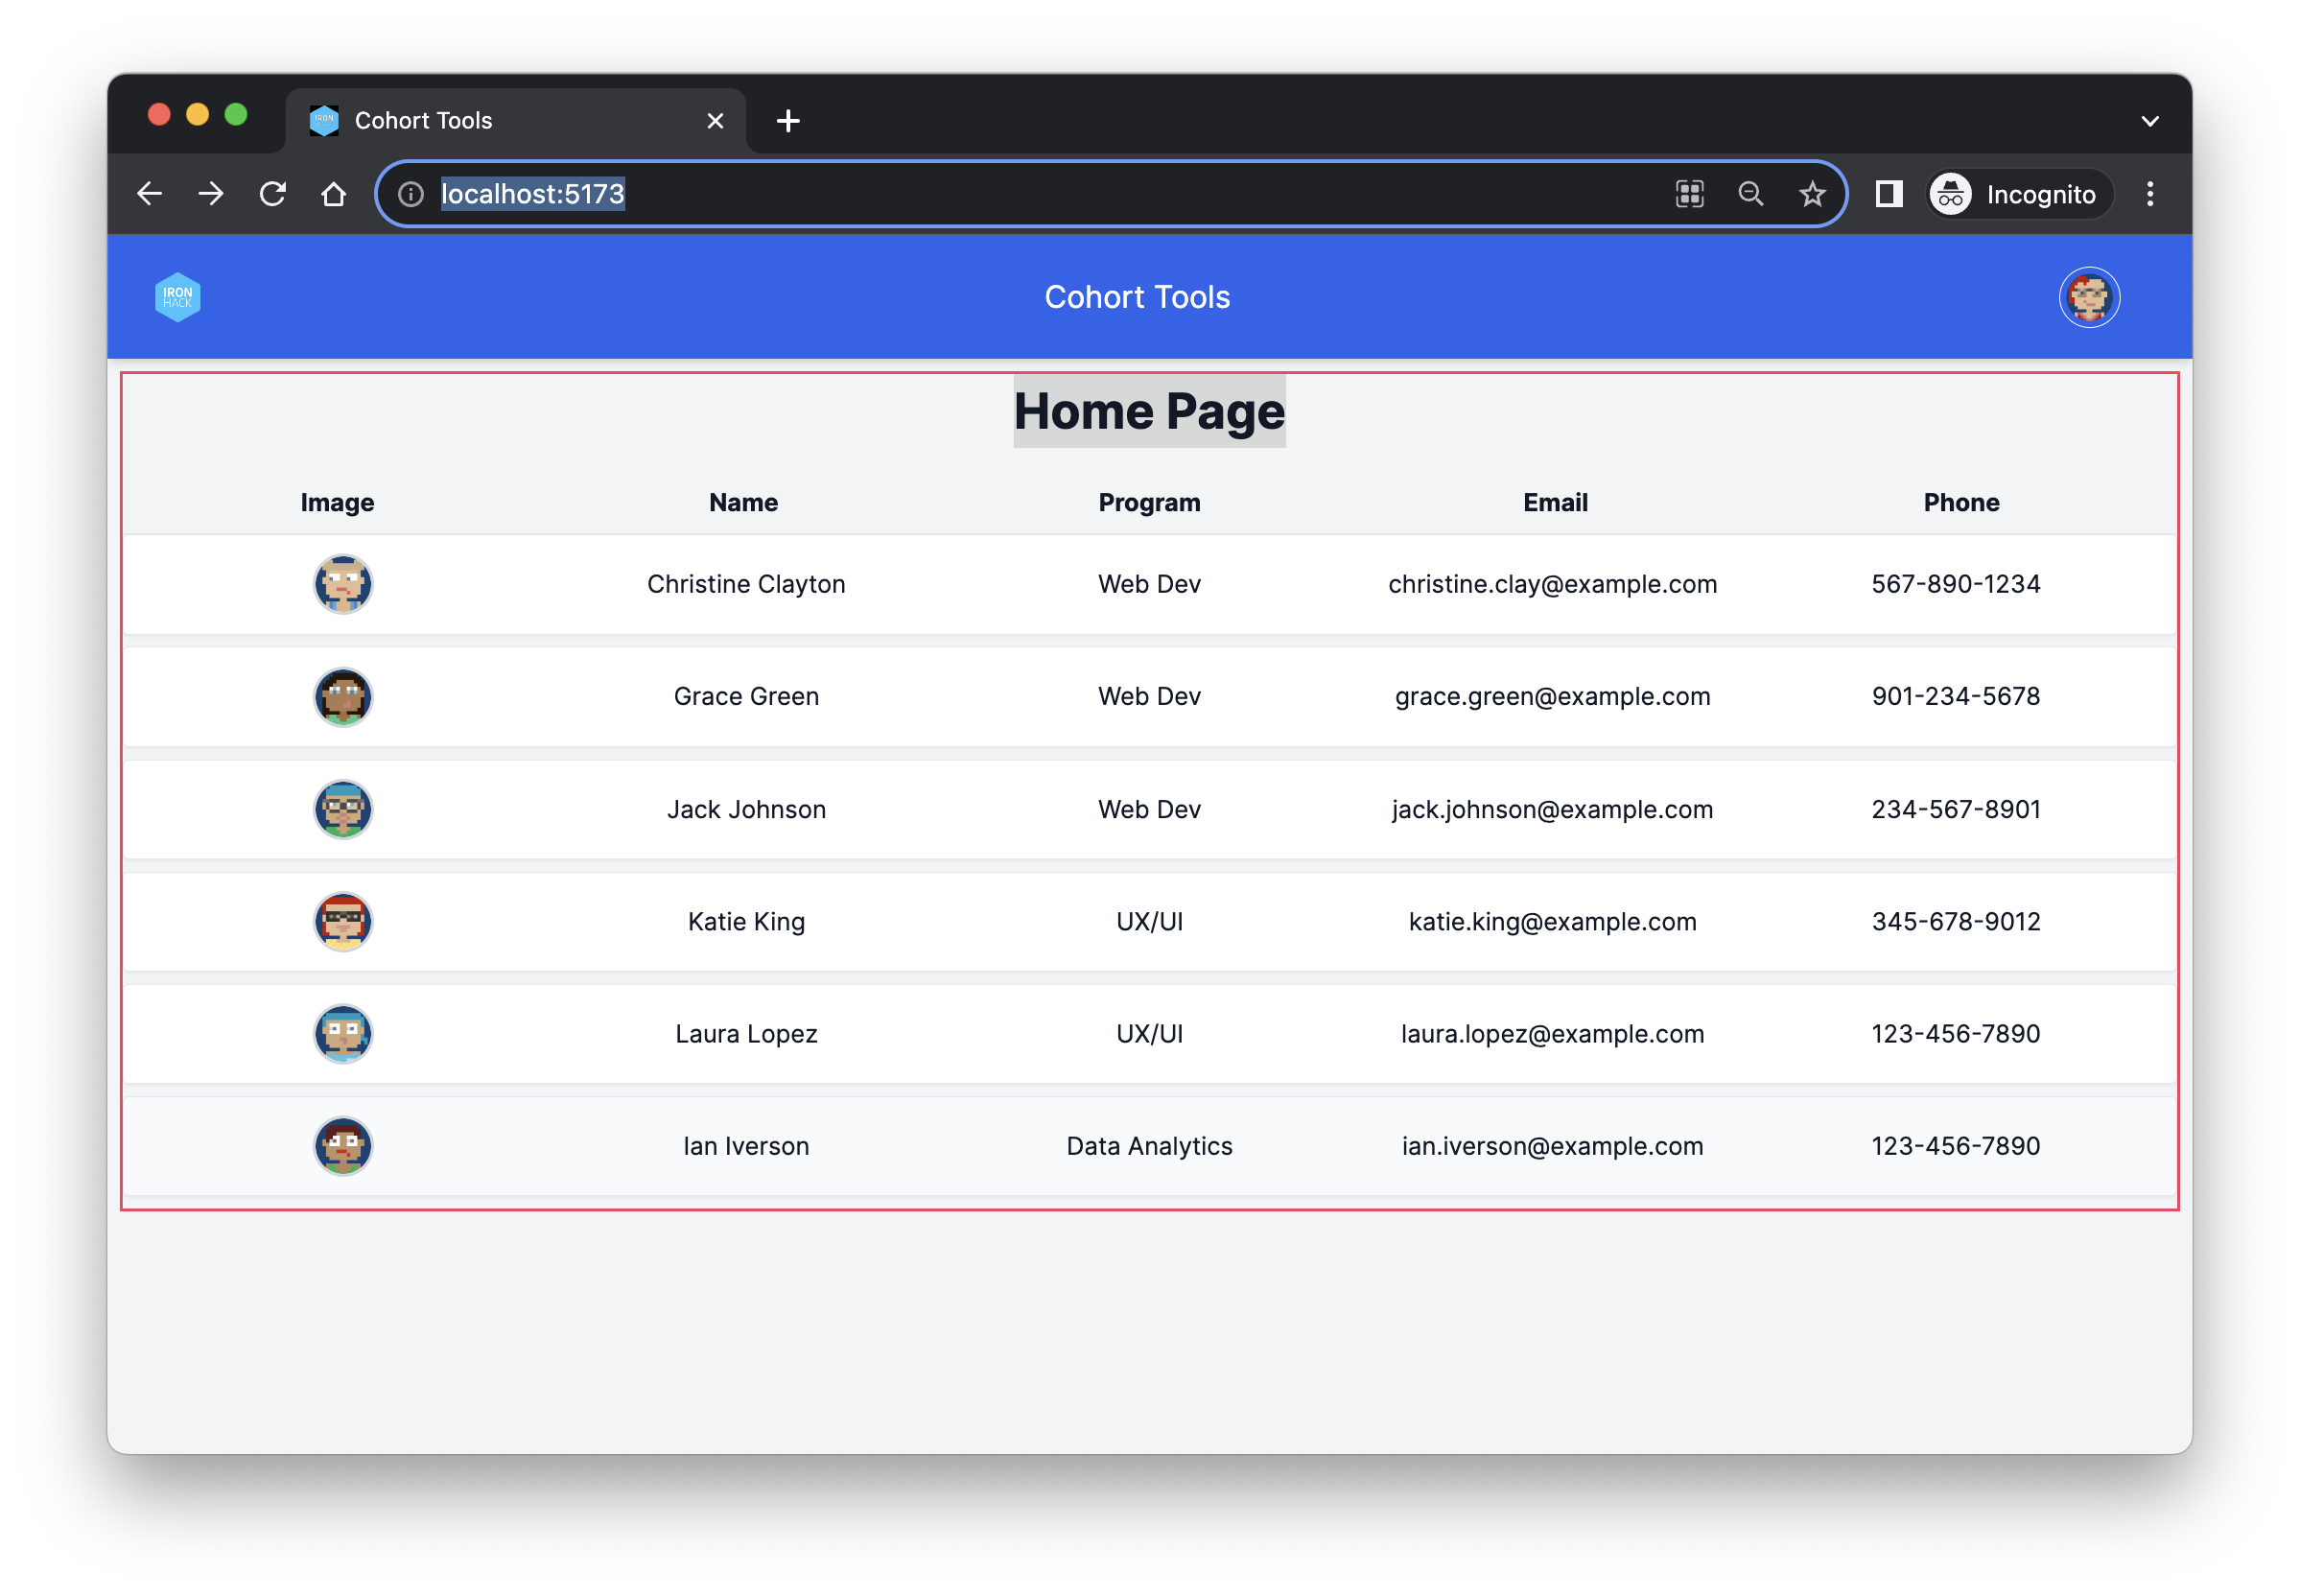
HomePage - /
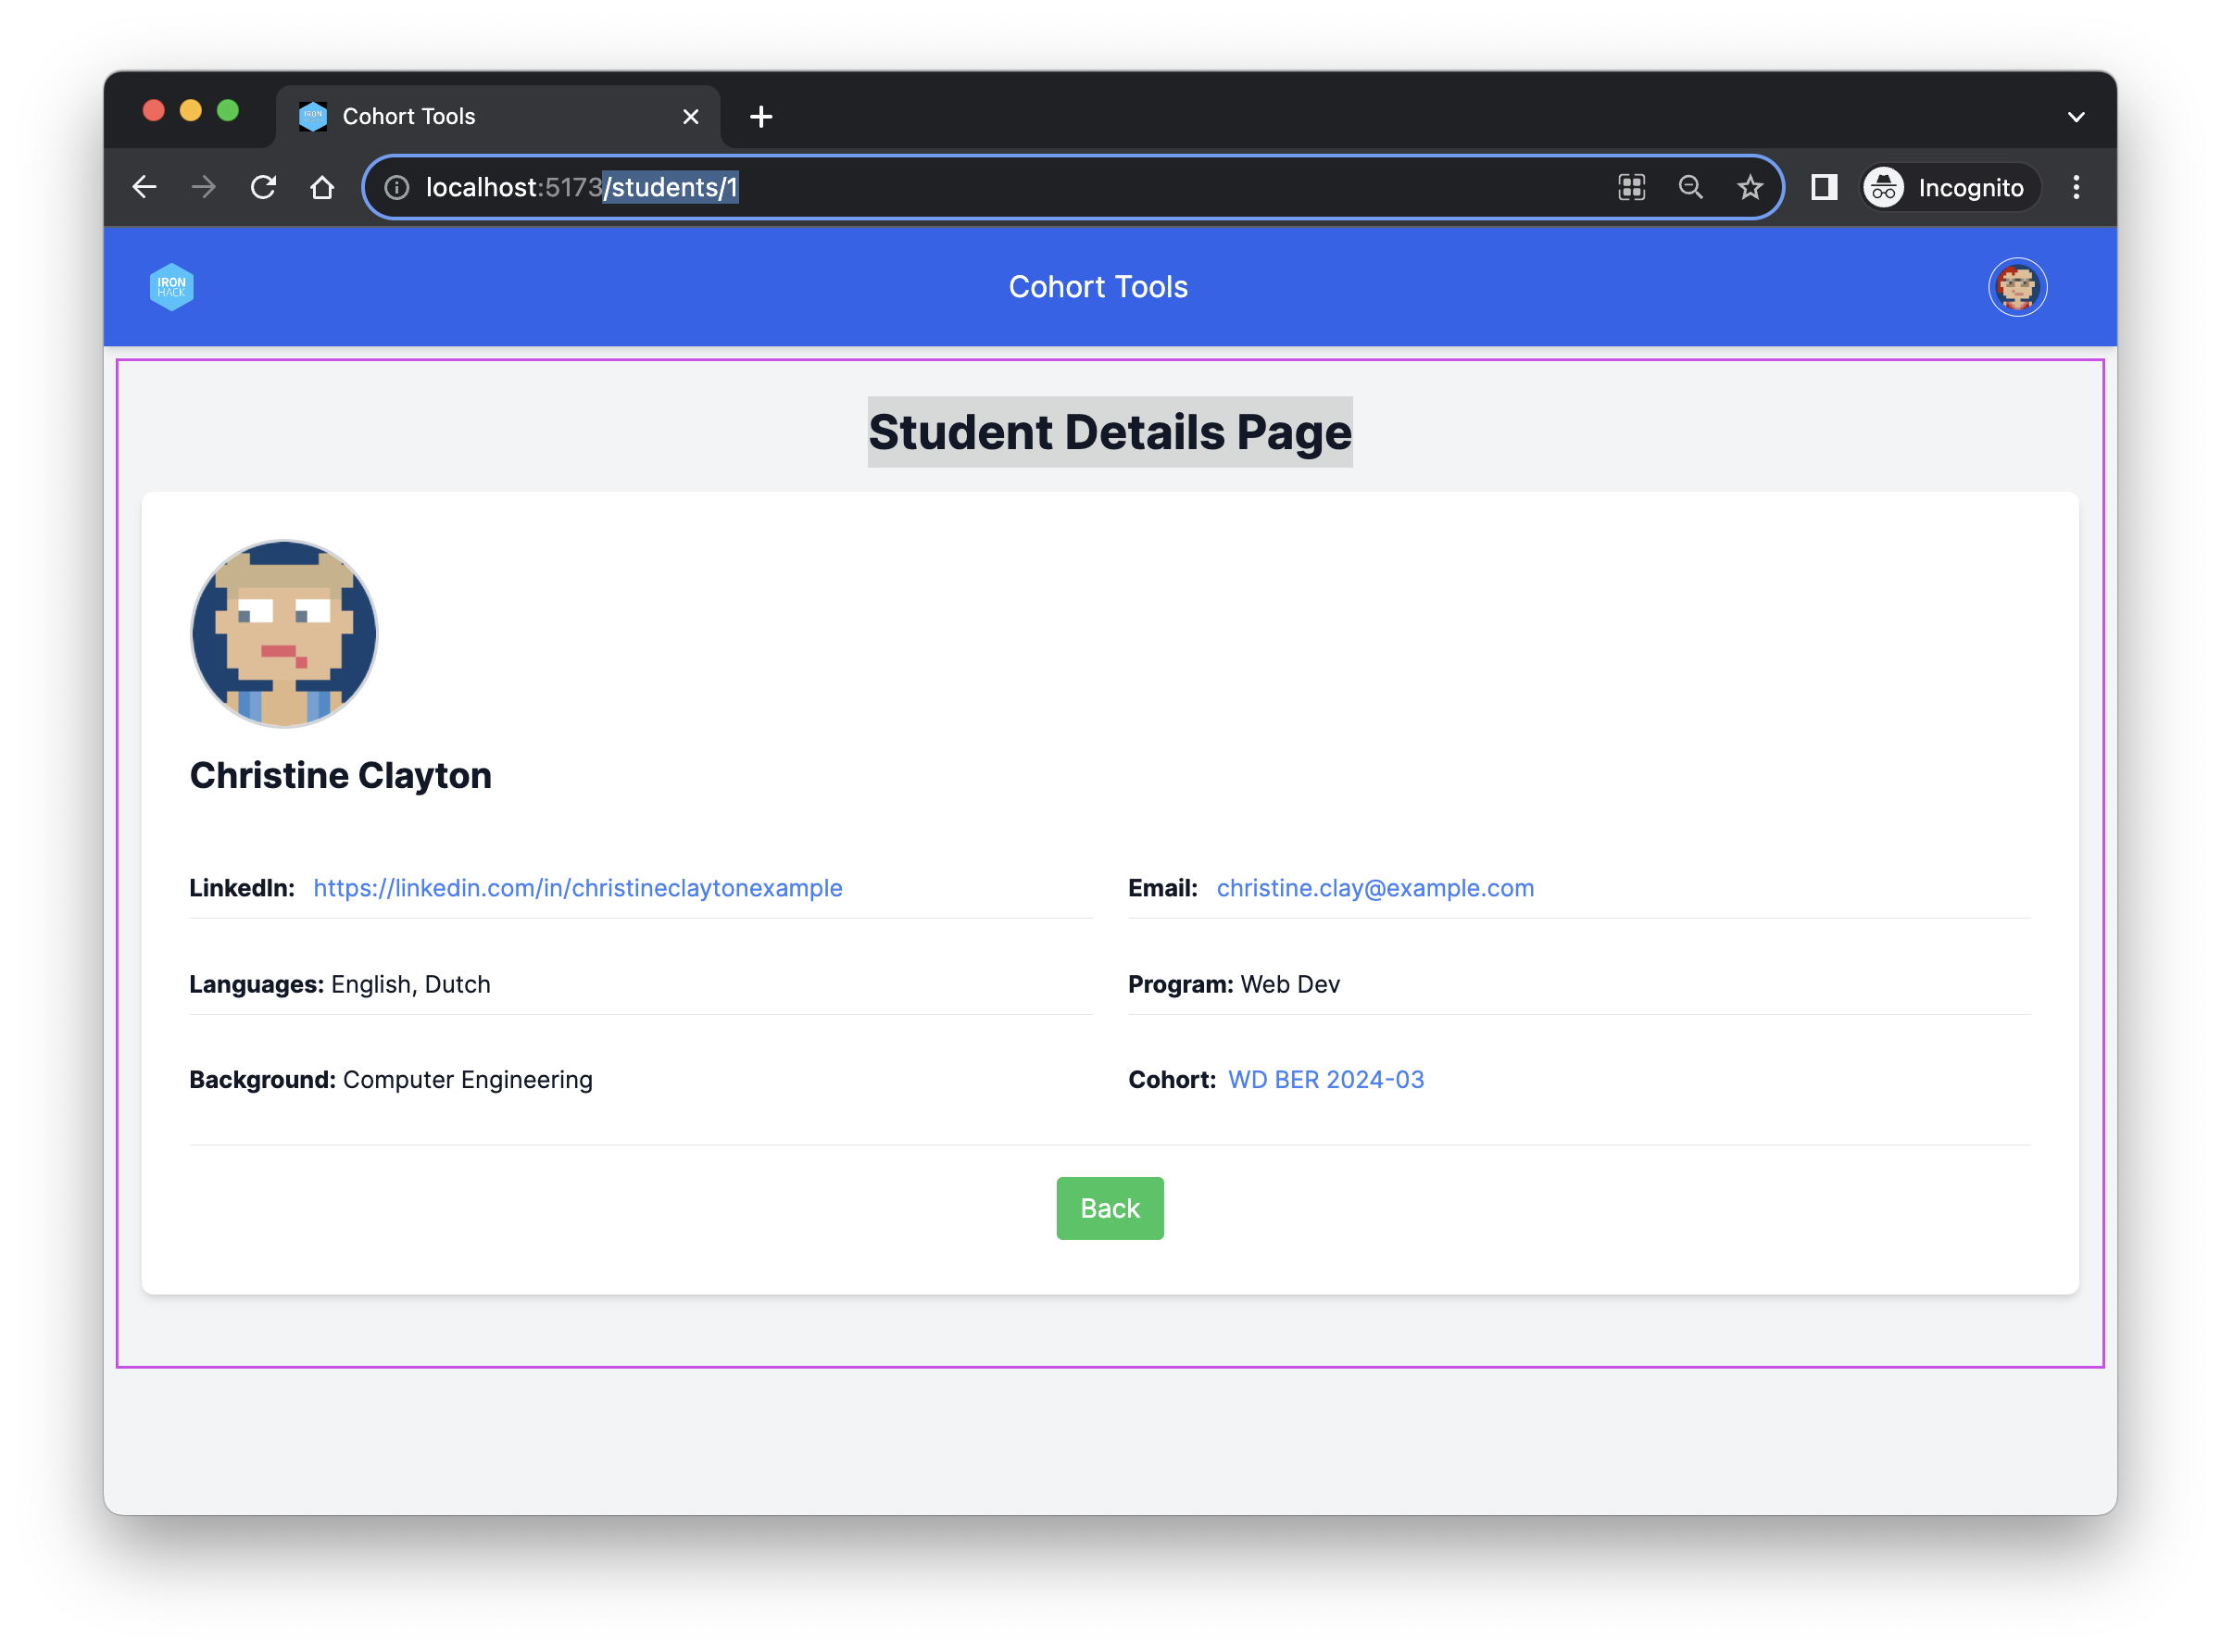
StudentDetailsPage - /students/:studentId
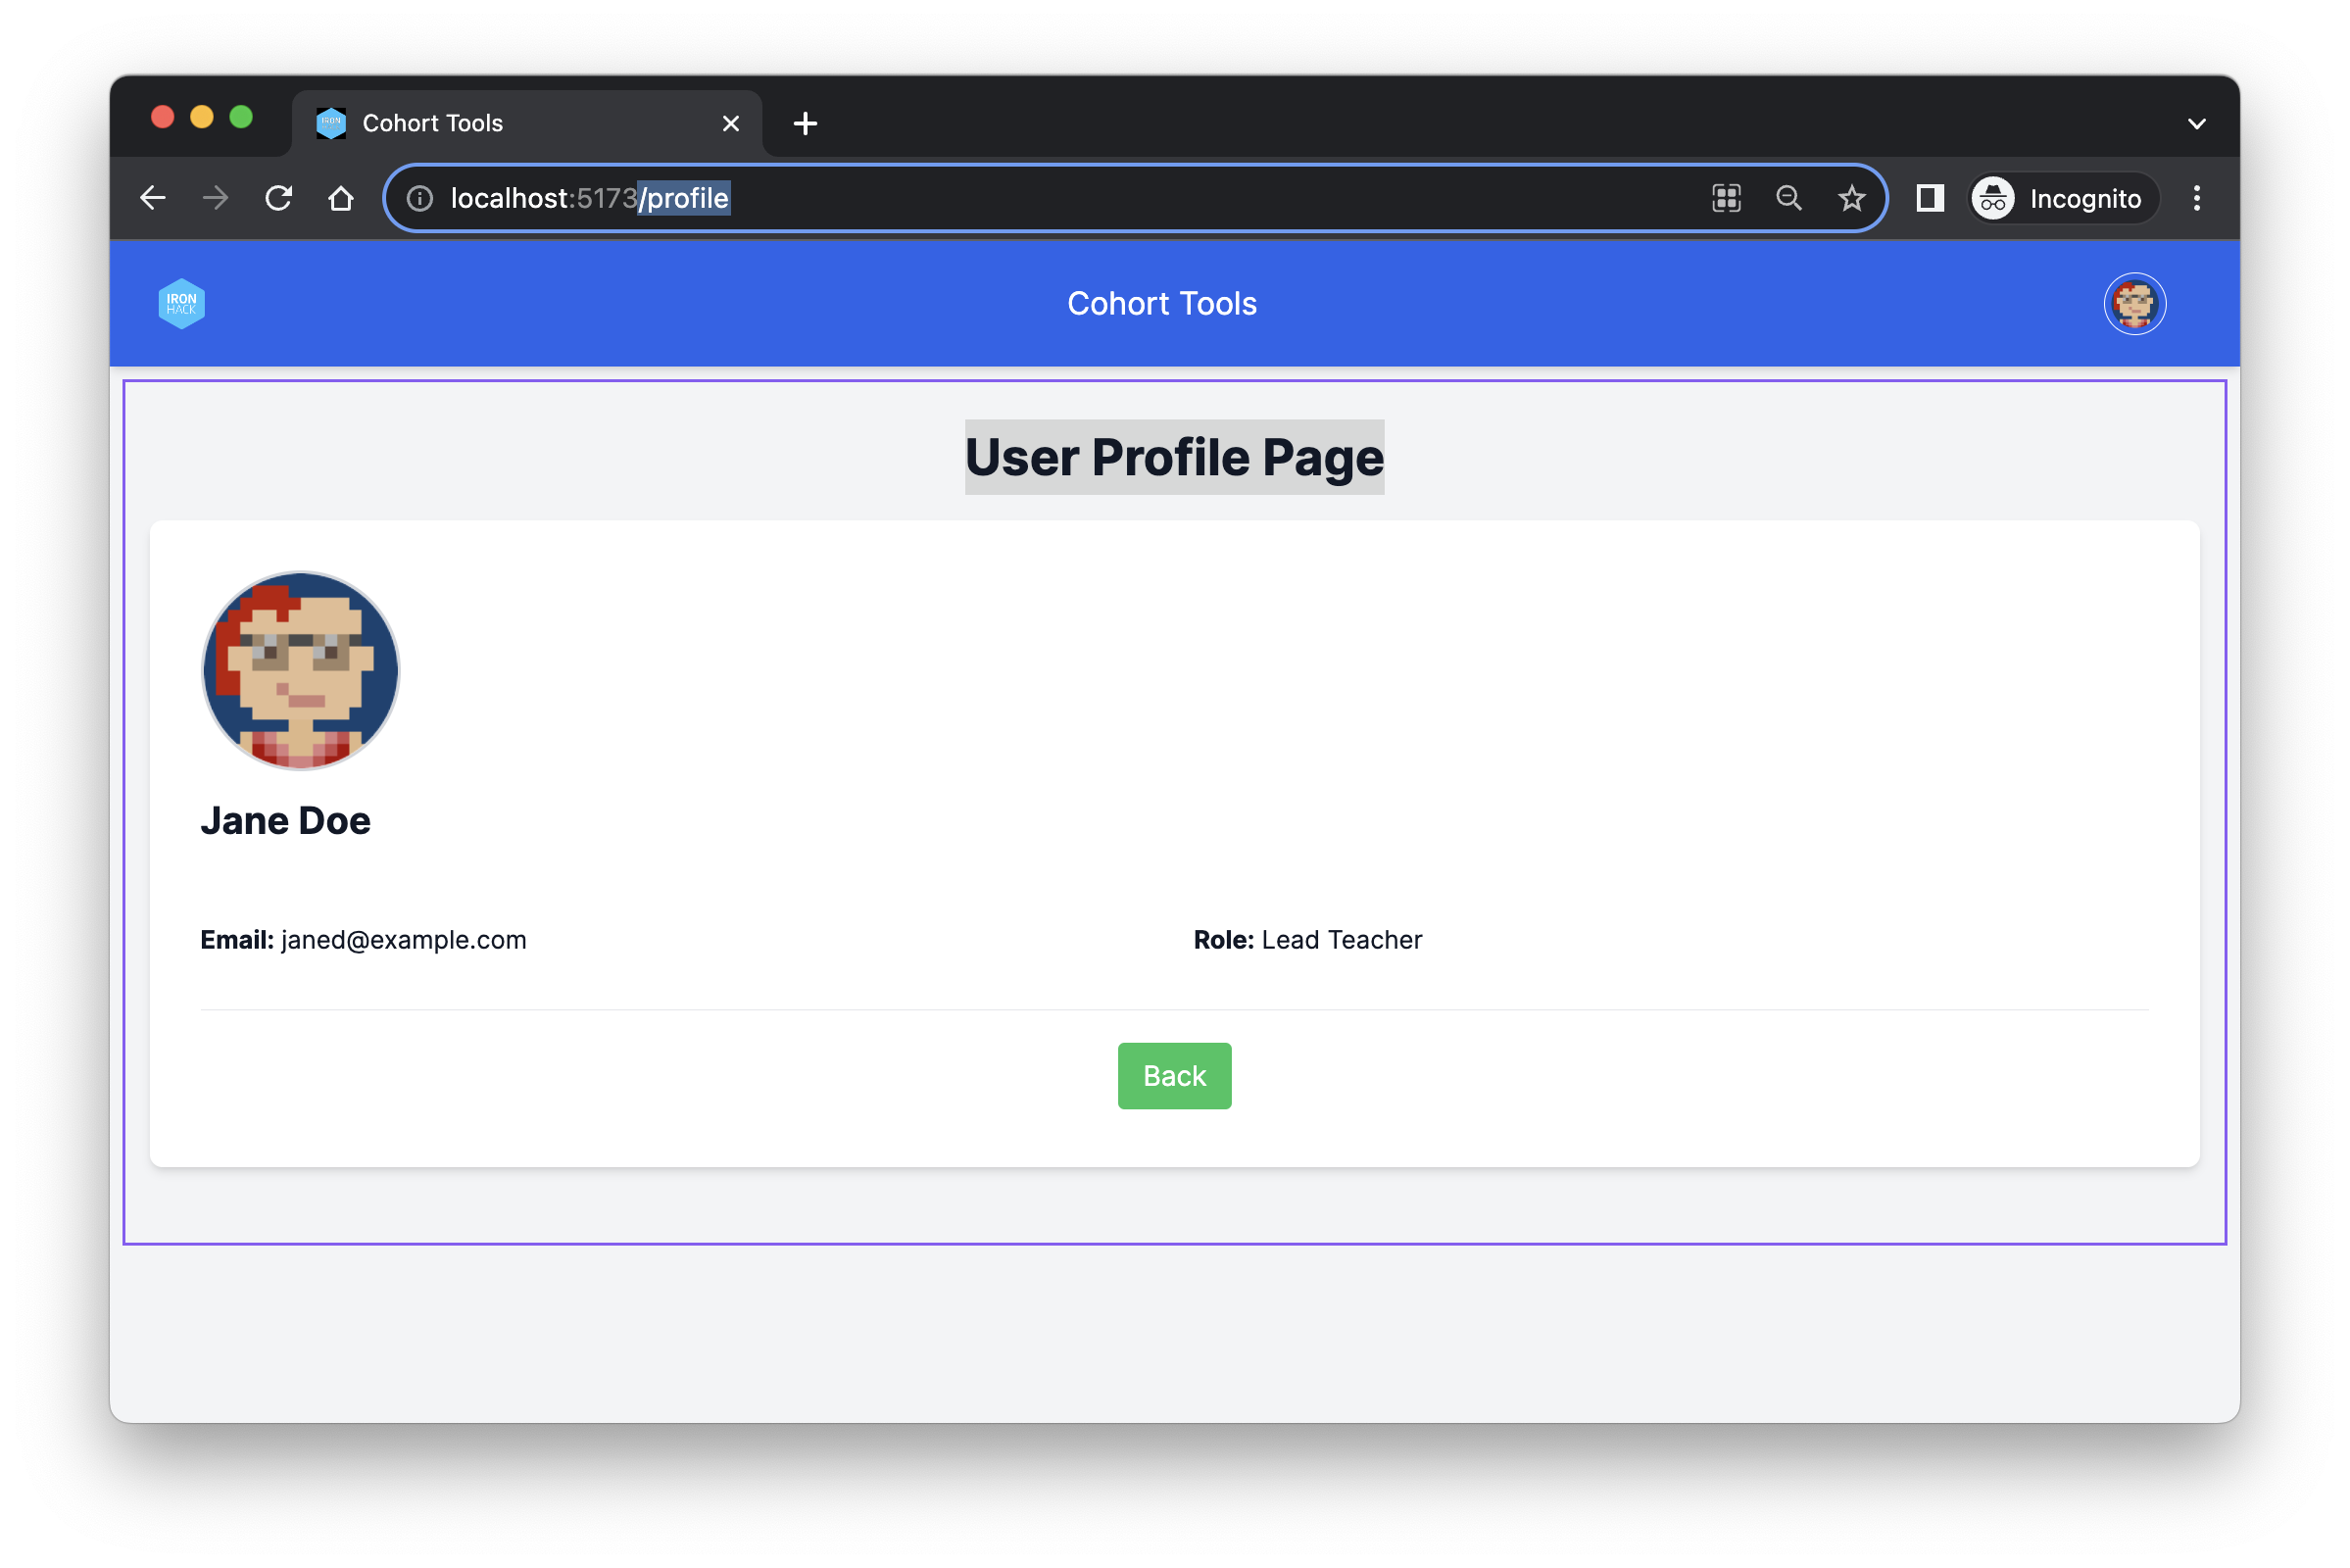
UserProfilePage - /profile
To make it easy to move from one page to another without having to manually enter a new URL, it is important to provide a way to navigate between different pages of your application. The React Router's Link element allows you to create links that allow users to navigate from one page to another.
Add the links in the following components as explained below:
-
In the
Navbarcomponent:-
A link to
/profile(User Profile Page) on the user icon in the top right corner. -
A link to
/(Home Page) on the logo in the top left corner.
See Expected Result
-
-
In the
UserProfilePagecomponent:- A link to
/(Home Page) on the Back button that takes you back.
See Expected Result
- A link to
-
In the
StudentDetailsPagecomponent:- A link to
/(Home Page) on the Back button that takes you back.
See Expected Result
- A link to
-
In the
HomePagecomponent:- A link to
/students/:studentId(Student Details Page) on each student list item in the list of students. The link should contain the student's_idas a URL parameter.
See Expected Result
- A link to
If you have correctly implemented the link in the previous step, when a user clicks on any student card shown on the list on the home page, they should be navigated to the StudentDetailsPage, as shown below. Additionally, the URL displayed in the address bar should change to /students/:studentId, where the :studentId is the actual _id of the selected student, for example /students/1.
The component StudentDetailsPage currently displays the same content at all times, featuring a student with an _id 1, since the value was hard-coded. Your task is to update the component logic and make the component dynamic so that it shows the information of the selected student.
To be able to find a corresponding student that was selected, you'll need to access the studentId passed as the URL parameter. To access the URL parameters from the browser's URL bar, use the React Router hook useParams.
If you need a reminder on how to set up the useParams hook and access the URL parameters, check this example.
See Expected Result
Happy coding! 💙
I am stuck and don't know how to solve the problem or where to start. What should I do?
If you are stuck in your code and don't know how to solve the problem or where to start, you should take a step back and try to form a clear question about the specific issue you are facing. This will help you narrow down the problem and come up with potential solutions.
For example, is it a concept that you don't understand, or are you receiving an error message that you don't know how to fix? It is usually helpful to try to state the problem as clearly as possible, including any error messages you are receiving. This can help you communicate the issue to others and potentially get help from classmates or online resources.
Once you have a clear understanding of the problem, you will be able to start working toward the solution.
How do you set up the React Router in a React app?
To set up the React Router in your React application, follow these steps:
- Install React Router package by running the following command from the root folder:
npm install react-router-dom- Import the
BrowserRoutercomponent in your app's entry point (usuallymain.jsx) and wrap your<App />component with it:
import { BrowserRouter as Router } from "react-router-dom";

const root = ReactDOM.createRoot(document.getElementById("root"));

root.render(
  <React.StrictMode>
    <Router>
      <App />
    </Router>
  </React.StrictMode>
);- Import the components
RoutesandRouteinApp.js:
import { Routes, Route } from "react-router-dom";- Define the routes (pages) in your app using the components
RoutesandRoutecomponent:
import { Routes, Route } from "react-router-dom";
import HomePage from "./pages/HomePage";
import AboutPage from "./pages/AboutPage";

function App() {
  return (
    <div className="App">
      {/* Add <Route /> components between <Routes> </Routes>   */}
      <Routes>
        <Route path="/" element={<HomePage />} />
        <Route path="/about" element={<AboutPage />} />
      </Routes>
    </div>
  );
}

export default App;I am getting an error: "not defined". How do I fix it?
The "ReferenceError: variable is not defined" error in JavaScript occurs when you try to access a variable or a function that has not been defined yet or is out of scope.
To fix the issue, check that you have defined the variable or function that you are trying to use and double-check the spelling to make sure you are using the correct name.
In case the variable or a function is defined in another file, make sure that the file has been imported or loaded correctly.
I am unable to push changes to the repository. What should I do?
There are a couple of possible reasons why you may be unable to push changes to a Git repository:
-
You have not committed your changes: Before you can push your changes to the repository, you need to commit them using the
git commitcommand. Make sure you have committed your changes and try pushing again. To do this, run the following terminal commands from the project folder:git add . git commit -m "Your commit message" git push
-
You do not have permission to push to the repository: If you have cloned the repository directly from the main Ironhack repository without making a Fork first, you do not have write access to the repository. To check which remote repository you have cloned, run the following terminal command from the project folder:
git remote -v
If the link shown is the same as the main Ironhack repository, you will need to fork the repository to your GitHub account first, and then clone your fork to your local machine to be able to push the changes.
Note: You may want to make a copy of the code you have locally, to avoid losing it in the process.
