

This exercise allows you to practice and apply the concepts and techniques taught in class.
Upon completion of this exercise, you will be able to:
- Use the
setInterval()to run code at specified intervals repeatedly. - Use the
clearInterval()method to stop an interval timer. - Use the
setTimeout()to run code after a specified delay. - Use the
clearTimeout()method to cancel a timeout. - Select HTML elements using DOM methods and HTML element properties
querySelector(),querySelectorAll(), etc. - Access and modify HTML elements content using properties
textContent,innerHTML - Add and remove CSS classes from HTML elements using DOM methods
classList.add(),classList.remove(),classList.toggle()
Now that we have explored the world of asynchronous JavaScript, it is time to practice and apply what we have learned. In this lab, you will use the setTimeout() and setInterval() functions to create a countdown timer. What better way to practice it than creating a timer for a rocket launch countdown? 🚀 3... 2... 1... Lift off! 🚀
- Fork this repo.
- Clone this repo.
- Upon completion, run the following commands:
git  .
git commit -m "Solved lab"
git push origin master- Create a Pull Request and submit your assignment
Before you start working on the iterations, take a moment and review the starter code provided in the files index.html, styles/style.css, and src/index.js.
Next, open the index.html file in your browser using the Live Server extension. You should see a page with a countdown timer that looks like this:
See Expected Result
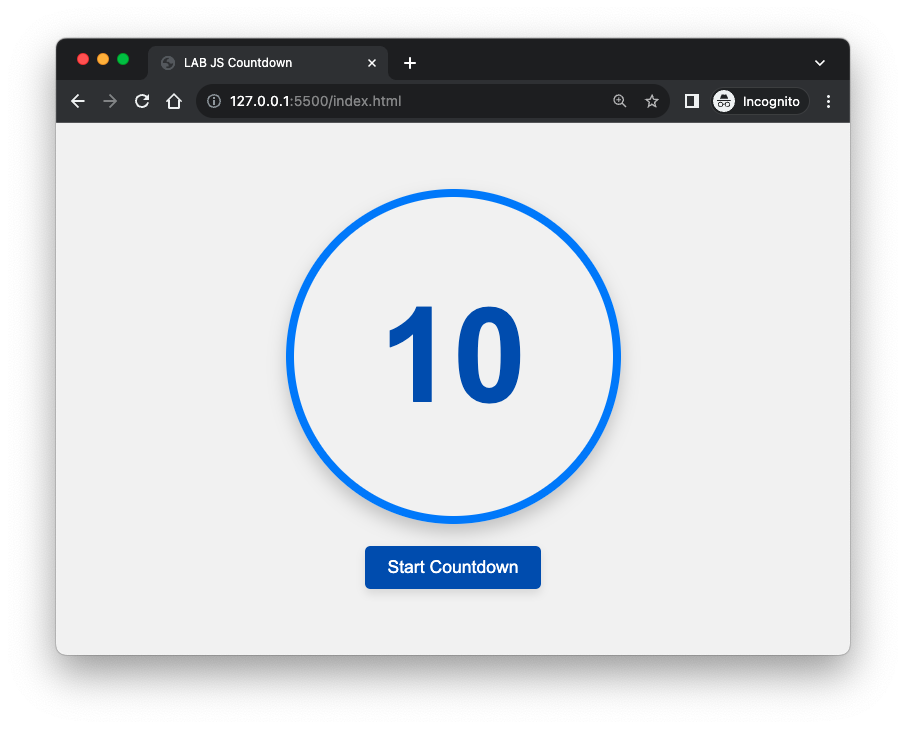
The countdown timer is currently set to 10 seconds - this value is hard-coded in the index.html file. There is also a start button that doesn't do anything yet, and a toast message that is initially hidden (you can see it in the HTML code).
Your task in the following iterations is to implement the countdown timer and the toast message that appears when the countdown reaches 0. By the end of the lab, you should have a countdown timer that looks and works like this:
To start the counter, we'll need to an event listener to the start button (Start Countdown).
Go ahead and add a click event listener to the start button. When clicked, the event should trigger the existing function startCountdown().
See Expected Result
With the event listener now set up on the start button to trigger the startCountdown() function, our next step is to implement the function logic.
The startCountdown() function should start a countdown timer that runs for 10 seconds. Every second, the remaining time should be updated on the screen and the countdown timer should stop when the remaining time reaches 0.
Here are the steps you should follow to implement the function logic:
- Start the countdown timer using
setInterval()that runs in intervals of 1 second (1000 milliseconds). - On each interval tick, the remaining time (seconds) should be decreased by 1.
- On each interval tick, the
div#timeelement should be updated to display the remaining time. - When the remaining time reaches 0, the countdown timer should be stopped.
- When the remaining time reaches 0, the
showToast()function should be called to display a toast message to the user (you'll implement this function in the next iteration).
The start button (button#start-btn) should be disabled during the countdown so that the user can't click on it during the countdown. You need to use the disabled property for this (example).
See Expected Result
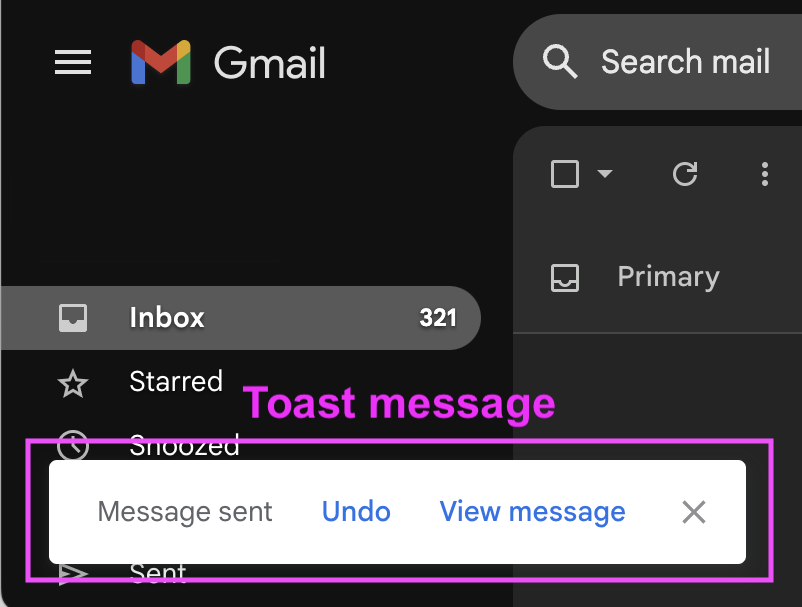
A Toast is a small message that appears on the screen for a few seconds. It's usually used to display a feedback, notifications, or a confirmation message to the user. For example, when you make a purchase on Amazon, or send an email using Gmail, a toast message appears to confirm that the operations was successful.
See Example
As the last step in the previous iteration, when the countdown timer reaches 0, we call a function called showToast(), however the function logic is not implemented yet. In this iteration, we'll implement the showToast() function so that it displays a toast message on the screen.
The index.html file already contains the HTML for the toast card (div#toast-card) element:
<!-- Toast Card - hidden by default using CSS -->
<div id="toast" class="toast">
  <span id="toast-message">Lift off! 🚀</span>
  <span id="close-toast">x</span>
</div>
The toast card is set to be hidden at first and should only be shown when the countdown timer reaches 0.
To show the toast card element, we need to update the CSS property display to "block". We already have a CSS class called show that does this. To show the toast card, we simply add the "show" class to the toast card, and it will become visible. We will use the showToast() function to do this.
Here's what you need to do to implement the showToast() function:
- Show the toast card element (
div#toast), which is initially hidden.
To do this, add the class"show"to the element's class list. You can useclassListmethods to do this. - Set a timeout of 3 seconds (3000 milliseconds), after which the toast card should be hidden again.
- To hide the toast card back, simply remove the class
"show"from the element's class list.
See Expected Result

The toast card element has a close button (span#close-toast), which currently doesn't do anything. The button should allow the user to close the toast card, even before the 3 seconds timeout is reached.
Add a 'click' event listener to the close button. When clicking the "x" button, the event should clear the timeout and hide the toast card.
To make the toast card disappear, you need to remove the class "show" from the element's class list, in the same way you did in the previous iteration.
See Expected Result

For this bonus iteration, you'll work on the showToast() function to make it reusable. Currently, the function only shows the toast card, which always displays the same message - "Lift off! 🚀". We want to be able to use the function to show different messages in the toast card.
Update the showToast() function so that it can be used to show more than one toast message. The function should take a message string as an argument. The function should then display the message in the toast element and display the toast for 3 seconds.
To test your function, call the showToast() function with different messages in the startCountdown() function:
- When the countdown timer is 10 seconds, show the message:
"⏰ Final countdown! ⏰". - When the countdown timer is 5 seconds, show the message:
"Start the engines! 💥". - When the countdown timer reaches 0, show the message:
"Lift off! 🚀".
See Expected Result
Happy coding! 💙
I am stuck in the exercise and don't know how to solve the problem or where to start.
If you are stuck in your code and don't know how to solve the problem or where to start, you should take a step back and try to form a clear question about the specific issue you are facing. This will help you narrow down the problem and develop potential solutions.
For example, is it a concept you don't understand, or are you receiving an error message you don't know how to fix? It is usually helpful to try to state the problem as clearly as possible, including any error messages you are receiving. This can help you communicate the issue to others and potentially get help from classmates or online resources.
Once you have a clear understanding of the problem, you will be able to start working toward the solution.
How to use setTimeout() and clearTimeout()?
setTimeout() is a global function that can be used to execute a callback function after a specified delay.
setTimeout(callback, delay);callbackis the function that will be executed after the specified delay.delayis the time in milliseconds that the callback function should be delayed before being executed.
Here is an example of using setTimeout() to log a message to the console after a delay of 2000 milliseconds (2 seconds):
setTimeout(() => {
  console.log("Hi!");
}, 2000);When invoked, setTimeout() returns a timer ID that can be used to cancel the execution of the callback function using the clearTimeout() function:
const timerId = setTimeout(() => {
  console.log("Hi!");
}, 2000);

// Cancel the execution of the callback function
clearTimeout(timerId);How to use setInterval() and clearIntervalI()?
setInterval() is a global function that can be used to execute a callback function repeatedly at a specified interval.
setTimeout(callback, delay);callbackis the function that will be executed after the specified delay.delayis the time in milliseconds that the callback function should be delayed before being executed.
Here is an example of using setTimeout() to log a message to the console after a delay of 2000 milliseconds (2 seconds):
setInterval(() => {
  console.log("Hello, world!");
}, 2000);When invoked, setInterval() returns a timer ID that can be used to cancel the execution of the callback function using the clearInterval() function:
const timerId = setInterval(() => {
  console.log("Hello, world!");
}, 2000);


// Cancel the execution of the interval function after 10 seconds
setTimeout(() => {
  clearInterval(timerId);
}, 10000);What is the proper way to pass a callback function as an argument and execute it?
In JavaScript, you can pass a callback function as an argument to another function and execute it by calling it inside the outer function.
Here is an example of passing a callback as an argument to a function:
function sayHello() {
  console.log('Hello!!!');
}


function outerFunction(callback) {
  console.log('Inside outerFunction');

  callback();
}


outerFunction(sayHello);
In this example, the sayHello function is passed as a callback to the outerFunction. The outerFunction calls the passed function using its parameter name callback by invoking it with callback(). When you run the code, you will see the log statements from both functions printed to the console.
Here is an example of passing a callback as an argument to a method:
class ExampleClass {
  constructor() {
    this.name = "ExampleClass";
  }

  myMethod(callback) {
    console.log("Inside myMethod");

    callback();
  }

}
Here is an example of passing a callback to a method and checking if it was passed before invoking it:
class ExampleClass {
  constructor() {
    this.name = "ExampleClass";
  }

  myMethod(callback) {
    console.log("Inside myMethod");

    if (callback) { // Check if the callback is passed before invoking it to prevent errors
      callback();
    }

  }
}
In the above example, the method myMethod takes a callback function as an argument. Inside the method, it first checks if a callback function was actually passed using an if statement. If a callback was passed, the method invokes it by calling callback().
This approach prevents errors from occurring if the callback was not passed (if it is undefined).
I am unable to push changes to the repository. What should I do?
There are a couple of possible reasons why you may be unable to push changes to a Git repository:
- You have not committed your changes: Before you can push your changes to the repository, you need to commit them using the
git commitcommand. Make sure you have committed your changes and try pushing again. To do this, run the following terminal commands from the project folder:
git add .
git commit -m "Your commit message"
git push- You do not have permission to push to the repository: If you have cloned the repository directly from the main Ironhack repository without making a Fork first, you do not have write access to the repository. To check which remote repository you have cloned, run the following terminal command from the project folder:
git remote -vIf the link shown is the same as the main Ironhack repository, you will need to fork the repository to your GitHub account first and then clone your fork to your local machine to be able to push the changes.
Note: You should make a copy of your local code to avoid losing it in the process.

