Full Stack Frameworks with Django Milestone Project Milestone Project.
BK Store
This app is a shoping site similar to Amazon, to help user easily search through all the products provided in the store. Purchase the disired product and see the summary of their purchases
To view the live version of the site, please click here
-
UX
The main purpose of this project is to build a full-stack site based around business logic used to control a centrally-owned dataset. By authenticating on the site and paying for some of its services, users can advance their own goals. Before authenticating, the site makes it clear how those goals would be furthered by the site. The site owner is able to make money by providing this set of services to the users. There is no way for a regular user to bypass the site's mechanisms and derive all of the value available to paid users without paying.
-
Viewing and Navigating
- I want to be able to view a list of products, so that I can select some to purchase.
- I want to be able to view insividual product details, so that I can identify the price, description, product rating,product image and availabe sizes.
- I want to be able to quickly identify deals, clearance items and special offers, so that I can take advantage of special saving on products I'd like to purchase.
- I want to be able to easily view the total of my purchases at any time, so that I can avoid spending too much.
-
Sorting and Searching
- I want to be able to sort the list of availabe products, so that I can easily identify the best rated, best priced and categorically sorted products.
- I want to be able to sort a specific category of product, so that I can find the best priced or best rated product in a specific category, or sort the products in that category name.
- I want to be able to sort multiple categories of products simultaneously, so that I can find the best priced or best rated products accross broad categories such as "Clothing" or "Homeware".
- I want to be able to search for a product by name or description, so that I can find a specific product I'd like to purchase.
- I want to be able to easily see what I've searched for and the number of results, so that I can quickly decide wheather the product I want is availabe.
-
Purchasing and Checkout
- I want to be able to easily select the size and quantity of a product when purchasing it, so that I can ensure I don't accidentally select the wrong product, auantity or size.
- Registeration and User Account
- I want to be able to easily register for an account, so that I can have a personal account and be able to view my profile.
- I want to be able to easily login and logout, so that I can have access my personal account information.
- I want to be able to easily recover my password in case I forget it, so that I can recover access to my account.
- I want to be able to receive an email confirmation after registering, so that I can verify that my account registeration was successful.
- I want to be able to have a personalized user profile, so that I can view my personal order history and order confirmations and save my payment information.
The goal in design was to create a website that is overall user friendly, has a modern feel with emphasis on providing information about recipes in a readable and eye-catching way. Therefore, following design choices were made:
-
Framework
-
Typography
- I used Google Fonts for the font style of my project:
- The font I have used for the body of this project is called Montserrat and for the headers, input and labels I used Yusei Magic font with sans-serif as a backup font.
- I used Google Fonts for the font style of my project:
-
Icons
- I used Favicon to make a unic brand for my website.
- I used FontAwesome as the main icon library across the project (e.g. for forms and buttons).
-
Colour Scheme
The idea of using different shades of the same colour is implemented accross the website. The primary colour used for main buttons and headings is deep purple as it seems to create a nice contrast with white backgrounds. The secondary colour used for icons, dividers and some other buttons is blue and pink.
-
Main colour palette
- #5e35b1 deep-purple darken-1 used for navbar, collapsible header flash text and add buttons.
- #7e57c2 deep-purple lighten-1 used for hover effect on navbar and add buttons.
- #d81b60 pink darken-1 used for reset, delete and cancel buttons and some info texts.
- #ad1457 pink darken-3 used for hover effect on reset, delete and cancel buttons.
- #2979ff blue accent-3 used for edit buttons.
- #2962ff blue accent-4 used for hover effect on edit buttons.
-
Balsamiq Wireframes was used to create all wireframes for the project.
Desktop view | Mobile view
- | -
 Admin |
 Registered users |
 Not registered users |
Desktop view | Mobile view
- | -
 Admin |
 Registered users |
Desktop view | Mobile view
- | -
 Admin |
 Registered users |
Desktop view | Mobile view
- | -
 Admin |
Desktop view | Mobile view
- | -
 Admin |
Desktop view | Mobile view
- | -
 Admin|
Desktop view | Mobile view
- | -
 Admin |
Desktop view | Mobile view
- | -
 All users |
Desktop view | Mobile view
- | -
 All users |
- Implemented features
- All Recipes page
-
First collapsible body is open on loading the page to make the page more appealing.
-
Unregistered and registered users are able to view all recipes that have been added by registered users on All recipes page.
-
Upon registering/loggin in, the user will be greeted with the flash note on top of the "All Recipes" page.
-
All recipes are shown in a collapsible drop down list.
-
A search input provided on top of the page to make is easy to search through the recipes, giving the recipe name,category,marks and ingredients as an index to mongo database.
-
The recipe name, created_by, date of the recipe, edit button and delete button is shown on the header of the collapsible list, for desktop view. In mobile views just the recipe name and edit button is shown on the header and the user name and date of insertion and delete button is added on top of the body section of the collapsible.
-
Recipes information like recipe category, marks, ingredients, cooking steps and recipe image are included in body of the collapsible.
-
Admin Users, will be able to delete any recipes entered by any users, whereas everyone else will only be able to edit or delete their own recipes.
-
Delete button is shown in all views to the admin in the colapsible header whereas for other users this button will change position to the top of collapsible body.
-
- All Recipes page
- Profile
-
By clicking on the profile buttton on the top navbar user can see the recipes that have been added by this user and have an option to delete or edit these recipes. This option is also available in All recipes page but only for the recipes that have been created by this user.( except the admin that can delete any recipe.)
-
If this user didn't add any recipe to this page yet they recive a small note and instructed how to do so.
-
-
Add Recipe page
- The 'Add Recipe' button will redirect the users to the form template that the users will need to fill out to add their recipes.
- When users are adding a new recipe, they are guided through with notifications of what to do and requirements.
- The form will not be able to be submitted with any required boxes not filled out by the user.
- The cancel button also provided in the bottom of this page in case the user decided to not add the recipe.
- A warning pop-up note provided to ask the user if they are sure that they don't want to add any recipe, when clicking on cancel bottom. If user confirms he/she will be redirected to profile page without adding a recipe.
- Once the user has added the required information for the recipe, they will see it on their profile page with a flash message of top on the page indicating that the recipe added.
-
Edit form
- If users ever decide that they would like to edit any of the data, all they need to do is click on the edit button on the head part of the collapsible on either "All Recipe" page or "Profile" page. For admin, this button can be found only on profile page for his/her own recipes.
- By clicking on edit button, edit form will reveal with all the previous information that have been added to the form.
- User can change any part they desire and then click on edit button at the bottom of the page.
- If user decided to not change the informations they can click on the cancel buttton next to edit buttton.
-
Delete buttton
- If user decides that they would like to delete any of their recipe, all they need to do is click on the delete button, on the head of the collapsible, on either "All Recipe" page or "Profile" page.
- In mobile view devices the delete buttton is located on top of the recipe body instead.( exept for the admin on all recipe page. Admin delete botton stays in the collapsible header in all views in "All Recipes" page.)
- When the user tries to delete a recipe, they will be asked to confirm if that is what they really want to do by means of a confirmation message. This is to prevent any user to delete a recipe by mistake.
-
Manage category and marks
- Admin can add, edit or delete the categories or marks by clicking on these options provided in the navbar, only for admin user, in two pages provided ("Manage Categories" and "Manage Marks").
-
Register/Login page
- On registeration user is asked to enter their first and last name, username and a password and confirmation for the password.
- A user will need to register a profile to be able to add any recipes, this infomation is on get_recipe.html.
- If a user tries to register a username which is used by someone else already, they will not be allowed to use that username. The user will be notified of this by use of Flash Messages - "Username already exists!".
- If a user password and confirm password dosen't match user gets a flash message - "Passwords do not match, please re-enter"
- tooltips provided on each input field to give more guidence tothe user.
- When a user has successfully registered their new profile, they will be redirected to 'get_recipes.html'.
- When a returning user logs in successfully, they will also be redirected to 'get_recipes.html'.
- If a registered user puts their infomation in incorrectly when loging in, they will be notified by the use of Flash Messages - "Incorrect Username and/or Password".
- Log Out
- user is provided by the option to log out when clicking on the button provided on the navbar.
- By clicking on "Log Out" button user get a message to check if they really want to log out.
- On log out user redirects to log in page and getting a flash message: "You have been logged out!"
- Features Left to Implement
- Adding a like/dislike button for each Recipe and sort the recipes from the most to least favorites.
- Adding the liked recipes in a new section in profile page.
- Make the design of the site more appealing and more food friendly.
- Adding a footer with social media sites for the app.
- Seperating the recipes in different sections for each category.
- More secure pathway for the admin.
-
Front-End
- HTML5
- To give the page its structure and presenting static data.
- All HTML files are located within the 'templates' directory.
- CSS
- CSS has been used to style and customise the content of this project.
- Materialize
- This is a framework that I have used to simplify CSS classes, features that have been used and modified include the navbar, responsive design classes, and colors for backgrounds and text.
- JQuery
- JQuery has been used to give the site its functionality as well as making DOM manipulation simpler.
- HTML5
-
Back-end
- MongoDB
- As the data entered by users can always be different from one to the next, the project uses MongoDB to store its data as MongoDB is a Document Based Database.
- Flask
- Flask is a framework that allows developers to easily present data in an orderly fashion. All data entered by a user, such as the Recipe Name, is presented to users with a few lines of code embedded into the HTML.
- Modules from Flask that have been included are:
- Flask
- flash
- render_template
- redirect
- request
- session
- url_for
- PyMongo
- Flask is a framework that allows developers to easily present data in an orderly fashion. All data entered by a user, such as the Recipe Name, is presented to users with a few lines of code embedded into the HTML.
- bson.objectid
- ObjectId
- werkzeug.security
- generate_password_hash
- check_password_hash
- datetime
- datetime
- Python
- Python is working very closely with Flask to manipulate data and HTML across multiple pages within the app.
- MongoDB
-
Deployment
-
validators
- The validators that have been used on the project are as followed:
- HTML Validator - No issues apart from jinja templating
- CSS Validator - No issues
- JavaScript Validator - No issues
- Python Validator - No issues
- The validators that have been used on the project are as followed:
-
Supported browsers and screens
-
The Website was tested on Google Chrome, Microsoft Edge, and Firefox and Opera browser.
-
The website was shown responsive on a variety of emulated devices such as iphone4, 5, SE, 6, 6 plus, 7, 7plus, 8, 8plus and X, Nokia Lumia 520 and N9, Moto G4, Galaxy S5, Blackberry Z30 and playbook, Galaxy note, Microsoft Lumia 950 and 550, LG Optimus L70, Nexus 4, 5, 6, 7 and 10, 6P, Pixel 2 and 2XL, iPad mini, iPad, Kindle Fire, iPad pro and laptop with MDPI, touch, and HiDPI.
-
A large amount of testing was done to ensure that all pages were linking correctly.
-
Friends and family members were asked to review the site and documentation to point out any bugs and/or user experience issues.
-
-
Register.html
-
Test 1 - Register - Test Passed ✓
-
Step 1 - Click the register button on the navbar for desktop view devices or side navbar for tablet or mobile view devices.
-
Step 2 - Put in a first name(2 character minimum).
-
Step 3 - Put in a last name (also 2 character minimum).
-
Step 4 - Put in a username which is unique (5 character minimum).
-
Step 5 - Put in a password (also 5 character minimum).
-
Step 6 - Click 'Register' button.
-
Step 7 - Be redirected to 'get_recipes.html' with a flash message, welcoming the user.
-
-
Test 2 - Register with a username which already exists - Test Passed ✓
-
Step 1 - While on 'register.html', enter username 'admin' or any username existing in our data base.
-
Step 2 - Enter password (5 character minimum).
-
Step 3 - Click the 'Register' button.
-
Step 4 - Be presented by flash message containing "Username already exists!".
-
-
Test 3 - Register with less than 2 Alphabet for first and last name and less than 5 characters for username - Test Passed ✓
-
step 1 - While on 'register.html', enter first or last name with numbers or less than 2 alphabet is shown invalid.
-
Step 2 - While on 'register.html', enter username or password with less than 5 charecters is shown invalid.
-
Step 3 - As the 'Required' and minlength=2 for first and last name, and minlength=5 for username and password has been added, the form will not be submitted.
-
Step 4 - Changing first and last name to more than 1 alphabet, and username and password to more than 4 charecters will submit the form.
-
step 5 - All the tooltips are shown an the page by hovering over the input icon.
-
Desktop view | Mobile view
- | -
 |
| 
-
-
Login.html
-
Test 1 - Log In - Test Passed ✓
-
Step 1 - Enter your Username.
-
Step 2 - Enter your Password.
-
Step 3 - Click the 'log in' buttton.
-
Step 4 - Be redirected to 'get_recipes.html' with flash message containing "Welcome, [ user ]".
-
-
Test 2 - Log in attempt with incorrect info - Test Passed ✓
-
Step 1 - Enter credentials that are incorrect.
-
Step 2 - Click the 'log in' button.
-
Step 3 - Be redirected to the log in page with a flash message containing "Incorrect Username and/or Password".
-
Desktop view | Mobile view
- | -
 |
| 
-
-
Adding a New Recipe
-
Test 1 - Adding a New Recipe - Test Passed ✓
-
Step 1 - Log In.
-
Step 2 - Be redirected to get_recipes.
-
Step 3 - Click the button labeled 'Add Recipe'.
-
Step 4 - Be redirected to the form for user to fill in.
-
Step 5 - Form is tried to be submitted with empty fields for required fields and faild; user is notified of missing items.
-
Step 6 - There is 1 multichoice dropdown field on the form, which is called marks. This field is not required and the form still successfully post if this field is empty.
-
Step 7 - There is a cancel button provided on the bottom of the form. If the user don't want to add the recipe. he/she can click on this button and get redirected to their profile page.
-
Step 8 - Once the form is filled out to the satisfaction of the constraints and the 'Add Recipe!' button is clicked user will be redirected to 'profile.html' where the user can see their newly added recipe located alphabeticly in the collapsible dropdown list. User also be notified that the new recipe added by flash notifications.
-
Step 9 - Check the contents of the newly added recipe right away by clicking on that recipe in the dropdown list.
-
Desktop view | Mobile view
-
| -
 Admin views: |
  note: same for all users, except that in the admin page there is manage Catogory and manage mak buttons visable in the navbar.
 -
Test 2 - Avoids empty strings in out textarea fields - Test Passed ✓
- Step 1 - Fill in all the required feilds in "Add Recipe" form.
- Step 2 - Add an empty line to the ingredients or cooking steps textarea.
- Step 3 - click on "Add Recipe" button.
- Step 4 - Empty lines will be removed when showing the recipe in the "All Recipes" or "Profile" page.
-
-
Editing/Deleting a Recipe
-
Test 1 - Editing a Recipe - Test Passed ✓
- Step 1 - Navigate to profile or All recdipe page.
- Step 2 - Click the button labeled "EDIT" for the desired recipe.
- Step 3 - Navitgate to the part of the recipe that the user wishes to edit.
- Step 4 - After editing the desired part, click on the blue button, "EDIT RECIPE" at the bottom of the page to edit the recipe.
- Step 5 - Be redirected to profile.html and a flash message, notifing the user that the recipe is updated.
- Step 6 - Should the user wish to cancel the action, they can click on the cancel button located on bottom left.
- Step 7 - If user clicks the cancel button he/she will be redirected to profile page and all changes will be disregarded.
Desktop view | Mobile view
- | -
 |
| 
-
-
Test 2 - Avoid duplication in multi choice dropdown input field - Test Passed ✓
- step 1 - In edit form in marks field user can just add one of each choices to the list.
-
Test 3 - Deleting a Recipe for registered users - Test Passed ✓
- Step 1 - Navigate to All Recipes, or profile page.
- Step 2 - Click the button labeled "DELETE". In mobile phone view this button can be found on top of the recipe collapsible body but in desktop view it is placed in the head of the collapsible.
- Step 3 - User gets a message if they are sure to delete this recipe.
- step 4 - If confirm the recipe deletes and user redirects to their profile page but if press cancel, recipe stays unchanged and the user will be redirected to their profile page. Admin user will stay in any page that they deleted the recipe from.
Desktop view | Mobile view
- | -
 |
| 
- Test 2 - Deleting a Recipe for Admin - Test Passed ✓
- Step 1 - Navigate to All Recipes, or profile page.
- Step 2 - Click the button labeled "DELETE", in the head of collapsible, for each rcipe.
- Step 3 - User gets a message if they are sure to delete this recipe.
- step 4 - If confirm the recipe deletes and user redirects to their profile page but if press cancel, recipe stays unchanged and the user will be redirected to their profile page. Admin user will stay in any page that they deleted the recipe from.
Desktop view | Mobile view
-
| -
 |
| 
-
-
Test 1 - Add, edit or delete categories or marks - Test Passed ✓
- step 1 - Click on the Manage Categries to manage the categories or Manage Marks to manage the marks.
- step 2 - Admin can sees all the categories in manage categories and all the marks in manage marks in a seperate card with an option of delete or edit and an Add button on top of the page to add a new category or mark.
- step 3 - By clicking on the add button, a one input field form, called add category or add mark opens regardingly.
- step 4 - Admin can write the desired name for the new category/mark and press the Add category or Add mark at the bottom of the form.
- step 5 - Admin is provided also with a cancel button in both pages if he/she decided to not add any new category or mark.
-
step 6 - Pressing this button bring up a note if he/she is sure not to add any category or mark.
- step 7 - if press ok, admin redirects to the get_categories if in add category form, or get_marks if in add marks form.
- step 8 - if press cancel, no category or mark will be added and user will be redirected to "Add Catogory" or "Add mark" regarding to which one that he/she was adding.
Desktop view | Mobile view
- | -
 |
| 
 |
| 
 |
| 
 |
| 
-
-
- Test 1 - Log out - Test Passed ✓
- step 1 - Click on the "log Out" button in the navbar to log out.
- step 2 - Pressing this button bring up a note: "Are you sure you want to log out?".
- step 3 - if press ok user will log out.
- step 4 - if press cancel, the user would not log out.
- Test 1 - Log out - Test Passed ✓
- Issue 1 - When a user were adding a recipe with empty lines in multi-line textarea inputs, empty lines were shown in these areas.
- I fixed this issue by adding the above script.js file to trim the empty lines.
return $(this).text().trim() === '';}).remove();
- Issue 2 - When editing a recipe user could add the marks that they have chosen for this recipe from before, again, in the dropdown list.
- I fixed this issue by adding the above edit.js file code to avoid duplication.
var marks = document.getElementById("mark");

[].slice.call(marks.options)
  .map(function(a){
    if(this[a.value]){
      marks.removeChild(a);
    } else {
      this[a.value]=1;
    }
  },{});
});
-
Issue 3 - Users could open unauthorized pages if providing it's url route path in the browser.
- I fixed this problem with adding error handlers in my python and using relative error conditions in the functions that needed like manage, add, edit and delete categories and mark pages, users profile page, add, edit and delete buttons. These codes are provided with docstrings in my app.py in more details.
@app.errorhandler(404)
def page_not_found(e):
    return render_template('404.html'), 404


@app.errorhandler(500)
def internal_server_error(e):
    return render_template('500.html'), 500


@app.errorhandler(403)
def page_forbidden(e):
    return render_template('403.html'), 500
- Issue 4 - The title areas for category and marks where changing height depending on their html note.
- I fixed this issue with adding the code below to my script.js file
    var manageTitleHight = 0;

$(".manage-title").each(function(){
   if ($(this).height() > manageTitleHight) { manageTitleHight = $(this).height(); }
});

$(".manage-title").height(manageTitleHight);
   // to avoid copying the link of the delete and edit btns
$(".delete-btn, .edit-btn").contextmenu(function () { return false; });
});
- Issue 5 - By putting some recipe informations with both edit and delete buttons in the recipes collapsible header, mas not a good choice for smaller views.
- I fixed that issue by using some materialize classes to replace dome of these info in the body of the collapsible in smaller views.
This class is in the collapsible header and hide this buttton in small views.
 <a href="{{ url_for('delete_recipe', recipe_id=recipe._id) }}"
 class="btn-small delete-btn hide-on-small-only">Delete</a>

This class is in the collapsible body and hide this buttton in medium and large views.
 <a href="{{ url_for('delete_recipe', recipe_id=recipe._id) }}"
class="btn-small delete-btn hide-on-med-and-up -align">Delete Recipe</a>
This project is stored in a GitHub repository and hosted on Heroku.
-
Click here to get to the projects repository.
-
Click on 'Settings' to the far right in navigation menu below your repository name.
-
Scroll down to 'GitHub Pages' and select 'master branch' as the source.
-
Click save.
-
The link to the site hosted on GitHub Pages should appear at the top of the section.
-
Click here to get to the projects repository.
-
Click "Clone or Download".
-
Click the "copy" icon.
-
Open Git Bash in your local IDE.
-
Change your current working directory to where you want the cloned directory to be made.
-
Type
$ git cloneand then paste the URL you copied earlier.git clone https://github.com/USERNAME/REPOSITORY -
When you press enter your local clone will be ready.
-
Created a new application using the Heroku dashboard.
-
Go to settings tab, click on 'reveal config vars' and add config vars such as IP (0.0.0.0), PORT (5000), MongoDB Name, MongoDB URI (URL with DB name and password).
-
Install Heroku via the console using 'npm install -g Heroku'.
-
Log into Heroku via the console using 'heroku login' and follow the on screen instructions to log in.
-
Create a requirements.txt via the console using 'pip3 freeze > requirements.txt'.
-
Create a Procfile via the console using 'echo web: python app.py > Procfile'.
-
Connect GitHub to Heroku via the console using 'heroku git:remote a creative-hub'
-
Commit all files in your project via the console using 'git add .' and 'git commit -m "Message"'.
-
Deploy your project to Heroku via the consol using 'git push heroku master'.
-
Clone the repository as outlined above and upload it to GitPod.
-
Install the necessary libraries specified in the requirements.txt.
-
Set your environment variables by creating and adding them into a env.py file.
-
Create a .gitignore file in the root directory and add the env.py file to avoid it being pushed to GitHub.
-
Import the env.py file into the app.py file.
-
Run the application.
-
Content and Media
The content and images used in this site were obtained from links below: Images | Content
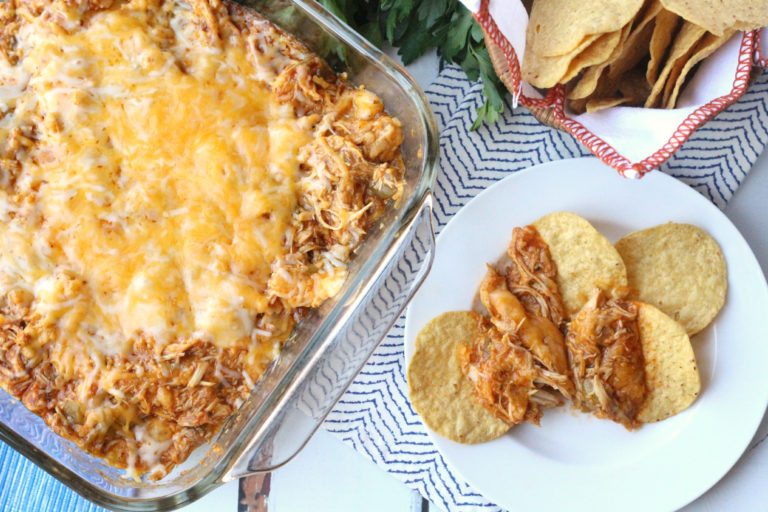
- | - Adas polo image |Adas polo content Chicken enchilada dip image | Chicken enchilada dip content Chicken tikka masala image | Chicken tikka masala content Khoreshte ghorme sabzi image | content added by me Mojito image | Mojito content Pepper & walnut hummus image | Pepper & walnut hummus content |
-
Resources
Below is a list of the resources used to create this project:
-
Big thanks to my mentor, Rohit Sharma who provided me with tips, support and some helpful resources.
-
Also the whole code instetute support team for fast support and help all the time.
This project is purely educational, please contact me if there are any issues with Copyright. [email protected]
https://www.w3schools.com/howto/tryit.asp?filename=tryhow_css_fixed_footer
