Git Product home page Git Product logo

bcn3d / bcn3dsigma-firmware Goto Github PK

View Code? Open in Web Editor NEW
88.0 39.0 74.0 165.62 MB

Custom Marlin version for the brand new BCN3D Sigma from BCN3D Technologies

Home Page: https://bcn3d.com

License: GNU General Public License v3.0

C++ 34.22% C 54.59% Makefile 0.23% Python 0.30% Objective-C 0.79% TeX 2.49% Shell 0.25% CMake 0.10% Batchfile 0.01% OpenSCAD 0.11% Roff 6.91%
marlin 3d-printing firmware bcn3d-sigma code

bcn3dsigma-firmware's Introduction

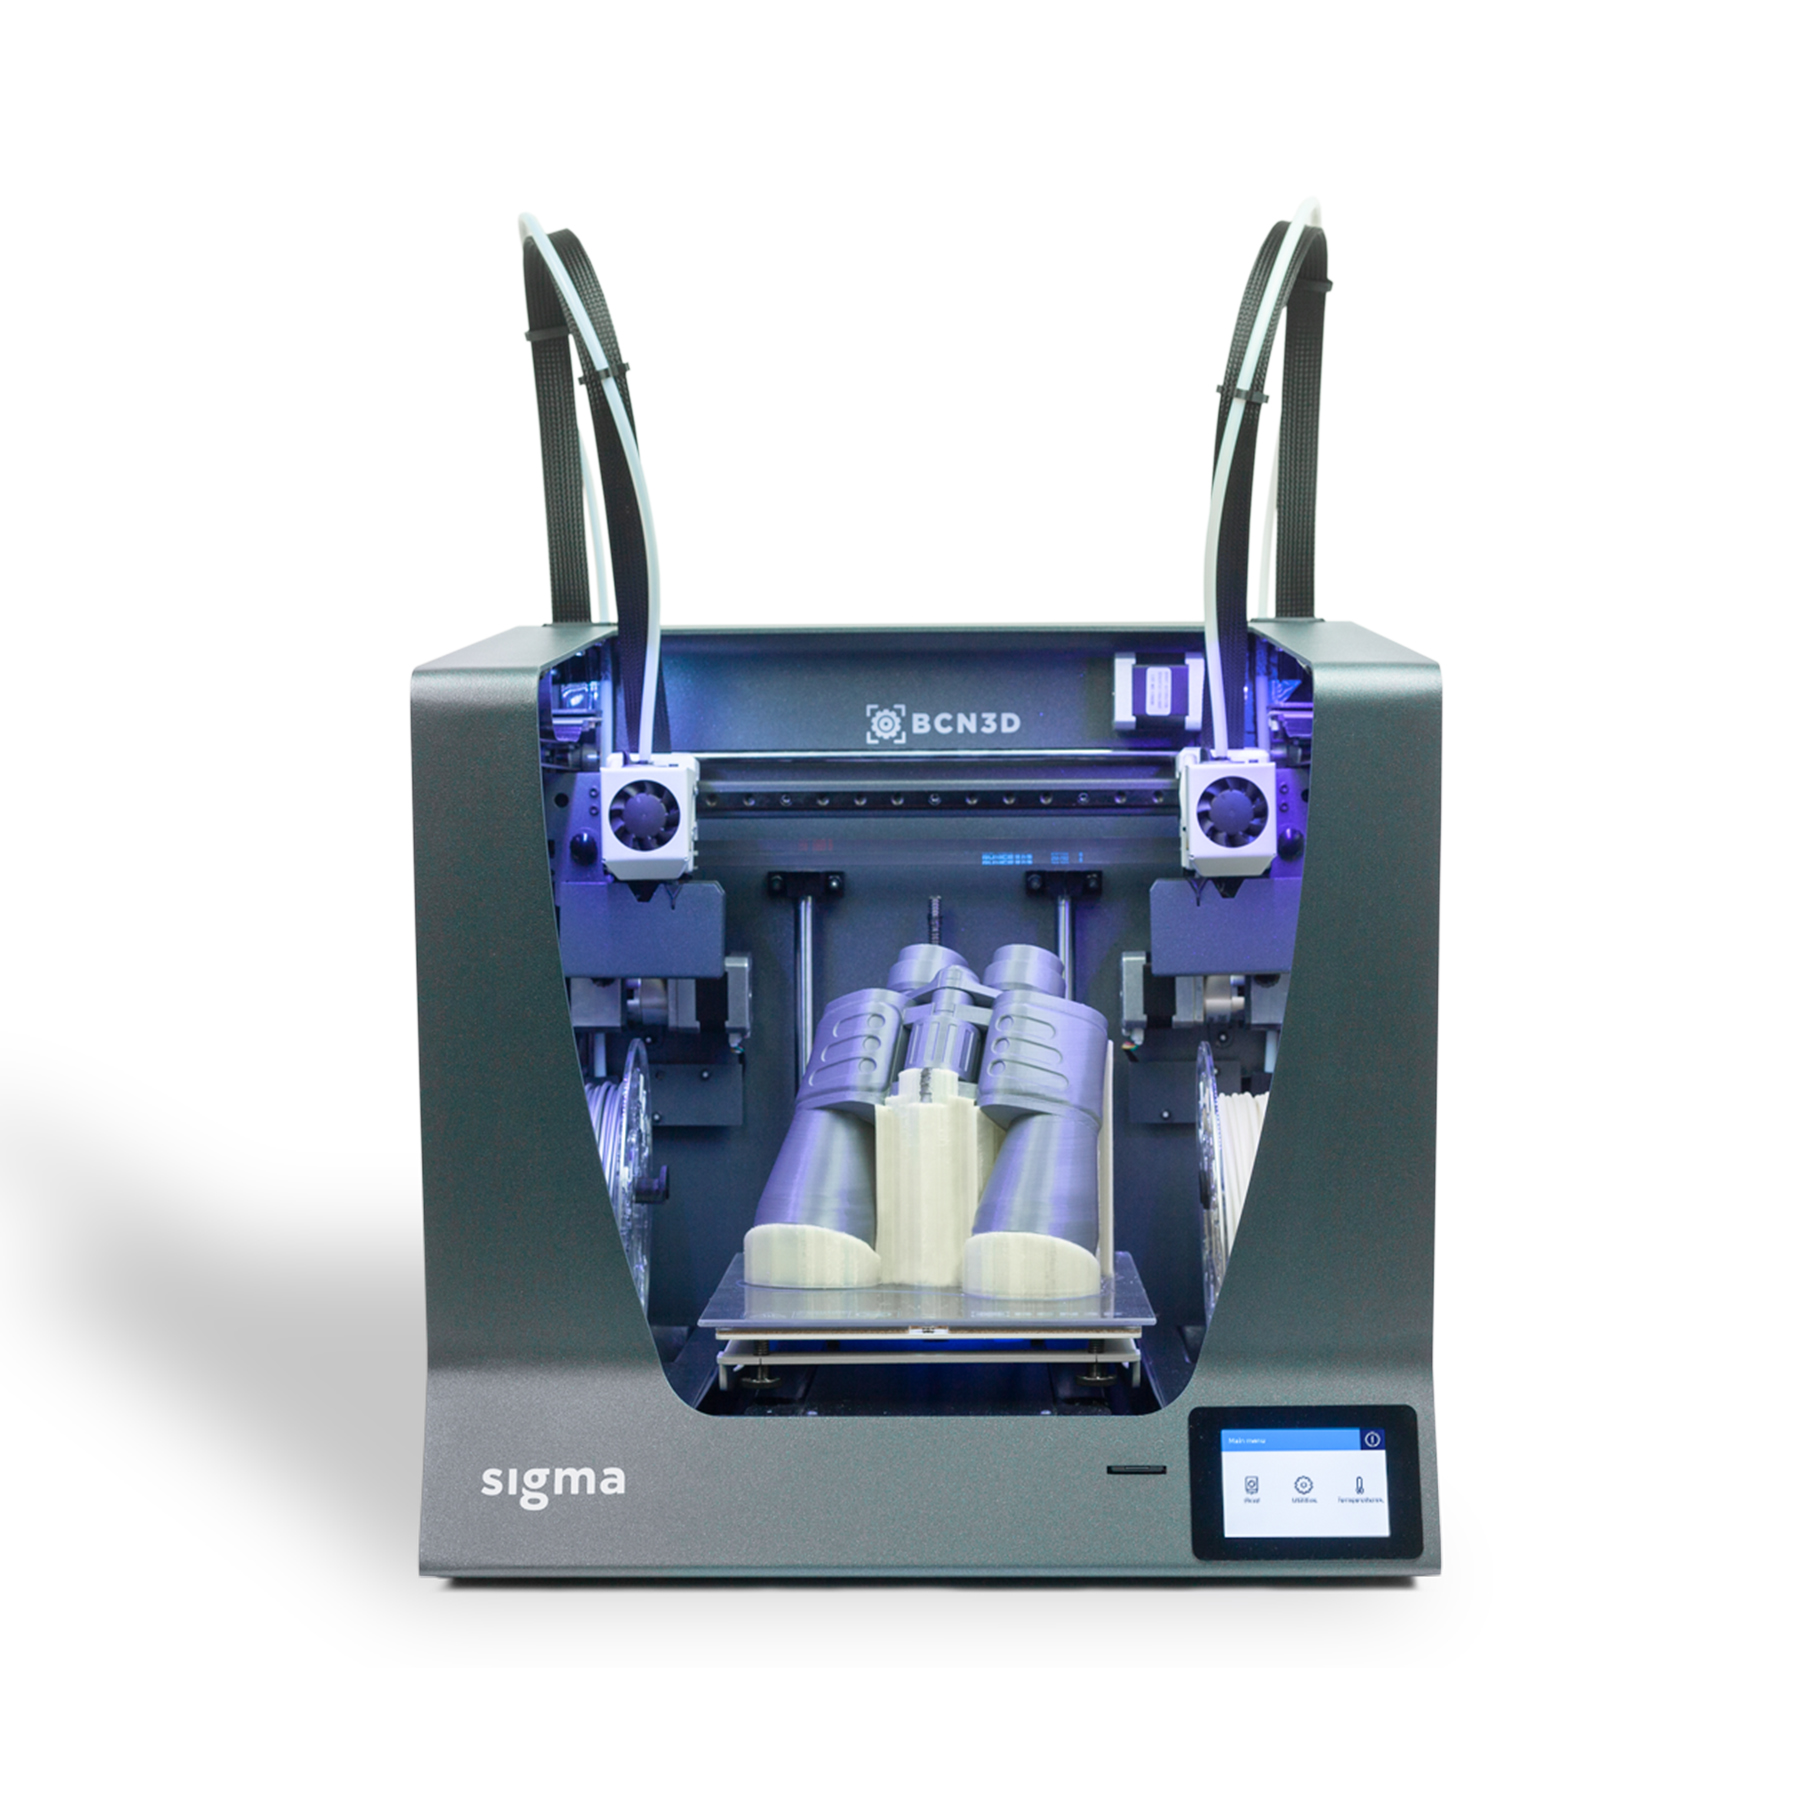
BCN3D Sigma Firmware based on Marlin

image

This is the repository that contains the firmware for the BCN3D Sigma 3D Printer. It's based on the well-known Marlin but with some modifications.

If you want to download the latest stable firmware version, go to Releases page and download the needed files. In the releases page you will find the Source Code and the SD Files needed for the LCD Display.

Please refer to the wiki in order to get instructions on how to upgrade the firmware and load new LCD SD files to the display.

IMPORTANT

This repo contains the firmware and the files for the LCD Touchscreen display (for now). When a new release is done, normally is needed updating the SD files of the display. That way we can update menus, graphics and functionalities. You can find more information on how to update the LCD SD files here.

Features

  • Dual independent X extruders.
  • Duplication & Mirror modes.
  • Autolevel, autocalibration of XYZ axis.
  • LCD Touchscreen support.
  • Shims installation assisted.
  • Load/Unload filament.
  • Refined firmware for better printing experience.
  • Filament Runout Sensor.

This firmware was first developed by Jordi Calduch then was Xavier Gómez and now the current developer is Alejandro Garcia at BCN3D Technologies. This firmware is a rework of the popular Marlin.

The code is currently in development, trying to improve functionalities.

Issues, bugs and suggestions

Your feedback is very important to us as it helps us improve even faster. Therefore we think github is the way to go. Feel free to make an issue.

In order to be more efficient with the feedback, we recommend to follow some guidelines:

  • First of all. Search for related issues.
  • Detail the firmware version you're running. It is displayed during start-up at the right bottom corner of the splash screen.
  • Try to explain us how to reproduce the error or bug, that way we can test it properly.
  • On the title, indicate the label of the issue. For example > [enhancement]: Some changes..

Development

For advanced users, it's possible to contribute in firmware development. We explain everything in the wiki. So if you are interested in contributing, folow the instructions there.

The master branch is stable and it's currently on version 2.0.8.

bcn3dsigma-firmware's People

Contributors

dryrain avatar guillemap avatar kitusmark avatar xawox avatar

Stargazers

 avatar  avatar  avatar  avatar  avatar  avatar  avatar  avatar  avatar  avatar  avatar  avatar  avatar  avatar  avatar  avatar  avatar  avatar  avatar  avatar  avatar  avatar  avatar  avatar  avatar  avatar  avatar  avatar  avatar  avatar  avatar  avatar  avatar  avatar  avatar  avatar  avatar  avatar  avatar  avatar  avatar  avatar  avatar  avatar  avatar  avatar  avatar  avatar  avatar  avatar  avatar  avatar  avatar  avatar  avatar  avatar  avatar  avatar  avatar  avatar  avatar  avatar  avatar  avatar  avatar  avatar  avatar  avatar  avatar  avatar  avatar  avatar  avatar  avatar  avatar  avatar  avatar  avatar  avatar  avatar  avatar  avatar  avatar  avatar  avatar  avatar  avatar  avatar

Watchers

 avatar  avatar  avatar  avatar  avatar  avatar  avatar  avatar  avatar  avatar  avatar  avatar  avatar  avatar  avatar  avatar  avatar  avatar  avatar  avatar  avatar  avatar  avatar  avatar  avatar  avatar  avatar  avatar  avatar  avatar  avatar  avatar  avatar  avatar  avatar  avatar  avatar  avatar  avatar

bcn3dsigma-firmware's Issues

M504/M555 typo in Marlin_main.cpp (v114)

Minor issue found in "Marlin_main.cpp":

_ case 504: //M555 Revert to default settings calibration and PID
{
Config_Reset_Calib();_

It should be M504 or M555 ... I guess it should be M504
Only minor commenting issue but should be corrected to reduce risk of confusion.

Measuring Vref on stepper motor driver boards?

Hi,
I touched the X motors and they are very hot so i just tweaked the on board potensiometers of the stepper driver circuits but want to get an accurate measurement of the current setting. Is there a Vref and if so how can i measure it?

Preheating menu no longer works

Hi, another strange issue.
This work early, then I got it was not working for custom materials but always for ABS and PLA, and now it does not work at all.
When I preheat, nothing happens.
I had this problem in V113, but the V114 upgrade changed nothing.

No problem for print.

Thanks.

Feature Request: Option to print GCode from 2nd (right) extruder

I would like to have option for single mode when loading GCode from SD to print from the 2nd (right) extruder. As workaround "T1" command can be added to the very first line of the GCode but unfortunately nozzle fan control is not working on 2nd extruder.

Would be great to have such feature. Should be no big thing but VERY USEFUL !!!!

Errores al Cargar Filamento

Saludos,

Esta vez quería comentaros otro problema que estoy experimentando...
Se trata de algo que sucede ocasionalmente durante el proceso de cargar el filamento en cualquiera de los dos extrusores... y es que justo cuando empieza a recoger el filamento el sistema parece fallar y, o bien se reinicia la SIGMA, o bien se queda como bloqueada mostrando el mensaje "processing...", pero sin hacer nada y es necesario apagarla y volverla a encender para restablecerlo todo.

No sé si es algo que sólo me sucede a mí, o se trata de un error más frecuente.
Gracias por vuestro trabajo.

Proceso de Calibración

Hola de nuevo,

Ésta vez vengo a incordiaros por la rutina que sigue la máquina durante la "Full Calibration".
Quería comentar que me parece interesante intentar variar un poco las posiciones de ambos HotEnds en varios puntos del proceso para evitar que se queden fijos en al menos dos posiciones que considero posiblemente conflictivas: la primera es que el Nozzle se quede totalmente en contacto con la goma por la que debe pasar para limpiarse; la segunda es que se quede justo encima del borde de la plataforma que recoge el plástico sobrante durante las limpiezas, en este caso observo que sólo sucede con el Extrusor Derecho, y me parece la posición más crítica de todas, porque es muy posible que termine quemando un poco dicha plataforma (de hecho la mía ya tiene una pequeña marca).
En fin, que pensando en evitar futuros problemas arruinando la goma o parte de la plataforma de limpieza, he decidido compartir ésto con vosotros.

También echo de menos en la opción de "Bed Calibration" que una vez superado el proceso indicado (donde si es necesario la máquina te marca cómo mover los tornillos para alinearla, algo que me encanta), echo de menos que no repita el proceso donde pide alinear cada HotEnd de manera que quede en contacto con un folio, algo que sí realiza con el "Full Calibration", pero no con la opción de calibrar sólo la "Cama".
Creo que estaría bien añadir ese punto y así evitar tener que completar el "Full..." cada vez que pretendo alinear la cama hasta ese nivel.

Venga, un saludo.
¡Muchas gracias por vuestro trabajo! ¡Esta SIGMA tiene muy buena pinta!

PD: ¿sería posible adquirir los modelos de las partes impresas de la máquina? ¡Necesito un recambio para uno de los soportes de las bobinas y otro para una de las sujeciones del cableado+tubo de la parte superior izquierda!

Purge settings

Hi,
I have a suggestion about the "Purge Filament" settings...
Would it be possible to change the firmware in order to make the extruders move to the very same place as for "Remove Filament" when you press "Purge"?
By now I'm moving myself the extruders to that place so the filament would move a lot easier through the bowden tube during the purge process. I know it is not a big deal, but maybe it is not a bad idea to set up this. What do you think?

CRITICAL ISSUE: Loss of calibration settings in EEPROM after long power off !!!

FW/SD on v114 (latest, not corrupt files used !!!)

My Sigma is loosing it's settings stored in the EEPROM after machine was switched off few hours (e.g. 10h). Issue happend now at least 20 times ... or even more !!!!!
I can not reproduce the fault with short power breaks (e.g. 5-10min).

Data which get lost:

  • X/Y/Z calibration data
  • custom filament temperatures for L and R

Settings stored in EEPROM before issue occures (example):
Recv: echo: X 303.60 Y -0.15 Z -0.25 Z probe-1.75
Recv: echo: L_INSERT 230.00 L_REMOVE 250.00 L_BED 60.00 L_PRINT 230.00
Recv: echo: R_INSERT 230.00 R_REMOVE 250.00 R_BED 60.00 R_PRINT 230.00

Settings in EEPROM after data are lost (always set to this values!!):
Recv: echo: X 303.90 Y -0.15 Z -0.10 Z probe-2.90
Recv: echo: L_INSERT 220.00 L_REMOVE 170.00 L_BED 65.00 L_PRINT 215.00
Recv: echo: R_INSERT 220.00 R_REMOVE 170.00 R_BED 65.00 R_PRINT 215.00

############################## FULL M503 PRINTOUT ##############################

### M503 before issue occures ###
Send: M503
Recv: echo:Steps per unit:
Recv: echo: M92 X80.00 Y80.00 Z1600.00 E152.00
Recv: echo:Maximum feedrates (mm/s):
Recv: echo: M203 X250.00 Y180.00 Z15.00 E60.00
Recv: echo:Maximum Acceleration (mm/s2):
Recv: echo: M201 X2250 Y2250 Z80 E800
Recv: echo:Acceleration: S=acceleration, T=retract acceleration
Recv: echo: M204 S1500.00 T2000.00
Recv: echo:Advanced variables: S=Min feedrate (mm/s), T=Min travel feedrate (mm/s), B=minimum segment time (ms), X=maximum XY jerk (mm/s), Z=maximum Z jerk (mm/s), E=maximum E jerk (mm/s)
Recv: echo: M205 S0.00 T0.00 B20000 X5.00 Z0.40 E5.00
Recv: echo:Home offset (mm):
Recv: echo: M206 X0.00 Y0.00 Z0.00
Recv: echo:PID settings:
Recv: echo: M301 LEFT P15.16 I1.16 D49.38 - M301 RIGHT P15.16 I1.16 D49.38
Recv: echo:Offsets (mm):
Recv: echo: X 303.60 Y -0.15 Z -0.25 Z probe-1.75
Recv: echo:Temp (???C):
Recv: echo: L_INSERT 230.00 L_REMOVE 250.00 L_BED 60.00 L_PRINT 230.00
Recv: echo:Temp (???C):
Recv: echo: R_INSERT 230.00 R_REMOVE 250.00 R_BED 60.00 R_PRINT 230.00
Recv: echo:LOG:
Recv: echo: prints 2.00 hours print 0.00 prints finished 0.00 max temp L 251.00 max temp R 230.00 max temp B 60.00
Recv: ok

### M503 after data got lost ###
Send: M503
Recv: echo:Steps per unit:
Recv: echo: M92 X80.00 Y80.00 Z1600.00 E152.00
Recv: echo:Maximum feedrates (mm/s):
Recv: echo: M203 X250.00 Y180.00 Z15.00 E60.00
Recv: echo:Maximum Acceleration (mm/s2):
Recv: echo: M201 X2250 Y2250 Z80 E800
Recv: echo:Acceleration: S=acceleration, T=retract acceleration
Recv: echo: M204 S1500.00 T2000.00
Recv: echo:Advanced variables: S=Min feedrate (mm/s), T=Min travel feedrate (mm/s), B=minimum segment time (ms), X=maximum XY jerk (mm/s), Z=maximum Z jerk (mm/s), E=maximum E jerk (mm/s)
Recv: echo: M205 S0.00 T0.00 B20000 X5.00 Z0.40 E5.00
Recv: echo:Home offset (mm):
Recv: echo: M206 X0.00 Y0.00 Z0.00
Recv: echo:PID settings:
Recv: echo: M301 LEFT P15.16 I1.16 D49.38 - M301 RIGHT P15.16 I1.16 D49.38
Recv: echo:Offsets (mm):
Recv: echo: X 303.90 Y -0.15 Z -0.10 Z probe-2.90
Recv: echo:Temp (???C):
Recv: echo: L_INSERT 220.00 L_REMOVE 170.00 L_BED 65.00 L_PRINT 215.00
Recv: echo:Temp (???C):
Recv: echo: R_INSERT 220.00 R_REMOVE 170.00 R_BED 65.00 R_PRINT 215.00
Recv: echo:LOG:
Recv: echo: prints 1.00 hours print 0.00 prints finished 0.00 max temp L 230.00 max temp R 0.00 max temp B 70.00
Recv: ok

[Issue]Extruder temperatures locked

with last firmware T0 is off and temperature stay @209°C and T1 is off stay @77°C
No issue for bed.
Checked,no heating but big deviation of temp probes
Thanks for assistance

[Issue] Purge Function in FW.1.4

I just updated my Sigma with the last version of the Firmware 1.1.4 and the Purge Function button is not working !!!

I havn't any troubles to insert or remove filament, but the Purge function is not available. The icon is here, but I can't touch on it... It's a very very big.

Thanks

Bed temperature for Full Calibration needs review

There is a significant temperature drop between the heated bed PCB and the top surface of the glass. The PLA pre-heat temperatures specified in the firmware appear to be 45C or 50C which although near to the Tg of PLA does not account for the temperature drop across the glass.

I calculated that to achieve a 55C glass surface temperature (which I use on other printers when printing PLA) the heated bed needs to be set to 85C. I did this as an experiment and measured the glass surface temperature to be 56C which confirms my calculation.

By having the lower temperature the glass surface is not sufficiently hot enough to permit PLA to stick reliably during Full Calibration.

Thinking further on this, is there a reason why the Full Calibration alignment test cannot be supplied as a STL or G-Code outside the firmware? If that were possible, users could set bed temperature to suit the materials they are using instead of assuming that PLA is being used.

Left extruder Bed Calibration probe position problem.

The glass platform has a 45 degree bevel (or chamfer if you prefer that term).

I am finding that during Bed Calibration the left extruder microswitch is making contact with the glass on the bevel and not on the flat glass surface.

This, I believe, can introduce an error into the bed calibration that raises the left side of the bed and could cause the nozzle to hit the surface as noticed in another issue here.

Z-calibration part of Full Calibration requires modification

During Full Calibration the Z height is set in a procedure as follows:

  1. Heat both extruders
  2. Permit user to wipe left extruder
  3. Permit user to wipe right extruder
  4. Perform left extruder Z-calibration
  5. Perform right extruder Z-calibration

The left extruder Z-calibration can take some time while the user adjusts the nozzle height repeatedly and during this time the right extruder is oozing plastic. When the time arrives for the right extruder Z-calibration there is significant build-up of plastic on the nozzle which should be wiped away.

I suggest a better procedure would be:
For each extruder --

  1. Heat extruder
  2. Permit user to wipe this extruder
  3. Perform this extruder Z-calibration
    Repeat for other extruder

By heating the extruder just before performing the wipe and Z-calibration the nozzle is given very little time to ooze plastic before the calibration sequence is performed.

Impresión del Test para la Calibración del Offset en X e Y

From @4truemodels on September 15, 2015 15:42

Saludos,
Quería compartir mi experiencia con la recién adquirida SIGMA, las primeras impresiones son muy buenas, me encanta el trabajo que habéis realizado para el proceso de alimentación y retirada del material de impresión, y sobretodo para el proceso tan cómodo y guiado de todo el calibrado.

Sin embargo, en este último punto, durante todas las pruebas que he lanzado para el Calibrado del Offset en X e Y, para las que la SIGMA realiza una impresión de una serie de líneas con ambos extrusores con las que hacer una estimación y seleccionar la pareja mejor alineada, nunca he logrado que las primeras 1-3 líneas se impriman correctamente.

Con esto me surge una primera duda, ¿sólo me sucede a mí?
Pero también me surge una posible causa y solución:

  • Causa: que los extrusores todavía no logran sacar un flujo apropiado de material al inicio del test.
  • Solución: ¿qué tal si le incorporamos la realización de un "skirt" previo, aunque sea de una sola línea, y así garantizamos que el flujo ya sea el idóneo para cuando se disponga a imprimir las líneas del Test?

Sea como sea, ¡gran trabajo!

Copied from original issue: BCN3D/BCN3DSigma-FirmwareOLD#2

"line tests" extruding settings

It would be necessary to update the printing settings for the line tests:

  • it leaks always filament due to a low retraction applied. It surely be related filament materials but the most common retraction you have set on your profiles is 4mm and may work better
  • before starting extruding the tests it purges the nozzle, it eventually happens to me that it is necessary to purge more millimetres because it starts extruding "nothing" (this is due to material dripping when the nozzle is hot and not on use). It is very notable on Z leveling tests because its brim line is so small, maybe, a fast solution would be to increase the brim lines to 2 or 3.

Machine Control Panel in Simplify3D Connection lost...

When I try to connect to the printer in Simplify3D...
it first connects,
suddenly there's a CRC error,
then some commands that seem to work,

But then the printer suddenly reboots and... the connection is lost !

Here is wat the "Machine control panel" says :

Attempting connection at \\.\COM4...
RECEIVED: 01-1.1.4
RECEIVED: echo:start
RECEIVED: BCN3D Sigma
  Testing plaintext communication protocol...
  Testing binary communication protocol...
  Testing alternate communication protocols...
RECEIVED: echo:Stored settings retrieved
  Attempting RTS reset and trying again...
RECEIVED: ok
  Connected to machine!
SENT: T0
WARNING: CRC mismatch detected
RECEIVED: 
RECEIVED: echo:Active Extruder: 0
Active Extruder: 0
RECEIVED: ok
SENT: M105
RECEIVED: ok T:17.7 /0.0 B:18.6 /0.0 T0:17.7 /0.0 T1:19.0 /0.0 @:0 B@:0
  Connection failed.

New v01-1.1.3 doesn´t update correctly?

I have just updated my Sigma with yesterdays commits and I think it is not correctly updated:

  • from Cura (I tried it on OSX) it says there is no new firmware online. I did it by downloading it from Github and then uploading a custom firmware. I of course also copied and overwritten the LCD files
  • now the startup screen reads version "v02-1.1.3_d"
  • even updating the LCD files to v113 it's not possible to get the supposed new feature "Calibration prints have been redistributed for better visualization and performace"
    Once found the previously explained issues I haven't continued testing but I would like to know if it has been correctly uploaded or it's me that have done anything wrong...

Thanks

Update FW Instructions in "Readme.md"

You should update the FW update instructions in the initial Readme.md to make it more clear which zip-file to be used for manual update.
Unfortunately i did not know at the beginning that i will find the compilied hex file in the "Source Code.zip" which you will only find when you go to "Releases".

I have downloaded the file from the repository (via RAW Button) and this file can not be used.
Make it more clear to the users who are not familar with Github.
Anyhow .... the latest FW Files and instructions must be placed on BCN3D Support pages.
At the moment only very old files are stored here.

[Enhancement] - Manual axis movement

It could be very usefull to have a menu to move the different axis.

  • Move X/Y the right and the left extruder (could be with the hands)
  • Move Z up and down (couldn't be by hands) VERY VERY VERY USEFULL to do some maintenance on the printer
  • Auto-home for both extruders
  • Present the left extruder (The left extruder come to the front of the printer and the bed go down.
  • Same thing for the right extruder

[Issue] No return to home after stop print

I noticed that the extruder are not return to home systematically when I cancelled a print. I saw that during the right extruder printing.

Same thing, please add a return to home for both extruder before each print. I launch a print but I let my right extruder in the middle, and the left extruder start printing and collides the right one.

New printer with firmware version : 1.1.3

Preheat starts as soon as screen is entered.

When performing Preheat the temperatures start increasing as soon as the function is selected not when Accept is pressed.

This means that if you wanted to set a temperature of e.g. 85C for a PLA cold-pull by the time you have adjusted the temperature down to that value the extruder might be hotter than 85C.

Worse still is that there is no opportunity to reduce temperatures of items you do not want to preheat before Accepting. Both extruders and bed are heated on entry which is not sensible.

[Enhancement] Head position after a print

It could be better to place the head at the top front of the printer instead of at the back after a finished print (and a stopped print). Because at the back, their is some torsion on the bowden tube and the flat cable.

Wrong release description v114 for M503

With the Gcode M502 you can reset all the variables to factory and with the M503 you reset PID values and calibration variables.

M503 does not reset any value. It's only printing the currently used variables.
Should be corrected.

Ayuda: Extrusor golpea la cama

Saludos,
Disculpad que aproveche este mismo medio, supongo que no es el lugar apropiado y en ese caso agradecería cualquier otro método de contacto para este tipo de cosas...

Sucede que desde la última vez que realicé un "Full Calibration" esta mañana, cada vez que intento imprimir cualquier cosa parece que algo ha cambiado en los primeros pasos, puesto que la Cama o no baja lo suficiente o sube demasiado deprisa, lo que provoca que cuando el Extrusor Izquierdo se dirige al primer punto del recorrido de la impresión, golpea con bastante violencia el cristal, para luego empezar a imprimir con total normalidad.
Llevo unas horas dándole vueltas y no entiendo lo que está sucediendo. Si fuese un problema de calibrado, se habría resuelto tras alguno de los siguientes procesos de "Full Calibration" que he llevado a cabo con posterioridad. Además tras ese golpe durante el recorrido desde el "área de reposo" hasta el punto inicial de impresión, el proceso sigue con normalidad y las impresiones terminan correctamente, sin rozar el cristal ni nada por el estilo.
No veo por ninguna parte la causa de que esto me esté sucediendo, puesto que sigo usando por el momento el mismo Cura (el modificado por vosotros) desde el primer día que recibí la máquina, y hasta esta misma mañana no me había sucedido jamás nada parecido.

Os adjunto un link con el "profile" que llevo días usando con el Cura sin ningún problema, y que es con el mismo con el que estoy teniendo estos "sustos" desde esta mañana:
https://drive.google.com/file/d/0BwcplIMBp-swbWt4RG5lY3BpUlE/view?usp=sharing

Espero que podáis echarme un cable y decirme algo pronto, seguiré dándole vueltas y volveré a calibrar la máquina alguna que otra vez más, a ver si termino resolviendo por qué está sucediendo esto.

Muchas gracias!

[Enhancement] LCD screen during printing

It could be very usefull to have a direct look (without clicking on settings) of the target for each value.

Something like:

204°C/205°C 51°C/50°C 206°C/2005°C 100%

Full calibration crashes

After all my tests I have seen there is a problem in the Full calibration routine that sometimes crashes the software and it reboots.
When setting the right extruder Z distance to bed, if you press twice the "OK" button once you have adjusted it, it sometimes crashes and reboots.
I don't know if this is the real problem but it happens to me.

Why all the adjustment of current_position[Z_AXIS] during extruder calibration?

In Marlin_main.cpp the code following line 2174 (search "case 40") and line 2405 (search "case 41") has many differing values for current_position[Z_AXIS].

There are static assignments of 0.65, 0.5 and 0.2 and modifications of -=0.2, +=0.2, +=2 and -=2. In other parts I have seen 0.4 statically assigned.

Why is there all this vertical adjustment of the nozzle position during the Calibration pattern printing?

If Z has already been calibrated I would expect that a single layer height would be used for the whole Calibration pattern print - maybe 0.2mm.

[Enhancement] BCN3D Sigma buzzer

Eric already pointed out that BCN3D electronics doesn't have buzzer but LCD does.
It would be great that you "connect" it by firmware so that is possible to use it with Marlin default gcodes.

Thank you

XY calibration is useless

Hello,
On my Sigma I can properly calibrate by following the procedure, the X and Y calibration lines matches perfectly.
But the XY offset values doesn't seem to be stored by the printer, when I print I always have a bad offset in X and Y.
I tried to reload factory settings M502 + M500 and M500 after caibration, it changes nothing.
I have the problem in V113 and V114.

Thanks.

Deactivation of motor and fan of inactive nozzle during single nozzle prints

would it be possible to switch off the cooling fan and nema 14 stepper motor of the inactive nozzle during single nozzle prints?

During single nozzle printing the fan and motor are not required to be active. maybe this could be done by setting a minimum temperature threshold (say 50 degrees) for the cooling fan and motor to be activated.

This will make the printer quieter when switched on and not printing but also while printing with a single nozzle.

Impresiones "sucias"

¡Hola de nuevo!

Todavía sigo experimentando con la máquina, trabajando a distintas escalas, formas, con un solo extrusor, con los dos, combinando materiales (PLA + PVA), etc...
Por el momento no logro afinar con la Retracción para imprimir, ni siquiera usando vuestros GCodes como configuraciones a emular en el Cura para imprimir mis propios modelos 3D.
El problema es muy grande cuando intento imprimir más de un objeto a la vez, y un inconveniente de menor escala al trabajar con los dos extrusores.
Se trata de que las impresiones salen "sucias", y con esto quiero decir que ambos extrusores generan muchos "hilos perdidos", y es que cuando se mueven sin imprimir todavía sueltan demasiado filamento, generando muchas "rebabas" e hilos finos que ensucian mucho las impresiones y requieren demasiado trabajo de "post-producción" para dejarlas bien.
Por ahora éste problema está resultando bastante molesto, y no termino de encontrarle el truco.
¿Os sucede también a vosotros?

Creo que tiene mucho que ver con haber cambiado el sistema de Extrusión, tirando de tubos de alimentación en lugar del "Direct Extruder" que utiliza la BCN3D+. Lo digo porque es algo que también experimenté en mis inicios en este mundo con la primera versión de la Ultimaker hace 3 años, que utiliza un sistema de alimentación muy similar al de la SIGMA.
¿Alguna sugerencia para reducir al máximo este inconveniente?

¡Gracias por vuestro trabajo!

PD: mi última prueba sin éxito ha sido retocando la Distancia de Retracción en el Cura, incrementándola a 6'0mm, pero dejando intacta su Velocidad en 45mm/s.

[Help] understanding touch screen

I would like to help on the firmware development, especially on the GUI part but I don't know how the different screens are designed and compiled. I know they are stored in the "SD files v100" but don't know how to edit them... workflow? software?
Any help would be great in order to start helping the development.

Thank you

[Enhancement] Noise reduction

In this ticket I want to share you a tips to reduce the noise of the sigma and an engancement request.

About the request, is it possible to activate the heated head fan only when the nozzle is heating or cooling ? For maintenance, it's intersting to power on the sigma just for activate the light system and the fan noise is anoying and useless.

About the tips. I significantly reduce the noise during printing by glue with a heated glue pistol the edges (inside) of the two container bellow the heads. It's reduce the vibration and the noise.

Misalignments on dual extruder after calibration run

I have fine tuned X and Y dual extruder calibration with the "lines test" and I have noticed you don't get a perfect alignment on X axis: just after the tuning I have printed a dual extruder file, it's just a cube but enough to see that it gets the misalignment... Of course I was able to select another number in the "lines test" in order to compensate the misalignment but I wanted to let you know.
If you want pictures let me know.

Algunas Sugerencias

Esto realmente no es un "issue", así que si consideráis que éste no es el lugar para éste tipo de comentarios podemos moverlo o eliminarlo, lo que deseéis.

Se trata de sugeriros que en el "display" pueda aparecer el tiempo de impresión, monitorizar el tiempo de trabajo de la SIGMA (como de cualquier otra máquina) me parece imprescindible, así que como petición os diría que se mostrase en pantalla el tiempo de impresión, tanto durante la misma como al completarse.

También hecho de menos no poder ordenar a la máquina un desplazamiento por pasos (10.0, 1.0 y 0.1 mm) para cada Eje, como sí puede hacerse con la BCN3D+, y así poder realizar ciertos diagnósticos.

Finalmente, durante el proceso de introducción de Temperaturas, el hecho de no poder introducir más que 5 grados por cada pulsación como máximo lo hace un poco tedioso, quizás cambiar el comando para que el cambio vaya de 10 en 10 (dejando el otro tal y como está en 1 por pulsación) podría ser de agradecer.

Como véis esto no tiene nada de "issue", sólo son ideas sobre detalles menores que no tienen relevancia sobre el funcionamiento práctico de la máquina.
Sea como sea... ¡Muchas gracias por vuestra atención!

PD: ¿alguna preferencia sobre el idioma en el que comunicarse por este medio? No tengo inconveniente en escribir ni en Castellano, Català (mi lengua materna) o Inglés.

Full calibration Impossible (V1.1.4) : Does the Machine want the bed to reach 257°C?

I wanted to do a full Calibration.
When the process wants to print the first Z pattern, the pinter stays stuck at "Adjusting temperatures, please wait".
As it was taking way too much time compared to previous "adjusting temperatures" I turned off the printer.
I Tried Multiple times to do the calibration procedure with the same issue.

Then I went to the "utilities/Temp/Preheat" Menu where I can see that the "preheat settings" are 257°C for bed and R Extr... Of course, As I am using PLA & PVA this set up is not mine.

My Z calibration seems lost,
I can not remove filament safely (wanted to re-entry type of material) ,
==> I can't do any print safely anymore.

Edit :
Removed PVA/right extruder,
tried to insert PVA/right extruder, the printer says "adjusting temperature"... for too long. Checked temperature : 300°C...
Trier to insert Custom/right extruder (with 200°C), th printer says "ajdusting temperautre"... for too long... checked temperature :302°C...
==> TEMPERATURE SETTING DOES NOT WORK ANYMORE.

MAJOR: M109/M190 Wait until temperature is reached does not work via USB (1.1.4g=>1.1.5RC)

When sending M109 (Set Extruder Temperature and Wait) or M190 (Wait for bed temperature to reach target temp) the printer is proceeding with gcode without waiting for temperature to be reached.

This is causing the print code to be executed before bed and extruder is reaching it's target temperature.

I can not believe that this basic functionality is not working but i have tested this now several times.
Issue was happening with all 1.1.5 release candidates (1.1.4 not tested).

As workaround extruder and bed needs to be pre-heated before starting the print.

[enhancement] Long time before heating

I noticed that sometime (often) after selected a gcode into the Sd Card, the printer take long time (more than a 1 minute) before heating the extruders. You can show that in the settings where the target still 0 a long time too...

SD-Files v114

when i update my sigma with Firmware 114 and i use the SD-files 114 then i can't use the purge-menu on the controlpanel of my sigma. i use now the sd-files from v113_d then i can use this menupoint.

[Enhancement] Separate calibration tests

Sometimes is useful to run just one calibration test and not all of them (for instance dual extruder alignement).
It would be great to have an option to run all of them at once (already included) and all of them individually (now only bed calibration is available).

Thanks

Feature Request: Parallel print of same GCode on both extruder. 2x pieces with one print.

It would be really excellent feature to print same 3d model on both extruder in parallel.
In theory it should be possible but not sure if Sigma FW does support this.

The printing volume needs to be halved from 210x297mm to 105x297.
The benefit of this "duplication" feature is to print 2 pieces in one print.
This will save lot of time and will be unique feature on the market !!!!

Rotura de Filamento

Saludos,

Esta vez quería comentar lo que me ha sucedido en no pocas ocasiones, y se trata de que el filamento (por ahora sólo he probado el PLA de Colorfila) se rompe durante la carga o retirada del mismo, con las consecuencias siguientes de pérdida de tiempo para conseguir retirar la parte rota a mitad del tubo del alimentador (ya sea en el tubo superior -del motor al HotEnd-, o en el inferior -de la bobina al motor-).

Le he estado dando vueltas, y creo que una forma de reducir bastante las probabilidades de que esto siga sucediendo con tanta regularidad (en mi caso 1 de cada 6-7 cargas/retiradas), sería cambiar las instrucciones que realiza durante el proceso...
Considero que la posición que tiene el tubo durante el proceso de carga/retirada es demasiado forzada, puesto que la máquina coloca los HotEnds en el fondo del eje Y, provocando que el tubo tome una curvatura bastante extrema.
Por lo tanto, quizás sólo con cambiar las instrucciones del Firmware para que, durante los procesos de carga y retirada de filamento, coloque los HotEnds en el extremo opuesto (en el frente y no en el fondo como ahora), las probabilidades de que esto suceda se reduzcan notablemente al dejar el tubo en una curvatura mucho más "agradecida".

Llevo un par de días probando esto mismo, puesto que los Steppers no se quedan bloqueados y antes de iniciar el proceso (una vez acabado el posicionamiento), puedo mover manualmente el carril de los HotEnds hasta la parte frontal. Lo estoy haciendo así desde las últimas 9 cargas/retiradas y por el momento no se me ha vuelto a partir el filamento.

Atentamente,
Eduard Miñana,
< 4 True Models >

PD: si estoy siendo demasiado pesado con tanta historia decídmelo, no quisiera hacer perder el tiempo a nadie, ni tampoco el mío propio.

Limited Z Axis MAX_FEEDRATE

From @kitusmark on September 15, 2015 10:53

As we've tested, the printer works much better when Z Axis speed is limited to 15mm/sec by firmware.

Line 792 in _Configuration.h_

#define DEFAULT_MAX_FEEDRATE          {250, 250, 50, 100}    // (mm/sec)

Copied from original issue: BCN3D/BCN3DSigma-FirmwareOLD#1

Recommend Projects

  • React photo React

    A declarative, efficient, and flexible JavaScript library for building user interfaces.

  • Vue.js photo Vue.js

    🖖 Vue.js is a progressive, incrementally-adoptable JavaScript framework for building UI on the web.

  • Typescript photo Typescript

    TypeScript is a superset of JavaScript that compiles to clean JavaScript output.

  • TensorFlow photo TensorFlow

    An Open Source Machine Learning Framework for Everyone

  • Django photo Django

    The Web framework for perfectionists with deadlines.

  • D3 photo D3

    Bring data to life with SVG, Canvas and HTML. 📊📈🎉

Recommend Topics

  • javascript

    JavaScript (JS) is a lightweight interpreted programming language with first-class functions.

  • web

    Some thing interesting about web. New door for the world.

  • server

    A server is a program made to process requests and deliver data to clients.

  • Machine learning

    Machine learning is a way of modeling and interpreting data that allows a piece of software to respond intelligently.

  • Game

    Some thing interesting about game, make everyone happy.

Recommend Org

  • Facebook photo Facebook

    We are working to build community through open source technology. NB: members must have two-factor auth.

  • Microsoft photo Microsoft

    Open source projects and samples from Microsoft.

  • Google photo Google

    Google ❤️ Open Source for everyone.

  • D3 photo D3

    Data-Driven Documents codes.