


该项目正在火热的开发中 QQ群号: 499563266

uiautomator2 是一个Android UI自动化框架,支持Python编写测试脚本对设备进行自动化。底层基于Google uiautomator,Google提供的uiautomator库可以获取屏幕上任意一个APP的任意一个控件属性,并对其进行任意操作,但有两个缺点:1. 测试脚本只能使用Java语言 2. 测试脚本必须每次被上传到设备上运行。 我们希望测试能够用一个更脚本化的语言,例如Python编写,同时可以每次所见即所得地修改测试、运行测试。这里要非常感谢 Xiaocong He (@xiaocong),他将这个想法实现了出来(见xiaocong/uiautomator),原理是在手机上运行了一个http服务器,将uiautomator中的功能开放出来,然后再将这些http接口,封装成Python库。 我们的uiautomator2项目是对xiaocong/uiautomator的增强,主要有以下部分:
- 设备和开发机可以脱离数据线,通过WiFi互联(基于atx-agent)
- 集成了openstf/minicap达到实时屏幕投频,以及实时截图
- 集成了openstf/minitouch达到精确实时控制设备
- 修复了xiaocong/uiautomator经常性退出的问题
- 代码进行了重构和精简,方便维护
- Requirements:
Android OS Version >= 4.4Python >=2.7 || <= 3.6
虽然我说的很简单,但是实现起来用到了很多的技术和技巧,功能非常强,唯独文档有点少。哈哈
-
Install uiautomator2
# Since uiautomator2 is still under development, you have to add --pre to install the development version
pip install --upgrade --pre uiautomator2

# Or you can install directly from github source
git clone https://github.com/openatx/uiautomator2
pip install -e uiautomator2
Optionally,
pillowis needed to process screenshot data.pip install pillow
-
Deploy associated daemons to a device 电脑连接上一个手机或多个手机, 确保adb已经添加到环境变量中,执行下面的命令会自动安装本库所需要的设备端程序:uiautomator-server 、atx-agent、openstf/minicap、openstf/minitouch
# init 所有的已经连接到电脑的设备 python -m uiautomator2 init因为**的网络限制,访问Github的资源速度会比较慢,执行上面的命令可能很费时间,所以我们专门制作了一个国内的Github镜像网站,网站采用的是请求时缓存的策略,所以全网第一次请求需要等待一会。 使用国内镜像只要增加一个参数
--mirrorpython -m uiautomator2 init --mirror
也可以使用
--serial可以指定单个设备python -m uiautomator2 init --mirror --serial $SERIAL安装提示
success即可 -
Install weditor (UI Inspector)
因为uiautomator是独占资源,所以当atx运行的时候uiautomatorviewer是不能用的,为了减少atx频繁的启停,我们开发了基于浏览器技术的weditor UI查看器。https://github.com/openatx/weditor
安装方法
pip install --pre -U weditor
Windows系统可以使用命令在桌面创建一个快捷方式
python -m weditor --shortcut命令行启动
python -m weditor会自动打开浏览器,输入设备的ip或者序列号,点击Connect即可。具体参考文章:浅谈自动化测试工具python-uiautomator2
There are two ways to connect to the device.
- Through WiFi (recommended)
Suppose device IP is
10.0.0.1and your PC is in the same network.
import uiautomator2 as u2

d = u2.connect('10.0.0.1') # alias for u2.connect_wifi('10.0.0.1')
print(d.info)- Through USB
Suppose the device serial is
123456f(seen fromadb devices)
import uiautomator2 as u2

d = u2.connect('123456f') # alias for u2.connect_usb('123456f')
print(d.info)
Calling u2.connect() with no argument, uiautomator2 will obtain device IP from the environment variable ANDROID_DEVICE_IP.
If this environment variable is empty, uiautomator will fall back to connect_usb and you need to make sure that there is only one device connected to the computer.
其中的$device_ip代表设备的ip地址
-
init: 为设备安装所需要的程序
-
install: 安装apk,apk通过URL给出
$ python -m uiautomator2.cli install $device_ip https://example.org/some.apk MainThread: 15:37:55,731 downloading 80.4 kB / 770.6 kB MainThread: 15:37:56,763 installing 770.6 kB / 770.6 kB MainThread: 15:37:58,780 success installed 770.6 kB / 770.6 kB -
clear-cache: 清空缓存
$ python -m uiautomator2 clear-cache
-
app-stop-all: 停止所有应用$ python -m uiautomator2 app-stop-all $device_ip -
screenshot: 截图
$ python -m uiautomator2 screenshot $device_ip screenshot.jpg -
healthcheck: 健康检查
$ python -m uiautomator2 healthcheck $device_ip
先中文写着了,国外大佬们先用Google Translate顶着
- Question and Answers (FAQ)
- 浅谈自动化测试工具python-uiautomator2
- weditor 用于查看UI层次结构,方便写脚本用。
- htmlreport 记录测试过程的测试报告(实验性质)
d.healthcheck()为了提高uiautomator2再有播放器界面不卡死,代码中将默认3000ms中的waitForIdleTimeout改成了0,不过有可能会造成坐标偏移,虽然概率不大。
如果出现这种情况,可以将其调大一点 d.jsonrpc.setConfigurator({"waitForIdleTimeout": 100})
因为有atx-agent的存在,Uiautomator会被一直守护着,如果退出了就会被重新启动起来。但是Uiautomator又是霸道的,一旦它在运行,手机上的辅助功能、电脑上的uiautomatorviewer 就都不能用了,除非关掉该框架本身的uiautomator。下面就说下两种关闭方法
方法1:
直接打开uiautomator app(init成功后,就会安装上的),点击关闭UIAutomator
方法2:
d.service("uiautomator").stop()
# d.service("uiautomator").start()Notes: In below examples, we use d to represent the uiautomator2 object for the connected device.
- Install an app
- Launch an app
- Stop an app
- Stop all running apps
- Push and pull files
- Auto click permission dialogs
- Shell commands
- Session
- Retrieve the device info
- Key Events
- Gesture interaction with the device
- Screen-related
- Selector
- Watcher
- Global settings
- Input method
- Toast
- XPath
Google uiautomator与uiautomator2的区别
This part contains some global settings
Trace HTTP requests and response to find out how it works.
>>> d.debug = True
>>> d.info
12:32:47.182 $ curl -X POST -d '{"jsonrpc": "2.0", "id": "b80d3a488580be1f3e9cb3e926175310", "method": "deviceInfo", "params": {}}' 'http://127.0.0.1:54179/jsonrpc/0'
12:32:47.225 Response >>>
{"jsonrpc":"2.0","id":"b80d3a488580be1f3e9cb3e926175310","result":{"currentPackageName":"com.android.mms","displayHeight":1920,"displayRotation":0,"displaySizeDpX":360,"displaySizeDpY":640,"displayWidth":1080,"productName"
:"odin","screenOn":true,"sdkInt":25,"naturalOrientation":true}}
<<< ENDSet default element wait time, unit seconds
d.implicitly_wait(10.0)
d(text="Settings").click() # if Settings button not show in 10s, UiObjectNotFoundError will raised

print("wait timeout", d.implicitly_wait()) # get default implicit wait
This function will have influence on click, long_click, drag_to, get_text, set_text, clear_text, etc.
This part showcases how to perform app management
We only support installing an APK from a URL
d.app_install('http://some-domain.com/some.apk')d.app_start("com.example.hello_world") # start with package name# equivalent to `am force-stop`, thus you could lose data
d.app_stop("com.example.hello_world")
# equivalent to `pm clear`
d.app_clear('com.example.hello_world')# stop all
d.app_stop_all()
# stop all app except for com.examples.demo
d.app_stop_all(excludes=['com.examples.demo'])-
push a file to the device
# push to a folder
d.push("foo.txt", "/sdcard/")
# push and rename
d.push("foo.txt", "/sdcard/bar.txt")
# push fileobj
with open("foo.txt", 'rb') as f:
    d.push(f, "/sdcard/")
# push and change file access mode
d.push("foo.sh", "/data/local/tmp/", mode=0o755)
-
pull a file from the device
d.pull("/sdcard/tmp.txt", "tmp.txt")

# FileNotFoundError will raise if the file is not found on the device
d.pull("/sdcard/some-file-not-exists.txt", "tmp.txt")
注意注意 disable_popups函数,检测发现很不稳定,暂时不要使用,等候通知。
Import in version 0.1.1
d.disable_popups() # automatic skip popups
d.disable_popups(False) # disable automatic skip popups
If this method is not working on your device, You can make a pull request or create an issue to enhance this function. I'll show you how to do it.
- Open
uiautomatorviewer.bat - Get popup hierarchy

Now you know the button text and current package name. Make a pull request by update function disable_popups or create an issue if you are not familar with git and python.
This part showcases how to perform common device operations:
-
Run a short-lived shell command with a timeout protection. (Default timeout 60s)
Note: timeout support require
atx-agent >=0.3.3adb_shellfunction is deprecated. Useshellinstead.Simple usage
output, exit_code = d.shell("pwd", timeout=60) # timeout 60s (Default)
# output: "/\n", exit_code: 0
# Similar to command: adb shell pwd

# Since `shell` function return type is `namedtuple("ShellResponse", ("output", "exit_code"))`
# so we can do some tricks
output = d.shell("pwd").output
exit_code = d.shell("pwd").output
The first argument can be list. for example
output, exit_code = d.shell(["ls", "-l"])
# output: "/....", exit_code: 0
This returns a string for stdout merged with stderr. If the command is a blocking command,
shellwill also block until the command is completed or the timeout kicks in. No partial output will be received during the execution of the command. This API is not suitable for long-running commands. The shell command given runs in a similar environment ofadb shell, which has a Linux permission level ofadborshell(higher than an app permission). -
Run a long-running shell command
add stream=True will return
requests.models.Responseobject. More info see requests streamr = d.shell("logcat", stream=True) # r: requests.models.Response deadline = time.time() + 10 # run maxium 10s try: for line in r.iter_lines(): # r.iter_lines(chunk_size=512, decode_unicode=None, delimiter=None) if time.time() > deadline: break print("Read:", line.decode('utf-8')) finally: r.close() # this method must be called
Command will be terminated when
r.close()called.
Session represent an app lifestyle. Can be used to start app, detect app crash.
-
Launch and close app
sess = d.session("com.netease.cloudmusic") # start 网易云音乐
sess.close() # 停止网易云音乐
-
Use python
withto launch and close appwith d.session("com.netease.cloudmusic") as sess: sess(text="Play").click()
-
Attach to the running app
sess = d.session("com.netease.cloudmusic", attach=True)
-
Detect app crash
# When app is still running
sess(text="Music").click() # operation goes normal

# If app crash or quit
sess(text="Music").click() # raise SessionBrokenError
# other function calls under session will raise SessionBrokenError too
# check if session is ok.
# Warning: function name may change in the future
sess.running() # True or False
Get basic information
d.infoBelow is a possible output:
{
    u'displayRotation': 0,
    u'displaySizeDpY': 640,
    u'displaySizeDpX': 360,
    u'currentPackageName': u'com.android.launcher',
    u'productName': u'takju',
    u'displayWidth': 720,
    u'sdkInt': 18,
    u'displayHeight': 1184,
    u'naturalOrientation': True
}
Get window size
print(d.window_size())
# device upright output example: (1080, 1920)
# device horizontal output example: (1920, 1080)
Get current app info. For some android devices, the output could be empty (see Output example 3)
print(d.current_app())
# Output example 1: {'activity': '.Client', 'package': 'com.netease.example', 'pid': 23710}
# Output example 2: {'activity': '.Client', 'package': 'com.netease.example'}
# Output example 3: {'activity': None, 'package': None}
Get device serial number
print(d.serial)
# output example: 74aAEDR428Z9
Get WLAN ip
print(d.wlan_ip)
# output example: 10.0.0.1
Get detailed device info
print(d.device_info)Below is a possible output:
{'udid': '3578298f-b4:0b:44:e6:1f:90-OD103',
 'version': '7.1.1',
 'serial': '3578298f',
 'brand': 'SMARTISAN',
 'model': 'OD103',
 'hwaddr': 'b4:0b:44:e6:1f:90',
 'port': 7912,
 'sdk': 25,
 'agentVersion': 'dev',
 'display': {'width': 1080, 'height': 1920},
 'battery': {'acPowered': False,
  'usbPowered': False,
  'wirelessPowered': False,
  'status': 3,
  'health': 0,
  'present': True,
  'level': 99,
  'scale': 100,
  'voltage': 4316,
  'temperature': 272,
  'technology': 'Li-ion'},
 'memory': {'total': 3690280, 'around': '4 GB'},
 'cpu': {'cores': 8, 'hardware': 'Qualcomm Technologies, Inc MSM8953Pro'},
 'presenceChangedAt': '0001-01-01T00:00:00Z',
 'usingBeganAt': '0001-01-01T00:00:00Z'}
-
Turn on/off screen
d.screen_on() # turn on the screen
d.screen_off() # turn off the screen
-
Get current screen status
d.info.get('screenOn') # require Android >= 4.4
-
Press hard/soft key
d.press("home") # press the home key, with key name
d.press("back") # press the back key, with key name
d.press(0x07, 0x02) # press keycode 0x07('0') with META ALT(0x02)
-
These key names are currently supported:
- home
- back
- left
- right
- up
- down
- center
- menu
- search
- enter
- delete ( or del)
- recent (recent apps)
- volume_up
- volume_down
- volume_mute
- camera
- power
You can find all key code definitions at Android KeyEvnet
-
Unlock screen
d.unlock()
# This is equivalent to
# 1. launch activity: com.github.uiautomator.ACTION_IDENTIFY
# 2. press the "home" key
-
Click on the screen
d.click(x, y)
-
Double click
d.double_click(x, y)
d.double_click(x, y, 0.1) # default duration between two click is 0.1s
-
Long click on the screen
d.long_click(x, y)
d.long_click(x, y, 0.5) # long click 0.5s (default)
-
Swipe
d.swipe(sx, sy, ex, ey)
d.swipe(sx, sy, ex, ey, 0.5) # swipe for 0.5s(default)
-
Drag
d.drag(sx, sy, ex, ey)
d.drag(sx, sy, ex, ey, 0.5) # swipe for 0.5s(default)
-
Swipe points
# swipe from point(x0, y0) to point(x1, y1) then to point(x2, y2)
# time will speed 0.2s bwtween two points
d.swipe((x0, y0), (x1, y1), (x2, y2), 0.2)
多用于九宫格解锁,提前获取到每个点的相对坐标(这里支持百分比), 更详细的使用参考这个帖子 使用u2实现九宫图案解锁
Note: click, swipe, drag operations support percentage position values. Example:
d.long_click(0.5, 0.5) means long click center of screen
-
Retrieve/Set device orientation
The possible orientations:
naturalornleftorlrightorrupsidedownoru(can not be set)
# retrieve orientation. the output could be "natural" or "left" or "right" or "upsidedown"
orientation = d.orientation

# WARNING: not pass testing in my TT-M1
# set orientation and freeze rotation.
# notes: setting "upsidedown" requires Android>=4.3.
d.set_orientation('l') # or "left"
d.set_orientation("l") # or "left"
d.set_orientation("r") # or "right"
d.set_orientation("n") # or "natural"
-
Freeze/Un-freeze rotation
# freeze rotation
d.freeze_rotation()
# un-freeze rotation
d.freeze_rotation(False)
-
Take screenshot
# take screenshot and save to a file on the computer, require Android>=4.2.
d.screenshot("home.jpg")

# get PIL.Image formatted images. Naturally, you need pillow installed first
image = d.screenshot() # default format="pillow"
image.save("home.jpg") # or home.png. Currently, only png and jpg are supported

# get opencv formatted images. Naturally, you need numpy and cv2 installed first
import cv2
image = d.screenshot(format='opencv')
cv2.imwrite('home.jpg', image)

# get raw jpeg data
imagebin = d.screenshot(format='raw')
open("some.jpg", "wb").write(imagebin)
-
Dump UI hierarchy
# get the UI hierarchy dump content (unicoded).
xml = d.dump_hierarchy()
-
Open notification or quick settings
d.open_notification()
d.open_quick_settings()
Selector is a handy mechanism to identify a specific UI object in the current window.
# Select the object with text 'Clock' and its className is 'android.widget.TextView'
d(text='Clock', className='android.widget.TextView')
Selector supports below parameters. Refer to UiSelector Java doc for detailed information.
text,textContains,textMatches,textStartsWithclassName,classNameMatchesdescription,descriptionContains,descriptionMatches,descriptionStartsWithcheckable,checked,clickable,longClickablescrollable,enabled,focusable,focused,selectedpackageName,packageNameMatchesresourceId,resourceIdMatchesindex,instance
-
children
# get the children or grandchildren
d(className="android.widget.ListView").child(text="Bluetooth")
-
siblings
# get siblings
d(text="Google").sibling(className="android.widget.ImageView")
-
children by text or description or instance
# get the child matching the condition className="android.widget.LinearLayout"
# and also its children or grandchildren with text "Bluetooth"
d(className="android.widget.ListView", resourceId="android:id/list") \
 .child_by_text("Bluetooth", className="android.widget.LinearLayout")

# get children by allowing scroll search
d(className="android.widget.ListView", resourceId="android:id/list") \
 .child_by_text(
    "Bluetooth",
    allow_scroll_search=True,
    className="android.widget.LinearLayout"
  )
-
child_by_descriptionis to find children whose grandchildren have the specified description, other parameters being similar tochild_by_text. -
child_by_instanceis to find children with has a child UI element anywhere within its sub hierarchy that is at the instance specified. It is performed on visible views without scrolling.
See below links for detailed information:
- UiScrollable,
getChildByDescription,getChildByText,getChildByInstance - UiCollection,
getChildByDescription,getChildByText,getChildByInstance
Above methods support chained invoking, e.g. for below hierarchy
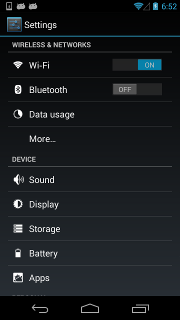
<node index="0" text="" resource-id="android:id/list" class="android.widget.ListView" ...>
  <node index="0" text="WIRELESS & NETWORKS" resource-id="" class="android.widget.TextView" .../>
  <node index="1" text="" resource-id="" class="android.widget.LinearLayout" ...>
    <node index="1" text="" resource-id="" class="android.widget.RelativeLayout" ...>
      <node index="0" text="Wi‑Fi" resource-id="android:id/title" class="android.widget.TextView" .../>
    </node>
    <node index="2" text="ON" resource-id="com.android.settings:id/switchWidget" class="android.widget.Switch" .../>
  </node>
  ...
</node>
To click the switch widget right to the TextView 'Wi‑Fi', we need to select the switch widgets first. However, according to the UI hierarchy, more than one switch widgets exist and have almost the same properties. Selecting by className will not work. Alternatively, the below selecting strategy would help:
d(className="android.widget.ListView", resourceId="android:id/list") \
  .child_by_text("Wi‑Fi", className="android.widget.LinearLayout") \
  .child(className="android.widget.Switch") \
  .click()
-
-
relative positioning
Also we can use the relative positioning methods to get the view:
left,right,top,bottom.d(A).left(B), selects B on the left side of A.d(A).right(B), selects B on the right side of A.d(A).up(B), selects B above A.d(A).down(B), selects B under A.
So for above cases, we can alternatively select it with:
## select "switch" on the right side of "Wi‑Fi"
d(text="Wi‑Fi").right(className="android.widget.Switch").click()
-
Multiple instances
Sometimes the screen may contain multiple views with the same properties, e.g. text, then you will have to use the "instance" property in the selector to pick one of qualifying instances, like below:
d(text="Add new", instance=0) # which means the first instance with text "Add new"
In addition, uiautomator2 provides a list-like API (similar to jQuery):
# get the count of views with text "Add new" on current screen
d(text="Add new").count

# same as count property
len(d(text="Add new"))

# get the instance via index
d(text="Add new")[0]
d(text="Add new")[1]
...

# iterator
for view in d(text="Add new"):
    view.info  # ...
Notes: when using selectors in a list fashion, you must ensure that the UI elements on the screen keep unchanged. Otherwise, when Element-Not-Found error could occur when iterating through the list.
-
Check if the specific UI object exists
d(text="Settings").exists # True if exists, else False
d.exists(text="Settings") # alias of above property.

# advanced usage
d(text="Settings").exists(timeout=3) # wait Settings appear in 3s, same as .wait(3)
-
Retrieve the info of the specific UI object
d(text="Settings").info
Below is a possible output:
{ u'contentDescription': u'', u'checked': False, u'scrollable': False, u'text': u'Settings', u'packageName': u'com.android.launcher', u'selected': False, u'enabled': True, u'bounds': {u'top': 385, u'right': 360, u'bottom': 585, u'left': 200}, u'className': u'android.widget.TextView', u'focused': False, u'focusable': True, u'clickable': True, u'chileCount': 0, u'longClickable': True, u'visibleBounds': {u'top': 385, u'right': 360, u'bottom': 585, u'left': 200}, u'checkable': False } -
Get/Set/Clear text of an editable field (e.g., EditText widgets)
d(text="Settings").get_text()  # get widget text
d(text="Settings").set_text("My text...")  # set the text
d(text="Settings").clear_text()  # clear the text
-
Get Widget center point
x, y = d(text="Settings").center()
# x, y = d(text="Settings").center(offset=(0, 0)) # left-top x, y
-
Perform click on the specific object
# click on the center of the specific ui object
d(text="Settings").click()

# wait element to appear for at most 10 seconds and then click
d(text="Settings").click(timeout=10)

# click with offset(x_offset, y_offset)
# click_x = x_offset * width + x_left_top
# click_y = y_offset * height + y_left_top
d(text="Settings").click(offset=(0.5, 0.5)) # Default center
d(text="Settings").click(offset=(0, 0)) # click left-top
d(text="Settings").click(offset=(1, 1)) # click right-bottom

# click when exists in 10s, default timeout 0s
clicked = d(text='Skip').click_exists(timeout=10.0)

# click until element gone, return bool
is_gone = d(text="Skip").click_gone(maxretry=10, interval=1.0) # maxretry default 10, interval default 1.0
-
Perform long click on the specific UI object
# long click on the center of the specific UI object
d(text="Settings").long_click()
-
Drag the UI object towards another point or another UI object
# notes : drag can not be used for Android<4.3.
# drag the UI object to a screen point (x, y), in 0.5 second
d(text="Settings").drag_to(x, y, duration=0.5)
# drag the UI object to (the center position of) another UI object, in 0.25 second
d(text="Settings").drag_to(text="Clock", duration=0.25)
-
Swipe from the center of the UI object to its edge
Swipe supports 4 directions:
- left
- right
- top
- bottom
d(text="Settings").swipe("right")
d(text="Settings").swipe("left", steps=10)
d(text="Settings").swipe("up", steps=20) # 1 steps is about 5ms, so 20 steps is about 0.1s
d(text="Settings").swipe("down", steps=20)
-
Two-point gesture from one point to another
d(text="Settings").gesture((sx1, sy1), (sx2, sy2), (ex1, ey1), (ex2, ey2))
-
Two-point gesture on the specific UI object
Supports two gestures:
In, from edge to centerOut, from center to edge
# notes : pinch can not be set until Android 4.3.
# from edge to center. here is "In" not "in"
d(text="Settings").pinch_in(percent=100, steps=10)
# from center to edge
d(text="Settings").pinch_out()
-
Wait until the specific UI appears or disappears
# wait until the ui object appears
d(text="Settings").wait(timeout=3.0) # return bool
# wait until the ui object gone
d(text="Settings").wait_gone(timeout=1.0)
The default timeout is 20s. see global settings for more details
-
Perform fling on the specific ui object(scrollable)
Possible properties:
horizorvertforwardorbackwardortoBeginningortoEnd
# fling forward(default) vertically(default)
d(scrollable=True).fling()
# fling forward horizontally
d(scrollable=True).fling.horiz.forward()
# fling backward vertically
d(scrollable=True).fling.vert.backward()
# fling to beginning horizontally
d(scrollable=True).fling.horiz.toBeginning(max_swipes=1000)
# fling to end vertically
d(scrollable=True).fling.toEnd()
-
Perform scroll on the specific ui object(scrollable)
Possible properties:
horizorvertforwardorbackwardortoBeginningortoEnd, orto
# scroll forward(default) vertically(default)
d(scrollable=True).scroll(steps=10)
# scroll forward horizontally
d(scrollable=True).scroll.horiz.forward(steps=100)
# scroll backward vertically
d(scrollable=True).scroll.vert.backward()
# scroll to beginning horizontally
d(scrollable=True).scroll.horiz.toBeginning(steps=100, max_swipes=1000)
# scroll to end vertically
d(scrollable=True).scroll.toEnd()
# scroll forward vertically until specific ui object appears
d(scrollable=True).scroll.to(text="Security")
You can register watchers to perform some actions when a selector does not find a match.
-
Register Watcher
When a selector can not find a match, uiautomator2 will run all registered watchers.
- Click target when conditions match
d.watcher("AUTO_FC_WHEN_ANR").when(text="ANR").when(text="Wait") \
                             .click(text="Force Close")
# d.watcher(name) ## creates a new named watcher.
#  .when(condition)  ## the UiSelector condition of the watcher.
#  .click(target)  ## perform click action on the target UiSelector.
There is also a trick about click. You can use click without arguments.
d.watcher("ALERT").when(text="OK").click()
# Same as
d.watcher("ALERT").when(text="OK").click(text="OK")
- Press key when a condition becomes true
d.watcher("AUTO_FC_WHEN_ANR").when(text="ANR").when(text="Wait") \
                             .press("back", "home")
# d.watcher(name) ## creates a new named watcher.
#  .when(condition)  ## the UiSelector condition of the watcher.
#  .press(<keyname>, ..., <keyname>.()  ## press keys one by one in sequence.
-
Check if the named watcher triggered
A watcher is triggered, which means the watcher was run and all its conditions matched.
d.watcher("watcher_name").triggered
# true in case of the specified watcher triggered, else false
-
Remove a named watcher
# remove the watcher
d.watcher("watcher_name").remove()
-
List all watchers
d.watchers
# a list of all registered watchers
-
Check for any triggered watcher
d.watchers.triggered
#  true in case of any watcher triggered
-
Reset all triggered watchers
# reset all triggered watchers, after that, d.watchers.triggered will be false.
d.watchers.reset()
-
Remove watchers
# remove all registered watchers
d.watchers.remove()
# remove the named watcher, same as d.watcher("watcher_name").remove()
d.watchers.remove("watcher_name")
-
Force to run all watchers
# force to run all registered watchers
d.watchers.run()
-
Run all watchers when page update.
通常可以用来自动点击权限确认框,或者自动安装
d.watcher("OK").when(text="OK").click(text="OK")
# enable auto trigger watchers
d.watchers.watched = True

# disable auto trigger watchers
d.watchers.watched = False

# get current trigger watchers status
assert d.watchers.watched == False
另外文档还是有很多没有写,推荐直接去看源码init.py
# set delay 1.5s after each UI click and click
d.click_post_delay = 1.5 # default no delay

# set default element wait timeout (seconds)
d.wait_timeout = 30.0 # default 20.0
UiAutomator中的超时设置(隐藏方法)
>> d.jsonrpc.getConfigurator()
{'actionAcknowledgmentTimeout': 500,
 'keyInjectionDelay': 0,
 'scrollAcknowledgmentTimeout': 200,
 'waitForIdleTimeout': 0,
 'waitForSelectorTimeout': 0}

>> d.jsonrpc.setConfigurator({"waitForIdleTimeout": 100})
{'actionAcknowledgmentTimeout': 500,
 'keyInjectionDelay': 0,
 'scrollAcknowledgmentTimeout': 200,
 'waitForIdleTimeout': 100,
'waitForSelectorTimeout': 0}为了防止客户端程序响应超时,waitForIdleTimeout和waitForSelectorTimeout目前已改为0
Refs: Google uiautomator Configurator
这种方法通常用于不知道控件的情况下的输入。第一步需要切换输入法,然后发送adb广播命令,具体使用方法如下
d.set_fastinput_ime(True) # 切换成FastInputIME输入法
d.send_keys("你好123abcEFG") # adb广播输入
d.clear_text() # 清除输入框所有内容(Require android-uiautomator.apk version >= 1.0.7)
d.set_fastinput_ime(False) # 切换成正常的输入法
d.send_action("search") # 模拟输入法的搜索
send_action 说明
该函数可以使用的参数有 go search send next done previous
什么时候该使用这个函数呢?
有些时候在EditText中输入完内容之后,调用press("search") or press("enter")发现并没有什么反应。
这个时候就需要send_action函数了,这里用到了只有输入法才能用的IME_ACTION_CODE。
send_action先broadcast命令发送给输入法操作IME_ACTION_CODE,由输入法完成后续跟EditText的通信。(原理我不太清楚,有了解的,提issue告诉我)
Show Toast
d.toast.show("Hello world")
d.toast.show("Hello world", 1.0) # show for 1.0s, default 1.0s
Get Toast
# [Args]
# 5.0: max wait timeout. Default 10.0
# 10.0: cache time. return cache toast if already toast already show up in recent 10 seconds. Default 10.0 (Maybe change in the furture)
# "default message": return if no toast finally get. Default None
d.toast.get_message(5.0, 10.0, "default message")

# common usage
assert "Short message" in d.toast.get_message(5.0, default="")

# clear cached toast
d.toast.reset()
# Now d.toast.get_message(0) is NoneFor example: 其中一个节点的内容
<android.widget.TextView
  index="2"
  text="05:19"
  resource-id="com.netease.cloudmusic:id/qf"
  package="com.netease.cloudmusic"
  content-desc=""
  checkable="false" checked="false" clickable="false" enabled="true" focusable="false" focused="false"
  scrollable="false" long-clickable="false" password="false" selected="false" visible-to-user="true"
  bounds="[957,1602][1020,1636]" />
xpath定位和使用方法
有些属性的名字有修改需要注意
description -> content-desc
resourceId -> resource-id
常见用法
# wait exists 10s
d.xpath("//android.widget.TextView").wait(10.0)
# find and click
d.xpath("//*[@content-desc='分享']").click()
# check exists
if d.xpath("//android.widget.TextView[contains(@text, 'Se')]").exists:
    print("exists")
# get all text-view text, attrib and center point
for elem in d.xpath("//android.widget.TextView").all():
    print("Text:", elem.text)
    # Dictionary eg:
    # {'index': '1', 'text': '999+', 'resource-id': 'com.netease.cloudmusic:id/qb', 'package': 'com.netease.cloudmusic', 'content-desc': '', 'checkable': 'false', 'checked': 'false', 'clickable': 'false', 'enabled': 'true', 'focusable': 'false', 'focused': 'false','scrollable': 'false', 'long-clickable': 'false', 'password': 'false', 'selected': 'false', 'visible-to-user': 'true', 'bounds': '[661,1444][718,1478]'}
    print("Attrib:", elem.attrib)
    # Coordinate eg: (100, 200)
    print("Position:", elem.center())
其他XPath常见用法
# 所有元素
//*

# resource-id包含login字符
//*[contains(@resource-id, 'login')]

# 按钮包含账号或帐号
//android.widget.Button[contains(@text, '账号') or contains(@text, '帐号')]

# 所有ImageView中的第二个
(//android.widget.ImageView)[2]

# 所有ImageView中的最后一个
(//android.widget.ImageView)[last()]

# className包含ImageView
//*[contains(name(), "ImageView")]
$ adb forward tcp:9008 tcp:9008
$ curl 127.0.0.1:9008/ping
# expect: pong

$ curl -d '{"jsonrpc":"2.0","method":"deviceInfo","id":1}' 127.0.0.1:9008/jsonrpc/0
# expect JSON output- API相似但是不完全兼容
- uiautomator2是安卓项目,而uiautomator是Java项目
- uiautomator2可以输入中文,而uiautomator的Java工程需借助utf7输入法才能输入中文
- uiautomator2必须明确EditText框才能向里面输入文字,uiautomator直接指定父类也可以在子类中输入文字
- uiautomator2获取控件速度比uiautomator快
为了方便uiautomator2跟其他项目集成,所以开发了这套插件机制。参考了一些过去flask的插件机制。 使用示例
import uiautomator2 as u2

def image_save(d, fileext='.jpg'):
    """ save screenshot plugin """
    def inner(filename):
        d.screenshot().save(filename+fileext)
    return inner

u2.plugin_register('png_save', image_save, '.png')

d = u2.connect()
d.ext_png_save("screen") # screenshot will save screen.png这里引入了一个函数plugin_register
def plugin_register(name, func_or_class, *args, **kwargs)name代表插件的名字,func_or_class可以是函数,也可以是类,其第一个参数一定是d(设备的实例), args和kwargs是可选参数
通过d.ext_加上注册插件是的名字,如果插件名是png_save则通过d.ext_png_save调用。
image_save这个函数只有在最初调用d.ext_png_save的时候会调用,之后都只使用第一次生成的实例。
PS: 插件的调用没有自动补全,有点不太方便
d = u2.connect()

def callback(stage, func_name, args, kwargs, ret):
    print("stage", stage)
    print("call", func_name, args, kwargs)
    print("return", ret)

d.hooks_register(callback)
d.click(0.5, 0.5)
# expect output
# stage: before
# call: click (540, 960) {}
# return: None
# stage: after
# call: click (540, 960) {}
# return: None
Use hooks, you can capture screenshot before or after click, long_click, double_click, swipe
-
提示
502错误尝试手机连接PC,然后运行下面的命令
adb shell am instrument -w -r -e debug false -e class com.github.uiautomator.stub.Stub \
	com.github.uiautomator.test/android.support.test.runner.AndroidJUnitRunner
如果运行正常,启动测试之前增加一行代码
d.healthcheck()
如果报错,可能是缺少某个设备组件没有安装,使用下面的命令重新初始化 python -m uiautomator2 init --reinstall
-
提示Connection Error
可能是atx-agent没有在运行。
# 检查是否运行的方法
> adb shell
$ ps | grep atx # 如果看到atx-agent则表示正在运行

# 启动atx-agent
$ /data/local/tmp/atx-agent -d

# 停止atx-agent
$ /data/local/tmp/atx-agent -stop
Other: https://github.com/openatx/uiautomator2/wiki/Common-issues
手机python -m uiautomator2 init之后,浏览器输入 <device_ip:7912>,会发现一个远程控制功能,延迟非常低噢。^_^
项目重构自 https://github.com/openatx/atx-uiautomator
- uiautomator守护程序 https://github.com/openatx/atx-agent
- uiautomator jsonrpc serverhttps://github.com/openatx/android-uiautomator-server/
- codeskyblue (@codeskyblue)
- Xiaocong He (@xiaocong)
- Yuanyuan Zou (@yuanyuan)
- Qian Jin (@QianJin2013)
- Xu Jingjie (@xiscoxu)
- Xia Mingyuan (@mingyuan-xia)
- Artem Iglikov, Google Inc. (@artikz)
Other contributors


