Firmware for sonoff dual. Source code.

Main button:
- 1 push to switch the first relay
- 2 pushes to switch the second relay
- 3 pushes to enable the access point
- 4 and more pushes to disable the access point
If the device is not connected as a client, the blue led will flash, otherwise the led will light continuously. The second led shows the current state of the relays.
Default network name of the access point is 'ktoolu', default password is 'password', ip is 192.168.4.1.
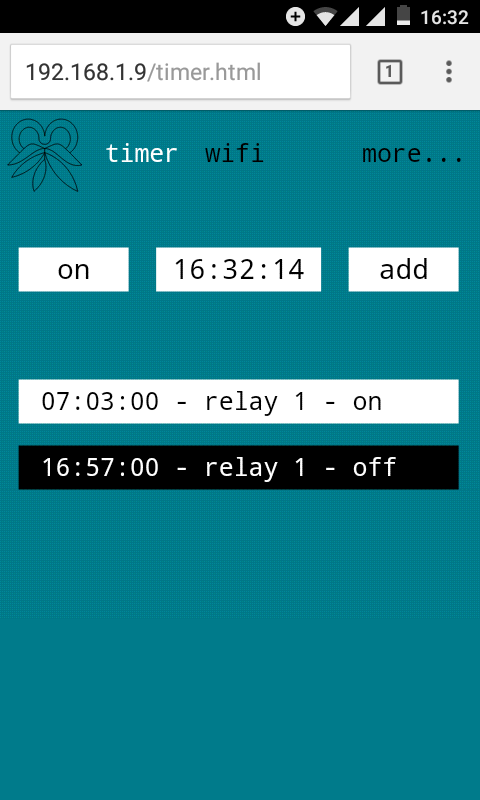
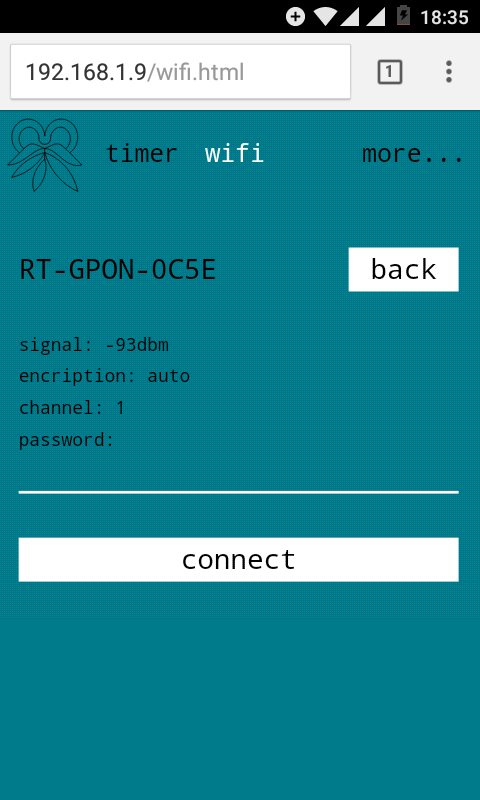
Use any device with a web browser to enter user interface, make sure that both devices are on the same network, and enter the current ip of the esp device in the browser.
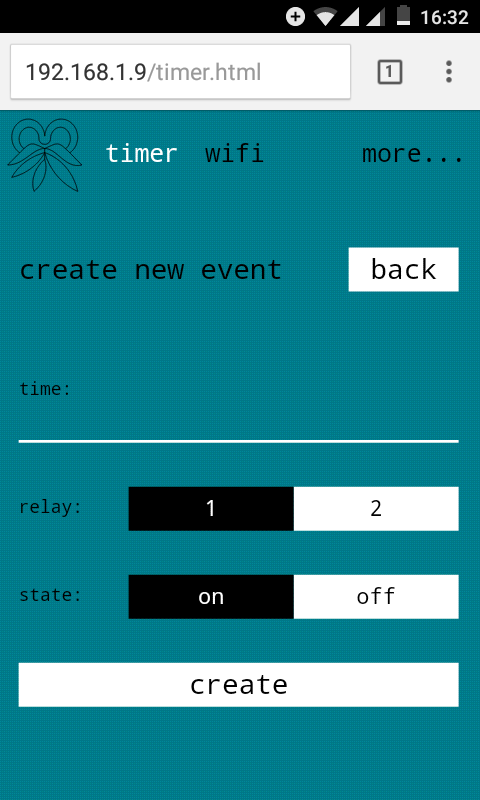
Timer has a period of 24 hours and can contain up to 20 events. After each change, the timer sets relays state the same as it would have been if the timer had been running since 00:00:00Z utc.
The device will perform 10 attempts to synchronize time with ntp server after power on, restart, or manually by clicking on the time on the 'timer' tab.
Click 'more...' to see all available commands.
Unplug the device from ac power supply before opening it!
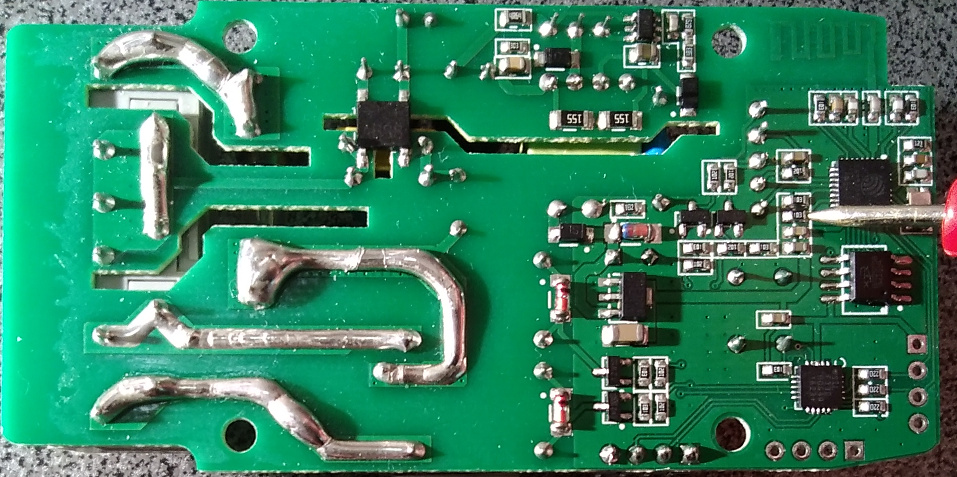
The firmware has been tested on this device.
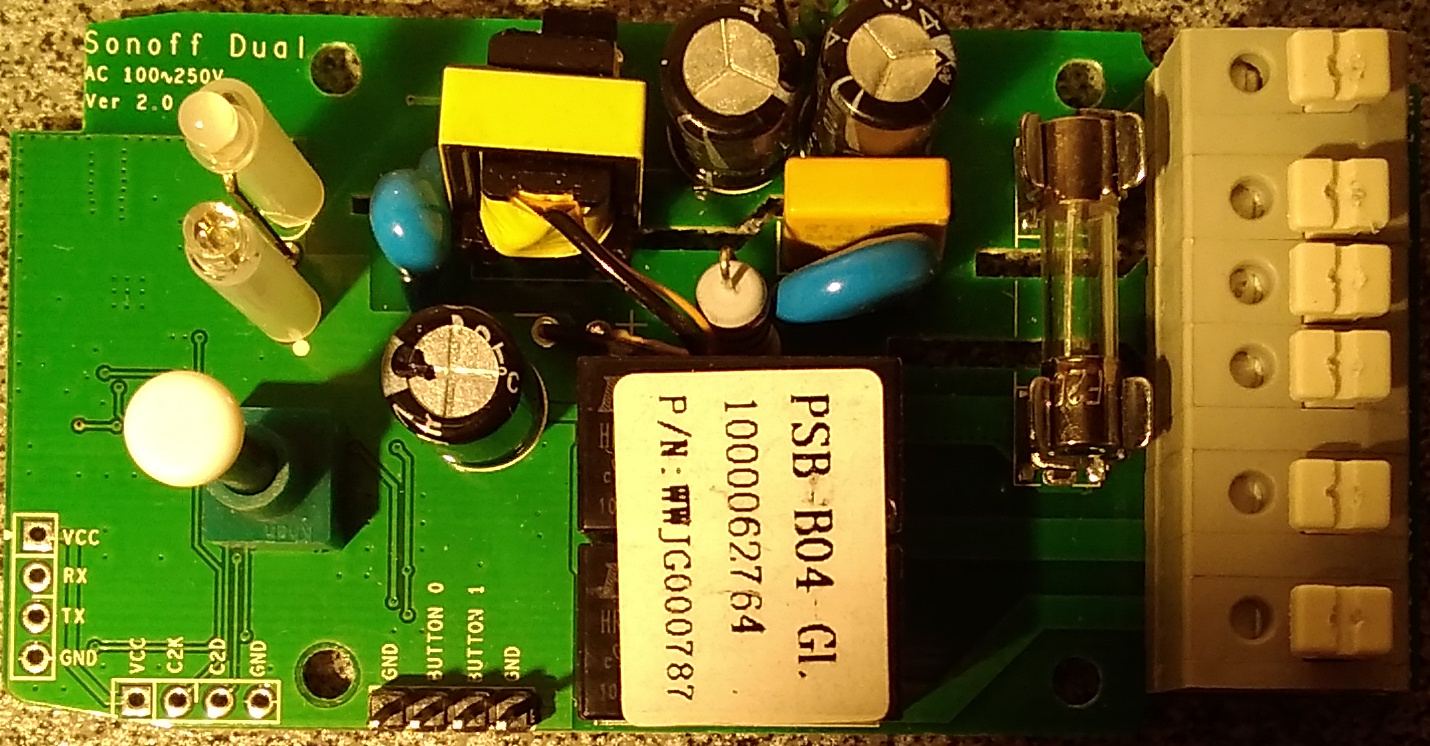
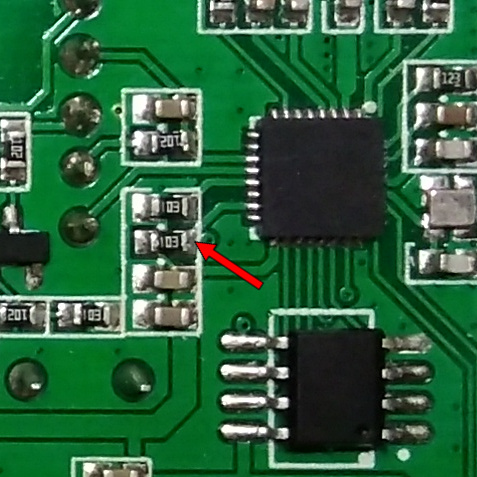
Use a 3.3 volt usb-ttl converter, for example based on ch340. Connect +3.3v to 'vcc', 0v to 'gnd', tx to 'rx' and rx to 'tx'. Connect gpio0 to the ground before booting to enter the flash mode, the convinient point is indicated by the red arrow. After loading gnd and gpio0 can be disconnected.
Download and install arduino (tested on version 1.8.5).
Add esp: file > preferences > additional boards manager urls:, enter 'https://arduino.esp8266.com/stable/package_esp8266com_index.json', click ok, and restart.
Download code.
$ git clone https://github.com/aqoleg/ktoolu.git
Move ktoolu/src folder to Arduino/sketchbook folder. Open code in arduino. Replace passwords in updater.cpp and wifi.cpp. Select Tools > Board > ITEAD Sonoff, Tools > Flash Size > 1MB(FS:192KB OTA:~406KB), and Tools > Port > your port. Click Upload. Upload all files from src/data using command /upload in the esp device.
After the first upload, the firmware can be uploaded via wifi. Enter command /flash in the esp device, select Tools > Port > your wifi network port, click Upload, and enter password from updater.cpp.

