To introduce another way to help you build useful and meaningful skills for Alexa quickly, we’ve launched a calendar reader skill template. This new Alexa skill template makes it easy for developers to create a skill like an “Event Calendar,” or “Community Calendar,” etc. The template leverages AWS Lambda, the Alexa Skills Kit (ASK), and the Alexa SDK for Node.js, while providing the business logic, use cases, error handling and help functions for your skill.
For this tutorial, we'll be working with the calendar from Stanford University. The user of this skill will be able to ask things like:
- "What is happening tonight?
- "What events are going on next Monday?"
- "Tell me more about the second event."
You will be able to plug your own public calendar feed (an .ICS file) into the sample provided, so that you can interact with your calendar in the same way. This could be useful for small businesses, community leaders, event planners, realtors, or anyone that wants to share a calendar with their audience.
Using the Alexa Skills Kit, you can build an application that can receive and respond to voice requests made on the Alexa service. In this tutorial, you’ll build a web service to handle requests from Alexa and map this service to a skill in the Amazon Developer Portal, making it available on your device and to all Alexa users after certification.
After completing this tutorial, you'll know how to do the following:
- Create a calendar reader skill - This tutorial will walk first-time Alexa skills developers through all the required steps involved in creating a skill that reads calendar data, called "Stanford Calendar".
- Understand the basics of VUI design - Creating this skill will help you understand the basics of creating a working Voice User Interface (VUI) while using a cut/paste approach to development. You will learn by doing, and end up with a published Alexa skill. This tutorial includes instructions on how to customize the skill and submit for certification. For guidance on designing a voice experience with Alexa you can also watch this video.
- Use JavaScript/Node.js and the Alexa Skills Kit to create a skill - You will use the template as a guide but the customization is up to you. For more background information on using the Alexa Skills Kit please watch this video.
- Get your skill published - Once you have completed your skill, this tutorial will guide you through testing your skill and sending your skill through the certification processso it can be enabled by any Alexa user.
- Interact with a calendar (.ics file) using voice commands.
Skills are managed through the Amazon Developer Portal. You’ll link the Lambda function you created above to a skill defined in the Developer Portal.
-
Navigate to the Amazon Developer Portal. Sign in or create a free account (upper right). You might see a different image if you have registered already or our page may have changed. If you see a similar menu and the ability to create an account or sign in, you are in the right place.
-
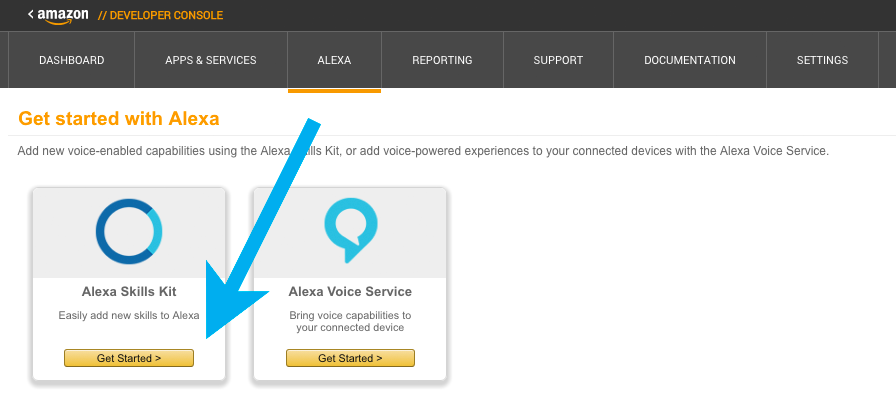
Once signed in, navigate to Alexa and select "Getting Started" under Alexa Skills Kit.
-
Here is where you will define and manage your skill. Select "Add a New Skill"
-
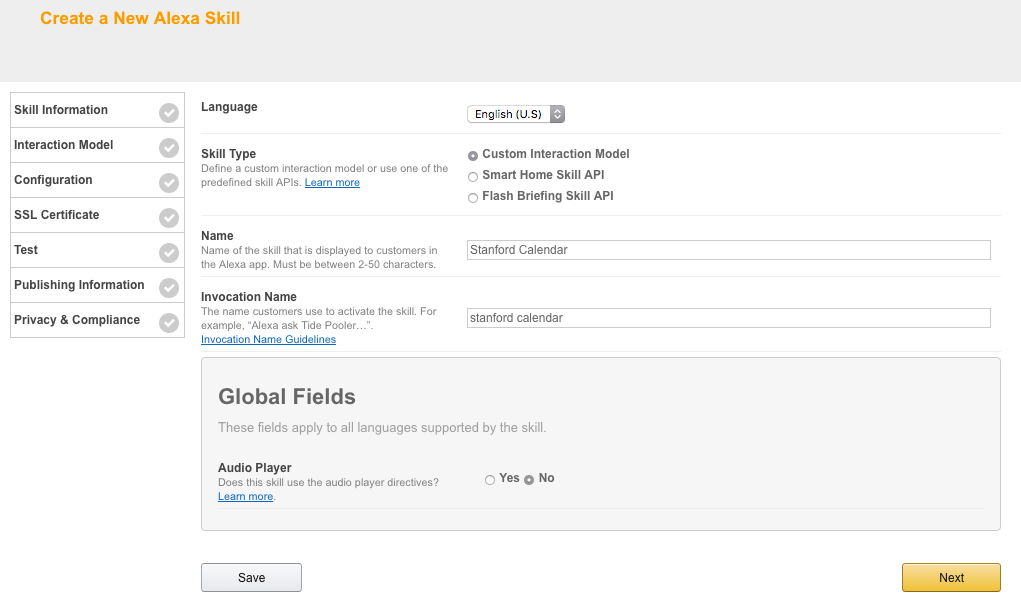
There are several choices to make on this page, so we will cover each one individually.
- Choose the language you want to start with. You can go back and add all of this information for each language later, but for this tutorial, we are working with "English (U.S.)"
- Make sure the radio button for the Custom Interaction Model is selected for “Skill Type”.
- Add the name of the skill. Give your skill a name that is simple and memorable, like "Stanford Calendar." The name will be the one that shows up in the Alexa App when users are looking for new skills. (Obviously, don't use Stanford Calendar. Use a name that describes the calendar you plan to read. For ideas, check out iCalShare for a huge list of user created calendars.)
- Add the invocation name. This is what your users will actually say to start using your skill. Like in Step #5, use one or two words, because your users will have to say this every time they want to interact with your skill.
- Under "Global Fields," select "no" for Audio Player, as our skill won't be playing any audio.
- Select Next.
-
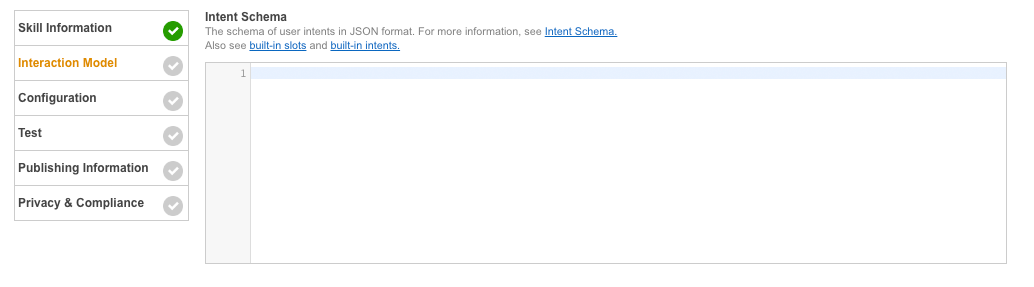
Next, we need to define our skill’s interaction model. Let’s begin with the intent schema. In the context of Alexa, an intent represents an action that fulfills a user’s spoken request.
-
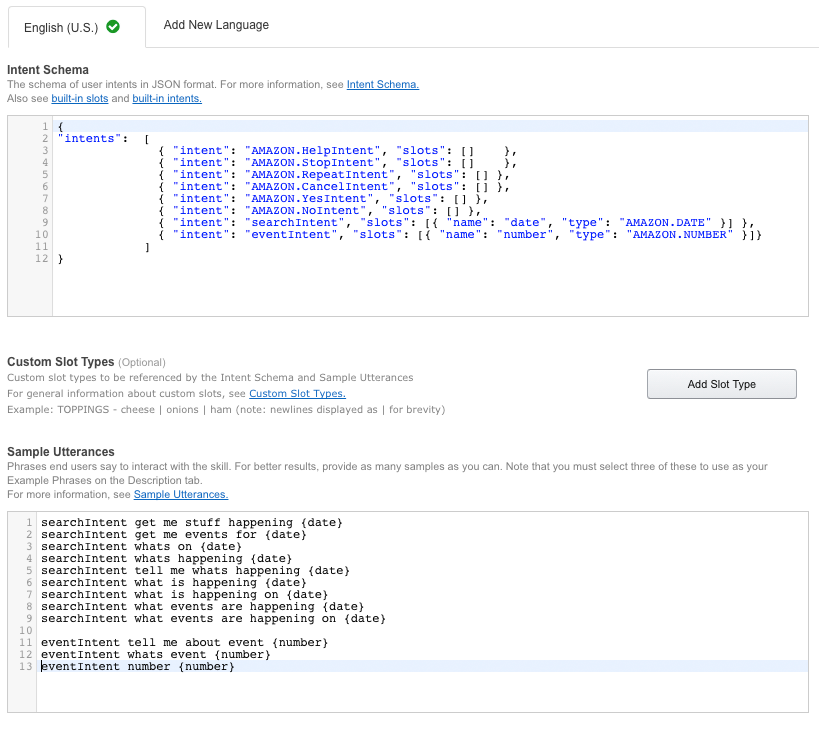
Review the Intent Schema below. This is written in JSON and provides the information needed to map the intents we want to handle programmatically. Copy this from the intent schema in the GitHub repository here.
Below you will see a collection of built-in intents to simplify handling common user tasks, and then two additional custom intents for querying our calendar source. Intents can optionally have arguments called slots. For our two custom intents, "searchIntent" and "eventIntent," we will use these slots to define the data type that we are expecting the user to provide.
Slots are predefined data types that we expect the user to provide. This helps resolve data to a standardized format (like an enum). For example, you could say "next Monday," and it would be able to return a specific date. This data also becomes training data for Alexa's Natural Language Understanding (NLU) engine.
For our searchIntent, we expect the user to provide a date, like "October 7th." For the eventIntent, the user will be providing a number, like "Tell me about event #1." For more on the use of built-in intents, go here.
{
  "intents":  [
    { "intent": "AMAZON.HelpIntent", "slots": [] },
    { "intent": "AMAZON.StopIntent", "slots": [] },
    { "intent": "AMAZON.RepeatIntent", "slots": [] },
    { "intent": "AMAZON.CancelIntent", "slots": [] },
    { "intent": "AMAZON.YesIntent", "slots": [] },
    { "intent": "AMAZON.NoIntent", "slots": [] },
    { "intent": "searchIntent", "slots":
                    [{ "name": "date", "type": "AMAZON.DATE" }] },
    { "intent": "eventIntent", "slots":
                    [{ "name": "number", "type": "AMAZON.NUMBER" }]}
  ]
}
You can see that we have defined six different built-in intents: Help, Stop, Repeat, Cancel, Yes, and No. Our two custom intents, searchIntent and eventIntent, each have a slot defined for them. This means that we expect a specific data type from the user when they use these intents. You will see how this works more clearly when we define our sample utterances below.
-
The next step is to build the utterance list. This is meant to be an thorough, well-thought-out list of the ways users will try to interact with your skill. You don't have to get every possible phrase, but it is important to cover a variety of ways so that the NLU engine can best understand your user's intent.
-
Given the flexibility and variation of spoken language in the real world, there will often be many different ways to express the same request. Providing these different phrases in your sample utterances will help improve voice recognition for the abilities you add to Alexa. It is important to include as wide a range of representative samples as you can -– all the phrases that you can think of that are possible in use (though do not include samples that users will never speak). Alexa also attempts to generalize based on the samples you provide to interpret spoken phrases that differ in minor ways from the samples specified.
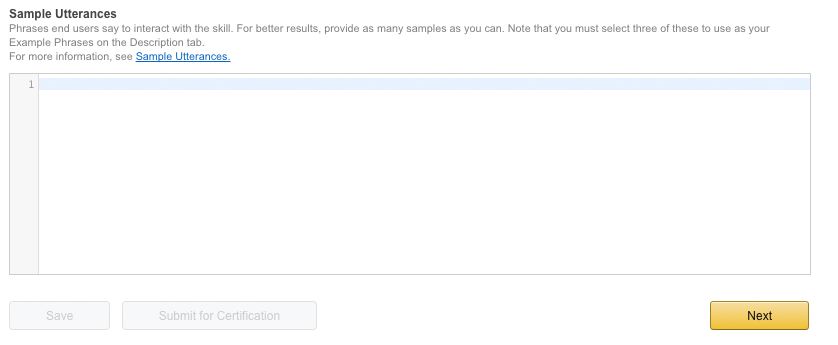
Now it is time to add the Utterances. Copy/paste the sample utterances from GitHub. An example of utterances is listed below.
searchIntent get me stuff happening {date}
searchIntent get me events for {date}
searchIntent whats on {date}
searchIntent whats happening {date}
searchIntent tell me whats happening {date}
searchIntent what is happening {date}
searchIntent what is happening on {date}
searchIntent what events are happening {date}
searchIntent what events are happening on {date}

eventIntent tell me about event {number}
eventIntent whats event {number}
eventIntent number {number}
As you can see in the example above, we are using our two custom intents: searchIntent and eventIntent. Each example is a different way that a user might ask for that intent. searchIntent expects a AMAZON.DATE slot, and eventIntent expects a AMAZON.NUMBER slot. (More information on slots can be found here.)
-
Select Save. You should see the interaction model being built (this might a take a minute or two). If you select Next, your changes will be saved and you will go directly to the Configuration screen. After selecting Save, it should now look like this:

Next we will configure the AWS Lambda function that will host the logic for our skill.
To make the development of skills easier, we have created the ASK SDK for Node.js. We will be using this module to deploy the sample. The alexa-sdk is available on github here and can be deployed as a node package from within your Node.js environment.
-
First, you will need to download the sample repository
- On GitHub, navigate to the Calendar Reader repository. Click download (the green button) to download the repository to your local machine.
-
To leverage the SDK for ASK you will need to install Node.js and update npm. To set this up on your machine, follow these steps.
-
Once you have the source downloaded, node.js installed and npm updated, you are ready to install the ASK-SDK. Install this in the same directory as your Calendar Reader src/index.js file you downloaded earlier. Change the directory to the src directory of your skill, and then in the command line, type:
npm install --save alexa-sdk icalOnce this is installed you will need to include the node_modules directory with the source code for your skill when you compress the src for uploading to AWS Lambda. Let's do this with the example.
-
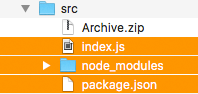
Navigate to where you downloaded the sample respository and installed the Alexa SDK in step 3. Select the src directory.
-
Compress the files inside the src directory into a zip file. Remember, do not compress the src directory itself, just the files within the directory, the index.js file and the node_modules folder. Your compressed file should show up in the src directory. You will use this file in a later step.

Note: If you already have an AWS account, you can skip this section. Just sign in to your console.
-
Open aws.amazon.com and then choose ‘Create an AWS Account’
- Follow the online instructions. Do not worry about the IAM role, we will do that later.
- You will need a Valid Credit Card to set up your account (note the AWS Free Tier will suffice however. You can find out more about the free tier here.)
- Part of the sign-up procedure involves receiving a phone call and entering a PIN using the phone keypad.
-
Sign in to the AWS Console
-
It can sometimes take a couple minutes for your new AWS account to go live. You will receive an e-mail when your account is active.
AWS Lambda lets you run code without provisioning or managing servers. You pay only for the compute time you consume - there is no charge when your code is not running. With Lambda, you can run code for virtually any type of application or backend service - all with zero administration. Just upload your code and Lambda takes care of everything required to run and scale your code with high availability.
Note: If you are new to Lambda and would like more information, visit the Lambda Getting Started Guide.
-
IMPORTANT: Select US East (N. Virginia) region, or the EU (Ireland) region (upper right corner). These are the only regions that currently support Alexa Skill development.
-
Select Lambda from AWS Services (under Compute)
-
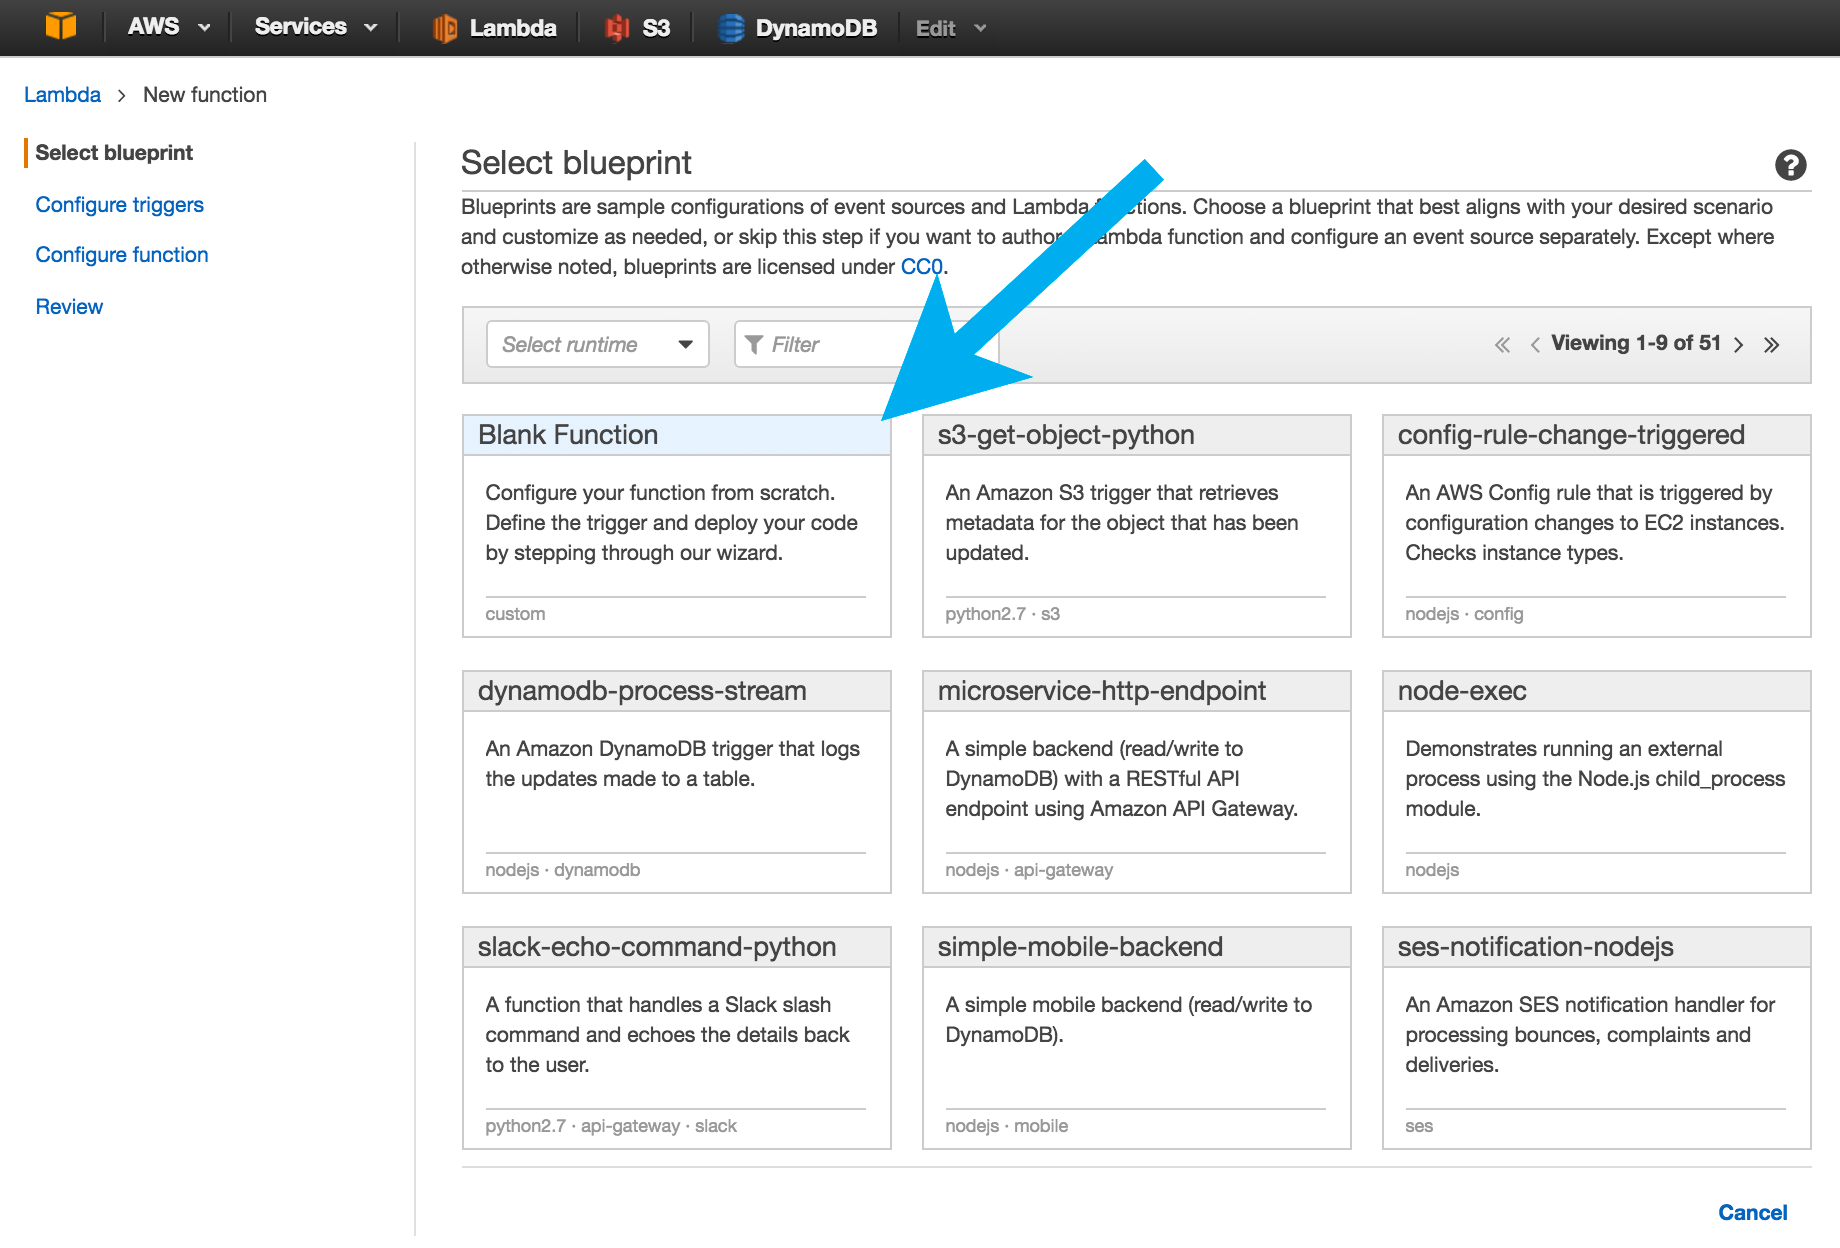
Select “Create a Lambda Function” to begin the process of defining your Lambda function.
-
Select the Blank Function option on the Select Blueprint screen.
-
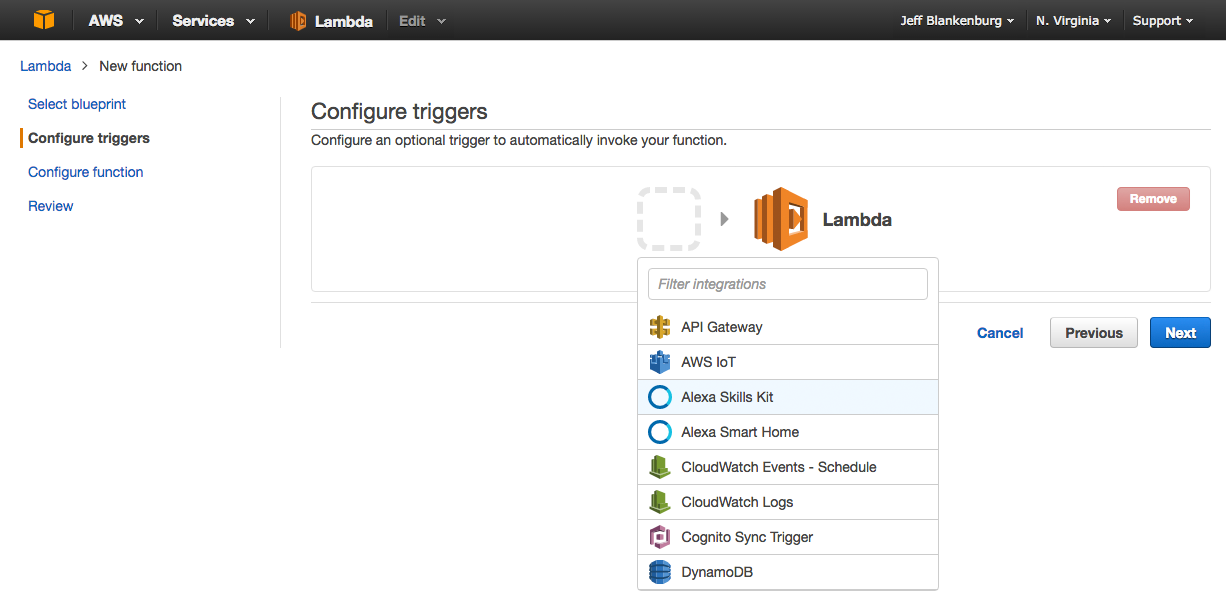
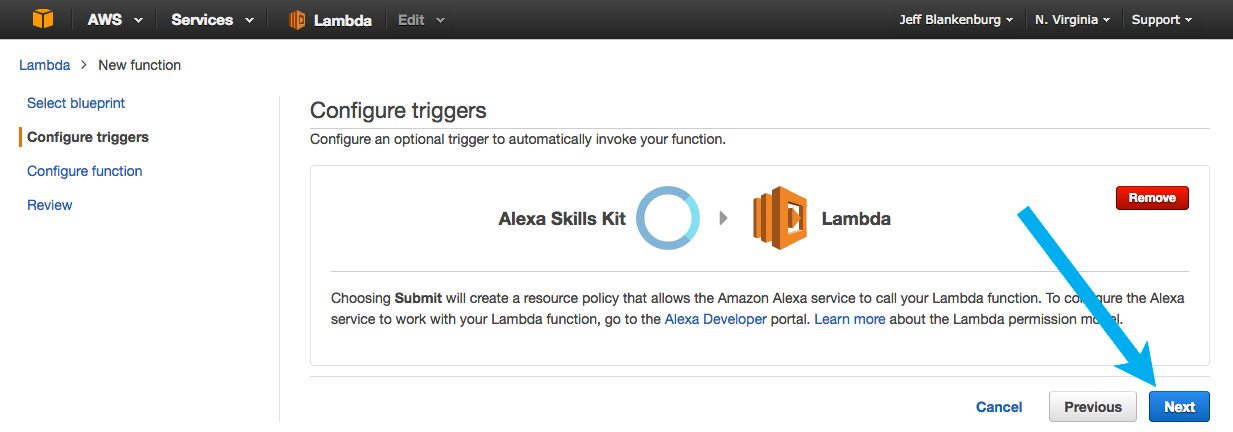
Now, you need to configure the event that will trigger your function to be called. As we are building skills with the Alexa Skills Kit, click on the gray dash-lined box and select Alexa Skills Kit from the dropdown menu. (If you don't see this option, go back to Step #1 and select US East (N. Virginia)). This gives the Alexa service permission to invoke your skill's function.
-
Choose Next to continue.
-
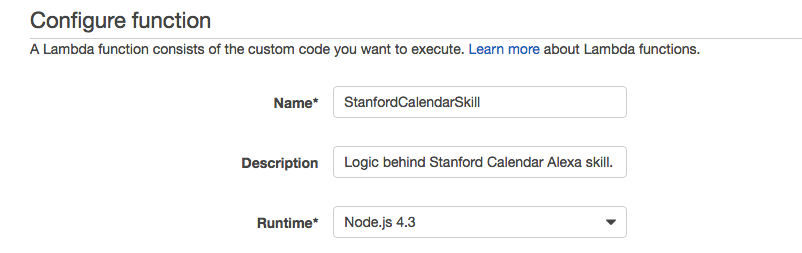
You should now be in the "Configure Function" section. Enter the Name, Description, and Runtime for your skill as in the example below. Your runtime should be "Node.js 4.3."
-
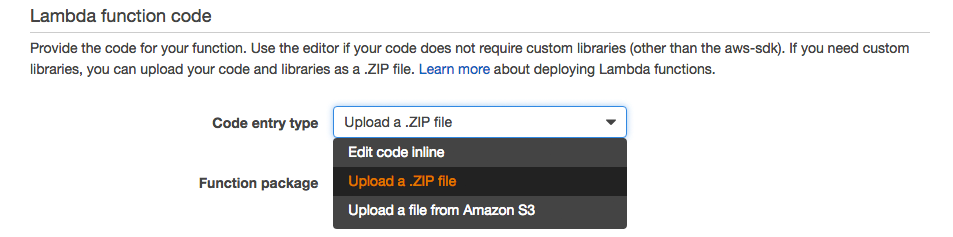
Select the ‘Code Entry Type’ as ‘Upload Zip File’ and upload the zip file containing the example you created in Step 1. Note: This zip file should contain the contents of the src directory, including the node_modules subfolder.
-
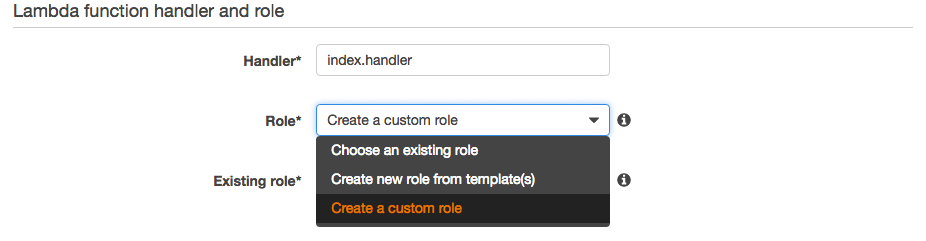
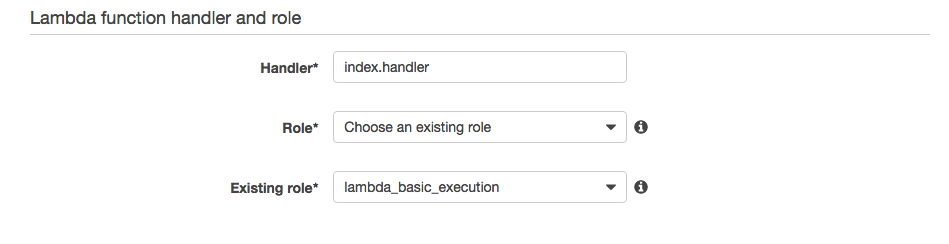
Set your handler and role as follows:
- Keep Handler as ‘index.handler’
- Drop down the “Role” menu and select “Create a custom role”. (Note: if you have already used Lambda you may already have a ‘lambda_basic_execution’ role created that you can use.) This will launch a new tab in the IAM Management Console.
-
You will be asked to set up an Identity and Access Management or “IAM” role if you have not done so. AWS Identity and Access Management (IAM) enables you to securely control access to AWS services and resources for your users. Using IAM, you can create and manage AWS users and groups, and use permissions to allow and deny their access to AWS resources. The IAM role will give your lambda function permission to use other AWS Services at runtime, such as Cloudwatch Logs, the AWS logs collection and storage service. In the Role Summary section, select "Create a new IAM Role" from the IAM Role dropdown menu. The Role Name and policy document will automatically populate.
-
Select “Allow” in the lower right corner and you will be returned to your Lambda function.
-
Keep the Advanced settings as default. Select ‘Next’ and review. You should see something like below. Then select ‘Create Function’:
-
Congratulations, you have created your AWS Lambda function. Copy the Amazon Resource Name (ARN) for use in the Configuration section of the Amazon Developer Portal.


-
Navigate back to developer.amazon.com and select your skill from the list. You can select the skill name or the edit button.
-
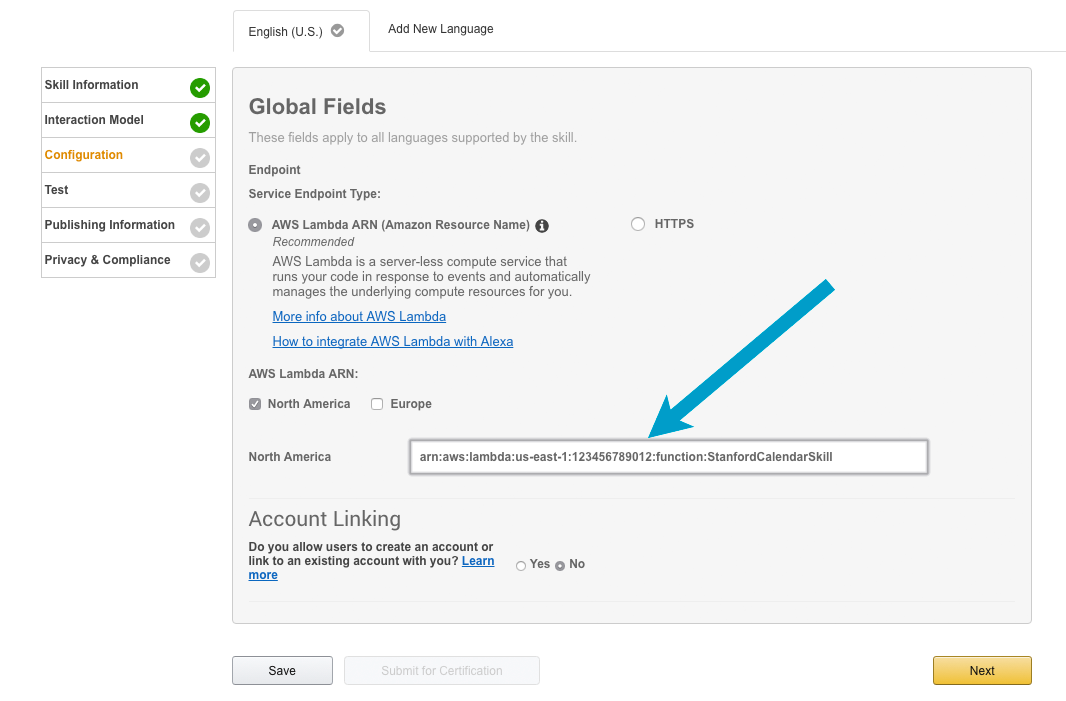
Select the Configuration section, and make sure to choose the AWS Lambda ARN region that corresponds to your AWS Lambda function's region. Add the ARN from the Lambda function you created in the AWS Console earlier. Select the Lambda ARN (Amazon Resource Name) radio button. Then, select “No” for account linking since we will not be connecting to an external account for this tutorial. Paste the ARN you copied earlier into the Endpoint field. Then select Next.
-
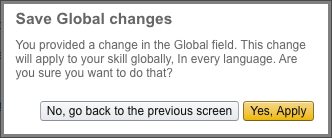
You will be asked if you want to "Save Global Changes." This happens because you are changing values that would apply to every version of your skill (in every language.) You can click "Yes, Apply" to complete this step.
-
You have now completed the initial development of your skill. Now it is time to test.

-
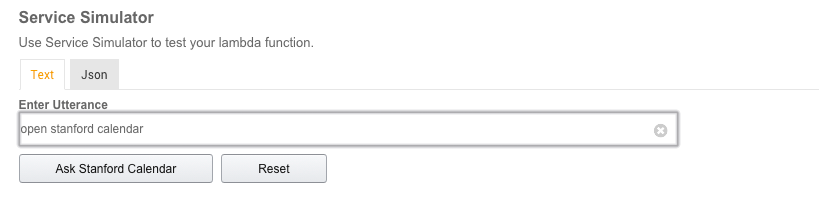
In the Test area, we are going to enter a sample utterance in the service simulator section and see how Alexa will respond. In this example, we have called the skill ‘Stanford Calendar,’ because we will be retrieving events from Stanford University's public events calendar. This is the ‘Invocation Name’ we set up on the Skill Information line in the “Skill Information” section.
- In the Service Simulator, type ‘open Stanford Calendar’ and click the “Ask Stanford Calendar” button.
-
You should see the formatted JSON request from the Alexa service and the response coming back from your Lambda function. Verify that you get a correct Lambda response.
-
(Optional) Testing with your device. This is optional as you can do all the testing in the portal. Assuming your Echo device is on-line (and logged in with the same account as your developer account), you should now see your skill enabled in the Alexa app (under "Your Skills," in the top right corner) and ask Alexa to launch your skill. For more information on testing an Alexa skill and registering an Alexa-enabled device, check here.


- Do you have the right ARN copied from your Lambda function into your Developer Portal / Skill?
- Are you calling the right invocation name?
- Are you saying launch, start or open (followed by your invocation name)?
- Are you sure you have no other skills in your accounts with the same invocation name?
-
In the Skill Information section in the Developer Console, edit the Skill Information Tab to reflect your new calendar reader skill:
-
Provide a skill name that represents the new skill you are creating.
-
Come up with a cool Invocation Name that users will use to invoke your skill. Make sure to read the rules for creating invocation names, as this is a common failure point during certification.
-
Create a fun icon. Be sure you have the rights to whatever icons you are uploading – you will need to provide both 108x108px and 512x512px images. Need help finding an image? Try The Noun Project or Pixabay as a possible source for royalty-free images. Use an image editor (such as Paint on Windows or Preview on Mac) to change the size of the image.
Everything else can stay as-is for now in the Developer Portal.
-
-
Open the source file for your Lambda function, index.js, in an editor of your choice. This is in the src directory of the repository you downloaded earlier. You will see on line 17 the address of the .ICS file at Stanford. You will want to replace this with the calendar source you're using for your skill. (If you need ideas for a calendar source, check out iCalShare for a huge list of user created calendars.)
-
Change the skillName variable to the name of your skill.
var skillName = 'Events calendar:' -
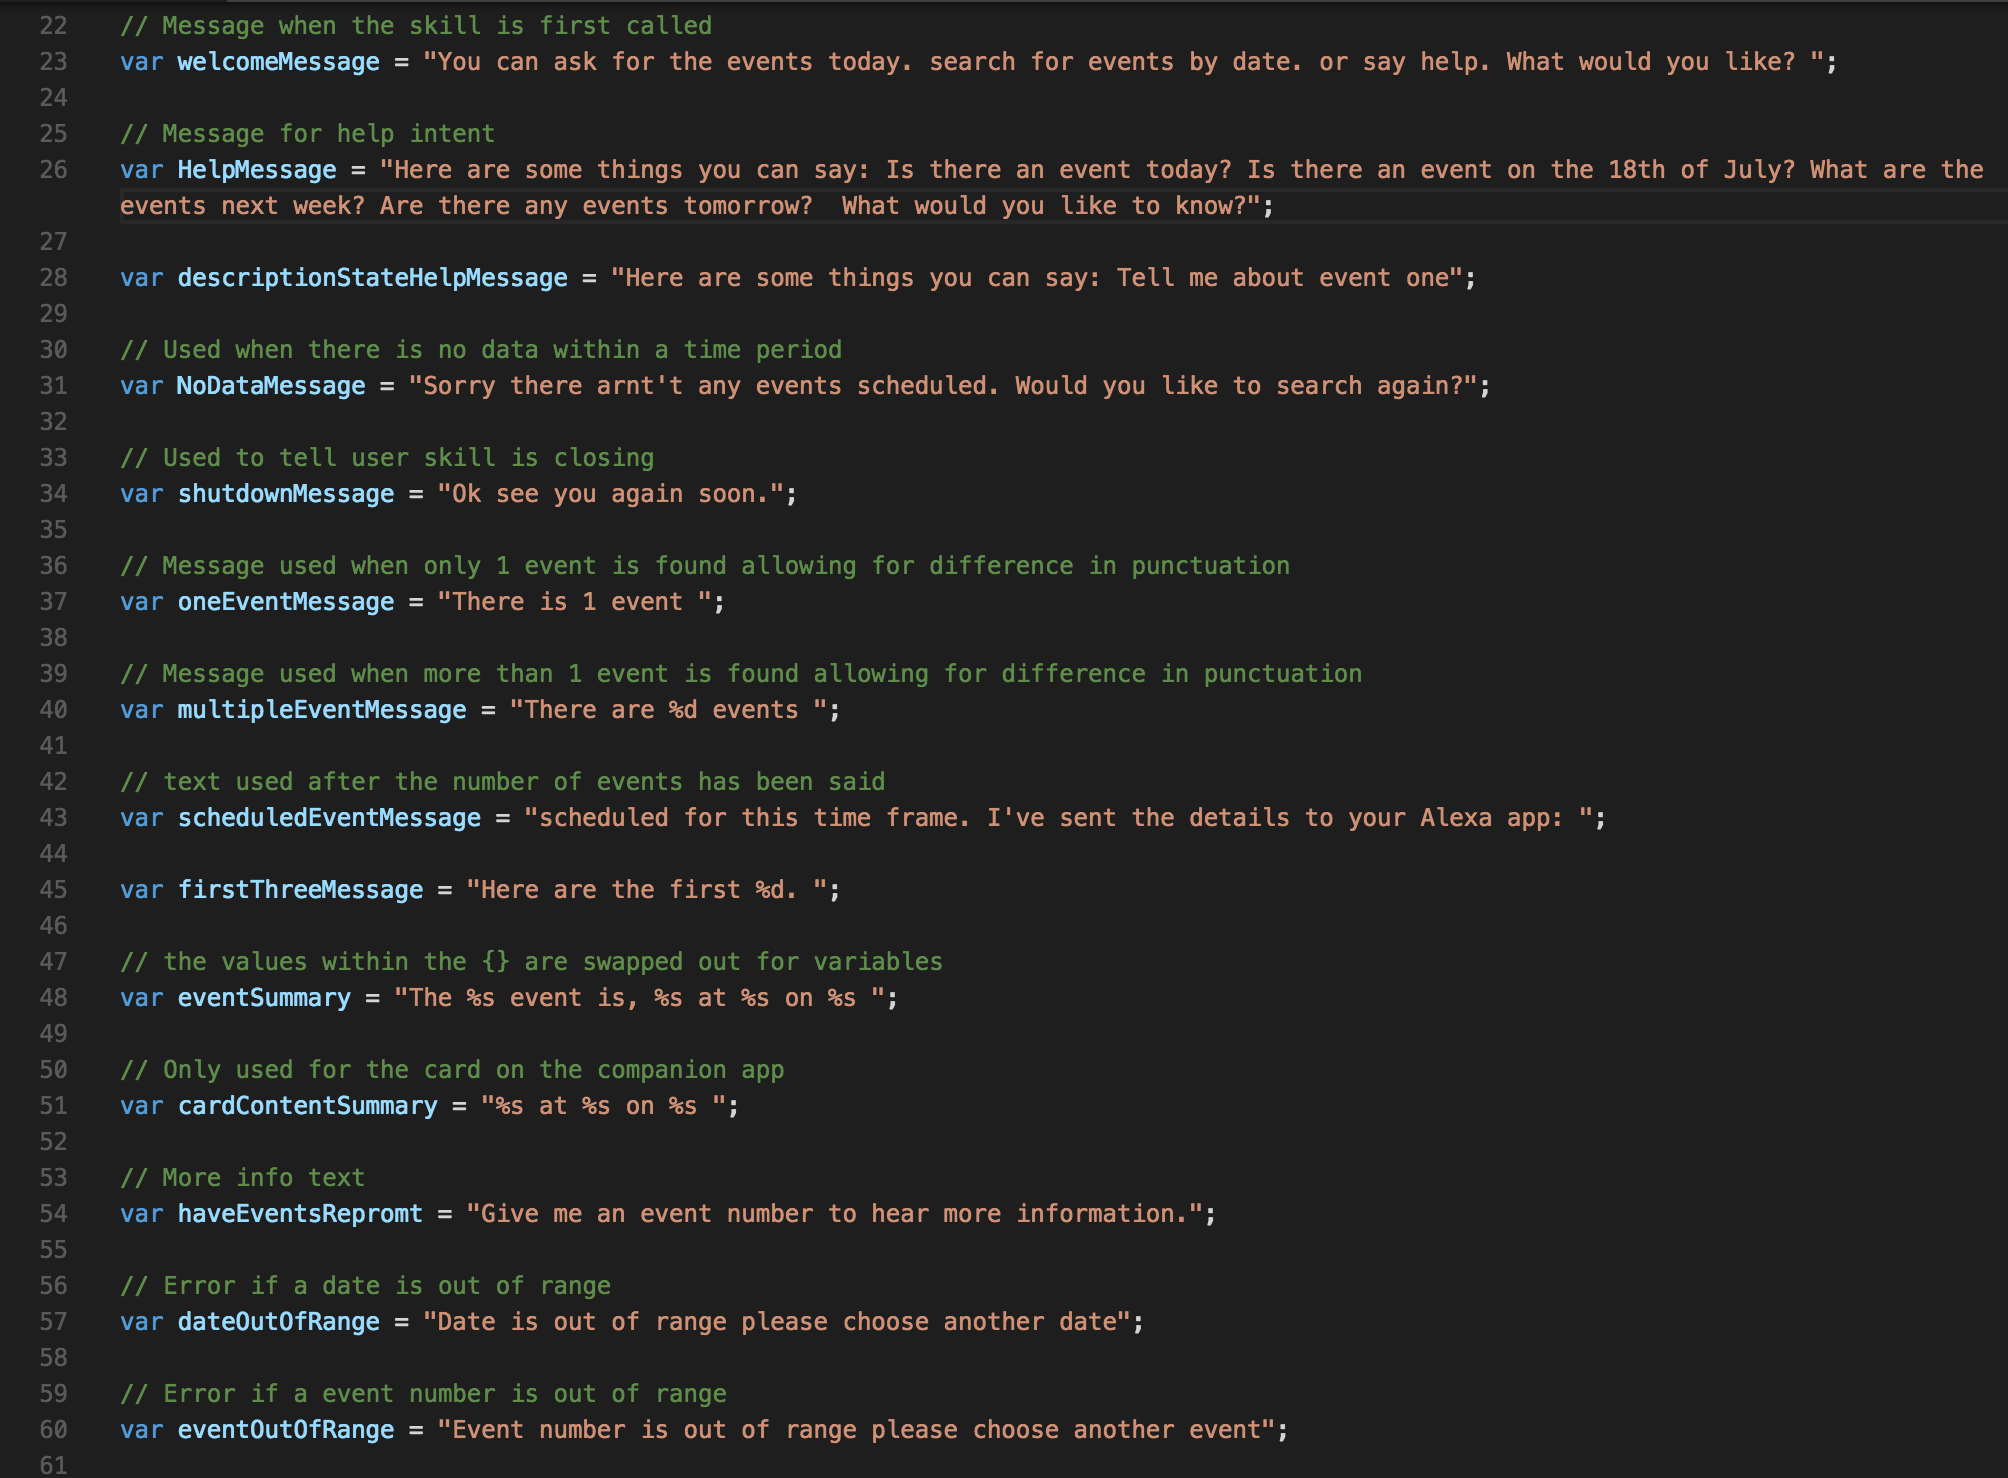
You may also want to change the speech responses we've provided. These are the things Alexa will use to respond to your user's intents, and customizing them will make your skill feel more authentic to your data. You don’t have to edit them, but we highly recommend making some customizations. If one of our predefined messages ends with a question, please keep an ending question in your modified message, as Alexa will continue to listen for customer's answer after speaking the message.
-
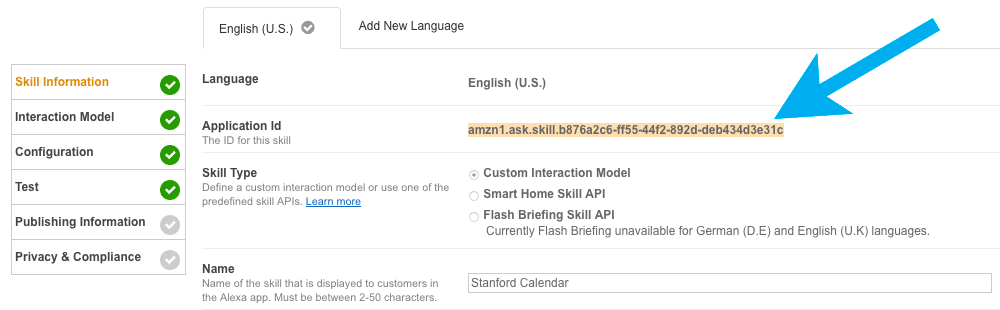
AWS Lambda built-in security will make sure only our Alexa service can call your Lambda function. To add an extra layer of security, we should validate the application id in requests made to your function. Let’s go back to your Alexa skill in your Developer Portal for a moment. Copy in your Application ID from the ‘Skill Information’ section in your developer portal / skill:
-
Copy the application id into the value of the APP_ID variable. Make sure to place the app id in quotation marks.
-
Be sure to select SAVE when you are all done. Note: we test initially in the Developer Portal, not in our Lambda function in the AWS console.
-
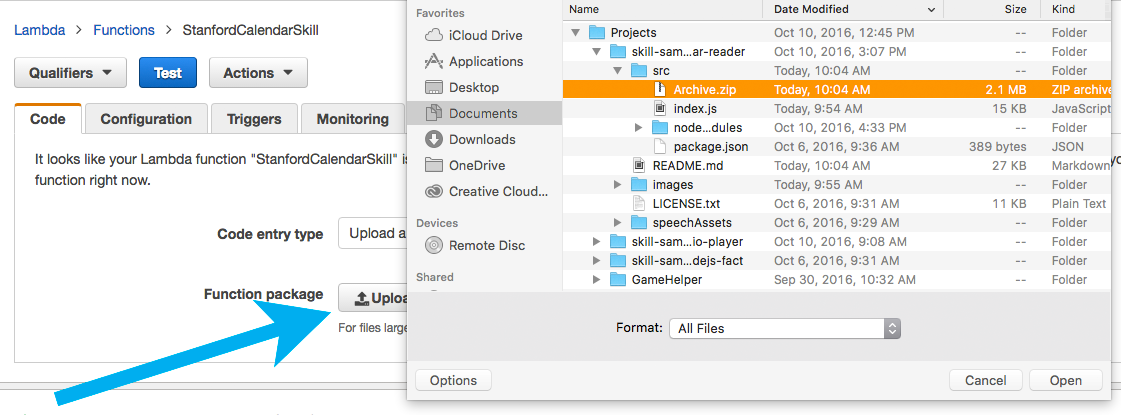
Log back into your AWS console and upload the changes you have just made. First you will need to zip up the files into a new archive. You can do this by selecting the files that you need in the src directory (the node_modules directory and your updated index.js) into a new archive. Be sure that you compress the files in the folder, not the folder itself.
-
Select your Lambda function and on the Code tab, select “Upload” to add the archive you just created.
-
Once you have successfully added the file you will see it on the screen, then select “Save”.
-
Repeat the tests you performed earlier to ensure your changes are functioning properly. See step 4 for a review of how to perform functional tests.


Now we need to go back to our Developer Portal to test and edit our skill and we will be ready for certification.
-
In your skill's Test section, enter your Utterances into the Simulator to make sure everything is working with your new calendar events.
-
Optionally, you can test with your Alexa-enabled device to make sure everything is working correctly. You may find a few words that need to be changed for a better user experience.
Some things to think about:
- Does every event sound correct?
- Do you need to change any words to make them sound correct?
Because we could have hundreds of events, this could take a while. Instead, you can use the Voice Simulator in the Test section to simulate Alexa’s responses. In the Voice Simulator, type in each event name that you are using to test how Alexa will say it. Use additional punctuation or possibly SSML if you need to better control how Alexa responds. You can find out more about SSML here.
Read more about functional testing for Alexa skills.
Read more about building effective voice user interfaces (VUI).
- Have you added in YOUR ApplicationID as per the previous instruction?
-
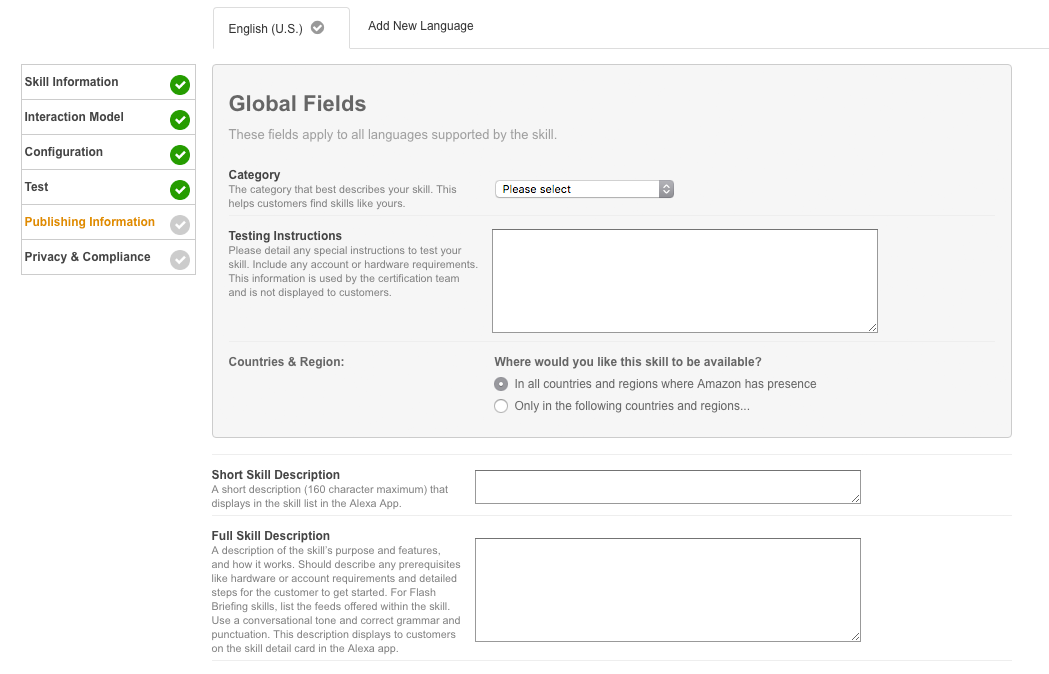
Select the Publishing Information area of your skill next:
- Spend some time coming up with an enticing, succinct description. This is the only place you have to attract new users. These descriptions show up on the list of skills available in the Alexa app.
- In your example phrases, be sure that the examples you use exactly match the utterances that you created in the Interaction Model section. The first example should be "Alexa, open {your invocation name}" and no utterance. Remember, there are built-in intents such as help and cancel. You can learn more about built-in intents here. You can also review the list of supported phrases to begin a conversation.
- Be sure you have the rights to whatever icons you are uploading – you will need to provide both 108x108px and 512x512px images. If there is any question, the Amazon certification team will fail your Alexa skill submission. In the event your skill fails certification, you will receive an email from Amazon's testing team with information about your certification results.
Once you have uploaded your icons, you should see a success message at the bottom of the screen.
-
IMPORTANT: Add the text “This is based on the Calendar Reader Template” to the Testing Instructions section. This alerts the Certification team of your submission using this standardized template, smoothing the road to a faster certification process. Finally, select Next.
-
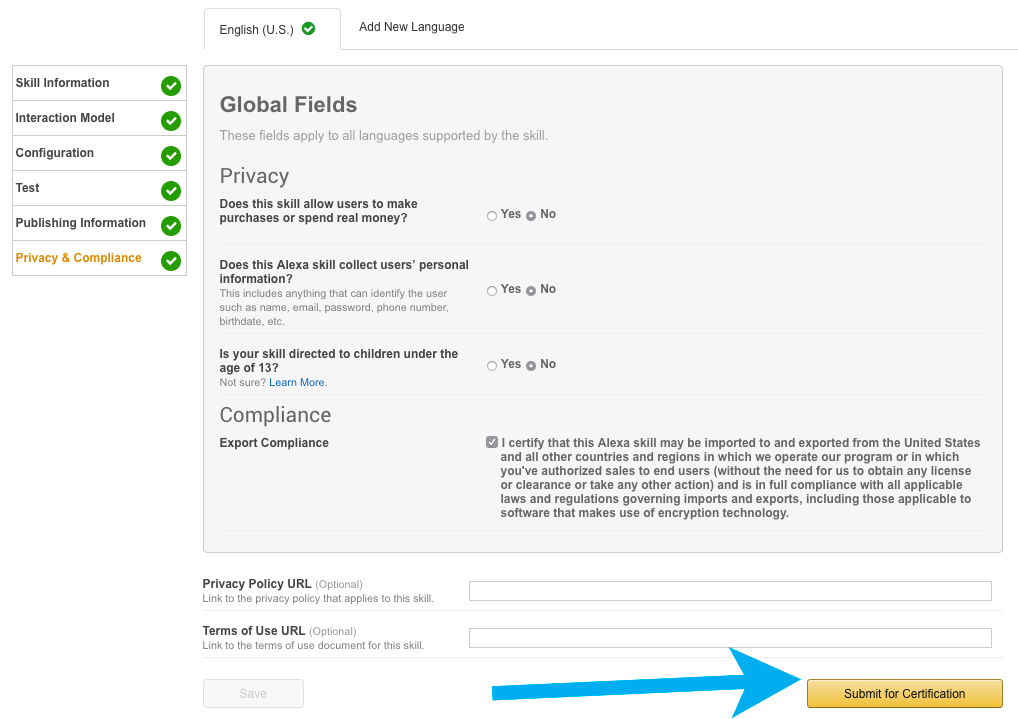
Privacy and Compliance.
-
On the Privacy and Compliance section, make sure to consider each answer.
- Since our skill does not require purchases or spending of money, choose "No" for the first question.
- We don't collect any personal data from our users, so you can also choose "No" for the second question.
- If your calendar skill is not intended to target children under the age of 13, choose "No" for the third question as well.
- Choose to certify that your skill can be imported to and exported from the countries and regions that you operate the skill.
- Privacy and Terms URL’s are optional, but recommended.
-
Select “Save”.
-
Select “Submit for Certification”
-
Finally, confirm your submission. Select “Yes” to submit your skill.
-


Congratulations! You have successfully submitted your skill for publication. You will receive progress e-mails and possibly other suggestions from the Alexa certification team on how you can make your skill even better. You will typically receive news back from the certification team within 4-5 business days. You can update your skills at any time, except while they are being reviewed for certification.
Did you like this tutorial? You can find more on our Alexa Skills Kit training page


